
Categorías populares
¿Buscas un hilo?


Comentarios / Preguntas (61)
![]() Barbara escribió:
Barbara escribió:
Pattern number 141-40 Sarah's delight vest The decrease for armhole on the back is causing some problems for me. The pattern says to decrease 3sts on the next two rows=6sts. 2sts six times=12 and 1sts x7 =7sts. A total of 25 stitches are decreased. I am doing the XXL and need to end up 84 its. Please help.
05.07.2022 - 22:13DROPS Design respondió:
Hi Barbara, You have 110 stitches before starting the armholes. You cast off on both sides: 3 stitches x 1 = 6, 2 sts x 4 = 16 and 1 st x 4 = 8. You have then cast off a total of 30 sts which leaves you with 80 sts. Happy knitting!
06.07.2022 - 06:57
![]() Barbara escribió:
Barbara escribió:
I have completed the back of pattern u-671 up to row 79. My question is do I now complete A3 It is hard to see from the photograph as the model has long hair which obscures the view of the upper back. I am anxious to complete this project so an early replay would be appreciated.
04.07.2022 - 09:04DROPS Design respondió:
Dear Barbara, when you have worked the whole diagram A.1, work now A.2 and repeat A.2 over A.1 (as shown in diagram = the 3 cables over 6 sts). Happy knitting!
04.07.2022 - 16:22
![]() Monica Ahlin escribió:
Monica Ahlin escribió:
När man stickat bakstycket med diagram A1s alla varv, skall man sedan sticka diagram A2 6 varv och sedan upprepa dessa 6 varv hela vägen upp?
30.03.2022 - 21:37DROPS Design respondió:
Hej Monica. Ja det stämmer. Mvh DROPS Design
31.03.2022 - 08:09
![]() Brandi escribió:
Brandi escribió:
Hello again. Earlier I had asked for help on the back piece for size xl. This was your answer: Dear Brandi, for size XL, you should cast off on BOTH SIDES 3 stitches 2 times = 6, 2 stitches 5 times = 10, and 1 stitch 4 times = 4, 6+10+4 = 10 stitches x 2 = so you cast off 20 stitch all together. 122-20= 82 stitch is the number of stitches you should end up with. Happy Stitching! The problem here is that 122-20 does not equal 82 it equals 102. Still needing help with the numbers. Thanks
04.08.2021 - 07:15DROPS Design respondió:
Dear Brandi, it looks like there was a small mistake in the previous answer, you will decrease 20 sts on each side (= 3 sts 2 times, 2 sts 5 times and 1 st 4 times), ie 40 sts in total = 102-40=82 sts remain. Happy knitting!
04.08.2021 - 07:59
![]() Brandi escribió:
Brandi escribió:
Currently working the back piece decreases for the armholes. When looking at the stitch counts for size xl it says I will start with 122 sts and end with 82 sts. When I counted the decreases it didn’t add up correctly. I’m sure I’m missing something. Please advise. Thank you
03.08.2021 - 16:57DROPS Design respondió:
Dear Brandi, for size XL, you should cast off on BOTH SIDES 3 stitches 2 times = 6, 2 stitches 5 times = 10, and 1 stitch 4 times = 4, 6+10+4 = 10 stitches x 2 = so you cast off 20 stitch all together. 122-20= 82 stitch is the number of stitches you should end up with. Happy Stitching!
04.08.2021 - 04:44
![]() Becky Eisen escribió:
Becky Eisen escribió:
I’m am working on the Right Front Piece and question is about the buttonhole. The patter says to k2tog in 3 and 4 stitch, then YO. The 3rd and 4th stitch are purl, so I P2tog. The button that is supposed to fit this tiny little hole is 20 mm. I could only get a 2.5 mm to fit. How to make a bigger hole, or am I missing something?
25.06.2021 - 19:55DROPS Design respondió:
Dear Becky, K2Tog and a yarnover should be anough for that size of button (on the next ro, take care that do not twist the stitch you knit into the yarnover. If it is still too small, try to do a double yarnover, and in the next row knit into the first and drop the second. Happy Stitching!
26.06.2021 - 01:10
![]() Keri Clark escribió:
Keri Clark escribió:
I am working on the right front piece and am at the direction in the pattern that says "AT THE SAME TIME when piece measures 12 1/4 (my size), dec 1 st towards mid front." I want to clarify what "towards mid front" means. Would I be decreasing in the stockinette section of the front, and doing so close to the patterned section of the front?
04.06.2021 - 06:43DROPS Design respondió:
Dear Mrs Clark, the decreases worked mid front are for the V-Neck, ie decrease as explained under DECRASE TIP = after A.4 on right front piece, ie at the beginning of the stocking section after the cable. Happy knitting!
04.06.2021 - 07:14
![]() Anna Ramadori escribió:
Anna Ramadori escribió:
Salve! Volevo avvisare che c'è un errore nella spiegazione del diagramma. Nella quinta riga dove dice. Trasferire 1 m sul f. ausiliario sul dietro del lavoro, 3 m dir (voi indicate 2) poi il resto è giusto.
15.05.2021 - 07:44DROPS Design respondió:
Buonasera Anna, grazie per la segnalazione, abbiamo corretto la legenda. Buon lavoro!
15.05.2021 - 22:21
![]() Keri Clark escribió:
Keri Clark escribió:
Does the front pieces require the 10 rows of garter stitch ribbing as required for the back before starting with the A.3 pattern?
07.05.2021 - 01:28DROPS Design respondió:
Dear Keri, The cable pattern at the back starts after the garter stitch, but on the front edge starts right after the cast on, because this cable is going allon all the front edge. There is a number of stitches on which a garter stitch edge still knitted, next to the cabled stitch at the edge. So no extra garter stitch needed on the front, just follow the pattern. Happy Knitting!
07.05.2021 - 01:37
![]() Melody escribió:
Melody escribió:
I’m currently on the back piece and wondering for the armhole decrease and it’s says “cast off for armholes at the beg of every row in each side as follows”, does that mean cast of (x) number of stitches at the BEG and END of row? Or does it mean ONLY beg of every row, so a 1 RS and 1 WS (or vice versa) = 1 set which = 1 times?
25.03.2021 - 00:17DROPS Design respondió:
Dear Melody, it means, the beginning of EVERY row, so there are cast off on both sides. happy Knitting!
25.03.2021 - 01:51
|
|||||||||||||||||||
Sarah's Delight#sarahsdelightvest |
|||||||||||||||||||
 |
 |
||||||||||||||||||
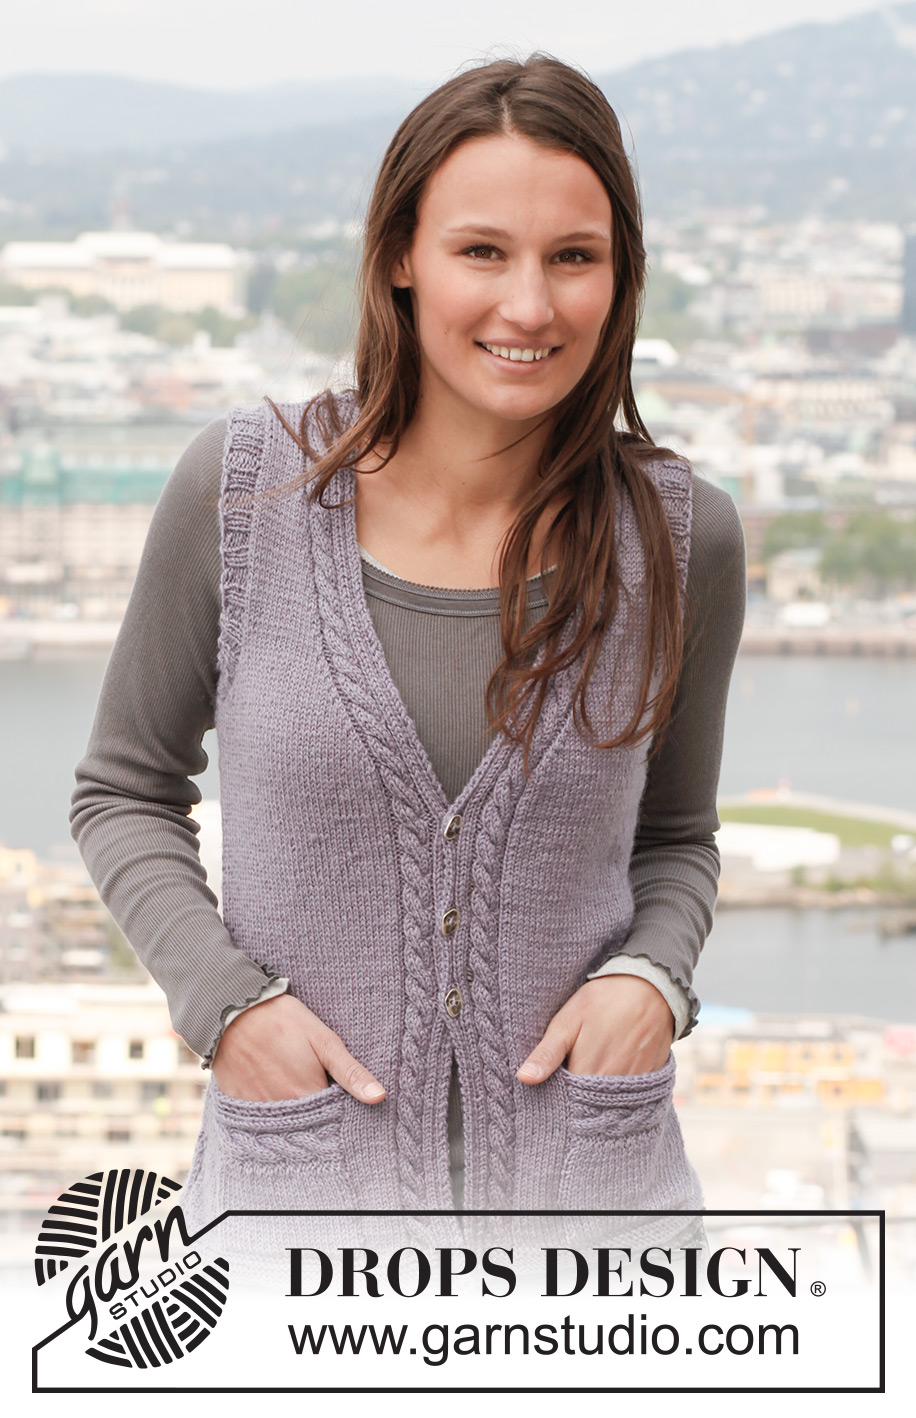
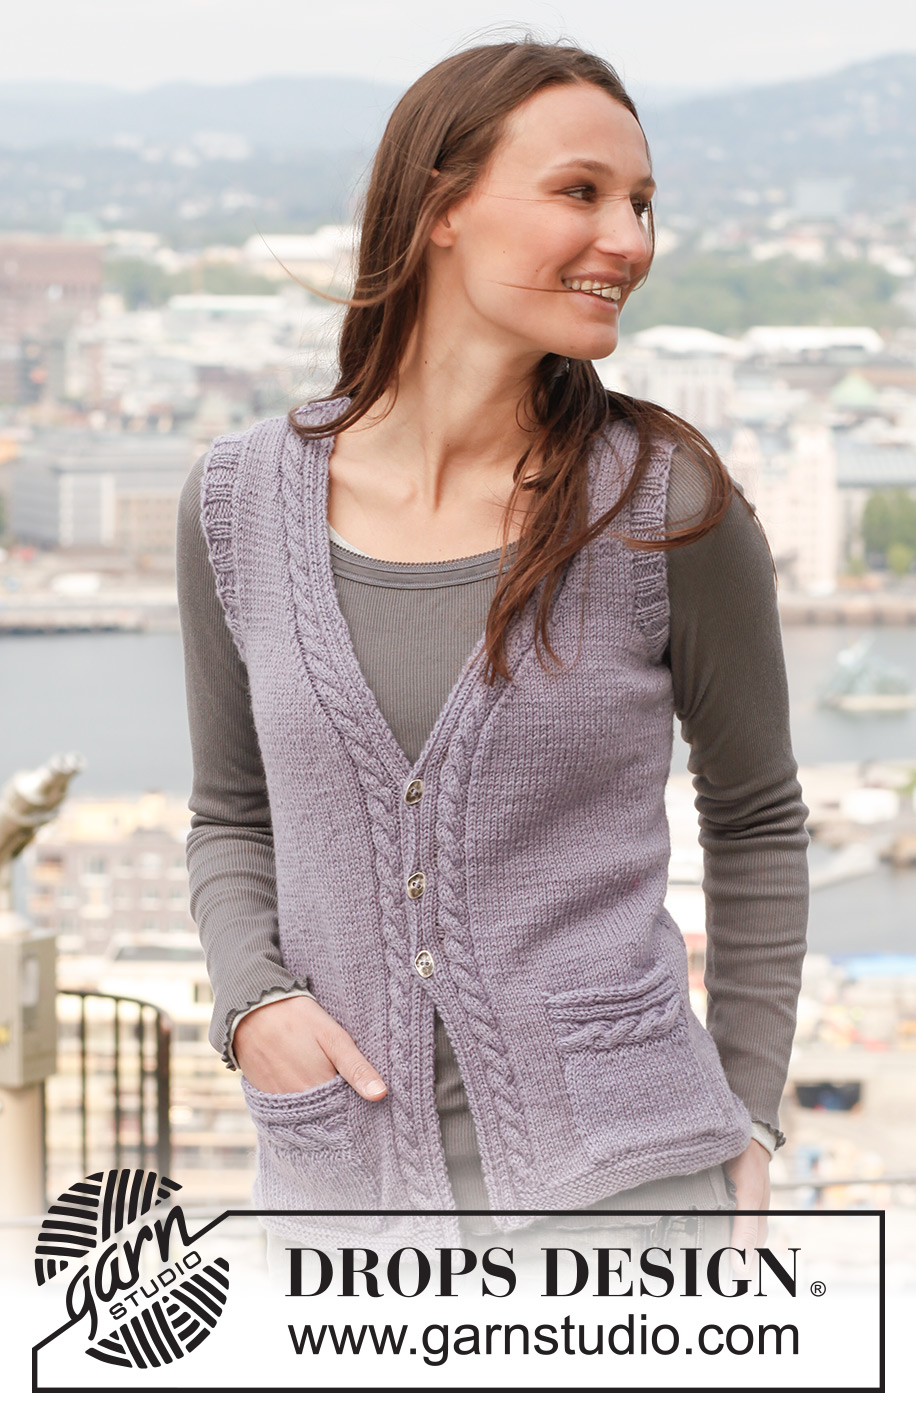
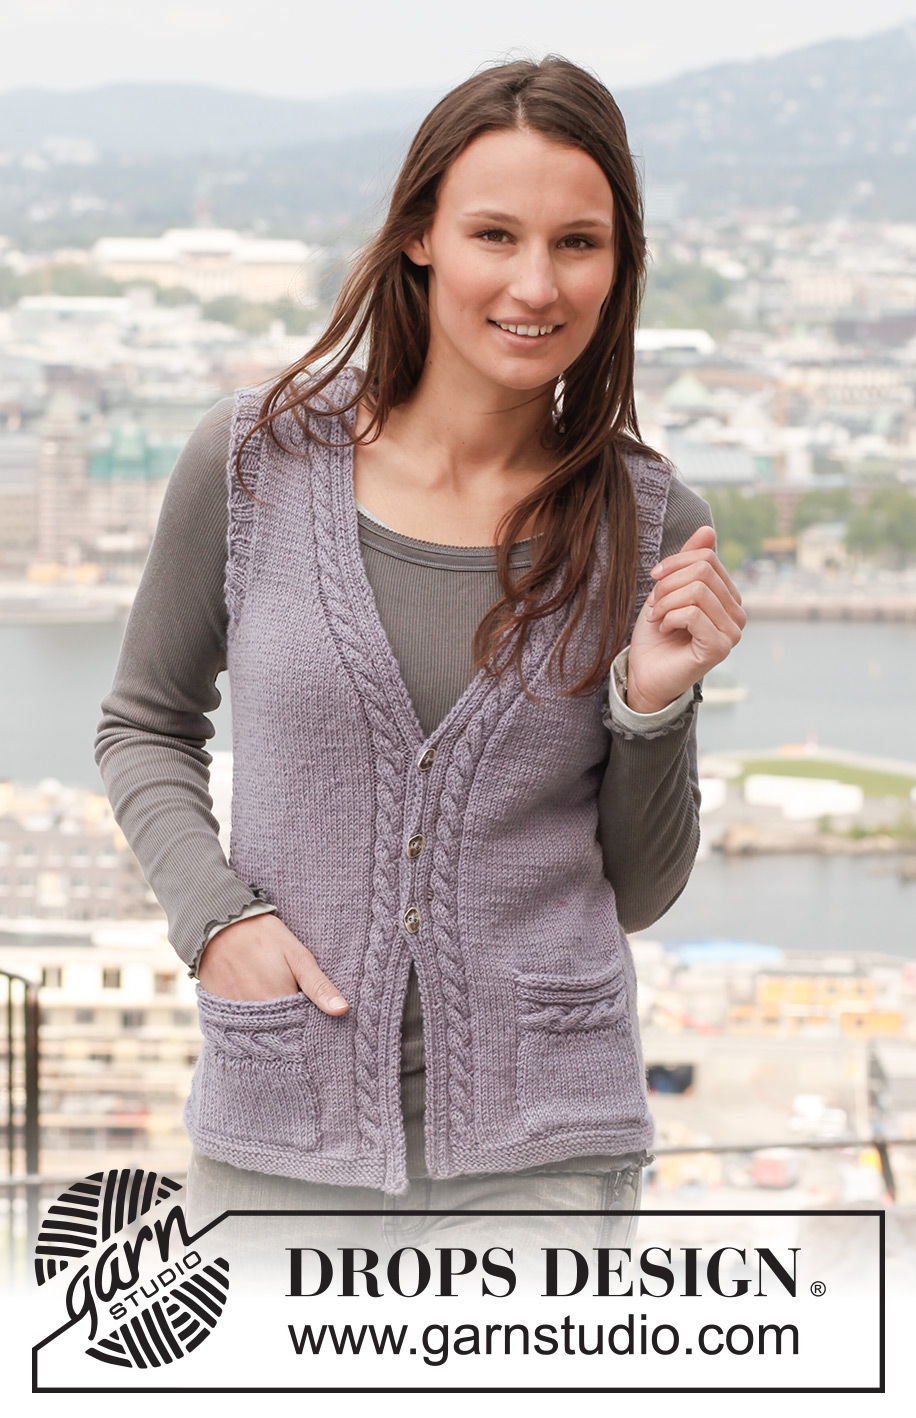
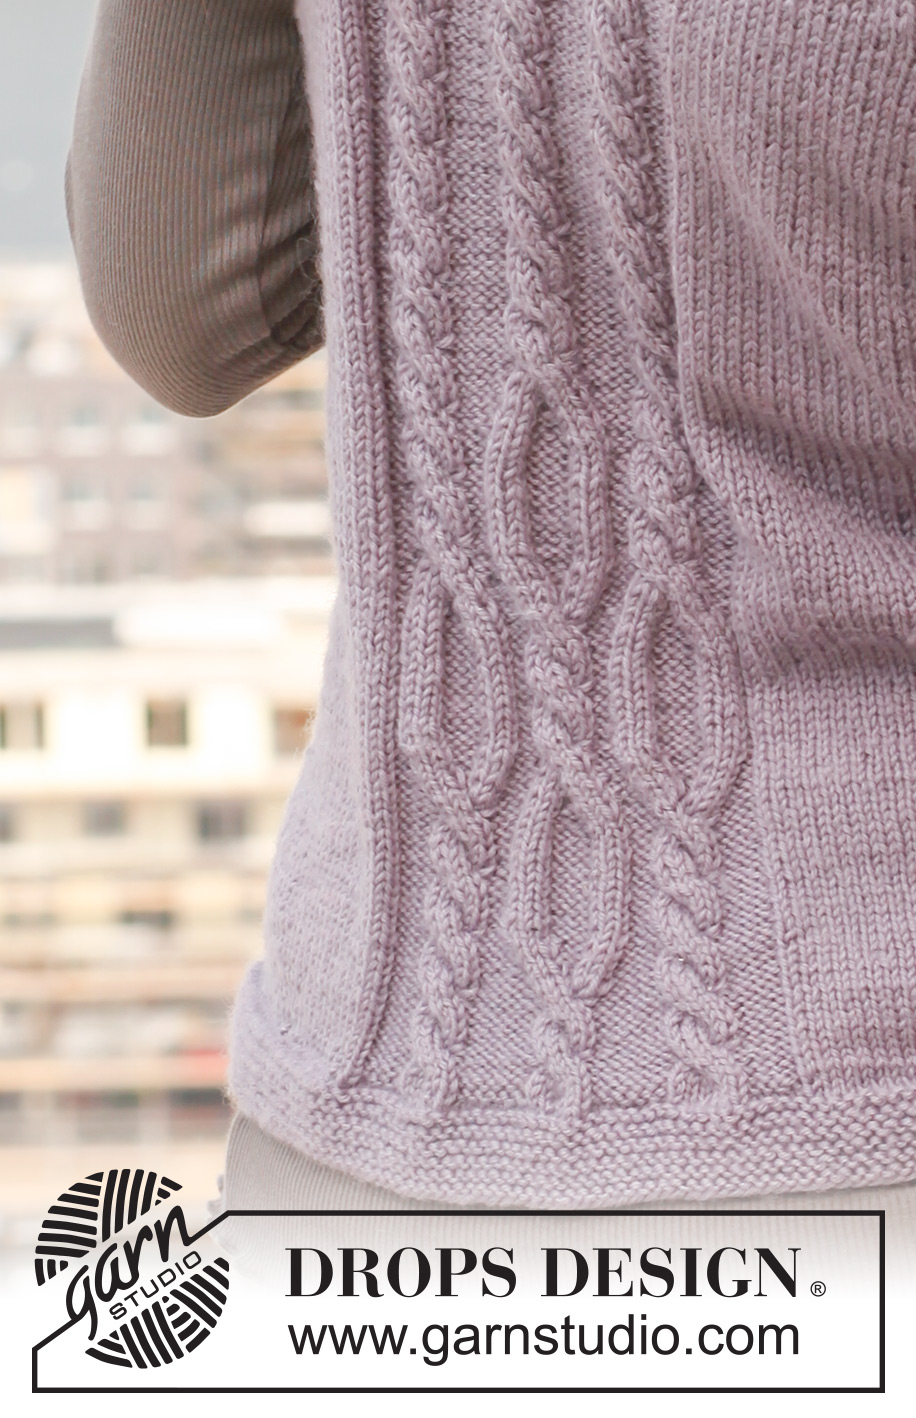
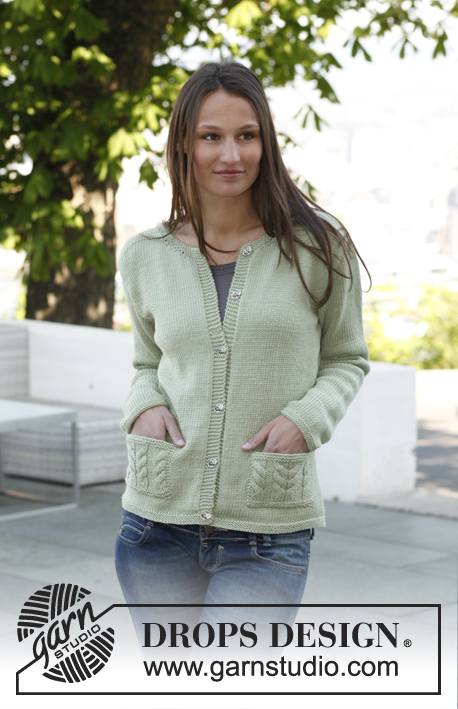
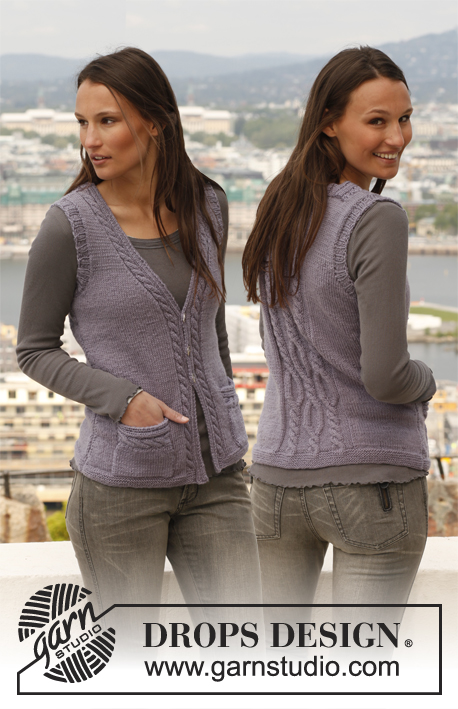
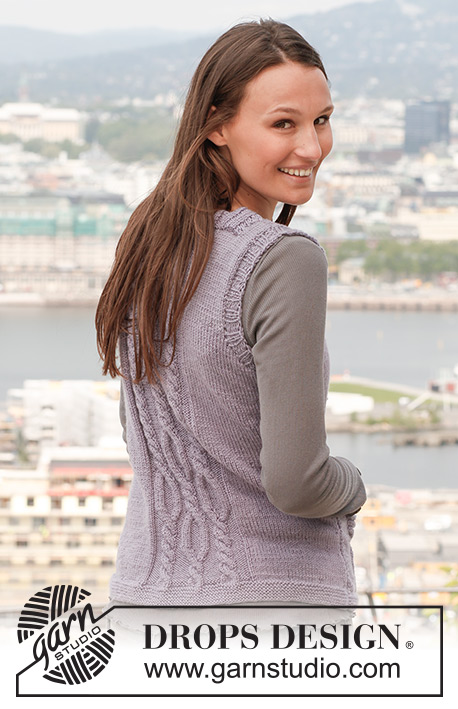
Chaleco DROPS tejido con torsadas, en “Karisma”. Talla: S – XXXL.
DROPS 141-40 |
|||||||||||||||||||
|
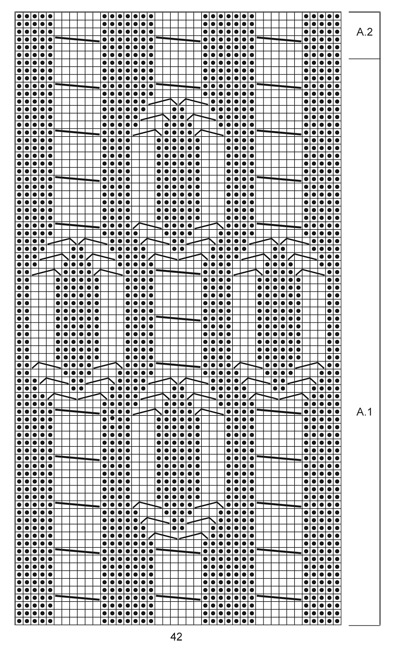
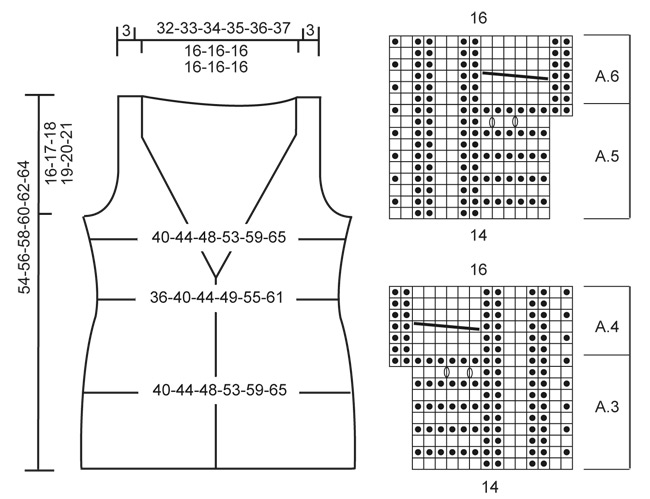
PT MUSGO (de ida y vuelta en la ag): Tejer todas las hileras de derecho. 1 surco = 2 hileras tejidas de derecho. PATRÓN: Ver diagramas A.1 a A.6. Los diagramas muestran todas las hileras en el patrón, vistas por el LD. TIP PARA DISMINUCIÓN: Dism antes/después de A.4/A.6. Todas las dism son hechas por el LD! Dism de la manera sig antes de A.6: Tejer 2 pjd. Dism de la manera sig después de A.4: Deslizar 1 pt de derecho, 1d, pasar el pt desl por encima. OJALES: Rem para los ojales en el borde derecho. 1 ojal = tejer juntos de derecho el 3º y 4º pt a partir del centro del frente y hacer 1 HEB (lazada). Rem para los ojales cuando la pieza mida: TALLA S: 16, 22 y 28 cm TALLA M: 16, 23 y 29 cm TALLA L: 17, 23 y 30 cm TALLA XL: 18, 24 y 31 cm TALLA XXL: 18, 25 y 32 cm TALLA XXXL: 19, 26 y 33 cm ------------------------------------------------------ ESPALDA: Tejida de ida y vuelta en la ag. Mon 86-94-102-114-126-138 pts (incl 1 pt de orillo en cada lado) en ag tamaño 3 mm con Karisma. Tejer 5 surcos en PT MUSGO – ver explicación arriba. Tejer la hilera sig de la manera sig (por el LD): 1 pt de orillo en pt musgo, 25-29-33-39-45-51 pts derechos, 34 pts derechos y, AL MISMO TIEMPO, aum 8 pts distribuidos equitativamente sobre estos pts, 25-29-33-39-45-51 pts derechos y 1 pt de orillo en pt musgo = 94-102-110-122-134-146 pts. Cambiar a ag tamaño 4 mm y tejer la hilera sig, de la manera sig, por el LR: 1 pt de orillo en pt musgo, 25-29-33-39-45-51 pts reveses, A.1 (= 42 pts), 25-29-33-39-45-51 pts reveses y 1 pt de orillo en pt musgo. Continuar con A.1 y en pt jersey sobre 25-29-33-39-45-51 pts y 1 pt de orillo en pt musgo en cada lado. AL MISMO TIEMPO, cuando la pieza mida 5 cm, dism 1 pt en cada lado, repetir las dism a cada 3 cm 3 veces más = 86-94-102-114-126-138 pts. Cuando A.1 ha sido tejido 1 vez verticalmente, continuar con A.2 sobre los pts de A.1. AL MISMO TIEMPO, cuando la pieza mida 20 cm, aum 1 pt en cada lado, repetir los aum a cada 5-5½-5½-6-6½-6½ cm 3 veces más = 94-102-110-122-134-146 pts. Cuando la pieza mida 38-39-40-41-42-43 cm, rem para las sisas, al inicio de cada hilera, en cada lado, de la manera sig: 3 pts 1-1-1-2-2-2 veces, 2 pts 2-3-4-5-6-8 veces y 1 pt 2-3-4-4-7-8 veces = 76-78-80-82-84-86 pts. Cuando la pieza mida 50-52-54-56-58-60 cm, dism 8 pts distribuidos equitativamente sobre los 42 pts centrales = 68-70-72-74-76-78 pts. En la hilera sig, por el LD, tejer de la manera sig: 9-10-11-12-13-14 pts en pt jersey, * 2r, 2d *, repetir de *a* sobre los 48 pts sig, 2r, 9-10-11-12-13-14 pts en pt jersey. Cuando la pieza mida 52-54-56-58-60-62 cm, rem los 34 pts centrales = 17-18-19-20-21-22 pts restantes en cada hombro. Terminar cada hombro por separado. Continuar con 9-10-11-12-13-14 pts en pt jersey, 2r, 2d, 2r, 1d y 1 pt en pt musgo del lado del escote, rem con derecho sobre derecho y revés sobre revés cuando la pieza mida 54-56-58-60-62-64 cm. DELANTERO DERECHO: Mon 49-53-57-63-69-75 pts (incl 1 pt de orillo en el lado) en ag tamaño 3 mm con Karisma. Tejer de la manera sig – por el LD: A.3 (= 14 pts), tejer en pt musgo sobre los últimos 35-39-43-49-55-61 pts. Continuar este patrón hasta que A.3 ha sido tejido 1 vez verticalmente = 51-55-59-65-71-77 pts. Cambiar a ag tamaño 4 mm. Ahora tejer de la manera sig, por el LD: A.4 (= 16 pts), pt jersey sobre los últimos 34-38-42-48-54-60 pts, 1 pt de orillo en pt musgo. Continuar este patrón en dirección hacia arriba y, cuando la pieza mida 5 cm, dism en el lado como lo hizo en la pieza de la espalda = 47-51-55-61-67-73 pts. Cuando la pieza mida 16-16-17-18-18-19 cm, empezar a rem para los OJALES – ver explicación arriba. Cuando la pieza mida 20 cm, aum en el lado como lo hizo en la pieza de la espalda. AL MISMO TIEMPO, cuando la pieza mida 29-30-31-32-33-34 cm, dism 1 pt del lado del centro del frente – LEER TIP PARA DISMINUCIÓN, repetir las dism a cada 1 cm 22 veces más. AL MISMO TIEMPO, cuando la pieza mida 38-39-40-41-42-43 cm, rem y dism para la sisa, en el lado, como lo hizo en la pieza de la espalda. Después que todos los rem y dism para la sisa y escote estén hechos, se tienen 19-20-21-22-23-24 pts en la ag. Cuando la pieza mida aprox 53-55-57-59-61-63 cm, dism 2 pts distribuidos equitativamente sobre la torsada de A.4 = 17-18-19-20-21-22 pts restantes en la ag. En la hilera sig, rem con derecho sobre derecho y revés sobre revés. DELANTERO IZQUIERDO: Tejer como la pieza del delantero derecho, pero a la inversa. En vez de A.3 y A.4, tejer A.5 y A.6. No rem para ojales. TERMINACIÓN: Hacer las costuras de los hombros. ORILLA DE LA MANGA: Levantar 90-94-98-102-106-110 pts en ag tamaño 3 mm a lo largo de la sisa. Tejer 1 hilera de derecho por el LR, después tejer resorte 2d/2r con 1 pt de orillo en cada lado. Continuar hasta que la orilla de la manga mida 3 cm, rem con derecho sobre derecho y revés sobre revés. TERMINACIÓN: Hacer las costuras laterales a 1 pt del pt de orillo. Coser los botones. BOLSILLO: Mon 16 pts en ag tamaño 4 mm con Karisma. Tejer de acuerdo a A.6, rem cuando la pieza mida 11 cm. Levantar aprox 23 pts a 1 pt del último pt revés de A.6. Tejer en pt jersey con 1 pt de orillo en pt musgo en cada lado. Rem cuando la pieza mida 12 cm en total. Tejer el otro bolsillo. Coser los bolsillos al centro de las piezas del frente, directamente arriba de los surcos en pt musgo. |
|||||||||||||||||||
Explicaciones del diagrama |
|||||||||||||||||||
|
|||||||||||||||||||
 |
|||||||||||||||||||
 |
|||||||||||||||||||
¿Terminaste este patrón?Entonces, etiqueta tus fotos con #dropspattern #sarahsdelightvest o envíalas a la galería #dropsfan. ¿Necesitas ayuda con este patrón?Encontrarás 11 videos tutoriales, un espacio para comentarios/preguntas y más visitando la página del patrón en garnstudio.com © 1982-2026 DROPS Design A/S. Todos los derechos reservados. Este documento, incluyendo todas sus sub-secciones, está protegido por los derechos de autor (copyright). Lee más acerca de lo que puedes hacer con nuestros patrones en la parte de abajo de cada patrón de nuestro sitio. |
|||||||||||||||||||


Con más de 40 años en el diseño de modelos de punto y de ganchillo, DROPS Design ofrece una de las más vastas colecciones de patrones gratuitos en el internet - traducidos en 17 idiomas. Al día de hoy, contamos con 324 catálogos y 12290 patrones - de los cuales 11673 están traducidos en español.
Nosotros trabajamos con mucho esmero para brindarte lo mejor que las labores de punto y ganchillo tienen para ofrecer,inspiración y consejos, así como hilos de magnífica calidad a precios increíbles! Te gustaría usar nuestros patrones para otro fin además del uso personal? Puedes leer acerca de lo que estás permitida a hacer en el texto de Copyright en la parte de abajo de todos nuestros patrones. Felices labores!
Escribe un comentario sobre DROPS 141-40
¡Nos encantaría saber qué piensas acerca de este patrón!
Si quieres escribir una pregunta referente al patrón, por favor asegúrate de elegir la categoría correcta en el formulario debajo, para acelerar el proceso de respuesta. Los campos obligatorios están marcados con un *.