
Categorías populares
¿Buscas un hilo?


Comentarios / Preguntas (37)
![]() Jacqueline Moore escribió:
Jacqueline Moore escribió:
I love this pattern but am having difficulty understanding the chart. I am knitting size 7/8 and about to start chart M.1 with 156 stitches. I will start at the 9th stitch on first round. Does that mean I knit 4 stitches then purl 152 to the end of the round? Or do I knit the 1st round, purl the 2nd, knit the 3rd and 4th, purl the 5th, knit the 6th and then start round 7 on the 9th stitch? Thank you.
01.12.2019 - 18:10DROPS Design respondió:
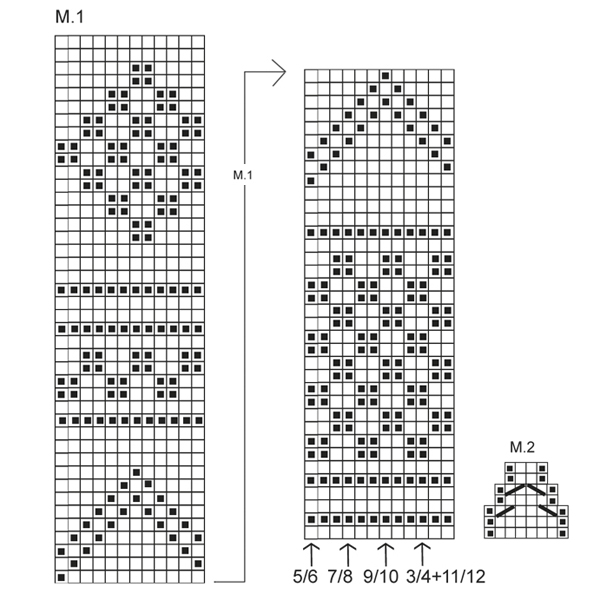
Dear Mrs Moore, in size 7/8, start working with 9th st in diagram and work the last 4 sts; then repeat M.1 (= 12 sts) a total of 12 times = over the next 144 sts; and finish with the first 8 stitches in diagram = 4+144+8= 156 sts. Happy knitting!
02.12.2019 - 10:21
![]() Ekaterina escribió:
Ekaterina escribió:
Dear Drops! I'm working Back piece row 28 on M1 with the arrow. How should I continue if I have 54 sts in order to have the pattern mid front?Should I work 1K, 11P on row 28, then on row 29 -1 P, 9 K, 1P, 1K?
08.11.2019 - 17:01DROPS Design respondió:
Dear Ektaterina, if you are working with a different tension or another size, you would have to adjust the pattern how you rather would like it to be and center the part of the pattern you'd like (check the example in the pattern to help you). Happy knitting!
11.11.2019 - 09:43
![]() Ekaterina escribió:
Ekaterina escribió:
Much obliged for your kind help!
07.10.2019 - 16:42
![]() Ekaterina escribió:
Ekaterina escribió:
"= start with 9th stitch in size 7/8, then work diagram to the end, then repeat diagram from 1st stitch" Dear Drops! Do you mean I have to repeat the right part of M.1 twice?
07.10.2019 - 15:36DROPS Design respondió:
Dear Ekaterina, in size 7/8 you first work the 4 last stitches in diagram (from the stitch with the arrow to the left/end of diagram), then repeat the 12 sts of diagram from 1st stitch (from the right towards the left) and finish round with the first 8 stitches in diagram (so that the pattern is nicely centered) : 4sts+ 12stsx12 repeats+ 8sts= 156 sts. Work then the first part of M.1 (with the arrows at the bottom), and when you have worked to the last row of this diagram, work now the 2nd part of diagram (the diagram on the left side). Happy knitting!
07.10.2019 - 15:55
![]() Ekaterina escribió:
Ekaterina escribió:
Dear Drops! Could you help me with the following: M.1 -Should I begin it with the smaller part for 36 rows and then continue with the bigger one for 42 rows? What does the big arrow from M.1to M.1indicate? And one more question: I knit for size 7/8 - should I consider the 9th stitch as the first one for this size?
07.10.2019 - 14:24DROPS Design respondió:
Dear Ekaterina, M.1 has been splitted into 2 parts to make it more visible, start working M.1 from the bottom part with the arrows (= start with 9th stitch in size 7/8, then work diagram to the end, then repeat diagram from 1st stitch), and when this part has been worked in height, continue with 2nd part of diagram (the one on the left side). Happy knitting!
07.10.2019 - 15:00
![]() Jocelyne Theberge escribió:
Jocelyne Theberge escribió:
Dois-je tricoter les 288 mailles en côtes 2/2 avant de réaliser le M2 ?
08.09.2019 - 09:40DROPS Design respondió:
Bonjour Mme Theberge, tricotez M.2 sur toutes les 288 mailles pour former le petit volant du bas du débardeur; quand M.2 est terminé, il reste 144 mailles, continuez en tricotant les mailles comme elles se présentent (1 m env, 2 m end, 1 m env), répétez de (à) jusqu'à ce que l'ouvrage mesure 5 cm. Bon tricot!
09.09.2019 - 08:40Marinkovic escribió:
Hi! I need help understanding M2 diagram. Since the number of stitches decreases, what should I do with those that are not needed (e.g. 3rd row is knitted with 8 st per repetition and the 4th row has 6 st per rep)? Do I cast off, knit 2 together or something like that? Jelena
19.10.2018 - 16:39DROPS Design respondió:
Dear Mrs Marinkovic, decrease as shown in diagram, ie on 3r row in M.2 work: P1, slip 1 as if to K, K1, psso, K3, K2 tog, P1 = 6 sts remain. On row 5 dec again as shown in diagram; P1, slip 1 as if to K, K1, psso, K2 tog, P1 = 4 sts remain. Happy knitting!
22.10.2018 - 07:48
![]() Agnes Holst Kazuhara escribió:
Agnes Holst Kazuhara escribió:
Iflg. opskrift skal der lukkes 2 m af til hals. Mine spørgsmål er: Skal disse 2 masker forblive aflukkede, og evt. hvorfor, eller skal de evt. indgå i de masker, man skal strikke op til halskant, - dvs. de 80 - 100 m? Jeg vil være meget taknemmelig for jeres forhåbentlige snarlige hjælp. Mvh Agnes
13.05.2018 - 14:14DROPS Design respondió:
Hei Agnes. Ja de 2 maskene skal felles av - Dette for å lage plass til halskantens om skal strikkes opp senere. God fornøyelse.
15.05.2018 - 15:10Nelly escribió:
Hola tengo una duda en el patrón SmåDROPS 22-4, cuántos puntos d tienen que montar para iniciar para la talla 3/4, porqué dice 288 pero más adelante dice q 144, cuál es el número correcto? Muchas gracias...
23.03.2017 - 21:17DROPS Design respondió:
Hola Nelly. Está correcto. Para el elástico debes montar 288 pts. El diagrama para trabajar el elástico incluye las disminuciones. Al terminar el elástico quedan 144 pts.
27.03.2017 - 20:29
![]() Manon Tholstrup escribió:
Manon Tholstrup escribió:
Hvordan skal jeg forstå mønstret - i str. 3/4 skal der slås 288 m op på rundpind og når M2/rib er strikket er der 144 m tilbage på rundpind?? Herefter skal der yderligere tages 12 m ind = ialt 132 m på rundpind; dvs. 156 (!) m mindre end slået op (288)?? Mvh
02.04.2015 - 22:49DROPS Design respondió:
Hej Manon. I og med du strikker M.2 tager du automatisk ind. 1 gentagelse af M.2 er i förste pind 8 m = 36 gentagelser over 288 m. Med indtagningerne ender du i 7. pind med 4 masker per gentagelse = 144 m tilbage
29.04.2015 - 14:52
|
|||||||||||||
Gretchen#gretchenvest |
|||||||||||||
 |
 |
||||||||||||
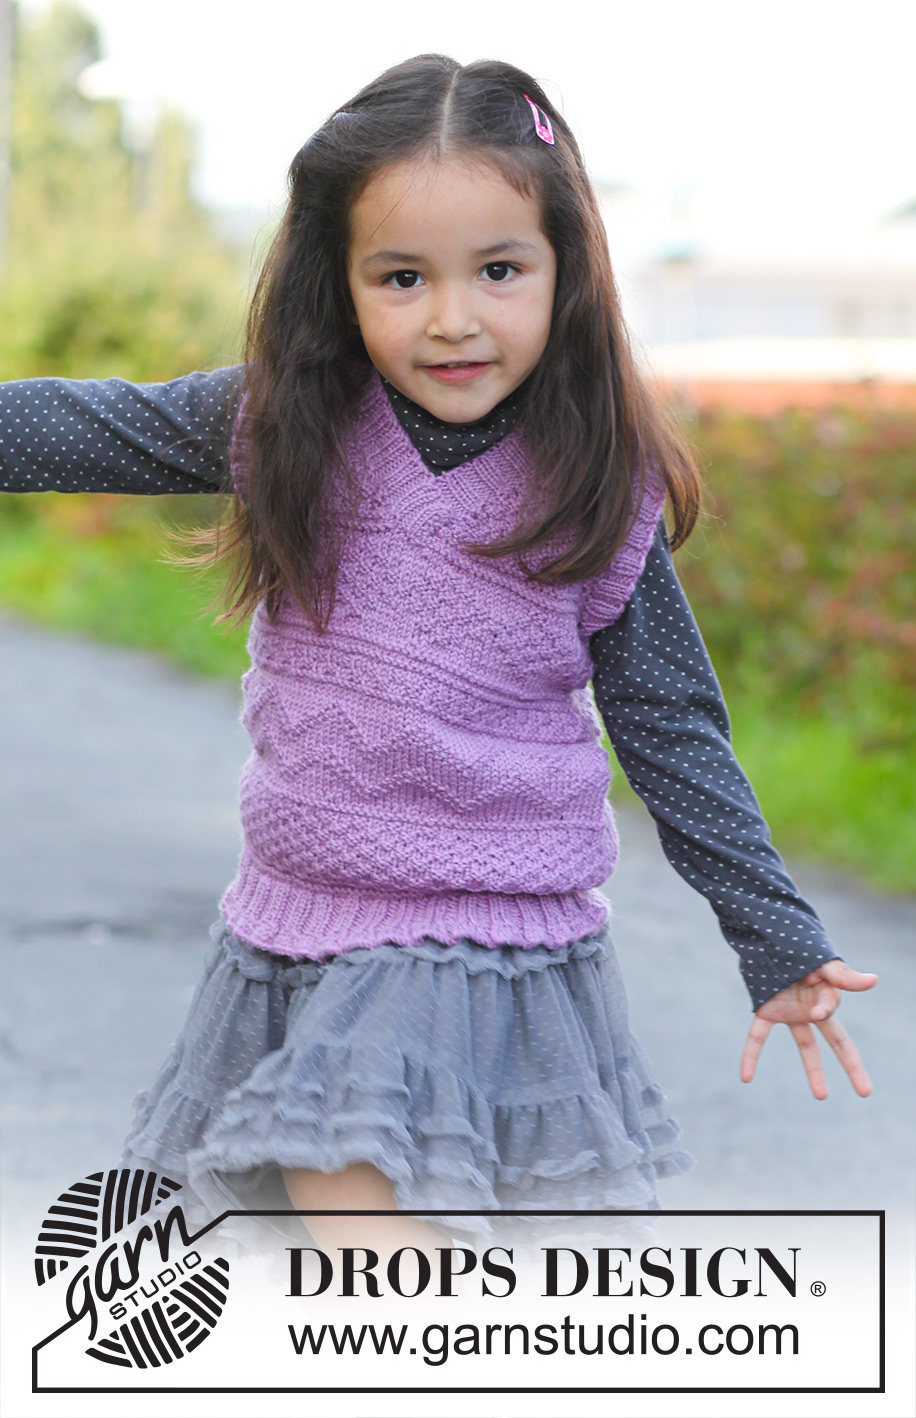
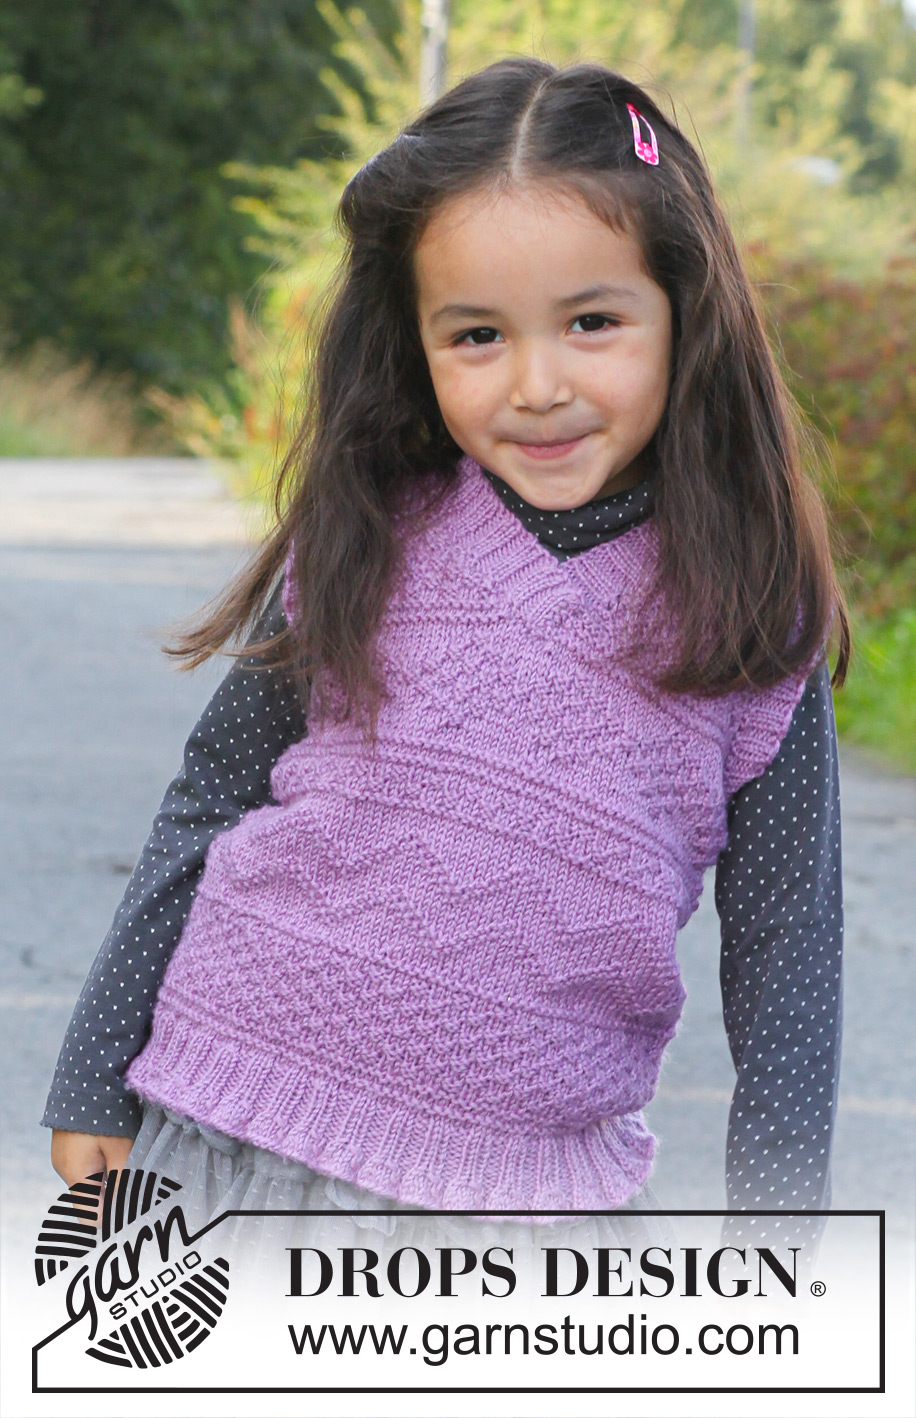
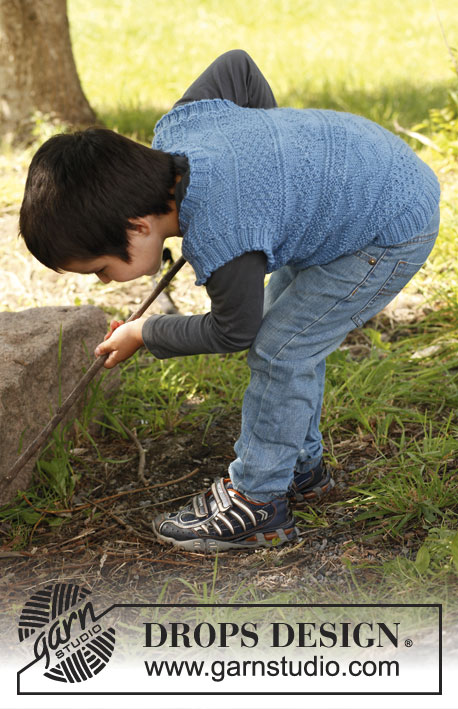
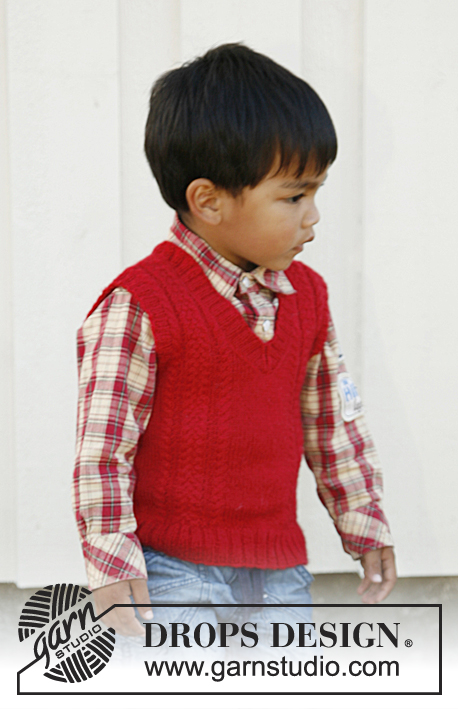
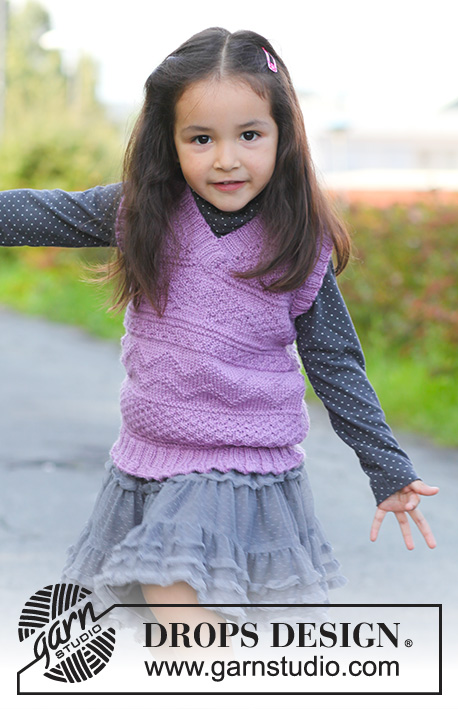
Chaleco / chaleco sin mangas de punto con patrón texturado y escote en V, en DROPS Karisma. Tallas para niños, 3 a 12 años.
DROPS Children 22-41 |
|||||||||||||
|
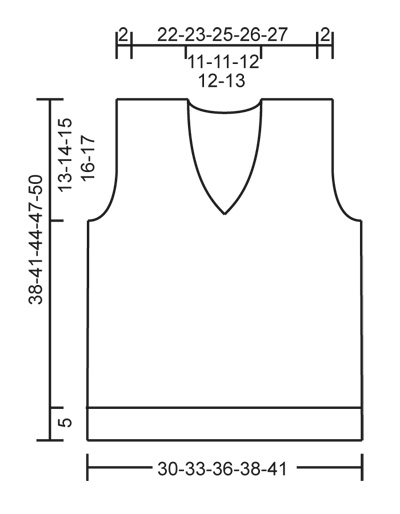
PATRÓN: Ver diagramas M.1 y M.2 – los diagramas muestran el patrón por el LD. ------------------------------------------------------ CUERPO: Tejido en redondo, en ag circular. Mon 288-312-336-360-384 pts en ag circular tamaño 3 mm con Karisma. Tejer el diagrama M.2. Cuando el diagrama M.2 ha sido tejido, tenemos 144-156-168-180-192 pts en la ag. Continuar con derecho sobre derecho y revés sobre revés. Cuando la pieza mida 5 cm, cambiar a ag circular tamaño 3.5 mm. Tejer 1 vta de derecho y, al mismo tiempo, dism 12 pts distribuidos equitativamente = 132-144-156-168-180 pts. Continuar con el diagrama M.1 hasta completar las medidas – ver la flecha para saber dónde empezar conforme a su talla (esto es importante para que el patrón quede bonito en el centro del frente). RECUERDE MANTENER LA MISMA TENSIÓN DE TEJIDO DE LA MUESTRA! Cuando la pieza mida 25-27-29-31-33 cm, tejer la vta sig de la manera sig: Rem 3 pts para la sisa, tejer 29-32-35-38-41 pts (= pieza del delantero, lado izquierdo), rem 2 pts para el escote, tejer 29-32-35-38-41 pts (= pieza del delantero, lado derecho), rem 6 pts para la sisa, tejer 60-66-72-78-84 pts (= pieza de la espalda), rem 3 pts para la sisa, cortar el hilo. Terminar la pieza del delantero y espalda por separado. ESPALDA: = 60-66-72-78-84 pts. Continuar el diagrama M.1 de ida y vuelta en la ag – AL MISMO TIEMPO, rem para las sisas al inicio de cada vta, en cada lado: 3 pts 1 vez, 2 pts 0-1-2-2-3 veces y 1 pt 3-3-2-3-3 veces = 48-50-54-58-60 pts. Cuando la pieza mida 36-39-42-45-48 cm, rem los 20-20-22-22-24 pts centrales para el escote y terminar cada hombro por separado. Después, rem en cada vta a partir del escote: 1 pt 2 veces = 12-13-14-16-16 pts restantes en el hombro. Rem cuando la pieza mida aprox 38-41-44-47-50 cm. DELANTERO, LADO IZQUIERDO: = 29-32-35-38-41 pts. Rem para la sisa como lo hizo en la pieza de la espalda – AL MISMO TIEMPO, rem en cada vta a partir del escote: 1 pt 11-11-12-12-13 veces. Después de todos los rem, tenemos 12-13-14-16-16 pts restantes en el hombro. Rem cuando la pieza mida 38-41-44-47-50 cm. DELANTERO, LADO DERECHO: Tejer como la pieza del delantero, lado izquierdo, pero a la inversa. TERMINACIÓN: Hacer las costuras de los hombros. ORILLA DEL CUELLO: Tejida de ida y vuelta a partir del centro del frente. Levantar aprox 80 a 100 pts alrededor del escote en ag circular tamaño 3 mm – empezar en el centro del frente. Virar y tejer 1 vta de derecho por el LR y, al mismo tiempo, hacer aum distribuidos equitativamente para un total de 96-100-108-112-124 pts. Después tejer resorte de la manera sig (visto por el LD): 1 pt, el cual es tejido de derecho en todas las vtas, * 2d, 2r *, repetir de *a* hasta que resten 3 pts, terminar con 2d y 1 pt, el cual es tejido de derecho en todas las vtas. Cuando la orilla mida aprox 2-2½-2½-3-3 cm, rem con derecho sobre derecho y revés sobre revés. Colocar la parte izquierda de la orilla del cuello sobre la parte derecha y asegurar en la orilla inferior con pequeñas puntadas prolijas. ORILLA DE LA SISA: Levantar aprox 70 a 90 pts alrededor de una sisa en ag de doble punta tamaño 3 mm. Tejer 1 vta de revés y, al mismo tiempo, hacer aum distribuidos equitativamente para un total de 80-88-92-100-104 pts. Tejer resorte = 2d/2r por 2 cm, después rem con derecho sobre derecho y revés sobre revés. Tejer de la misma manera alrededor de la otra sisa. |
|||||||||||||
Explicaciones del diagrama |
|||||||||||||
|
|||||||||||||
 |
|||||||||||||
 |
|||||||||||||
¿Terminaste este patrón?Entonces, etiqueta tus fotos con #dropspattern #gretchenvest o envíalas a la galería #dropsfan. ¿Necesitas ayuda con este patrón?Encontrarás 14 videos tutoriales, un espacio para comentarios/preguntas y más visitando la página del patrón en garnstudio.com © 1982-2026 DROPS Design A/S. Todos los derechos reservados. Este documento, incluyendo todas sus sub-secciones, está protegido por los derechos de autor (copyright). Lee más acerca de lo que puedes hacer con nuestros patrones en la parte de abajo de cada patrón de nuestro sitio. |
|||||||||||||


Con más de 40 años en el diseño de modelos de punto y de ganchillo, DROPS Design ofrece una de las más vastas colecciones de patrones gratuitos en el internet - traducidos en 17 idiomas. Al día de hoy, contamos con 325 catálogos y 12298 patrones - de los cuales 11726 están traducidos en español.
Nosotros trabajamos con mucho esmero para brindarte lo mejor que las labores de punto y ganchillo tienen para ofrecer,inspiración y consejos, así como hilos de magnífica calidad a precios increíbles! Te gustaría usar nuestros patrones para otro fin además del uso personal? Puedes leer acerca de lo que estás permitida a hacer en el texto de Copyright en la parte de abajo de todos nuestros patrones. Felices labores!
Escribe un comentario sobre DROPS Children 22-41
¡Nos encantaría saber qué piensas acerca de este patrón!
Si quieres escribir una pregunta referente al patrón, por favor asegúrate de elegir la categoría correcta en el formulario debajo, para acelerar el proceso de respuesta. Los campos obligatorios están marcados con un *.