Comentarios / Preguntas (22)
Renée escribió:
Hi Thanks for your response, but I figured it out myself, I was just a bit confused by the mid front and mid back. I am very pleased with the result. It looks really lovely. Thanks for all your help!
13.12.2013 - 11:48Renée escribió:
Hi Could you please explain the assembly instructions as they are rather confusing.
10.12.2013 - 10:44DROPS Design respondió:
Dear Renée, on both pieces, you increased on one side and not on the other one. Put both pieces tog so that edge without inc are on mid back. Sew cast off rows together starting from mid front, and continue along edges on back side, this seam should measure approx. 30 cm (back of head). Happy knitting!
10.12.2013 - 13:41
![]() Renée escribió:
Renée escribió:
Thank you for clarifying.
08.12.2013 - 11:21René escribió:
Just to clarify; for part 1 you do the increase at the beginning of the row after the edge stitch. And for Part 2, you do the increase before the final stitch at the end of the row. You wrote in your previous post that you do the increase every other row, but you meant every 4th row as stated in the pattern.
02.12.2013 - 09:31DROPS Design respondió:
Dear Renée, you are correct, I mistyped last answer, you inc approx. every 2 cm, ie every 4 th row (= every 2nd row from RS). Inc will be done at beg of row from RS for 1st part and at the end of row from RS for 2nd part. Happy knitting!
02.12.2013 - 13:57Renée escribió:
The pattern states that the part 1 increase,should be done on the RS. I assumed this was the right side of the work, i.e. the side worn outwards. But, as this is garter stitch there is no right/outer side or wrong/inner side, as both sides look the same. The part 2 increase is done on the left side. I am a little puzzled. Surely, it does not matter which side you do the increase on, as you would merely join the 2 sides that have been increased? Or I am missing something?
29.11.2013 - 15:44DROPS Design respondió:
Dear Renée, you will inc here at the right side of piece, seen from RS, ie at beg of row every other row. And for 2nd part you will inc at the end of row every other row (=every row from WS). Happy knitting!
29.11.2013 - 16:46Renee escribió:
Thank you!
21.11.2013 - 13:02Renée escribió:
Hi I am confused by the increase. I realise a YO is needed, but do not know what is meant by "inc 1 st from RS inside 1 st on the right side of the piece". I understand that the increase is done with the Right Side (RS) of the knitting facing you. However, I am not sure what is meant by "inside 1 st on the right side of the piece" Do you mean you knit the first stitch in the row and then do the YO? Can you please explain.
20.11.2013 - 10:06DROPS Design respondió:
Dear Renée, it means you will inc after the edge st, at the beg of row, seen from RS: K1 (edge st), YO (inc) and continue until end of RS row. Happy knitting!
20.11.2013 - 11:13
![]() Siv Aarflot escribió:
Siv Aarflot escribió:
Denne kunne vært morsom og prøve seg på.
01.02.2012 - 15:27
![]() Faultier escribió:
Faultier escribió:
Sehr leicht zu stricken, wunderschön und hält warm.
23.01.2011 - 19:31
![]() Karen Sanborn escribió:
Karen Sanborn escribió:
This one is very nice to wear with a coat during winter
30.06.2010 - 18:29
Sandy Wind |
|
 |
 |
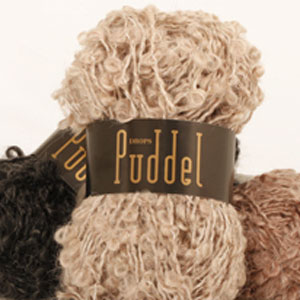
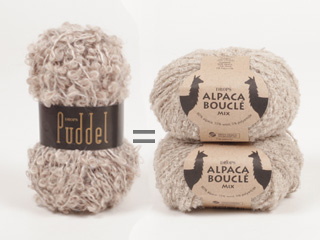
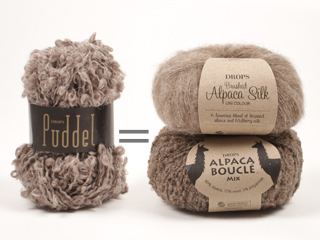
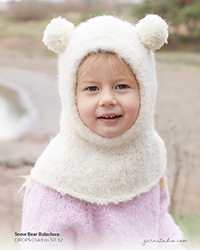
Bufanda DROPS con capucha / gorro en punto musgo en “Puddel”.
DROPS 123-36 |
|
|
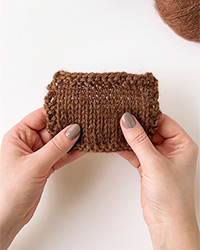
PT MUSGO (de ida y vuelta en la ag): Todas las vtas de derecho. TIP PARA AUMENTO: Aum con 1 HEB (lazada). En la vuelta siguiente tejer la HEB de derecho, por atrás, para evitar que se forme un agujero. ------------------------------------------------------ BUFANDA: Se teje en 2 partes que se cosen juntas posteriormente. PARTE 1: Se teje de ida y vuelta en la ag. Mon 25 pts en ag tamaño 7 mm. Tejer PT MUSGO – ver arriba! RECUERDE MANTENER LA MISMA TENSIÓN DE TEJIDO DE LA MUESTRA! Cuando la pieza mida 106 cm, aum 1 pt por el LD, a 1 pt del pt de orillo en el lado derecho de la pieza – Ver TIP PARA AUMENTO! Repetir el aum en cada 4ª vta (aprox cada 2 cm) un total de 8 veces = 33 pts. Cont en pt musgo. Rem los pts FLOJAMENTE cuando la pieza mida 130 cm. PARTE 2: Como la parte 1, mas aum en el lado izquierdo de la pieza. TERMINACIÓN: Los lados sin aum = centro de la parte de atrás. Coser las 2 partes juntas por la parte de arriba, orilla con orilla, empezando en el centro del frente. Continuar la costura aprox 30 cm hacia abajo a lo largo de la parte de atrás de la bufanda. Asegurar el hilo. |
|
¿Terminaste este patrón?Entonces, etiqueta tus fotos con #dropspattern o envíalas a la galería #dropsfan. ¿Necesitas ayuda con este patrón?Encontrarás 8 videos tutoriales, un espacio para comentarios/preguntas y más visitando la página del patrón en garnstudio.com © 1982-2025 DROPS Design A/S. Todos los derechos reservados. Este documento, incluyendo todas sus sub-secciones, está protegido por los derechos de autor (copyright). Lee más acerca de lo que puedes hacer con nuestros patrones en la parte de abajo de cada patrón de nuestro sitio. |
|







Escribe un comentario sobre DROPS 123-36
¡Nos encantaría saber qué piensas acerca de este patrón!
Si quieres escribir una pregunta referente al patrón, por favor asegúrate de elegir la categoría correcta en el formulario debajo, para acelerar el proceso de respuesta. Los campos obligatorios están marcados con un *.