
Categorías populares
¿Buscas un hilo?


Comentarios / Preguntas (153)
![]() Agueda escribió:
Agueda escribió:
Cuando dice tejer 1 hilera del revés por el lado reves, después de montar los puntos, como se haría la primera hilera porque después de montar los puntos la primera hilera es por el lado derecho, no entiendo cómo se haría. Muchas gracias
09.12.2017 - 21:21DROPS Design respondió:
Hola Agueda, no siempre en todos los patrones la primera fila es por el lado derecho; en algunos casos, como en este, la primera fila es por el lado revés, siempre hay que trabajar según el patrón.
17.12.2017 - 18:35
![]() Alicia escribió:
Alicia escribió:
For right leg, when it says P1 row from WS then continue as follows from RS: 4 garter stitches. I'm a newer knitter.. It was my understanding that all rows are from the RS when knitting in the round, how do you P a round in WS? Also, for garter, is that alternative K and P rows? Thank you!
28.06.2017 - 23:59DROPS Design respondió:
Dear Alicia, right leg is worked back and forth on circular needle, ie you will work alternately from RS and from WS. When sts are cast on, P all sts on 1st row = WS, then turn and work now from RS as explained. Happy knitting!
29.06.2017 - 08:20
![]() Erika Karpati escribió:
Erika Karpati escribió:
Jag kan inte få ihop flätorna mitt på benen. När jag följer instruktoner...sätt benen på samma rundst.. börja i plaggets vänster sida...18 21 24 27 m släts, 2 am osv.allting hamnar till "låren" ungefär inte i mitten. Samt hur blir det 108 mask (6/9 mån) och sedan när man nått 46cm och börjar sticka främre delen blir det 56 m ( 56x2 =112 ) eller? Tack på förhand ! Mvh Erika
29.05.2017 - 15:53DROPS Design respondió:
Hej! Då man stickar flätmönstret enligt beskrivningen skall flätan komma mitt fram. Det ökas 4 m över framst innan mönstret påbörjas, vilket gör att det blir fler m på framst (56 m) än på bakst (52 m).
29.05.2017 - 16:39
![]() Yinka Kuitenbrouwer escribió:
Yinka Kuitenbrouwer escribió:
Ik brei dit patroon in de kleinste maat, maar ik kom bij de pijpen niet uit met het stekenaantal. Bij het meerderen komen er 54 steken bij de bestaande 36 steken = 90 steken, na het afkanten hou ik er 74 over aan elke pijp = 148 ipv 92 zoals vermeld staat bij het begin van het Lijf. Kunt u mij helpen?
16.03.2017 - 16:59DROPS Design respondió:
Hoi Yinka. Nee, je krijg ze niet erbij. Je begint met 47 st. Bij 5 cm minder je 11 st gelijkmatig = 36 st op de nld. En dan meerder je 1 st aan ieder kant van de 4 ribbelst 9 keer (2 nieuwe st x 9 = 18 nieuwe st): 54 st op de nld in totaal.
20.03.2017 - 13:14
![]() Stephanie escribió:
Stephanie escribió:
I am adding stitches for the sleeves it says add 4 two times then 8 1 time and 9 one time but then the total stitches = 100. I think I am missing something : 50 + 4 + 4 + 8 + 9 = 75. Where should I increase the other 25 stitches? Thanks
19.02.2017 - 15:24DROPS Design respondió:
Hi Stephanie! You have to add stiches on both sides (on the right and on the left), because there are 2 sleeves. The calculation is 50+(4+4+8+9)*2=50+(25*2)=100 stitches. Happy knitting!
19.02.2017 - 17:32Carmen escribió:
Finally, figured out how to read your pattern. Please ignore my previous questions and my apologies for all the questions. Thank you for all your assistance. Have not gotten to the sleeves yet, hope I should have no problem. thank you again.
05.06.2016 - 05:35Carmen escribió:
On the Body Piece, when you first start the cable, what do you exactly mean when you say "Continue like this until piece...." Because you start with an increase row when you start the cable and then the next round you do the M1, M2, then continue like this - like what? Can you please be more specific. Also, when you start the body piece am I suppose to be knitting in the round?, and am I starting on the right row? after the 9"? I really need your help. Thank you.
04.06.2016 - 04:25DROPS Design respondió:
Dear Carmen, continue as worked on previous round, ie with stocking sts, M1 and M2 (inc for cables are now done). Body is worked in the round, rounds bg on the left side of piece. After both legs are worked, cut the yarn and slip sts onto same circular needle, place a marker on each side and beg round on the left side as stated for your size. Happy knitting!
06.06.2016 - 08:57Carmen escribió:
Thank you for your reply - it helps - only the count is off - I should end up with 120 stitches after the increases and if I only knit 24+[P2=K2+P2+K2 (from 2 sts)]+P2+24 (for front) + 58 for back = 116. I should be ending up with 120. Did you mean to knit 26 + increases + P2 + 26 this will = 120. Is the count off? This will also center the beginning of cable line in the front. Please advise. Thank you.
27.05.2016 - 18:34DROPS Design respondió:
Dear Carmen, when putting legs tog you have 116 sts (58 x 2 legs), then work: 24 sts, P2, (work kfbl in the next 2 sts (= 2 inc) = K 4 over K2), P2, (work kfbl in the next 2 sts (= 2 inc) = K 4 over K2), P2, 24 sts in stocking st (= 62 sts for front piece), 58 sts in stocking st (= back piece) = 120 sts. Happy knitting!
30.05.2016 - 08:40
![]() Carmen escribió:
Carmen escribió:
I am just starting the body piece after the legs - after you slip both legs on circular needle - am confused on where to start knitting - if I start at edge of leg where I just bound off the 4 stitches the P2K2 seem to appear in the middle of (or side of) the leg piece? Where do I start knitting the first 24 stitches? Do I start in the middle of one of the legs? Please advise - thank you in advance.
26.05.2016 - 18:37DROPS Design respondió:
Dear Carmen, when you have slipped both legs on the same needle you added 2 markers, 1 on each side with 58 sts between each marker. Start rounds on the marker on the left side of piece so that you have 24 sts + P2, K2 in each of the next 2 sts, P2, K2 in each of the next 2 sts, P2, 24 sts stocking st (= front piece), marker on right side of piece, 58 sts in stocking st (= back piece). Happy knitting!
27.05.2016 - 08:29
![]() Amanda escribió:
Amanda escribió:
I am just starting the body piece after the legs. After putting both legs on the circular needle it wants me to knit 18 stockinette stitches then start the cabling process. When I knit 18 stitches it leads me to believe I will have cable up the sides of the garment not up the front. Am I reading the pattern wrong?
17.05.2016 - 12:39DROPS Design respondió:
Dear Amanda, when starting body, rounds should now start on the left side of piece, so that you will have the 18 sts in stockinette, then the cables (= over 10 sts), and 18 sts in stockinette sts = front piece and remaining 46 sts on round = back piece. Happy knitting!
17.05.2016 - 13:34
|
||||||||||
Little Lamb#littlelambset |
||||||||||
|
|
||||||||||
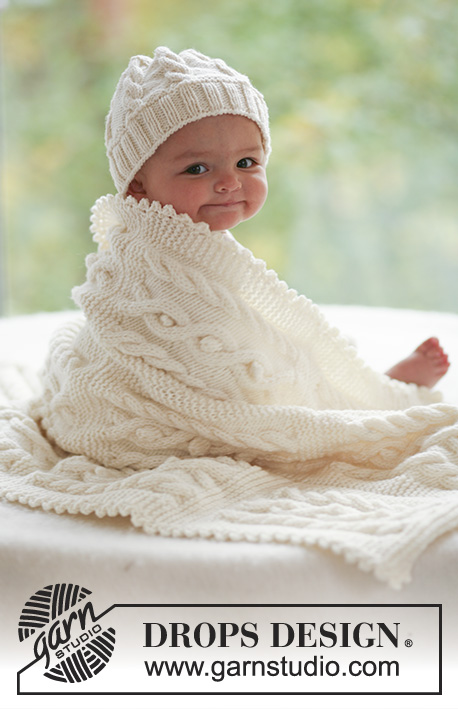
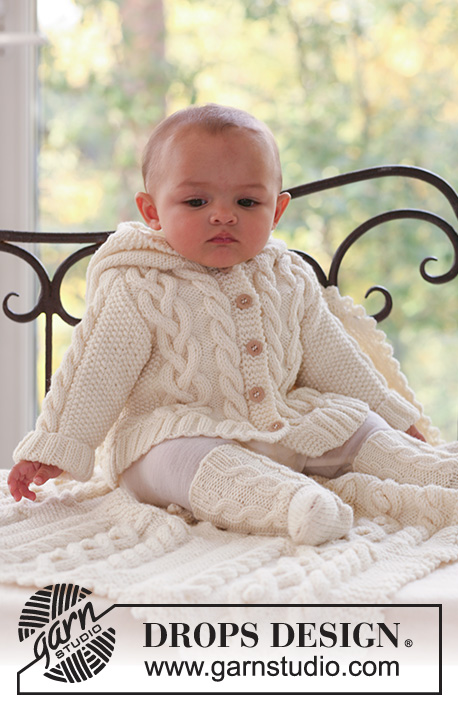
Boina y mameluco de mangas largas DROPS con torsadas al centro del frente, en “Merino Extra Fine”.
DROPS Baby 16-2 |
||||||||||
|
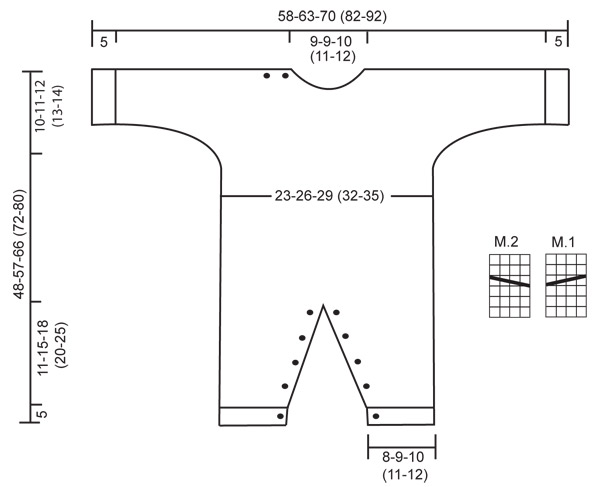
MAMELUCO: PT MUSGO (de ida y vuelta en la ag): Tejer todas las hileras de derecho. PATRÓN: Ver diagrama M.1 y M.2. Los diagramas muestran el patrón por el LD. OJALES: Hacer los ojales en la orilla para los ojales en el frente de la pierna. En la pierna derecha hacer los ojales por el LD y en la pierna izquierda hacer los ojales por el LR. 1 ojal = tejer juntos de derecho el 2º y el 3º pt a partir de la orilla y hacer 1 HEB (lazada). Hacer los ojales cuando la pierna mida: TALLA 1/3 meses: 2, 5, 8, 11 y 14 cm. TALLA 6/9 meses: 2, 6, 10, 14 y 18 cm. TALLA 12/18 meses: 2, 6, 11, 16 y 21 cm. TALLA 2 años: 2, 6, 10, 14, 18 y 23 cm. TALLA 3/4 años: 2, 7, 12, 17, 22 y 28 cm. ------------------------------------------------------ PIERNA DERECHA: Tejida de ida y vuelta en ag circular. Mon 47-53-53 (59-65) pts en ag circular tamaño 3.5 mm con Merino Extra Fine. Tejer 1 hilera de revés por el LR y continuar de la manera sig por el LD: 4 pts en pt musgo (orilla para los ojales), resorte 3d/3r en los 36-42-42 (48-54) pts sig y terminar la hilera con 3d y 4 pts en pt musgo (= orilla para los ojales). Continuar en resorte con 4 pts en pt musgo en cada lado y, AL MISMO TIEMPO, cuando la pieza mida 2 cm hacer un ojal – VER ARRIBA. Cuando la pieza mida 5 cm, tejer 2 hileras de derecho en todos los pts y, AL MISMO TIEMPO, dism 11-13-9 (11-13) pts distribuidos equitativamente en la primera hilera = 36-40-44 (48-52) pts. Cambiar a ag tamaño 4.5 mm y continuar en pt jersey con 4 pts en pt musgo en cada lado. AL MISMO TIEMPO, cuando la pieza mida 6 cm, aum 1 pt en cada lado en el interior de los 4 pts en pt musgo, a cada 3-3-4 (4-4) hileras, un total de 9-10-11 (12-13) veces = 54-60-66 (72-78) pts. RECUERDE MANTENER LA MISMA TENSIÓN DE TEJIDO DE LA MUESTRA! Cuando la pieza mida 16-20-23 (25-30) cm, rem 4 pts en cada lado = 46-52-58 (64-70) pts. Dejar la pieza a un lado y tejer la otra pierna. PIERNA IZQUIERDA: Como la pierna derecha, pero hacer los ojales en el lado opuesto. CUERPO: Deslizar ambas piernas en la misma ag circular = 92-104-116 (128-140) pts. Insertar 1 marcapuntos en cada lado = 46-52-58 (64-70) pts entre los marcapuntos. Tejer la vta sig de la manera sig – empezar en el lado izquierdo de la pieza: 18-21-24 (27-30) pts en pt jersey, 2r, 2d en cada uno de los 2 pts sig (= 4d), 2r, 2d en cada uno de los 2 pts sig (= 4d), 2r y tejer los pts restantes en pt jersey = 96-108-120 (132-144) pts. Tejer la vta sig de la manera sig: 18-21-24 (27-30) pts en pt jersey, 2r, M.1, 2r, M.2, 2r y tejer los pts restantes en pt jersey. Continuar de esta manera hasta que la pieza mida 38-46-54 (59-66) cm. Ahora dividir la pieza en los marcapuntos de los lados y completar las piezas del frente y espalda por separado – NOTA: Asegurarse de dividir la pieza para que la hilera de la torsada de M.1 y de M.2 sea una hilera por el LD. FRENTE: = 50-56-62 (68-74) pts. Continuar en pt jersey con las torsadas como antes y, AL MISMO TIEMPO, mon nuevos pts en cada lado para las mangas. Mon los pts al final de cada hilera en los lados: 4 pts 2-1-1 (1-1) veces, 6 pts 0-1-1 (2-1) veces, 8 pts 1-1-1 (1-2) veces y 9-9-13 (16-21) pts 1 vez = 100-110-124 (148-168) pts – tejer los pts aum en pt jersey. Cuando la pieza mida 44-53-61 (67-75) cm, tejer 2 pjd en las 2 torsadas = 96-106-120 (144-164) pts. En la hilera sig, deslizar los 10-10-12 (14-16) pts centrales a un gancho o seguro aux para el escote y completar cada lado por separado. HOMBRO DERECHO/MANGA: Continuar como antes y, AL MISMO TIEMPO, rem para formar la línea del escote, al inicio de cada hilera a partir del centro del frente: 2 pts 1 vez y 1 pt 2 veces = 39-44-50 (61-70) pts restantes en el hombro/manga. AL MISMO TIEMPO, cuando la pieza mida 46-55-64 (70-78) cm, tejer en pt musgo en los primeros 12-13-14 (15-16) pts del centro del frente (tejer los pts restantes como antes). Después de 4 hileras en pt musgo, hacer 2 ojales de la manera sig, por el LD: Tejer 2 pjd, 1 HEB, tejer 5-6-7 (8-9) pts, tejer 2 pjd, 1 HEB, tejer los pts restantes de la hilera. Continuar en pt jersey con pt musgo en los primeros 12-13-14 (15-16) pts del centro del frente hasta que la pieza mida 48-57-66 (72-80) cm, rem. HOMBRO IZQUIERDO/MANGA: Como el hombro derecho/manga, pero en sentido inverso = 39-44-50 (61-70) pts en el hombro/manga. Continuar en pt jersey hasta que la pieza mida 48-57-66 (72-80) cm, rem. ESPALDA: = 46-52-58 (64-70) pts. Mon nuevos pts en cada lado para las mangas, como se describe para la pieza del frente = 96-106-120 (144-164) pts. Cuando la pieza mida 46-55-64 (70-78) cm, rem los 16-16-18 (20-22) pts centrales para el escote y completar cada lado por separado. HOMBRO DERECHO/MANGA: = 40-45-51 (62-71) pts. Rem 1 pt en la línea del escote en la hilera sig = 39-44-50 (61-70) pts. Cuando la pieza mida 48-57-66 (72-80) cm, rem los primeros 27-31-36 (46-54) pts a partir de la orilla de la manga. Tejer otro 1.5 cm en pt jersey con 1 pt en pt musgo en cada lado en los 12-13-14 (15-16) pts restantes (= orilla para los ojales). Tejer 1 hilera de derecho por el LR y rem todos los pts por el LD. HOMBRO IZQUIERDO/MANGA: Continuar y rem como se describe para el hombro derecho/manga, pero en sentido inverso = 39-44-50 (61-70) pts restantes en el hombro/manga. Continuar en pt jersey hasta que la pieza mida 48-57-66 (72-80) cm, rem. TERMINACIÓN: Hacer las costuras de la parte de arriba de las mangas, orilla con orilla, para evitar que se forme una costura abultada – en el hombro derecho únicamente hacer la costura hasta la orilla para los ojales. PUÑO: Levantar 38-44-50 (50-56) pts en ag tamaño 3.5 mm a lo largo de la orilla de la manga. Tejer 2 hileras de derecho y continuar en resorte, 3d/3r, con 1 pt de orillo en cada lado. Rem cuando el resorte mida 5 cm. Repetir a lo largo de la orilla de la otra manga. Hacer las costuras bajo las mangas a 1 pt del pt de orillo. CUELLO: Levantar aprox 48 a 64 pts alrededor de la línea del escote (incl los pts en los ganchos o seguros aux) en ag tamaño 4.5 mm. Tejer 3 hileras de derecho y rem. Unir con una costura las orillas para los ojales en la parte de arriba del frente de las piernas y unir con una costura las orillas para los ojales en la parte de arriba de la parte posterior de las piernas. Coser los botones para que coincidan con los ojales de las piernas y del hombro. ------------------------------------------------------ BOINA: Circunferencia de la cabeza: 40/42 – 44/46 – 46/48 (48/50 – 50/52) cm TIP PARA AUMENTO: Aum 1 pt haciendo 1 HEB. En la hilera sig, tejer la HEB retorcida (es decir, insertar la ag por atrás del pt en vez de por delante) para evitar que se forme un agujero. ------------------------------------------------------ BOINA: Tejida de ida y vuelta en ag rectas. Mon 90-92-94 (96-98) pts en ag tamaño 4 mm con Merino Extra Fine. Tejer 2 cm en resorte, 1d/1r. Continuar en pt musgo – VER ARRIBA – y, AL MISMO TIEMPO, dism 5-7-4 (6-3) pts distribuidos equitativamente en la primera hilera = 85-85-90 (90-95) pts. Insertar 5 marcapuntos en la pieza, de la manera sig, por el LD: El primer marcapuntos después de 1 pt, y los 4 marcapuntos restantes con 17-17-18 (18-19) pts entre cada uno = 16-16-17 (17-18) pts restantes después del último marcapuntos. En la hilera sig, por el LD, aum 1 pt a la izquierda de todos los marcapuntos – VER TIP PARA AUMENTO – y repetir el aum a cada 2 hileras un total de 6-7-8 (9-10) veces = 115-120-130 (135-145) pts. RECUERDE MANTENER LA MISMA TENSIÓN DE TEJIDO DE LA MUESTRA! Cuando la pieza mida 6.5-7-7.5 (8-8.5) cm, dism 1 pt a la izquierda de todos los marcapuntos tejiendo 2 pjd, y repetir la dism a cada 2 hileras un total de 18-19-20 (21-22) veces = 25-25-30 (30-35) pts. Ahora tejer 2 pjd a lo largo de toda la hilera. Cortar el hilo, pasarlo a través de los pts restantes, fruncir y asegurar. Unir la boina con una costura al centro de la parte de atrás en la hebra externa de los pts. La boina mide aprox 15-16-17 (18-19) cm. |
||||||||||
Explicaciones del diagrama |
||||||||||
|
||||||||||
 |
||||||||||
¿Terminaste este patrón?Entonces, etiqueta tus fotos con #dropspattern #littlelambset o envíalas a la galería #dropsfan. ¿Necesitas ayuda con este patrón?Encontrarás 16 videos tutoriales, un espacio para comentarios/preguntas y más visitando la página del patrón en garnstudio.com © 1982-2026 DROPS Design A/S. Todos los derechos reservados. Este documento, incluyendo todas sus sub-secciones, está protegido por los derechos de autor (copyright). Lee más acerca de lo que puedes hacer con nuestros patrones en la parte de abajo de cada patrón de nuestro sitio. |
||||||||||


Con más de 40 años en el diseño de modelos de punto y de ganchillo, DROPS Design ofrece una de las más vastas colecciones de patrones gratuitos en el internet - traducidos en 17 idiomas. Al día de hoy, contamos con 324 catálogos y 12290 patrones - de los cuales 11685 están traducidos en español.
Nosotros trabajamos con mucho esmero para brindarte lo mejor que las labores de punto y ganchillo tienen para ofrecer,inspiración y consejos, así como hilos de magnífica calidad a precios increíbles! Te gustaría usar nuestros patrones para otro fin además del uso personal? Puedes leer acerca de lo que estás permitida a hacer en el texto de Copyright en la parte de abajo de todos nuestros patrones. Felices labores!
Escribe un comentario sobre DROPS Baby 16-2
¡Nos encantaría saber qué piensas acerca de este patrón!
Si quieres escribir una pregunta referente al patrón, por favor asegúrate de elegir la categoría correcta en el formulario debajo, para acelerar el proceso de respuesta. Los campos obligatorios están marcados con un *.