
Categorías populares
¿Buscas un hilo?


Comentarios / Preguntas (43)
![]() Marion escribió:
Marion escribió:
Bonjour, que signifie « snow » dans l’expression « aiguille n 9 en snow » ? Svp
19.02.2026 - 20:14DROPS Design respondió:
Bonjour Marion, il s'agit du nom de la laine utilisée pour ce modèle que vous retrouverez dans la liste des fournitures, retrouvez plus d'infos ici, sur DROPS Snow. Bon tricot!
20.02.2026 - 07:51
![]() Aimée escribió:
Aimée escribió:
Hello, Can I use circular needles instead of straight ones for this pattern?
03.06.2023 - 14:31DROPS Design respondió:
Dear Aimée, here we use double pointed needles, not straight needles. You can use 2 sets of circular needles for this piece, using the method explained in this video: https://www.garnstudio.com/video.php?id=97&lang=en. You can also work with one circular needle and use the magic loop technique. Happy knitting!
04.06.2023 - 18:11
![]() Sharon Hunt escribió:
Sharon Hunt escribió:
Hei, is the short side referred to in the lace pattern the side that will be sewn on to the leg warmer. Thank for responding. Shaton
14.03.2023 - 23:49DROPS Design respondió:
Hi Sharon, Yes, the shorter side is the side which will be sewn to the leg warmer. Happy crafting!
15.03.2023 - 07:21
![]() Sharon Junt escribió:
Sharon Junt escribió:
Hello, am now working the lace border for the leg warmer. The 4 row says to bind off 3 and knit 4. am I supposed to put the last stitch on the left needle after the bonus off stiches back on the right needle. Does this stitch count as the first stitch? Thanks for your response.
13.03.2023 - 22:54DROPS Design respondió:
Hi Sharon, You bind off 3 stitches and have 1 stitch left on the right needle, which stays there while you knit the remaining 3 stitches (this stitch is included in the 4 knitted stitches). Happy knitting!
14.03.2023 - 07:11
![]() Sharon Hunt escribió:
Sharon Hunt escribió:
How do I make sure there is a p2 in the middle of this 6 stitch cable? Thank you.
11.03.2023 - 13:28DROPS Design respondió:
Dear Sharon, you need to ensure that you will have k2,p2,k2 over the 6 stitches of the cable. Since you are working a k2,p2 rib, adjust as necessary to obtain the indicated combination over the cable (start the row with k2 or p2 accordingly). Happy knitting!
12.03.2023 - 17:05
![]() Sharon Hunt escribió:
Sharon Hunt escribió:
Hi. What am I missing where are the instruction to knit 2 purl 2? When I follow the instruction I end up with garter stitch. I have ripped 2 times already and I don’t know what am doing wrong. I don’t see anywhere in the pattern instruction where i says to knit 2 purl 2 for X number of inches before starting the cable. How many cables are in the pattern? I see the cables at the front only? Are there more?
09.03.2023 - 21:40DROPS Design respondió:
Dear Mrs Hunt, piece is worked bottom up, at the very beginning you start with garter stitch (and you will work and sew the lace edge afterwards), then work the pattern .There is only one cable in the pattern. And then you work in rib (= K2, P2) - the rib as explained under Rib: at the top of pattern explanations - until piece measures 15 3/4" from the cast on row. Happy knitting!
10.03.2023 - 09:48
![]() Isa escribió:
Isa escribió:
Combien faut-il de pelotes pour ce modèle, je ne vois pas l'indication ?
05.10.2020 - 12:56DROPS Design respondió:
Bonjour Isa, vous trouverez la quantité indiquée sous l'en-tête, au poids, soit pour ce modèle300 g DROPS Eskimo /50 g la pelote = 6 pelotes. Bon tricot!
05.10.2020 - 15:33
![]() Martinique escribió:
Martinique escribió:
Please advise the pattern sais cast on then knit 3 rows and p3 rows etc then the next row the cable with the reverse stocking sts this I understand but then it sais When piece measures aprox 33 cm what rows am I repeating for my knitting to reach 34cm I am basically asking how many rows do I knit between cables? Secondly when I decrease 6 sts evenly where do I do this in the middle or where? Thank you
10.06.2020 - 15:06DROPS Design respondió:
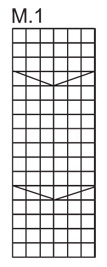
Dear Martinique, you will continue working as established (from RS) = 1 edge st, P16, M.1, P16, 1 edge st, repeating the 16 rows in M.1 until piece measures 34 cm from cast on edge. Read more here about diagrams. You decrease 3 sts on each side of M.1 (= from RS, purl 2 together evenly distributed a total of 3 times before M.1 and after M.1). Happy knitting!
10.06.2020 - 15:18
![]() Lilou escribió:
Lilou escribió:
Bonjour, j'ai toujours du mal à trouver un modèle sur votre nouvelle présentation!! j'ai le numéro du modèle comment faire?... je passe donc systhèmatiquement par google avec le n0 du modèle pour trouver!!!...
18.12.2016 - 09:55DROPS Design respondió:
Bonjour Lilou, recherchez des modèles plus simplement dès la page d'accueil en indiquant le numéro du modèle dans la case indiquée dans la rubrique "Cherchez des modèles!" - voir aussi l'aide à la recherche ici. Bon tricot!
19.12.2016 - 10:04Nayla Menassa escribió:
Bonjour je ne comprend pas le tout debut:tricoter 3rang à l'endroit et 3 autres rangs à l'envers? 1m lis çà ve dire quoi? Merci pour votre patience
19.02.2015 - 12:50DROPS Design respondió:
Bonjour Mme Menassa, on tricote d'abord toutes les mailles à l'endroit pendant 3 rangs (= 3 rangs endroit), puis on tricote toutes les mailles à l'envers pendant 3 rangs (= 3 rangs envers). Le 1er de ces 6 rangs se fait sur l'endroit de l'ouvrage. 1 m lis = la 1ère et la dernière maille du rang qui sert ensuite à l'assemblage. Bon tricot!
19.02.2015 - 14:29
|
|||||||
DROPS 98-45 |
|||||||
 |
 |
||||||
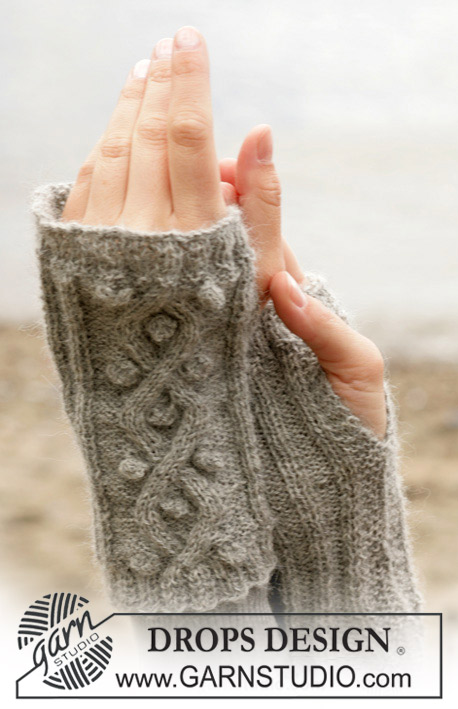
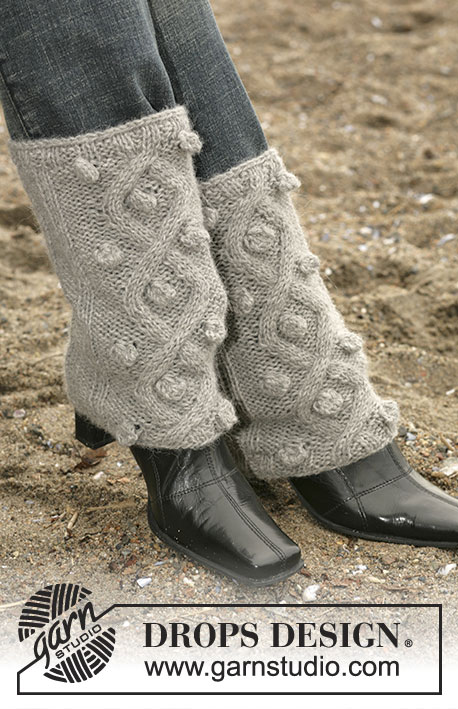
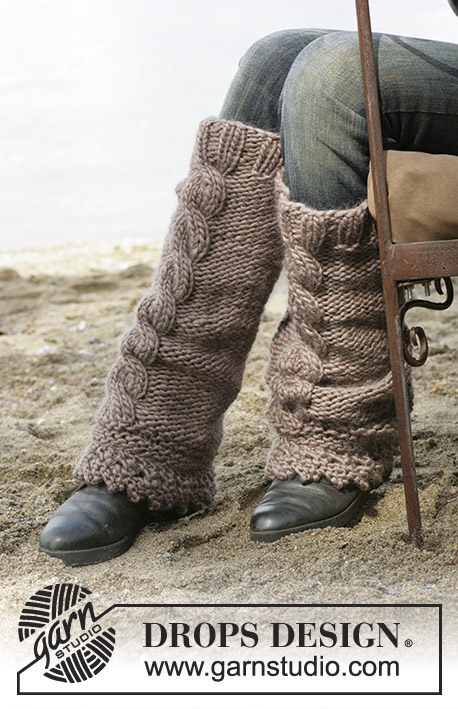
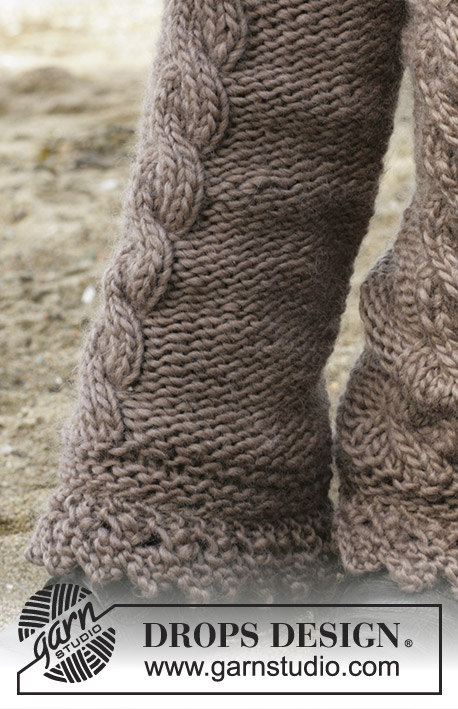
Calentadores DROPS con torsadas (trenzas) y patrón de calados en “Snow”
DROPS 98-45 |
|||||||
|
Muestra de Tejido: 10 pts x 14 vtas en ag tamaño 9 mm con puntada jersey = 10 x 10 cm. Patrón: Ver diagrama M.1. El diagrama del patrón visto por el lado derecho (LD). La traducción al español para el texto del diagrama se da al final de este patrón, en el orden vertical en que aparece en el diagrama. Punto resorte: *2d, 2r*, repetir de *a*. Orilla de calados: Vuelta 1: 2d, 2 heb (lazada), 2d Vuelta 2: 2d en el primer pt, 2d, 1r (en la segunda heb), 2d Vuelta 3: 7d Vuelta 4: Rem 3 pts, 4d. CALENTADORES: Mon 38 pts (incluyendo 1 pt de orillo a cada lado) en ag tamaño 9 mm con Snow. Tejer 3 vtas al derecho (1ª vta = LD) y 3 vtas al revés. Al mismo tiempo aum 1 pt en el 16º pt y 1 pt en el 18º pt de la última vta (= 40 pts). Tejer la vta sig por el LD: 1 pt de orillo, 16 pts en pt jersey revés, M.1 (= 6 pts), 16 pts en pt jersey revés y 1 pt de orillo. Cuando la pieza mida aprox 34 cm – ajustar después de una torsada ó 2 vtas después de una torsada – dism 6 pts distribuidos equitativamente = 34 pts (no dism en las torsadas). Cont en pt resorte y asegurarse que queden 2r sobre cada torsada. Cuando la pieza mida 40 cm rem pts flojos en pt resorte. Tejer el otro calentador. TERMINACION: Coser el calentador dentro del pt de orillo. ORILLA DE CALADOS: Mon 4 pts en ag tamaño 9 mm con Snow y tejer la orilla de calados - ver arriba. Rem pts cuando la orilla mida 36 cm en el lado más corto. Coser la orilla formando un anillo y coser a la orilla inferior del calentador (la orilla sin el pt resorte) con los “picos” hacia abajo. Repetir en el otro calentador. |
|||||||
Explicaciones del diagrama |
|||||||
|
|||||||
 |
|||||||
¿Terminaste este patrón?Entonces, etiqueta tus fotos con #dropspattern o envíalas a la galería #dropsfan. ¿Necesitas ayuda con este patrón?Encontrarás 12 videos tutoriales, un espacio para comentarios/preguntas y más visitando la página del patrón en garnstudio.com © 1982-2026 DROPS Design A/S. Todos los derechos reservados. Este documento, incluyendo todas sus sub-secciones, está protegido por los derechos de autor (copyright). Lee más acerca de lo que puedes hacer con nuestros patrones en la parte de abajo de cada patrón de nuestro sitio. |
|||||||


Con más de 40 años en el diseño de modelos de punto y de ganchillo, DROPS Design ofrece una de las más vastas colecciones de patrones gratuitos en el internet - traducidos en 17 idiomas. Al día de hoy, contamos con 324 catálogos y 12290 patrones - de los cuales 11685 están traducidos en español.
Nosotros trabajamos con mucho esmero para brindarte lo mejor que las labores de punto y ganchillo tienen para ofrecer,inspiración y consejos, así como hilos de magnífica calidad a precios increíbles! Te gustaría usar nuestros patrones para otro fin además del uso personal? Puedes leer acerca de lo que estás permitida a hacer en el texto de Copyright en la parte de abajo de todos nuestros patrones. Felices labores!
Escribe un comentario sobre DROPS 98-45
¡Nos encantaría saber qué piensas acerca de este patrón!
Si quieres escribir una pregunta referente al patrón, por favor asegúrate de elegir la categoría correcta en el formulario debajo, para acelerar el proceso de respuesta. Los campos obligatorios están marcados con un *.