
Categorías populares
¿Buscas un hilo?


Comentarios / Preguntas (19)
![]() Vanweddingen Ingrid escribió:
Vanweddingen Ingrid escribió:
Waar zijn die vasten gehaakt waarvan sprake is bij de bies? Ik begrijp niet hoe ik de bies moet haken en vast naaien aan de cirkels!?
17.06.2025 - 18:57DROPS Design respondió:
Dag Ingrid,
Op de eerste foto is te zien dat de bies aan de ene kant tegen cirkel 1 zit en aan de andere kant tegen cirkel 2. Om deze aan elkaar te haken, haak je vasten waarbij je de haaknaald steeds door de bies en de cirkel steekt, zodat je ze aan elkaar haakt.
17.06.2025 - 21:14
![]() Susana escribió:
Susana escribió:
Hello, what is the sewing technic used to sew both circles to the strap? There is no indication on the pattern or videos provided. Thank you
06.06.2025 - 12:30DROPS Design respondió:
Dear Susana, we don't have any video to that specific seam, you will use a mix of these 2 videos: how to sew a pice worked with treble crochets (here) = circle on one side and how to sew squares together (here) = strap. Make sure to not tighten piece, you can first add pins on your work so that it might make the seam easier. Happy assembly!
06.06.2025 - 13:08
![]() Susana escribió:
Susana escribió:
Heya, can I kindly ask if on this part "Work 6 treble crochets back and forth until the band measures a total of 140 cm" I will still need to work the crochet information "At the beginning of each round/row of treble crochets work 3 chain stitches, which do not replace the first treble crochet but are in addition"? Thank you
04.06.2025 - 22:50DROPS Design respondió:
Dear Susana, sure you still ned this info, this means you start each row with 3 chains to start row but these chains will not replace the first treble crochet, then crochet 1 treble crochet in each of the next 6 treble crochets = there are 6 treble crochets in total for the strap, repeat this row until the desired length. Happy crocheting!
05.06.2025 - 08:55
![]() Susana Araujo escribió:
Susana Araujo escribió:
What does the subtitle "1 treble crochet in stitch bellow" means? Is this on the 2nd stitch from the previous treble crochet ? Or around the actual chain stitch?
01.06.2025 - 23:40DROPS Design respondió:
Dear Susana, in the stitch below means that the treble crochet in this round is worked inside the stitch (the treble crochet from the previous round), and not around the stitch; you can check herethe difference between around and in the stitch. Happy crochetting!
01.06.2025 - 23:54
![]() Svitlana escribió:
Svitlana escribió:
Hei ! Er det mulig å se diagram A1 og A2 til denne oppskriften ?
12.05.2025 - 10:37DROPS Design respondió:
Hej Svitlana, ja du finder diagrammerne nederst i opskriften. Diagrammet starter ved cirklen nederst :)
12.05.2025 - 11:10
![]() Aoife Maeve escribió:
Aoife Maeve escribió:
Har dere instrukser på båndet med bilder som viser? jeg er en erfart hekler men det båndet gir ingen mening for meg
27.04.2025 - 12:59DROPS Design respondió:
Hei Aoife. Først hekler du et bånd med 12 staver til det måler 47 cm (= bunnen på vesken), så legger du dette båndet dobbelt og hekler kortsiden (12 staver) sammen med 1 stav i hver stav gjennom begge lag, slik at kortsiden nå består av 6 staver. Du har nå et bånd med 12 staver som er brettet dobbelt. Fortsett med å hekle staver over de 6 stavene ca 93 cm. Legg oppleggskanten (med 12 staver) dobbelt og sy igjen (kortsiden). Det doble båndet skal nå sys fast langs kanten på sirkelene. mvh DROPS Design
05.05.2025 - 10:23
![]() Helga Eitel escribió:
Helga Eitel escribió:
Ich vermisse bei den Videos immer die Erklärungen zu dem betreffenden Objekt. Wie nähe ich z. B. den gehäkelten Rand so an die beiden runden Taschenhälften dass es eine Kante ergibt ? Wie man Stäbchen usw. häkelt wird wohl jeder wissen der eine Anleitung sucht.
19.03.2025 - 15:02
![]() Sylvie Guilbot escribió:
Sylvie Guilbot escribió:
Bonjour pour débuter combien de Brides dans le cercle magique ? merci
24.07.2024 - 08:35DROPS Design respondió:
Bonjour Sylvie, le rond magique est presente ICI, mais faites-vous les brides au lieu des mailles serrees. Bon crochet!
24.07.2024 - 10:41
![]() Suzy escribió:
Suzy escribió:
Bonjour, pourquoi mon disque gondole merci
14.06.2024 - 08:53DROPS Design respondió:
Bonjour Susy, pensez à bien conserver la bonne tension en largeur et en hauteur, ajustez la taille du crochet si besoin. Bon crochet!
14.06.2024 - 16:18
![]() SUJO83 escribió:
SUJO83 escribió:
Bonjour je désire faire 2 ances pouvez vous me dire comment faire merci
10.06.2024 - 13:53DROPS Design respondió:
Bonjour Sujo83, tout dépend de ce que vous souhaitez comme résultat, vous pourrez peut-être trouver l'inspiration parmi tous nos modèles de sacs (cf ici), certains d'entre eux ont 2 anses. Bon crochet!
11.06.2024 - 07:47
|
||||||||||||||||
Tortilla Bag#tortillabag |
||||||||||||||||
 |
 |
|||||||||||||||
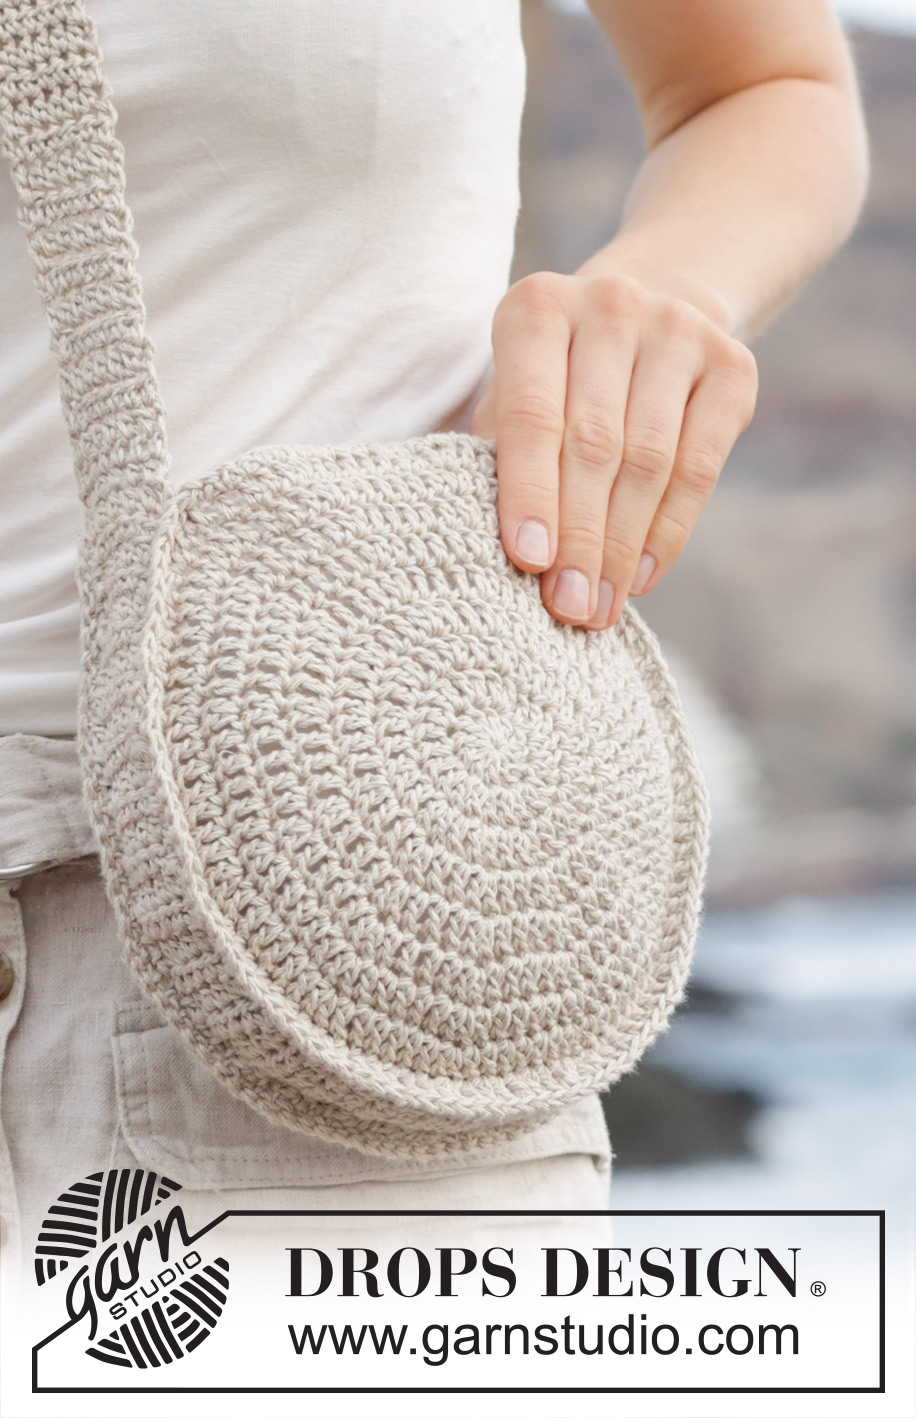
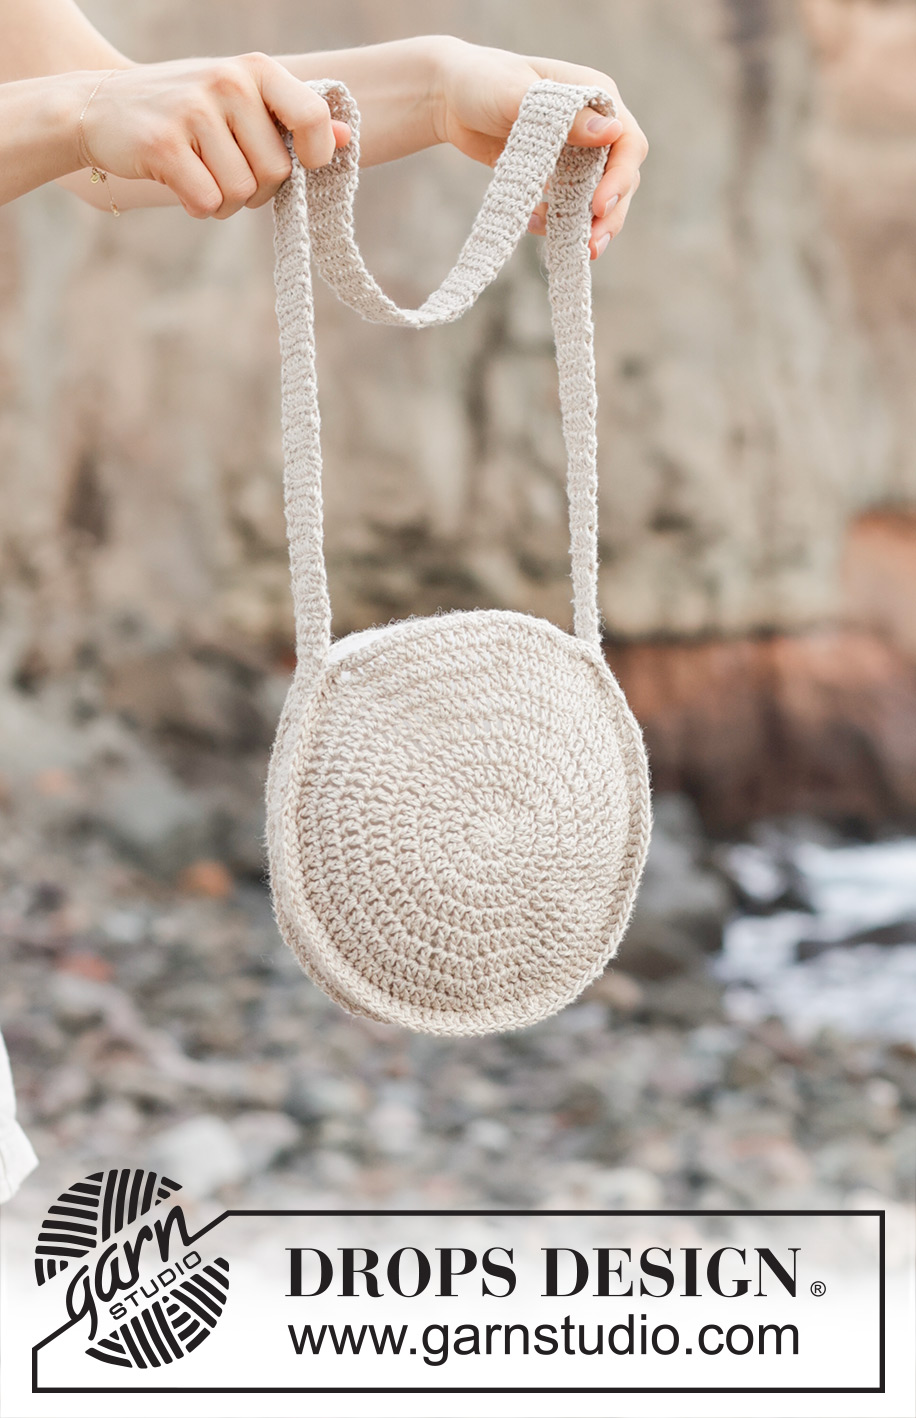
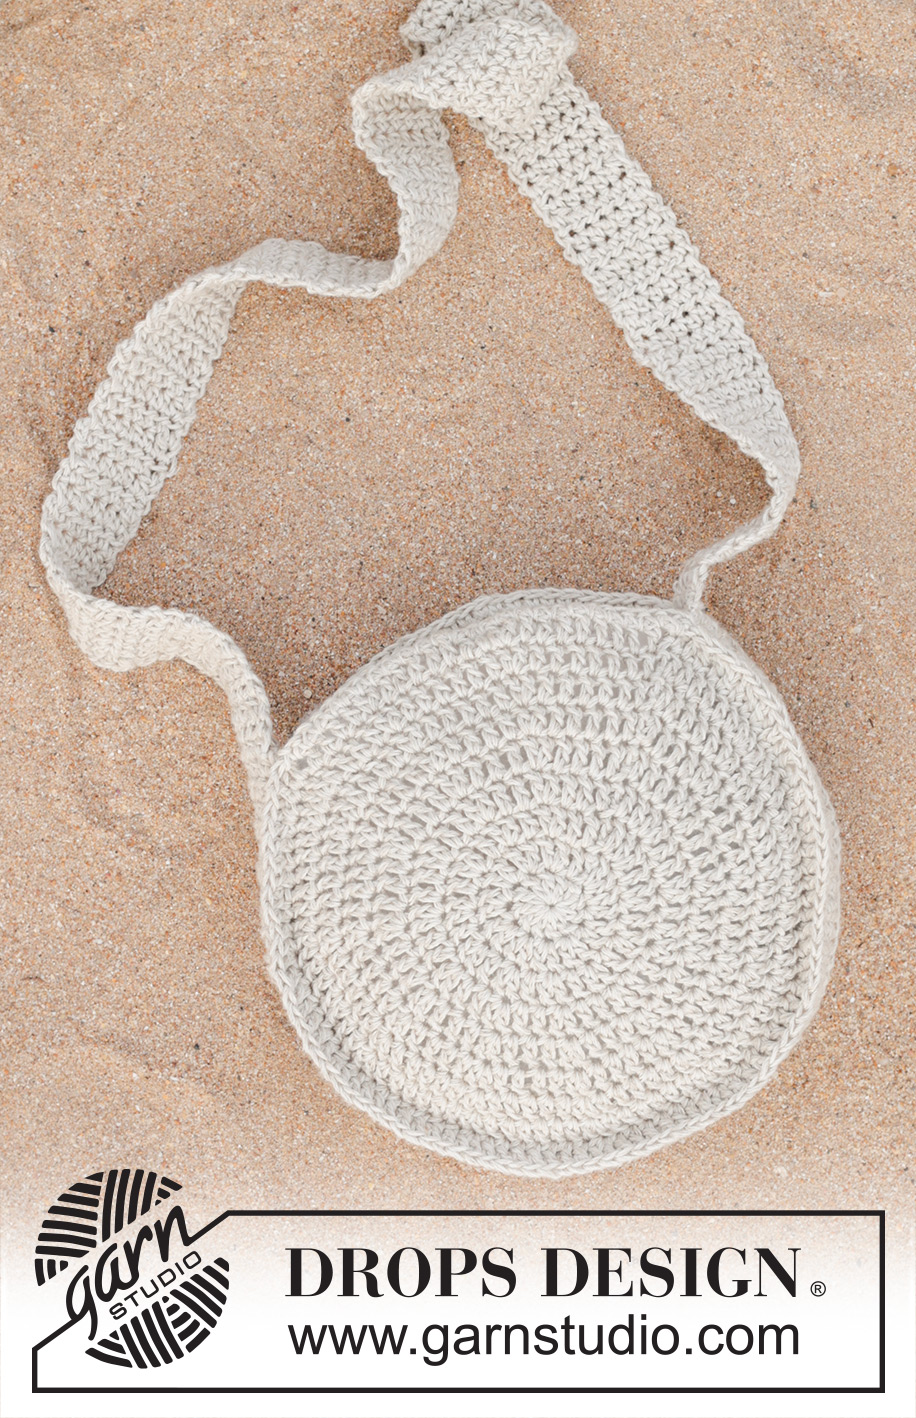
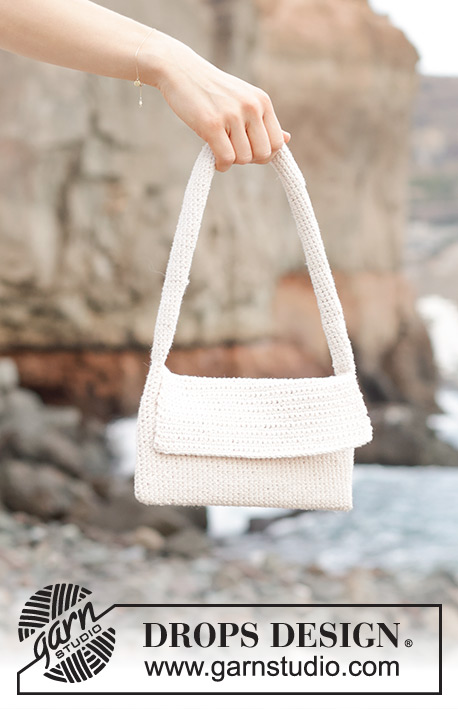
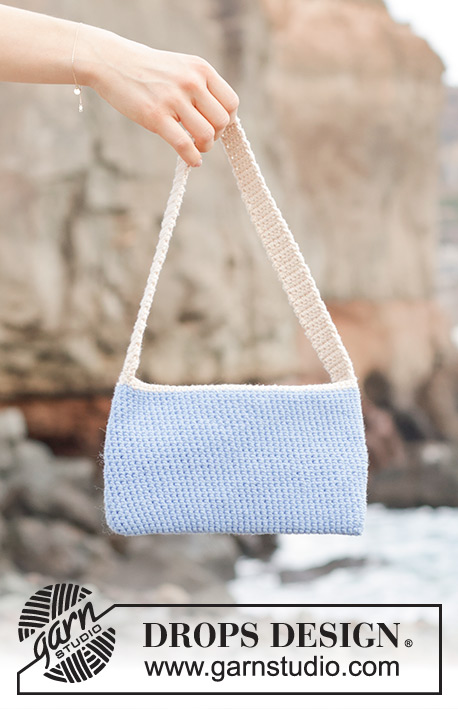
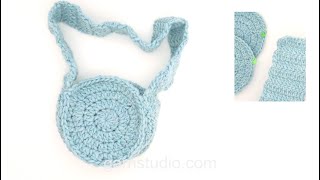
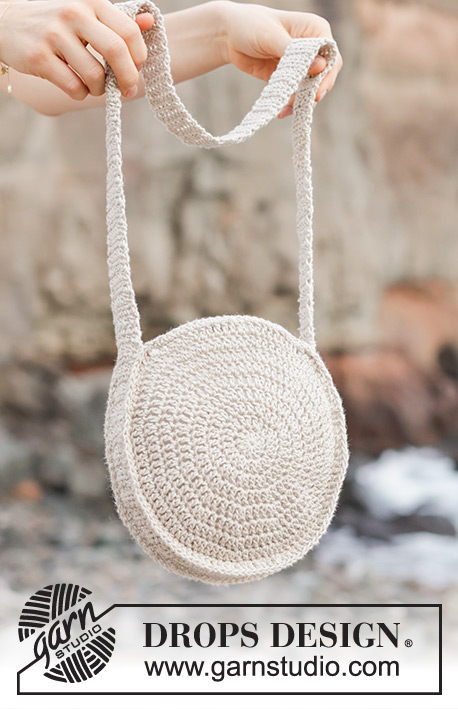
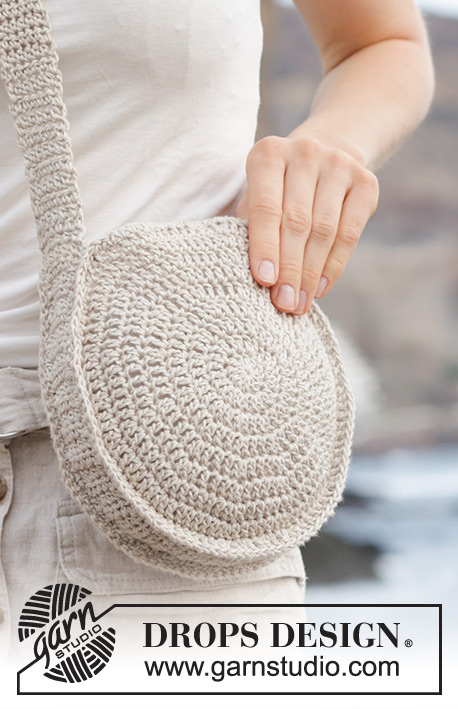
Bolso redondo a ganchillo en DROPS Bomull-Lin.
DROPS 247-5 |
||||||||||||||||
|
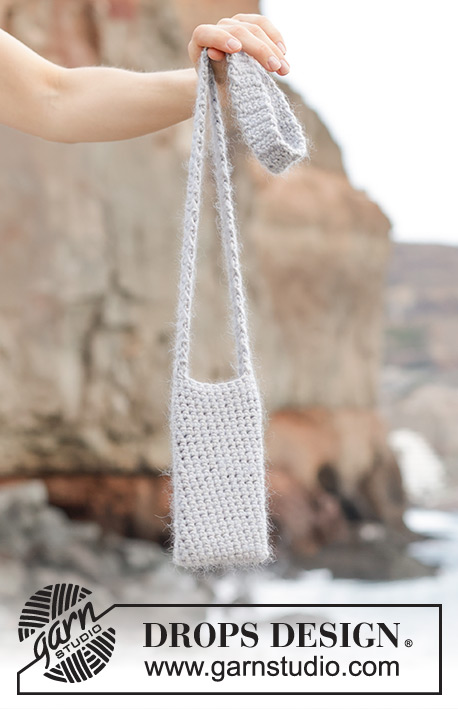
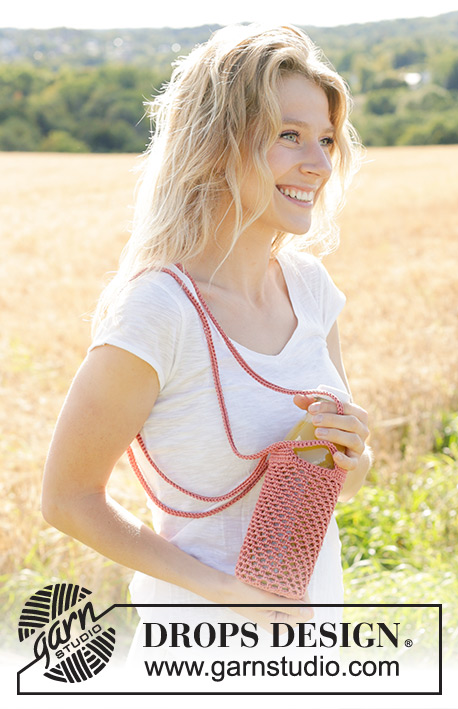
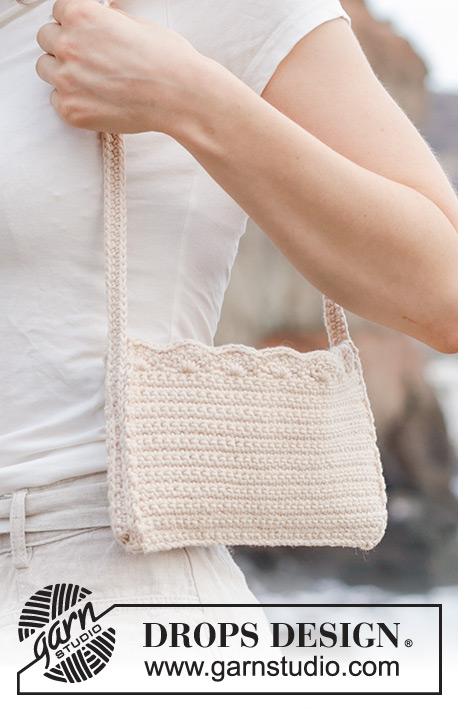
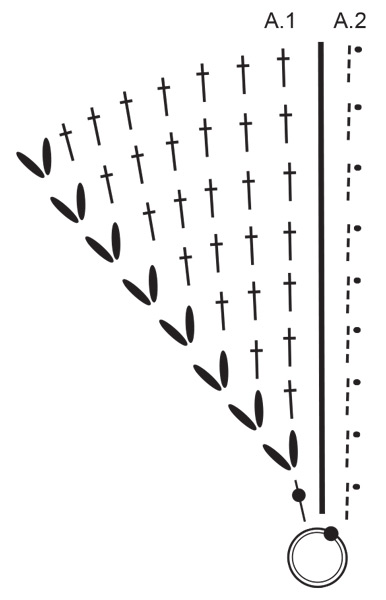
------------------------------------------------------- EXPLICACIONES PARA REALIZAR LA LABOR: ------------------------------------------------------- PATRÓN: Ver los diagramas A.1 y A.2. INFORMACIÓN PARA TRABAJAR A GANCHILLO: Al inicio de cada vuelta/fila de puntos altos trabajar 3 puntos de cadeneta, que no sustituyen al 1º punto alto sino que se trabajan adicionalmente. Al trabajar en redondo, terminar con 1 punto enano en el 3º punto de cadeneta al inicio de la vuelta. Ver el diagrama A.2. ------------------------------------------------------- COMENZAR LA LABOR AQUÍ: ------------------------------------------------------- BOLSO - RESUMEN DE LA LABOR: Se trabajan 2 círculos en redondo, desde el centro hacia fuera, despuás se trabajan las cenefas para el asa y los lados. Se unen las partes con costura. CÍRCULO: Trabajar 4 puntos de cadeneta con un ganchillo de 4.5 mm y DROPS Bomull-Lin. Formar un anillo con 1 punto enano en el 1º punto de cadeneta. Trabajar en redondo según el diagrama A.1, trabajando A.1 12 veces en la vuelta - el diagrama A.2 muestra cómo comienzan y terminan las vueltas y se trabaja adicionalmente a A.1. RECORDAR MANTENER LA TENSIÓN DE LA LABOR! Cuando se haya terminado el diagrama, la labor mide aprox. 20 cm de diámetro. Trabajar 1 punto bajo en cada uno de los primeros 27 puntos altos en la vuelta. Cortar y asegurar el hilo. Trabajar 1 círculo más de la misma manera. CENEFA: Trabajar 15 puntos de cadeneta, girar y trabajar 1 punto alto en el 4º punto de cadeneta desde el ganchillo, después 1 punto alto en cada punto de cadeneta = 12 puntos altos. Trabajar de ida y vuelta de esta manera 47 cm – leer INFORMACIÓN PARA TRABAJAR A GANCHILLO arriba. Doblar la cenefa por la mitad, a lo largo, y trabajar juntos los lados cortos, con 1 punto alto en cada punto alto, a través de ambas capas = 6 puntos altos. Trabajar 6 puntos altos de ida y vuelta hasta que la cenefa mida un total de 140 cm. TERMINACIÓN: Doblar el borde de montaje por la mitad para que toda la cenefa sea 6 puntos de ancho y coser el borde hacia abajo a través de ambas capas. La cenefa doble se asegura al borde del círculo - los puntos bajos en el círculo marcan la abertura del bolso. Coser juntos como sigue: Comenzar donde se terminaron los puntos bajos, coser un lado largo de la cenefa doble a los puntos altos en la parte externa del círculo (habrá un pequeño borde), continuar cosiendo por el borde hasta el inicio de los puntos bajos - la cenefa de puntos bajos se detiene aquí también. Coser el otro lado de la cenefa doble al otro círculo de la misma manera. La otra parte de la cenefa (que no es doble) es el asa del bolso. |
||||||||||||||||
Explicaciones del diagrama |
||||||||||||||||
|
||||||||||||||||
 |
||||||||||||||||
¿Terminaste este patrón?Entonces, etiqueta tus fotos con #dropspattern #tortillabag o envíalas a la galería #dropsfan. ¿Necesitas ayuda con este patrón?Encontrarás 10 videos tutoriales, un espacio para comentarios/preguntas y más visitando la página del patrón en garnstudio.com © 1982-2026 DROPS Design A/S. Todos los derechos reservados. Este documento, incluyendo todas sus sub-secciones, está protegido por los derechos de autor (copyright). Lee más acerca de lo que puedes hacer con nuestros patrones en la parte de abajo de cada patrón de nuestro sitio. |
||||||||||||||||


Con más de 40 años en el diseño de modelos de punto y de ganchillo, DROPS Design ofrece una de las más vastas colecciones de patrones gratuitos en el internet - traducidos en 17 idiomas. Al día de hoy, contamos con 324 catálogos y 12290 patrones - de los cuales 11673 están traducidos en español.
Nosotros trabajamos con mucho esmero para brindarte lo mejor que las labores de punto y ganchillo tienen para ofrecer,inspiración y consejos, así como hilos de magnífica calidad a precios increíbles! Te gustaría usar nuestros patrones para otro fin además del uso personal? Puedes leer acerca de lo que estás permitida a hacer en el texto de Copyright en la parte de abajo de todos nuestros patrones. Felices labores!
Escribe un comentario sobre DROPS 247-5
¡Nos encantaría saber qué piensas acerca de este patrón!
Si quieres escribir una pregunta referente al patrón, por favor asegúrate de elegir la categoría correcta en el formulario debajo, para acelerar el proceso de respuesta. Los campos obligatorios están marcados con un *.