
Categorías populares
¿Buscas un hilo?


Comentarios / Preguntas (35)
![]() TERESA CARMONA MÉNDEZ escribió:
TERESA CARMONA MÉNDEZ escribió:
Buenos dias, cuando dice el patron "Colocar 4-5-5-5-6-6 puntos en un gancho auxiliar 3 veces después los 5-4-5-6-4-6 puntos restantes." ¿Se refiere a las vueltas acortadas?
09.02.2023 - 07:14DROPS Design respondió:
Hola Teresa, sí, se trabaja similar a las vueltas acortadas.
13.02.2023 - 00:40
![]() Susana escribió:
Susana escribió:
In response to your comment today at 16.01.2023 kl. 10:27. If I am starting to shape the right armhole (right side to left) and I start the row casting off 3 sts, when I finally then start the other row from left to the right side (left armhole) I will inevitably casting off 3 sts on the row above to the other. Therefore, the armholes will start at different times. One below the other. Or am I missing something?
16.01.2023 - 11:24DROPS Design respondió:
Dear Susanna, you will cast off 3 sts at the beginning of the next 2 rows (= 3 sts at the beginning of the next row from RS + 3 sts at the beginning of the next row from WS) = 3 sts on each side 1 time, then cast off 2 stitches at the beginning of next 2 rows (= 2 sts from RS + 2 sts at the beg of next row from WS), etc.. The cast off are indeed worked with 1 row difference on each side, but this is not visible afterwards. Happy knitting!
16.01.2023 - 16:25
![]() Susana Araujo escribió:
Susana Araujo escribió:
Dear drops, have a question about this: “begin to cast off for the armholes on both sides: 3-3-3-4-4-4 stitches 1 time, 2 stitches 1 time and 1 stitch 1-3-4-6-9-12 times”. If we cast off this number of times from both sides WS and RS won't the sleeves inevitable be one row above the other? And therefore one of the armholes slightly higher?
15.01.2023 - 23:53DROPS Design respondió:
Dear Mrs Araujo, you should cast off the same number of stitches on each side, ie at the beginning of every row, both from RS and from WS so that the armholes are the same. Happy knitting!
16.01.2023 - 10:27
![]() Susana escribió:
Susana escribió:
On “Neck” section after “Assembly” when it says “knit up 80 to 100 stitches” is this to be picked-up from the neck randomly or cast on from our yarn?
06.01.2023 - 15:54DROPS Design respondió:
Hi Susana! Knit up means to pick up around the neck. Please look at videos and tutorials on how to do it! Happy knitting!
06.01.2023 - 22:36
![]() Susana escribió:
Susana escribió:
While on the “Neck” after “Front Piece” we have to cast off a number of stitches. Is this done with the stitches that we left on hold? Or on the next row?
06.01.2023 - 15:53DROPS Design respondió:
Hi Susana! Cast off stitches on the needle as it says in the pattern. Happy knitting!
06.01.2023 - 22:34
![]() Susana escribió:
Susana escribió:
Reading the pattern I am trying to see the maths and I can’t still figure it out what happen to some stitches. So, when we are still working the back, almost at the end we have “62 stitches”. Then we shall cast off 26 which would give us a total of 36. Then, on the Neck we cast off 1 stitch therefore, 35 total. And then, when we start working the diagonal shoulder, I will place 17 stitches on hold on a thread. What happen to the remaining 18? Shall they be cast off? This is not indicated
06.01.2023 - 15:53
![]() Susana escribió:
Susana escribió:
When working on the Diagonal Shoulder: “Place 4-5-5-5-6-6 stitches on the thread 3 times then the remaining 5-4-5-6-4-6 stitches.” Again, what does this mean with 3 times? Shall I place 17 stitches on hold on a thread (assuming that I am doing the smallest size)? Does this have to be done sparely and that is why is written “3 times”?
06.01.2023 - 15:53DROPS Design respondió:
Dear Susana, you need to do it separately. Work and place the first 4 stitches, work until the end of the row and then work back, then work and place the next 4 stitches, work until the end of the row and then work back again, then work and place the next 4 stitches, work until the end of the row and then work back. Now you work and place the remaining 5 stitches in the thread. Happy knitting!
07.01.2023 - 18:56
![]() Susana escribió:
Susana escribió:
On back piece instructions, it is written: “begin to cast off for the armholes on both sides: 3-3-3-4-4-4 stitches 1 time, 2 stitches 1 time and 1 stitch 1-3-4-6-9-12 times”. I am confused to what this means. Shall I cast off X number of stitches X times in a row at different times during the same row? Or is this mean to be cast off one after the other but then that wouldn’t invalidate the X number of times?
06.01.2023 - 15:52DROPS Design respondió:
Dear Susana, you need to cast off in different rows, once on each side of the row. So, cast off at the beginning of the row (from both the right and wrong sides). For example, in the smallest size, cast off 3 stitches at the beginning of the next row from the right and wrong sides. Then, cast off 2 stitches at the beginning of the next row from the right and wrong sides. Finally cast off 1 stitch at the beginning of the next row from the right and wrong sides. Happy knitting!
07.01.2023 - 19:01
![]() Susana escribió:
Susana escribió:
Would this be ok for beginners? I have only finished 1 sweater before, done some scarves and hats. Reading the pattern, the stitches seem simple, only confusion would be with some of the construction.
06.01.2023 - 15:52DROPS Design respondió:
Hi Susana! Please look at the videos and step-by-step tutorials at the end of the pattern. These will help you to overcome any questions you might have! Reading pattern might be very confusing but when you start making it everything becomes clear! Happy knitting!
06.01.2023 - 22:32
![]() Susana escribió:
Susana escribió:
I have a whole paragraph with questions and this comment box does not have enough space. How can I be helped?
06.01.2023 - 11:01DROPS Design respondió:
Dear Susana, maybe try to ask one or 2 questions each time using this box - remember to tell us the size you are working on, so that we can check especially this size if needed. Thanks for your comprehension.
06.01.2023 - 11:44
|
|
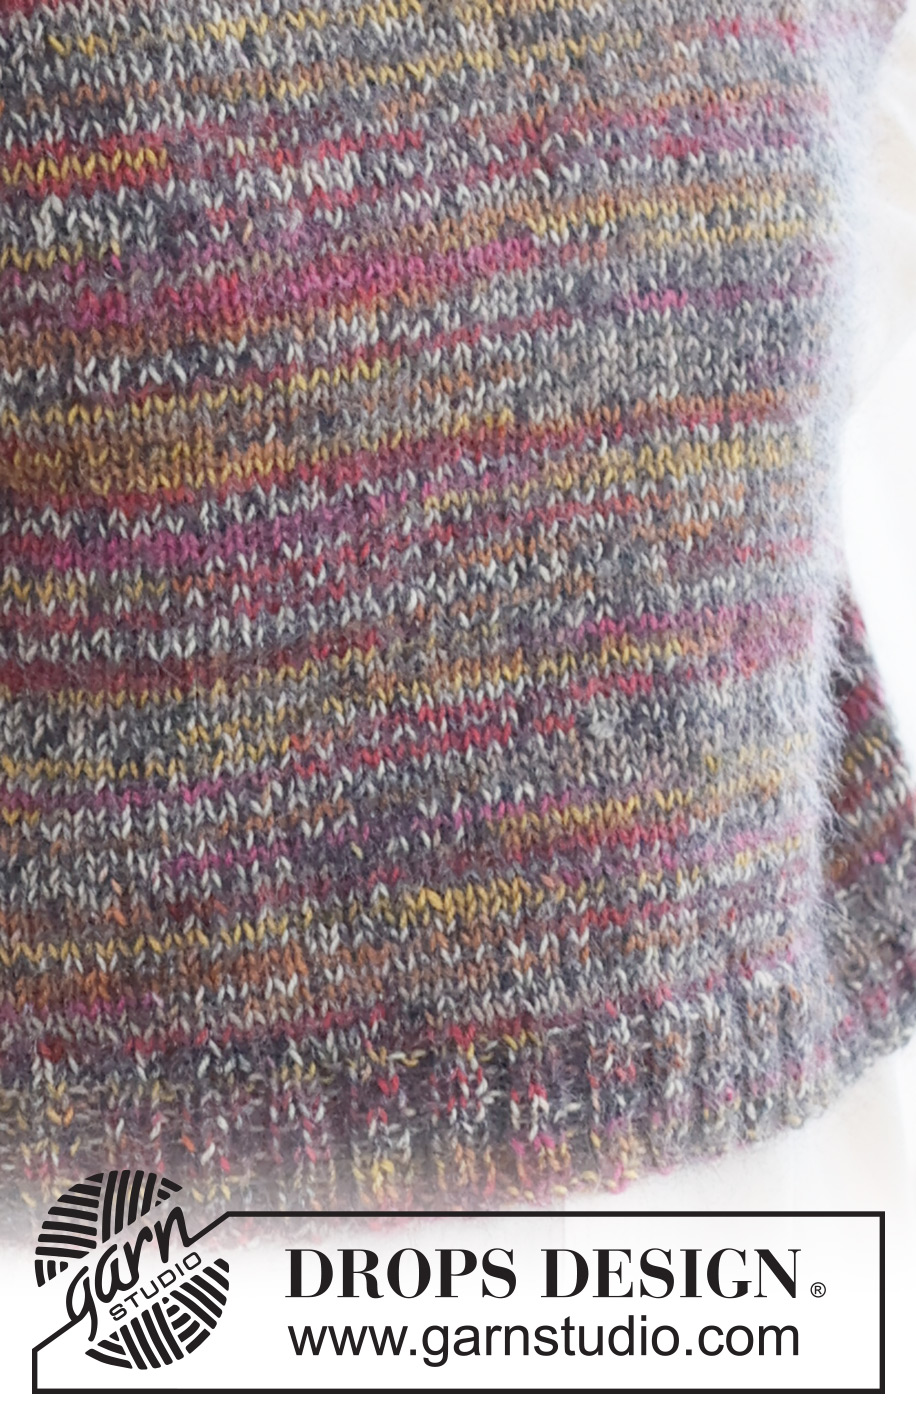
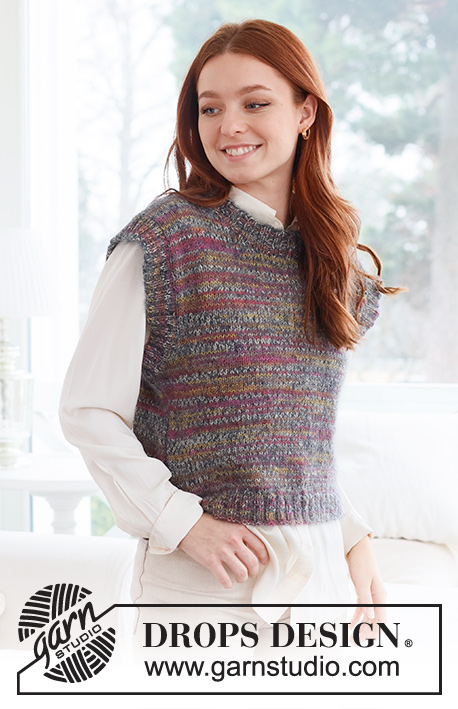
Fairytale#fairytalevest |
|
 |
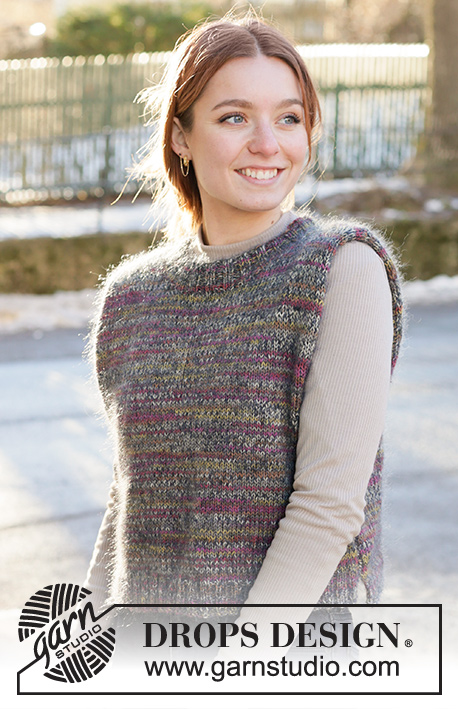 |
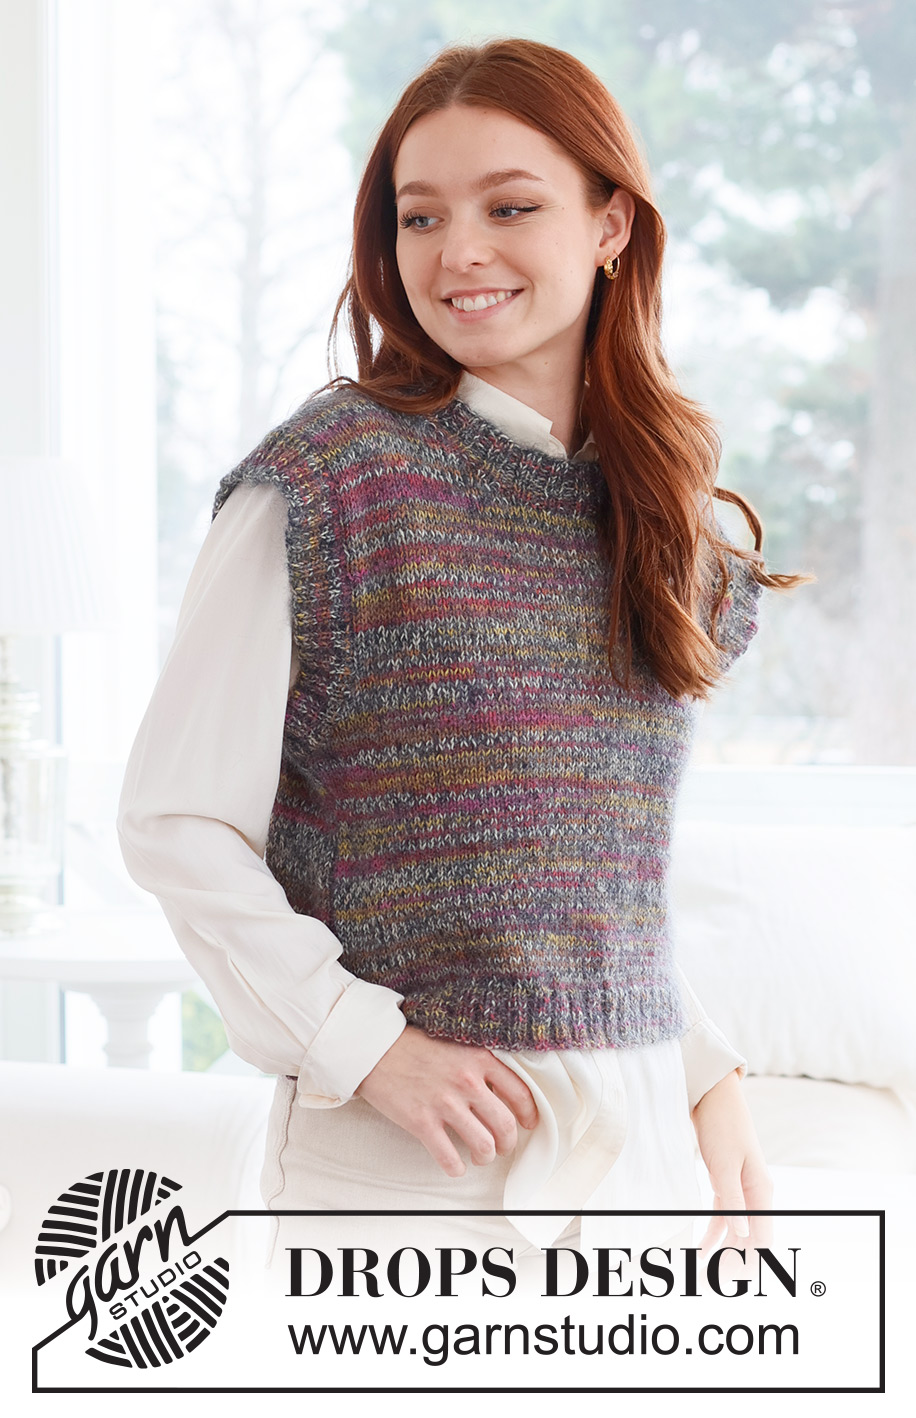
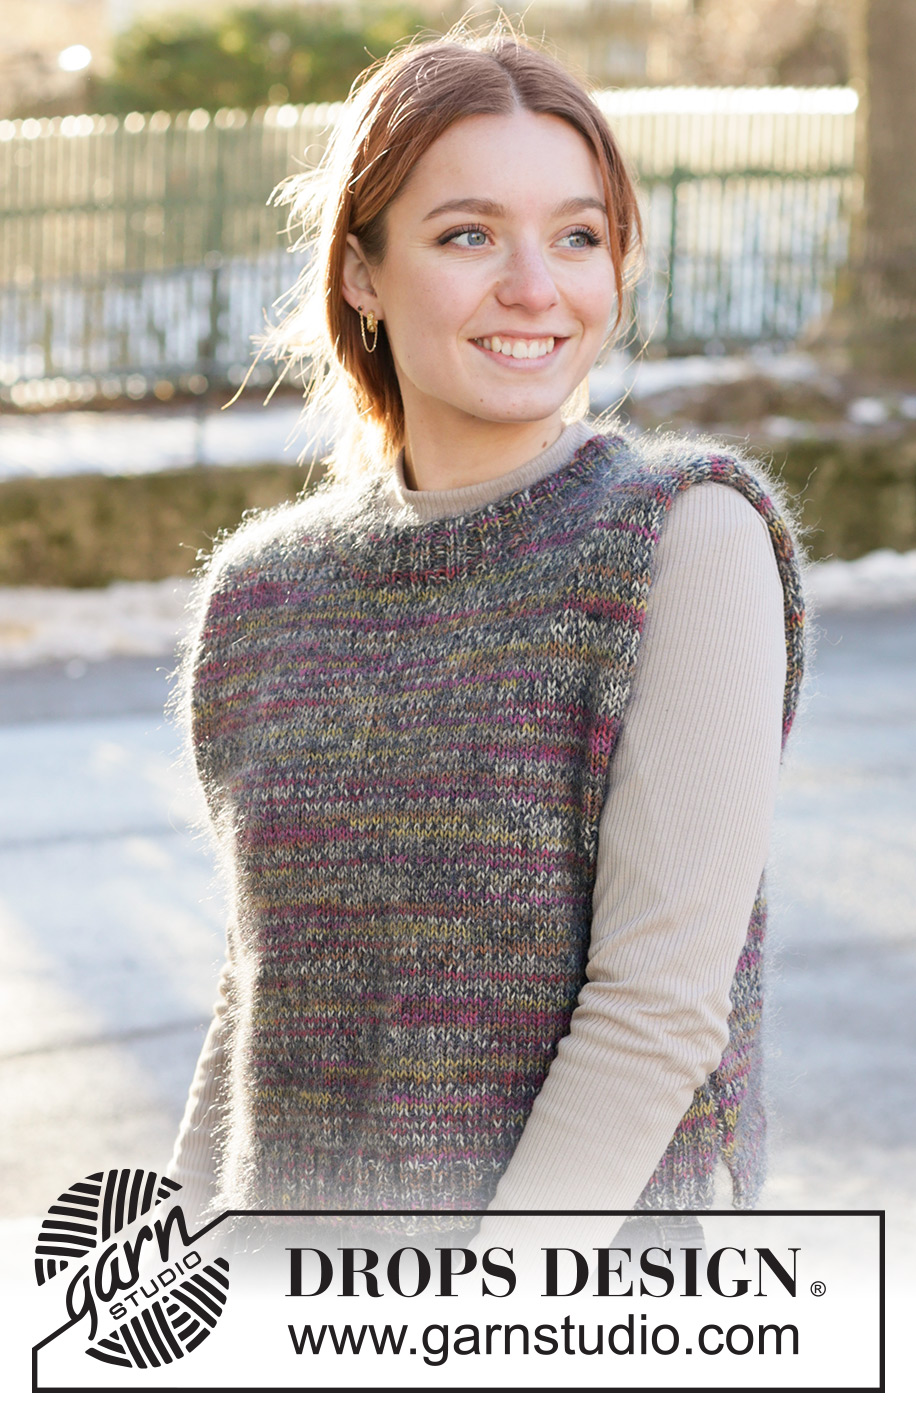
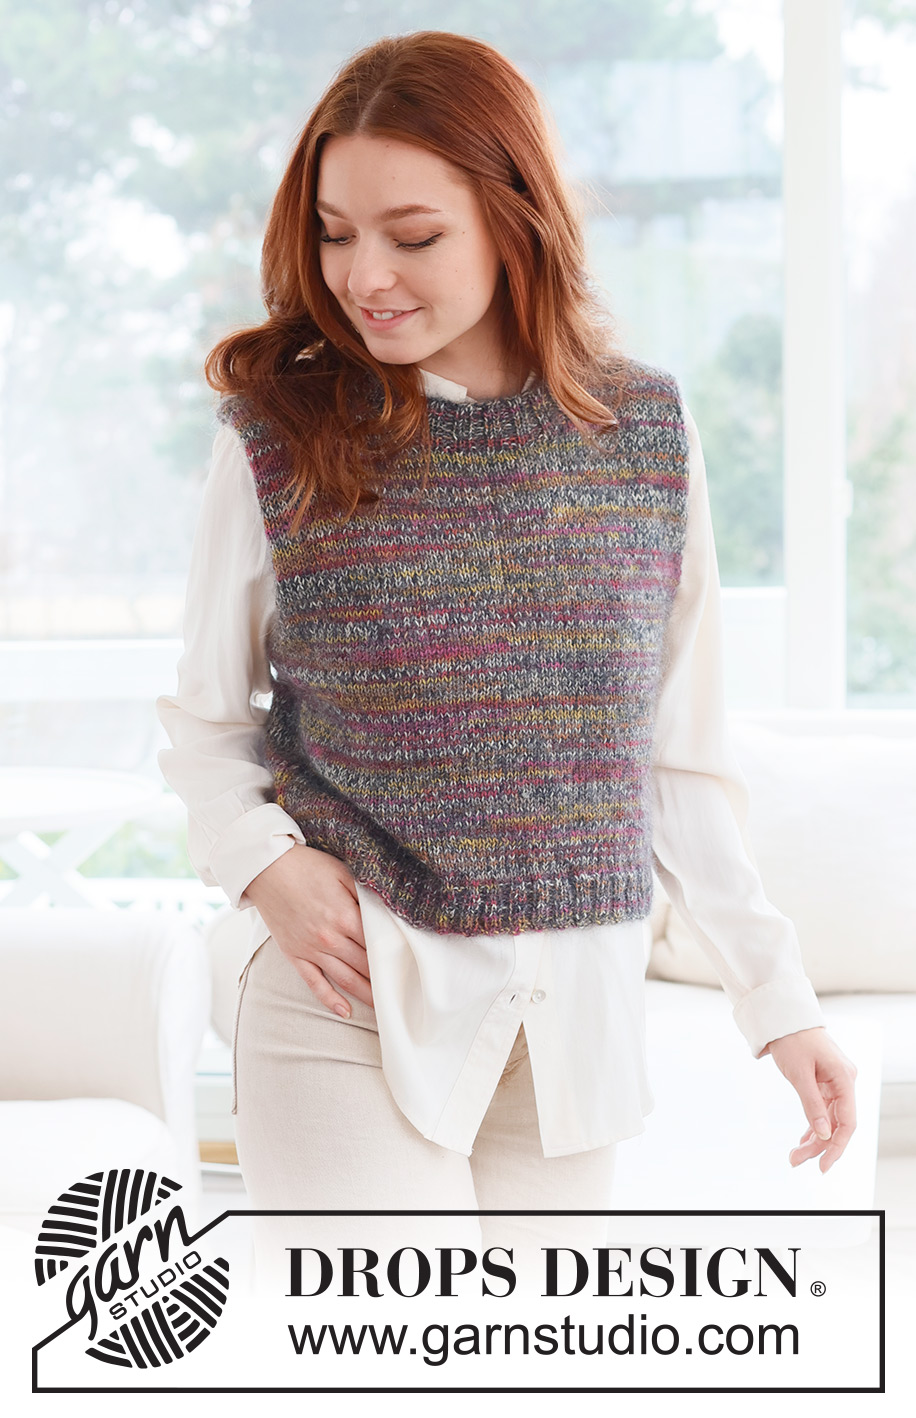
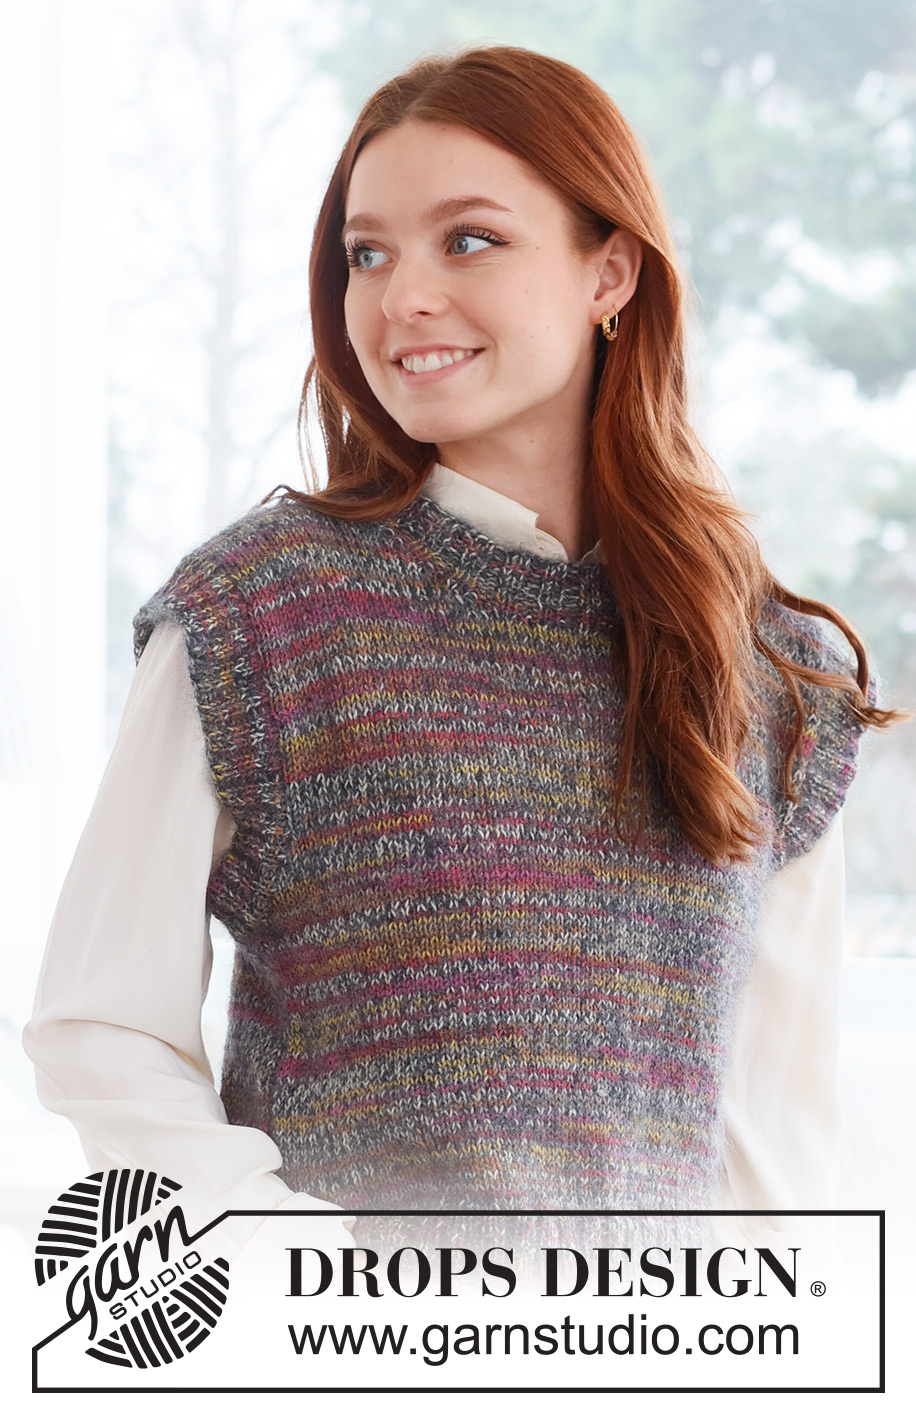
Chaleco/ chaleco sin mangas a punto con 1 hilo de DROPS Fabel y 1 hilo de Kid-Silk. La labor está realizada de abajo arriba con hombros europeos. Tallas S - XXXL.
DROPS 237-42 |
|
|
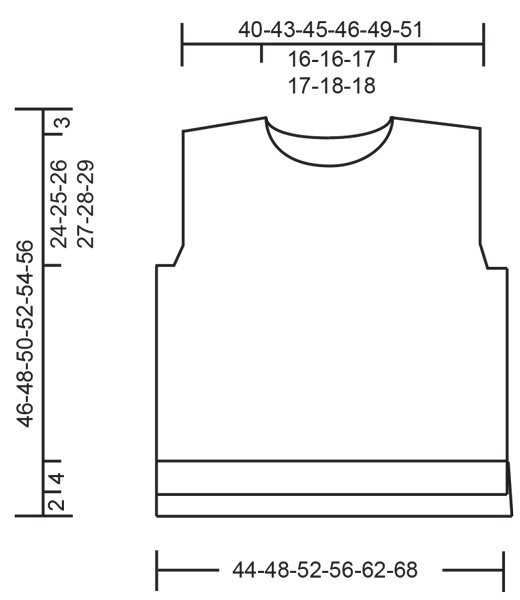
EXPLICACIONES PARA REALIZAR LA LABOR: ------------------------------------------------------- PLIEGUE/ PUNTO MUSGO (de ida y vuelta): Trabajar todas las filas de derecho. 1 pliegue = 2 filas de derecho. ------------------------------------------------------- COMENZAR LA LABOR AQUÍ: ------------------------------------------------------- CHALECO - RESUMEN DE LA LABOR: El delantero y la espalda se trabajan por separado de ida y vuelta, de abajo arriba. La espalda es 2 cm más largo que el delantero. Las cenefas de las mangas y el cuello se trabajan en redondo para terminar. ESPALDA: Montar 88-96-104-112-120-132 puntos con una aguja circular de 4 mm y 1 hilo de DROPS Fabel y 1 hilo de DROPS Kid-Silk (2 hilos). Trabajar 1 fila de revés por el lado revés. Trabajar el elástico por el lado derecho como sigue: 1 punto en PUNTO MUSGO – leer descripción arriba, trabajar el elástico (2 derechos, 2 reveses) hasta que queden 3 puntos, 2 derechos y 1 punto en punto musgo. Continuar este elástico 4 cm. Cambiar a una aguja circular de 5 mm. Continuar con punto jersey; en la 1ª fila disminuir 14-14-16-16-14-16 puntos repartidos = 74-82-88-96-106-116 puntos. Trabajar hasta que la labor mida 19-20-21-22-23-24 cm. RECORDAR MANTENER LA TENSIÓN DEL TEJIDO! En la siguiente fila comenzar a cerrar para las sisas a ambos lados: 3-3-3-4-4-4 puntos 1 vez, 2 puntos 1 vez y 1 punto 1-3-4-6-9-12 veces = 62-66-70-72-76-80 puntos. Continuar trabajando hasta que la labor mida 42-44-46-48-50-52 cm (quedan 4 cm hasta el largo final). En la siguiente fila cerrar los 26-26-28-28-30-30 puntos centrales para el escote y finalizar cada hombro por separado. RESUMEN DE LA SIGUIENTE SECCIÓN: Ahora cerrar para el escote y colocar puntos en un gancho auxiliar para el hombro europeo. Leer ESCOTE y HOMBRO EUROPEO antes de continuar. ESCOTE: Cerrar 1 punto al inicio de la siguiente fila desde el escote. HOMBRO EUROPEO: Colocar los puntos hacia la sisa en un gancho auxiliar; para evitar cortar el hilo, trabajar los puntos primero. Colocar 4-5-5-5-6-6 puntos en un gancho auxiliar 3 veces después los 5-4-5-6-4-6 puntos restantes. Todos los puntos están cerrados o en el gancho auxiliar. Colocar los 17-19-20-21-22-24 puntos desde el gancho auxiliar de vuelta a una aguja circular de 5 mm. Trabajar 1 fila de revés por el lado revés. Para evitar que se formen agujeros donde se giró, recoger el hilo entre 2 puntos y trabajarlo retorcido junto con el siguiente punto en la aguja izquierda. Cerrar de derecho, un poco flojo, por el lado derecho. La labor mide aprox. 46-48-50-52-54-56 cm desde el borde de montaje hasta el punto más alto en el hombro. Trabajar el otro hombro de la misma manera. DELANTERO: Montar y trabajar como la espalda hasta que el delantero mida 17-18-19-20-21-22 cm. En la siguiente fila comenzar a cerrar para las sisas a ambos lados: 3-3-3-4-4-4 puntos 1 vez, 2 puntos 1 vez y 1 punto 1-3-4-6-9-12 veces = 62-66-70-72-76-80 puntos. Continuar trabajando hasta que la labor mida 34-36-36-38-38-40 cm (quedan aprox. 10-10-12-12-14-14 cm hasta el largo final). En la siguiente fila por el lado derecho colocar los 12-12-14-14-16-16 puntos centrales en un gancho auxiliar para el escote y finalizar cada hombro por separado. RESUMEN DE LA SIGUIENTE SECCIÓN: Ahora cerrar para el escote y colocar los puntos en un gancho auxiliar para el hombro europeo. Leer ESCOTE y HOMBRO EUROPEO antes de continuar. CUELLO: Cerrar desde el escote 2 puntos 2 veces y 1 punto 4 veces. HOMBRO EUROPEO: AL MISMO TIEMPO, cuando la labor mida 41-43-45-47-49-51 cm colocar los puntos hacia la sisa en un gancho auxiliar de la misma manera que en la espalda. Cuando todos los puntos se hayan cerrado o estén en el gancho auxiliar, colocar los 17-19-20-21-22-24 puntos desde el gancho auxiliar de vuelta a una aguja circular de 5 mm. Trabajar 1 fila de revés por el lado revés de la misma manera que en la espalda. Cerrar algo flojo de derecho por el lado derecho. La labor mide aprox. 44-46-48-50-52-54 cm desde el borde de montaje hasta el punto más alto en el hombro. Trabajar el otro hombro de la misma manera. TERMINACIÓN: Coser los hombros borde con borde. Coser los lados borde con borde, comenzando desde las sisas y coser 1 cm después del inicio del elástico, dejando una abertura; la espalda es más larga que el delantero. CUELLO: Comenzar por el lado derecho en un hombro, con 1 hilo de Fabel y 1 hilo de Kid-Silk. Con una aguja circular de 4 mm recoger 80 a 100 puntos (incluyendo los puntos en un gancho auxiliar) alrededor del cuello. El número de puntos debería ser divisible entre 4. Trabajar el elástico en redondo (2 derechos, 2 reveses) 4 cm. Cerrar con derecho sobre derecho y revés sobre revés. CENEFAS DE LAS MANGAS: Comenzar por el lado derecho en la parte inferior de la sisa con 1 hilo de Fabel y 1 hilo de Kid-Silk. Con una aguja circular corta de 4 mm recoger 112 a 136 puntos alrededor de la sisa (el número de puntos debería ser divisible entre 4). Trabajar el elástico en redondo (2 derechos, 2 reveses) 4 cm. Cerrar con derecho sobre derecho y revés sobre revés. Trabajar la otra cenefa de la manga de la misma manera. La cenefa se puede doblar por la mitad hacia dentro para una cenefa de la manga más estrecha pero más gruesa. |
|
 |
|
¿Terminaste este patrón?Entonces, etiqueta tus fotos con #dropspattern #fairytalevest o envíalas a la galería #dropsfan. ¿Necesitas ayuda con este patrón?Encontrarás 25 videos tutoriales, un espacio para comentarios/preguntas y más visitando la página del patrón en garnstudio.com © 1982-2026 DROPS Design A/S. Todos los derechos reservados. Este documento, incluyendo todas sus sub-secciones, está protegido por los derechos de autor (copyright). Lee más acerca de lo que puedes hacer con nuestros patrones en la parte de abajo de cada patrón de nuestro sitio. |
|


Con más de 40 años en el diseño de modelos de punto y de ganchillo, DROPS Design ofrece una de las más vastas colecciones de patrones gratuitos en el internet - traducidos en 17 idiomas. Al día de hoy, contamos con 324 catálogos y 12290 patrones - de los cuales 11673 están traducidos en español.
Nosotros trabajamos con mucho esmero para brindarte lo mejor que las labores de punto y ganchillo tienen para ofrecer,inspiración y consejos, así como hilos de magnífica calidad a precios increíbles! Te gustaría usar nuestros patrones para otro fin además del uso personal? Puedes leer acerca de lo que estás permitida a hacer en el texto de Copyright en la parte de abajo de todos nuestros patrones. Felices labores!
Escribe un comentario sobre DROPS 237-42
¡Nos encantaría saber qué piensas acerca de este patrón!
Si quieres escribir una pregunta referente al patrón, por favor asegúrate de elegir la categoría correcta en el formulario debajo, para acelerar el proceso de respuesta. Los campos obligatorios están marcados con un *.