
Popular categories
Looking for a yarn?


Comments / Questions (84)
![]() Lisa Lebrija wrote:
Lisa Lebrija wrote:
Hej igen, Jeg forstår godt du ikke forstår noget! Det gør jeg heller ikke. Nu har jeg fundet en hækleekspert som også siger det er det værste rod af en opskrift hun længe har set. Hun har måtte ændre i den så det passer. Og opskriften svinger mellem mønster og diagram. Hvorfor er der altid så mange fejl i Jeres opskrifter? Er det derfor de er gratis? Så vil jeg langt heller købe en opskrift og få en hvor det hele fungerer. Jeg er simpelthen grædefærdig med den her møg opskrift.
20.06.2016 - 20:02DROPS Design answered:
Kaere Lisa. Det er ikke mönstret jeg ikke forstaar, men dit problem. Jeg pröver det bedste jeg kan at hjaelpe dig, men tror ikke vi kommer videre paa denne facon. Jeg har sat et önske paa om at faa lavet en video med mönstret. Jeg kan ikke sige hvor lang tid der vil gaa, men en video kan maaske hjaelpe dig med at forstaa mönstret.
21.06.2016 - 10:46
![]() Lisa Lebrija wrote:
Lisa Lebrija wrote:
Hej igen! Når jeg hækler 10. række, får jeg kun 8 hele vifter (stangmaskegrupper). Så et eller andet er forkert i 9. række hos mig. Jeg har hæklet 9. række sådan her: 3 lm, spring en fm over, 2 stgm 1 lm, spring 1 fm over, 1 stgm 1 lm, spring 1stgm over, 2 stgm osv. Det giver mig 8 viftemønstre. Hvad har jeg gjort forkert??? Hilsen Lisa
11.06.2016 - 22:41DROPS Design answered:
Hej Lisa. Jeg forstaar overhovedet ikke hvad du haekler. Du laeser diagrammet fra höjre mod venstre: 3 lm, 3 dbl-st i förste st, spring 2 st over = A.1, og saa gentager du A.2 13 eller 14 gangen: 1 fm i naeste st, spring 2 st over, vifte af 7 dbl-st i nest st, spring 2 st over, Du afslutter med A.3: v i st, spring 2 st over, 3 dbl-st i sidste st.
16.06.2016 - 15:56
![]() Lisa Lebrija wrote:
Lisa Lebrija wrote:
Hej Drops Jo men den fastmaske kommer jo først efter række 10. Hvordan skal række 10 så være? Det er lidt uforståeligt, synes jeg. Hilsen Lisa
07.06.2016 - 14:09DROPS Design answered:
Hej Lisa. Jeg kan ikke se hvad du mener. Du har heklet st ned til du starter med mönstret. Raekken med vifterne (anden raekke paa diagrammet), de haekles med dbl-st og 1 fm imellem hver vifte, dvs, du starter fra höjre med 4 lm, 3 dbl-st, 1 fm i st, 7 dbl-st, 1 fm i st osv. I neste omg fortsaetter du, men viften hekles nu i fm fra sidste omg og fm i 4 dbl-st i viften fra sidste omg. Osv.
07.06.2016 - 17:55
![]() Lisa Lebrija wrote:
Lisa Lebrija wrote:
Hej Drops Jeg har desværre også problem med det diagram. Jeg har nu hæklet den 9. række. Hvordan skal den 10. Række hækles? For i næste omgang skal man hækle i nogle fastmasker!! Hvor kommer de fastmasker fra? Indtil videre har jeg kun skulle hækle stangmasker! Så jeg er da i tvivl om der mangler beskrivelse af en omgang? Hilsen Lisa
03.06.2016 - 22:58DROPS Design answered:
Hej Lisa. Der er en fastmaske mellem hver vifte af stangmasker (den sorte cirkel).
06.06.2016 - 15:12
![]() Tina wrote:
Tina wrote:
Hej. När jag följer diagrammet för mönstret, dvs *7dst, hoppa över 2, fm, hoppa över 2* så blir det 17grupper (skulle bli 14 enl mönstret). Är det jag som gör något fel eller? Tack på förhand för svar:-) //Tina
25.02.2016 - 06:21DROPS Design answered:
Hej Tina, Du har 85 st, rapporten går över 6 m om du delar 85/6 får du 14 grupper + 1 m. Kolla så du har 85 m Innan du börjar med diagrammet. Lycka till!
11.03.2016 - 10:48
![]() Camilla wrote:
Camilla wrote:
Jag har svårt att läsa detta mönster. Har kommit ner till brättet och får helt fel form på hatten. I diagrammet är det tre rader. Ska man öka med en dst efter tre rader eller, som det står, varje rad? Då blir det ju väldigt många dst på sista varvet. Har kommit till andra varvet med stolpgrupper och det ser väldigt märkligt ut med 8dst i varje grupp.
24.02.2016 - 22:30DROPS Design answered:
Hej, du virkar 7 dst enligt mönster, men du måste öka med 1 dst i varje grupp på varje varv. Lycka till!
25.02.2016 - 15:38
![]() Karen Freeze wrote:
Karen Freeze wrote:
Thank you for your answer on 1/5/16. I am still confused.Starting at right hand bottom corner& going left doing A.1, A2 and A.3, then do you go back to the right hand side on the next line up, zig zag L to Rt or repeat what you just did. This is first experience w/a diagram. I understand to put stitches and what they are.just not sure which way to read the diagram. Also, what is the symbol that is like a hollowed out single crochet symbol on the right hand side of the chart.Thanks,Karen
12.01.2016 - 20:23DROPS Design answered:
Dear Mrs Freeze, when you have finished the round, sl st in st at beg of round (= either 4th ch or 1st ch, ie 4th symbol under legend - at the beg of round 2, beg with 1 ch, 1 sc in 4ch ch from previous round, then *7 tr in sc from previous round, 1 sc in 4th tr from previous round*, and repeat around. Happy crocheting!
13.01.2016 - 09:46
![]() Karen Freeze wrote:
Karen Freeze wrote:
I love this hat pattern and have worked it through round 7. I am not sure about how to do round #8. Also I don't understand how to work by looking at the pattern. could you possibley give me some guidance. I understand I would be working single crochets and triple crochet but not sure exactly where to put them. thanks so much for your help. Karen
04.01.2016 - 18:58DROPS Design answered:
Dear Mrs Freeze, on round 8 on height, inc 10 dc as before, but increase 5 dc extra (1st size) so that you get 85 dc at the end of this round. In the diagram each symbol represent 1 stitch. When sts are pointing tog on one st, these sts have to be worked in the same st on previous round. Start reading at the bottom corner on the right side and work towards the left every round. Happy crocheting!
05.01.2016 - 09:14
![]() Rachel Barthelemi wrote:
Rachel Barthelemi wrote:
Bonjour, c'est encore moi... Est-ce normal que les groupes de brides du point fantaisie forment des "bosses" ? Elles ressortent au lieu d'être à plat comme sur le modèle. Est-ce parce que je crochète trop serré peut-être ?
13.05.2015 - 15:30DROPS Design answered:
Bonjour Mme Barthelemi, les groupes de double-brides du point fantaisie ne doivent pas resserrer l'ouvrage, vérifiez bien votre tension et que le point ne resserre pas le chapeau, essayez avec un crochet plus gros si nécessaire. Bon crochet!
13.05.2015 - 16:21
![]() Rachel Barthelemi wrote:
Rachel Barthelemi wrote:
Bonjour, Faut-il toujours lire chaque ligne du diagramme de la droite vers la gauche, donc toujours A.1 puis x fois A.2 et terminer par A.3 ? Et répéter ça à la 2ème, 3ème ligne ? Il ne faut pas tourner le travail ? Le symbole représentant la maille coulée correspond à la maille coulée qui sert à fermer le tour ? Merci d'avance pour votre réponse. Rachel
11.05.2015 - 10:50DROPS Design answered:
Bonjour Mme Barthelemi, c'est tout à fait exact. On crochète en rond en commençant par A.1 (début du tour), on répète A.2 jusqu'à ce qu'il reste 4 m et on crochète A.3 sur les 4 dernière m, on ferme le tour par 1 mc dans la 4ème/1ère ml du début du tour. Bon crochet!
11.05.2015 - 11:14
|
||||||||||||||||
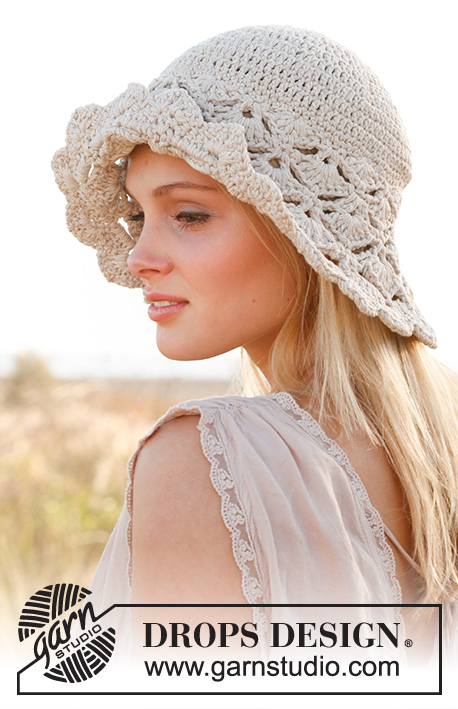
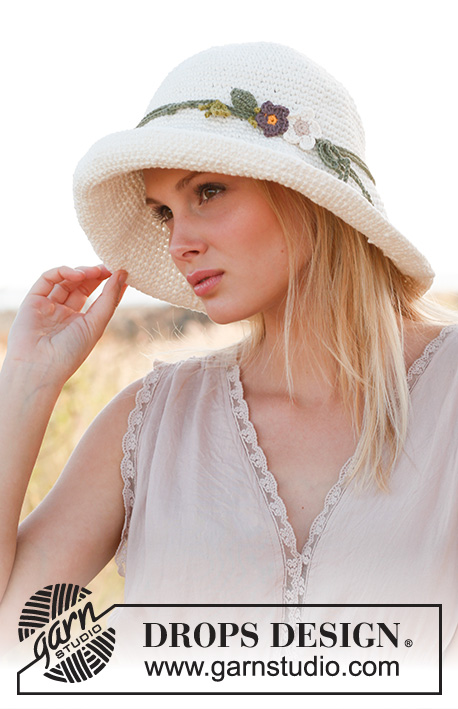
Glimpse of Spring#glimpseofspringhat |
||||||||||||||||
|
|
||||||||||||||||
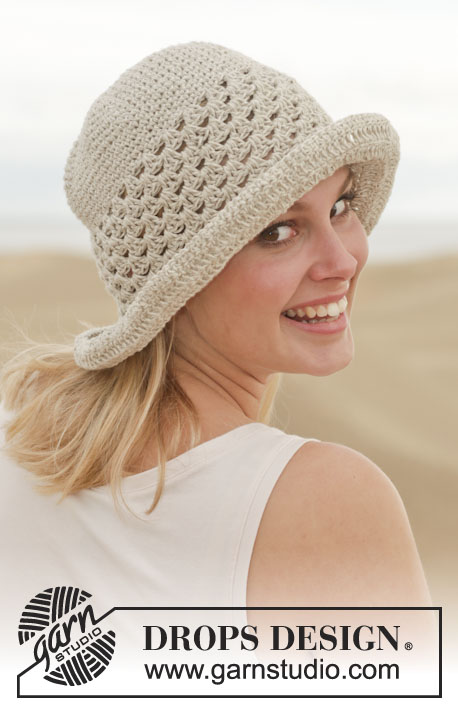
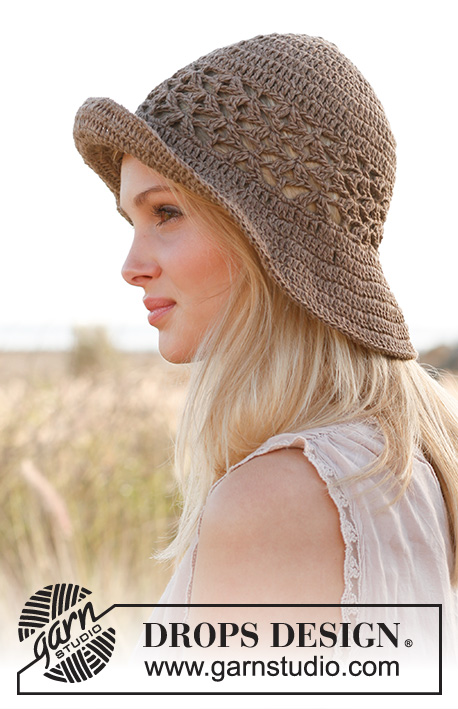
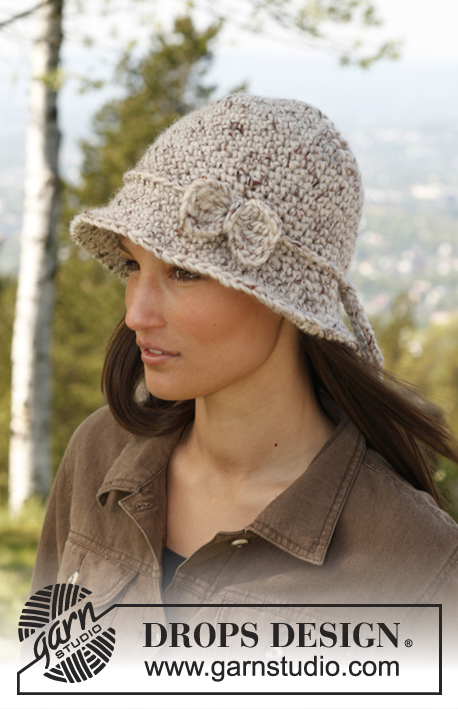
Crochet DROPS hat in "Muskat".
DROPS 153-36 |
||||||||||||||||
|
CROCHET INFO: Replace first tr at beg of a tr round with 3 ch. Finish every tr round with 1 sl st in 3rd ch from beg of round (= in first tr). Replace first dc at beg of a dc round with 1 ch. Finish every dc round with 1 sl st in ch from beg of round. INCREASE TIP: Inc 1 tr or 1 dc by working 2 tr/dc in same st. PATTERN: See diagrams A.1 to A.3. ---------------------------------------------------------- HAT: Crochet 5 ch on hook size 4 mm with 1 strand Muskat and form a ring with 1 sl st in first ch. READ CROCHET INFO! ROUND 1: Work 10 (10) tr in ch-ring. ROUND 2: Work 2 tr in every tr = 20 (20) tr. ROUND 3: * 1 tr in first tr, 2 tr in next tr *, repeat from *-* = 30 (30) tr. ROUND 4: * 1 tr in each of the first 2 tr, 2 tr in next tr *, repeat from *-* = 40 (40) tr. ROUND 5-8 (5-9): Continue inc the same way, i.e. inc 10 tr on every round, inc the same place as on previous round, i.e. 1 tr more between every inc on every round. Inc as before by working 2 tr in 1 tr, AT THE SAME TIME on round 8 (9) inc in addition 5 (1) tr evenly – READ INCREASE TIP = 85 (91) tr. Piece measures 9 (10) cm. ROUND 9-10 (10-11): Then work PATTERN as follows: Work A.1, then work A.2 13 (14) times in total, and finish with A.3. On next round work as follows: ROUND 1: Work 1 dc in first dc from previous round, skip 1 dtr, 1 dc in each of the next 2 dtr, * 1 dc in each of the next 3 dtr, skip 1 dtr, 1 dc in next dc, skip 1 dtr, 1 dc in each of the next 2 dtr*, repeat from *-* until 4 dtr remain on round, 1 dc in each of the last 4 dtr = 85 (91) dc on round. ROUND 2: Work 1 ch, * 1 dc in next dc, 1 ch, skip 1 dc *, repeat from *-* the entire round and finish with 1 sl st in 1st ch from beg of round. ROUND 3: Work 1 dc in next ch, * 1 dc in next dc, 1 dc in next ch *, repeat from *-* the entire round, at the same time inc 6 (12) dc evenly on round = 91 (103) dc. Finish with 1 sl st in 1 dc from beg of round. BRIM: Continue to crochet the brim as follows: ROUND 1: Then work PATTERN as follows: Work A.1, then work A.2 14 (16) times in total, and finish with A.3. ROUND 2-5: Continue with pattern A.1, A.2 and A.3, AT THE SAME TIME inc 1 dtr in every dtr-group (i.e. on 2nd round work 8 dtr in dtr-groups). Continue the same way and inc 1 dtr in every dtr-group on every round. When 5th round of brim has been worked, work 1 dc in every dtr from previous round. Fasten off. TWINED STRING: Cut 8 lengths of 3 metres each. Twine the strands tog until they resist, fold the string double so that it twines again. Tie a knot in one end, thread the string without knot up and down between the small holes worked on 2nd round after first section with tr-groups. Adjust the length of string to desired length and tie a knot in other end. |
||||||||||||||||
Diagram explanations |
||||||||||||||||
|
||||||||||||||||
 |
||||||||||||||||
Have you finished this pattern?Tag your pictures with #dropspattern #glimpseofspringhat or submit them to the #dropsfan gallery. Do you need help with this pattern?You'll find 11 tutorial videos, a Comments/Questions area and more by visiting the pattern on garnstudio.com. © 1982-2026 DROPS Design A/S. We reserve all rights. This document, including all its sub-sections, has copyrights. Read more about what you can do with our patterns at the bottom of each pattern on our site. |
||||||||||||||||


With over 40 years in knitting and crochet design, DROPS Design offers one of the most extensive collections of free patterns on the internet - translated to 17 languages. As of today we count 324 catalogues and 12290 patterns translated into English (UK/cm).
We work hard to bring you the best knitting and crochet have to offer, inspiration and advice as well as great quality yarns at incredible prices! Would you like to use our patterns for other than personal use? You can read what you are allowed to do in the Copyright text at the bottom of all our patterns. Happy crafting!
Post a comment to pattern DROPS 153-36
We would love to hear what you have to say about this pattern!
If you want to leave a question, please make sure you select the correct category in the form below, to speed up the answering process. Required fields are marked *.