
Popular categories
Looking for a yarn?


Comments / Questions (43)
![]() Vlinder wrote:
Vlinder wrote:
Mooi patroon
29.12.2009 - 20:48
![]() Larribe wrote:
Larribe wrote:
Modèle ravissant romantique
23.12.2009 - 14:34
![]() Teresa wrote:
Teresa wrote:
Really Really cute. With some side shaping would be great as a longer version as well.
22.12.2009 - 21:41
![]() Agnès wrote:
Agnès wrote:
Très mignon !!
17.12.2009 - 17:47
![]() Anette wrote:
Anette wrote:
Flot model.
15.12.2009 - 18:08
![]() Soudane wrote:
Soudane wrote:
Que c'est joli !
14.12.2009 - 11:30Ginés wrote:
Espectacular! Tienen la opción para hacerlo más largo?
13.12.2009 - 01:55
![]() Jennitting wrote:
Jennitting wrote:
Härlig längtar så efter att få sticka den
12.12.2009 - 00:37
![]() Agnetha wrote:
Agnetha wrote:
Tycker om denna lilla fina sommarkofta
11.12.2009 - 22:15
![]() Annette wrote:
Annette wrote:
Heel mooi met dat kabelpatroon in ronde pas. Ik zou zelf dit vestje grrag wat langer maken.
11.12.2009 - 09:09
|
|||||||||||||||||||||||||||||||
Claddagh Rings#claddaghringscardigan |
|||||||||||||||||||||||||||||||
 |
 |
||||||||||||||||||||||||||||||
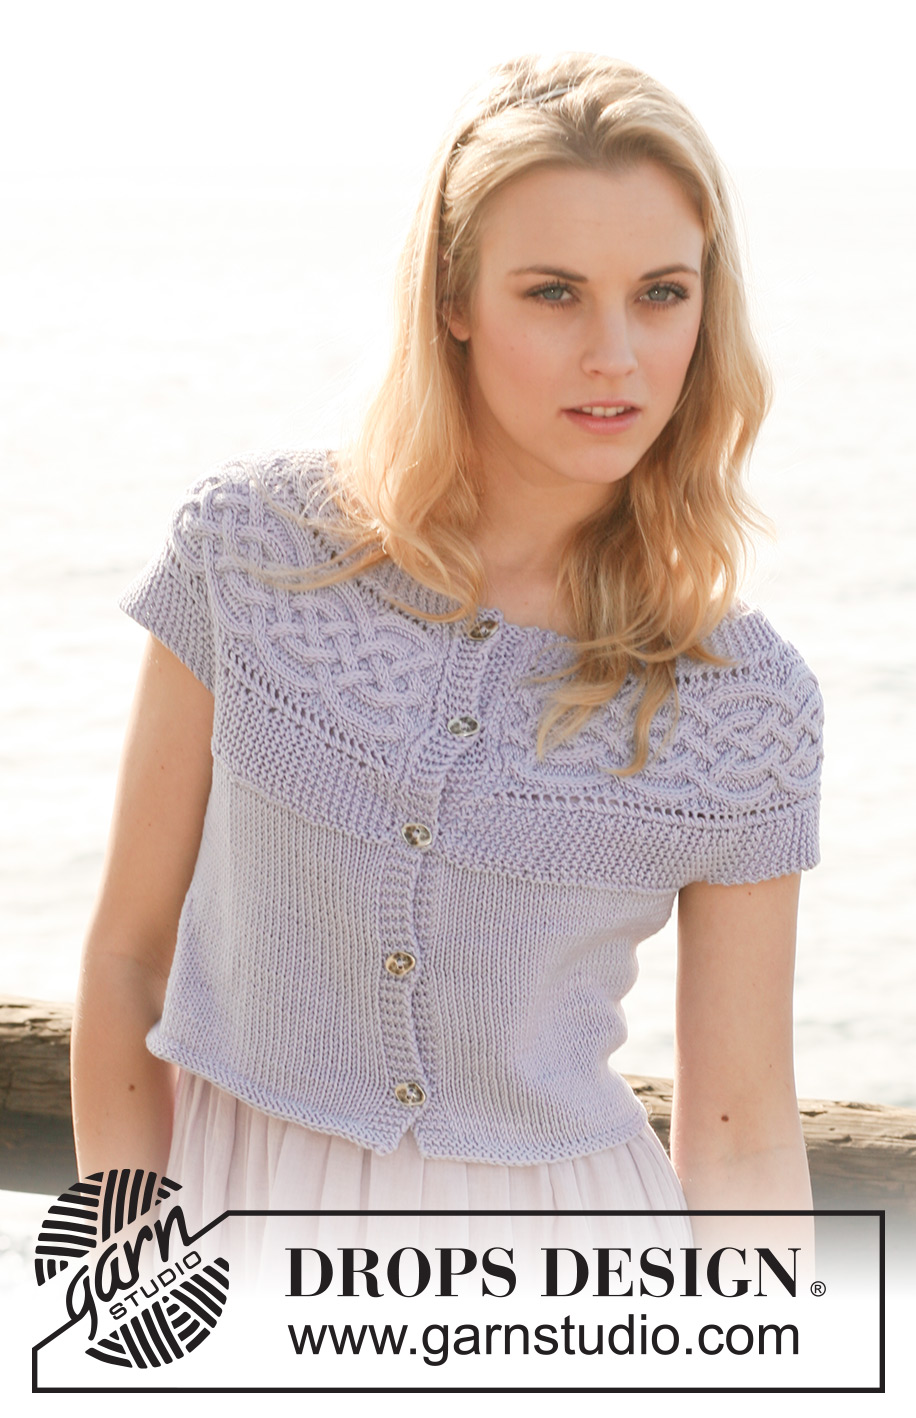
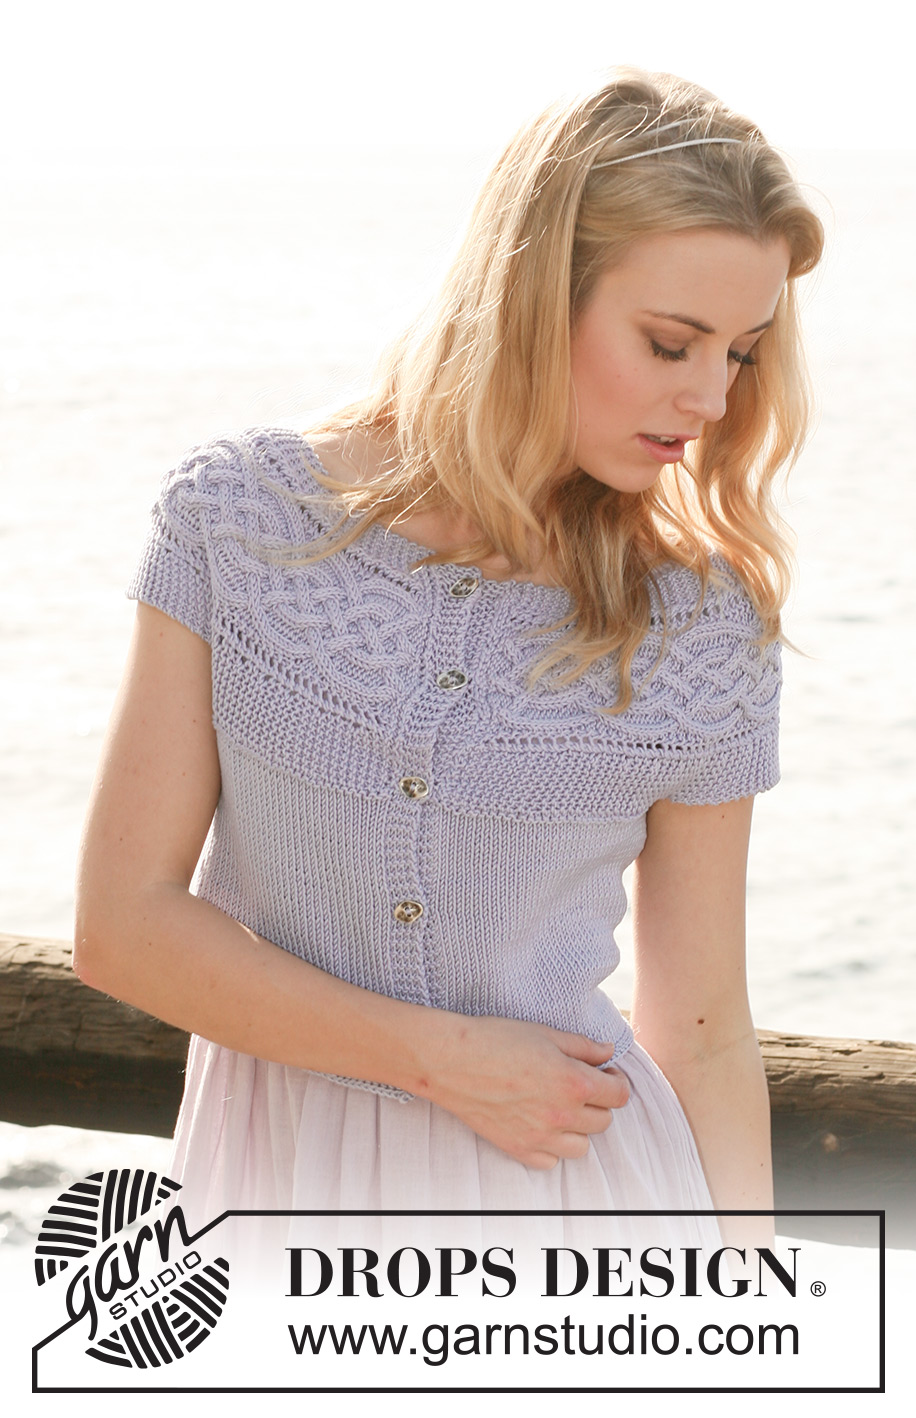
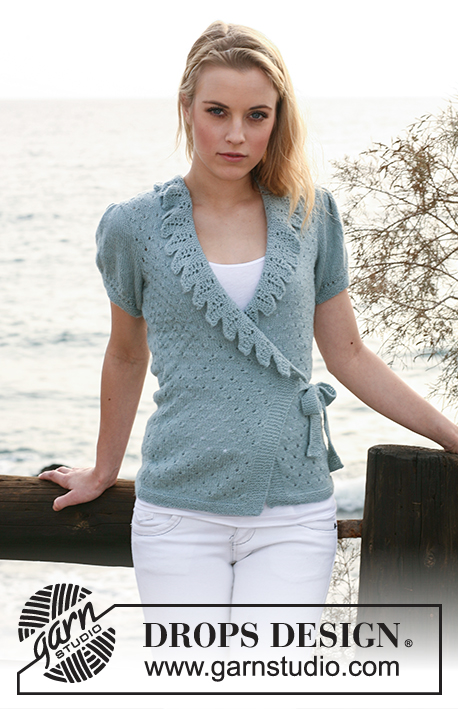
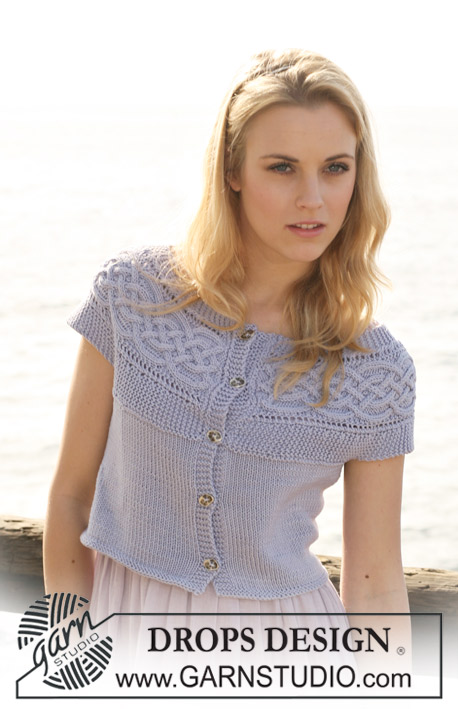
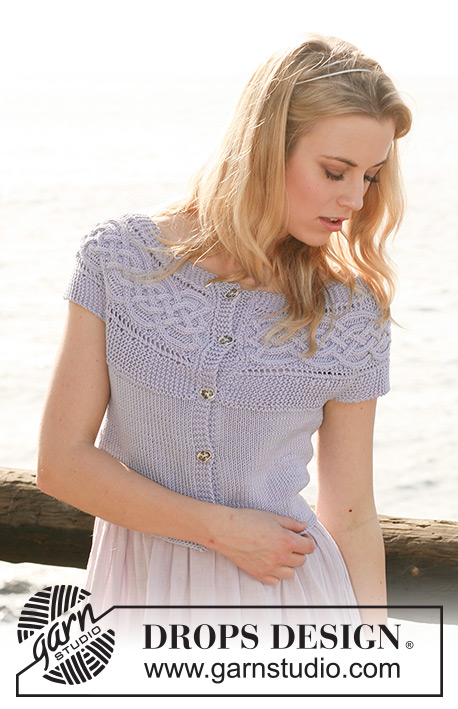
Short DROPS sleeveless jacket in ”Muskat” with yoke knitted from side to side with cables and shortened rows. Size S to XXXL.
DROPS 119-28 |
|||||||||||||||||||||||||||||||
|
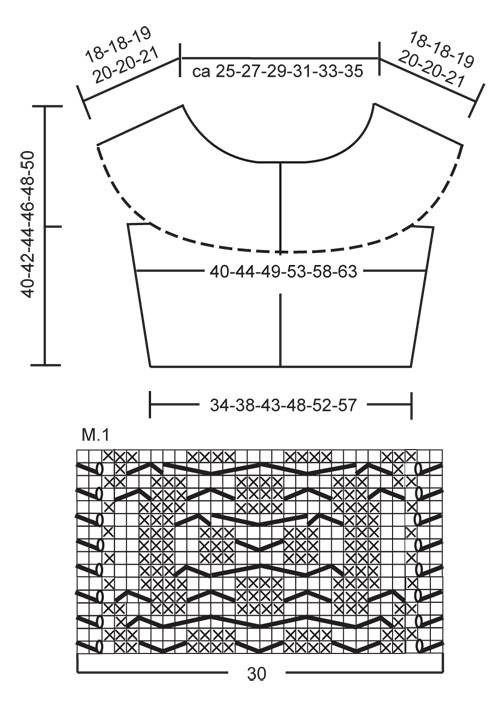
GARTER ST (back and forth on needle): K all rows. SHORTENED ROWS: To make yoke wider along bottom edge work shortened rows as follows: * Work 2 rows on all sts, work row to marker-2, turn, tighten thread and work return row, work row to marker-1, turn, tighten thread and work return row, work 2 rows on all sts, work row to marker-2, turn, tighten thread and work return row, work 2 rows on all sts, work row to marker-1, turn, tighten thread and work return row *, repeat from * -*, i.e. 1 repeat = 6 rows at the top and 14 rows at the bottom. PATTERN: See diagram M.1 - diagram is seen from RS and shows 1 pattern repeat. DECREASING TIP (applies to dec at the side): Make all dec from RS. Dec as follows BEFORE marker at the side: K2 tog. Dec as follows AFTER marker at the side: slip 1 st as if to K, K1, psso. BUTTONHOLES: Make buttonholes on right front band from WS. 1 BUTTONHOLE = K tog 3rd and 4th st from mid front and make 1 YO. Make buttonholes when piece measures: SIZE S and M: 7 and 15 cm. SIZE L, XL and XXL: 5, 12 and 19 cm. SIZE XXXL: 6, 13 and 21 cm. ---------------------------------------------------------- ---------------------------------------------------------- YOKE: Worked back and forth on needle from side to side from mid front. Cast on 37-38-39-41-42-43 sts on needle size 4 mm with Muskat. K 2 rows on all sts (first row beg at bottom edge). Work next row as follows (from RS): K 7-8-9-10-11-12, K2 tog, 1 YO, K1, P2, K2 in each of the next 2 sts (= K4), * P4, K2 in each of the next 2 sts (= K4) *, repeat from *-* a total of 2 times, P2, K1, 1 YO, slip 1 st as if to K, K1, psso, K 6-6-6-7-7-7 = 43-44-45-47-48-49 sts. Work next row as follows (from WS): K 6-6-6-7-7-7, P2, K3, P4, K4, P4, K4, P4, K3, P2 and K 7-8-9-10-11-12. Insert 2 markers in piece as follows (from RS): marker-1 after 7-8-9-10-11-12 sts and marker-2 after a total of 37-38-39-40-41-42 sts = 6-6-6-7-7-7 sts after marker-2 at the top. Now work SHORTENED ROWS – see above - and PATTERN as follows: 7-8-9-10-11-12 garter sts (= towards bottom edge), M.1 and 6-6-6-7-7-7 garter sts (= towards neck). REMEMBER THE KNITTING TENSION! When piece measures approx 116-126-136-146-156-166 cm at bottom edge (piece measures approx 50-54-58-63-67-71 cm at the top) – adjust to after a full repeat of diagram – work next row as follows (from RS): K 10-11-12-13-14-15, P2, * K2 tog, K2 tog, P4 *, repeat from *-* a total of 2 times, K2 tog, K2 tog, P2, K 9-9-9-10-10-10 = 37-38-39-41-42-43 sts. K 1 row on all sts from WS and cast off in K sts. Remove markers from piece and insert 4 new markers in the bottom edge of yoke as follows: MARKER-1 after 18-20-22-24-26-28 cm, MARKER-2: 22-23-24-25-26-27 cm from the first, MARKER-3: 36-40-44-48-52-56 cm from the second and MARKER-4: 22-23-24-25-26-27 cm from the third = approx 18-20-22-24-26-28 cm left after the last marker. BODY PIECE: Worked back and forth on circular needle. Cast on 5 sts with Muskat on circular needle size 4 mm (= front band), then pick up 1 st in every other row along bottom edge of yoke to MARKER-1 (= left front piece = approx 38 to 58 sts), cast on 8-8-10-12-14-16 new sts (= under sleeve), skip forward to MARKER-2, pick up 1 st in every other row to MARKER-3 (= back piece = approx 76 to 116 sts), cast on 8-8-10-12-14-16 new sts (= under sleeve), skip forward to MARKER-4, pick up 1 st in every other row on the rest of yoke (= right front piece = approx 38 to 58 sts), cast on 5 new sts at the end of row (= front band) = approx 178 to 274 sts in total. K 1 row from WS, AT THE SAME TIME adjust no of sts to 178-194-214-234-254-274 sts evenly (if you have less sts make a YO at evenly intervals across the row to make up the no of sts – work YO into back of loop on return row to avoid a hole – if you have too many sts K2 tog evenly across the row – do not inc/dec on front bands). NOW MEASURE PIECE FROM HERE! Continue in stocking st with 5 garter sts each side. Insert a marker 47-51-56-61-66-71 sts in from each side (to mark the sides). REMEMBER THE KNITTING TENSION! When piece measures 4 cm dec 1 st each side of both markers – SEE DECREASING TIP! Repeat the dec on every 3-3-3.5-3.5-4-4 cm a total of 6 times = 154-170-190-210-230-250 sts. AT THE SAME TIME when piece measures 7-7-5-5-5-6 cm make BUTTONHOLES on right front band – see above! When piece measures 21-23-24-25-27-28 cm change to circular needle size 3.5 mm, work 4 rows garter st and cast off loosely. LEFT FRONT BAND: Pick up 1 st in each of the 5 sts cast on for front band on left side of piece on needle size 4 mm. Work garter st until front band is approx 2 cm shorter than the yoke (front band should be stretched slightly when sewn on), cast off. Sew front band to yoke, edge to edge. RIGHT FRONT BAND: Like left front band but when front band measures 1-1-2-3-3-3 cm make 1 buttonhole in line with the others, and repeat when front band measures 8-8-9-10-10-11 cm and when 4 rows remain. ASSEMBLY: Sew on buttons. |
|||||||||||||||||||||||||||||||
Diagram explanations |
|||||||||||||||||||||||||||||||
|
|||||||||||||||||||||||||||||||
 |
|||||||||||||||||||||||||||||||
Have you finished this pattern?Tag your pictures with #dropspattern #claddaghringscardigan or submit them to the #dropsfan gallery. Do you need help with this pattern?You'll find 22 tutorial videos, a Comments/Questions area and more by visiting the pattern on garnstudio.com. © 1982-2026 DROPS Design A/S. We reserve all rights. This document, including all its sub-sections, has copyrights. Read more about what you can do with our patterns at the bottom of each pattern on our site. |
|||||||||||||||||||||||||||||||


With over 40 years in knitting and crochet design, DROPS Design offers one of the most extensive collections of free patterns on the internet - translated to 17 languages. As of today we count 325 catalogues and 12298 patterns translated into English (UK/cm).
We work hard to bring you the best knitting and crochet have to offer, inspiration and advice as well as great quality yarns at incredible prices! Would you like to use our patterns for other than personal use? You can read what you are allowed to do in the Copyright text at the bottom of all our patterns. Happy crafting!
Post a comment to pattern DROPS 119-28
We would love to hear what you have to say about this pattern!
If you want to leave a question, please make sure you select the correct category in the form below, to speed up the answering process. Required fields are marked *.