
Popular categories
Looking for a yarn?


Comments / Questions (43)
![]() Lucinda David wrote:
Lucinda David wrote:
J'aimerais pourvoir tricoter ce modèle comme un pull. Pourriez-vous m'indiquer comment procéder? Merci d'avance.
21.10.2024 - 16:19DROPS Design answered:
Bonjour Mme David, nous ne sommes malheureusement pas en mesure de pouvoir adapter chacun de nos modèles à chaque demande, vous pouvez essayer de contacter votre magasin et/ou un forum spécialisé où d'autres tricoteuses pourront vous aider; Merci pour votre compréhension. Bon tricot!
22.10.2024 - 08:50
![]() Hélène Gicquel Gicquel wrote:
Hélène Gicquel Gicquel wrote:
Bonjour , Avec quelle laine autre MUSKAT , puis tricter ce modèle ? POUVEZ VOUS ME DONNER SA LONGUEUR EN TAILLE / 46/48 ,Merci . HG
03.08.2022 - 12:01DROPS Design answered:
Bonjour Mme Gicquel, consultez notre convertisseur pour voir toutes les alternatives possibles ainsi que la nouvelle quantité dans la taille souhaitée. Vous retrouverez la hauteur totale (du haut de l'épaule jusqu'en bas) à gauche dans le schéma. Découvrez ici comment trouver votre taille. Bon tricot!
03.08.2022 - 15:17
![]() Da Cunha Antonio wrote:
Da Cunha Antonio wrote:
Bonjour, J'ai commencée ce joli modèle 119-28, l’empiècement ne rend pas comme le modèle. Est-ce-que le diagramme représente uniquement les rangs endroit où bien,les 2 4 6 8 etc . rangs ,sont l’envers du travail?
21.03.2022 - 08:31DROPS Design answered:
Bonjour Mr Da Cunha, tous les rangs sont représentés dans le diagramme, autrement dit, sur l'endroit lisez de droite à gauche et sur l'envers de gauche à droite; commencez en bas à droite et lisez vers le haut. Bon tricot!
21.03.2022 - 09:30
![]() Rosanne GUIDEMANN wrote:
Rosanne GUIDEMANN wrote:
J'ai terminé la bordure dans la petite taille. Si j'atteins bien les 50 cm pour le côté haut, je n'est pas la bonne dimension pour le côté bas. Pourtant j'ai bien suivi les instructions. Comment puis-je rattraper pour avoir l'ampleur des mancherons sans devoir tout recommencer ?
06.06.2021 - 15:52DROPS Design answered:
Bonjour Mme Guidemann, vous avez bien le bon échantillon en largeur autant qu'en hauteur? Vous avez bien 6 rangs en haut/ 14 rangs en bas pour chaque série des rangs raccourcis? Si vous continuez, l'encolure sera naturellement automatiquement plus large aussi. Essayez de bien vérifier que vous avez la bonne tension en hauteur (28 rangs jersey = 10 cm) et le bon nombre de rangs par série des rangs raccourcis. Bon tricot!
07.06.2021 - 07:39
![]() Valeria Rossi wrote:
Valeria Rossi wrote:
Buongiorno ho iniziato questo bellissimo modello, ma ho un dubbio: mi verrebbe da dire che tutto lo sprone va lavorato a ferri accorciati, o questa procedura si applica solo per due volte, cioè una sola ripetizione di quanto spiegato? Non vorrei dover disfare in fase avanzata. Grazie per l'attenzione. Valeria
07.08.2019 - 10:46DROPS Design answered:
Buongiorno Valeria. Ripete i ferri accorciati per tutto lo sprone. Buon lavoro!
07.08.2019 - 13:53
![]() Wemmigje wrote:
Wemmigje wrote:
Ben maat xl aan het breien nu heb ik boven in bijna de 63 cm maar moet onderin nog bijna 30 cm. Het patroon goed gebreid. De toeren steeds aangekruist. Kan ik beter de onderkant aanhouden war de cm betreft?
30.04.2019 - 10:42DROPS Design answered:
Dag Wemmigje,
Helaas begrijp ik niet goed wat je bedoelt met dat je nog 30 cm moet en bovenin 63 hebt. Is dit in de lengte of de breedte? Welke maat brei je en waar ben je precies? (Met het getal '30' dat onderaan het telpatroon staat, wordt trouwens het aantal steken bedoeld.)
05.05.2019 - 19:15
![]() Irina wrote:
Irina wrote:
Hallo, ich komme leider mit Ihrer Erklärung für verkürzte Reihen nicht klar. Bitte helfen Sie mir weiter. 2 R. über alle Maschen; 3te R. bis zu 2.Markierer, drehen , zurück. 5te Reihe bis zu 1.Markierer ,drehen und zurück. 7 und 8te Reihe über alle Maschen. So weit klar. Und dann?? Danke
03.02.2019 - 17:40DROPS Design answered:
Liebe Irina, so stricken Sie die verkürtzten Reihen: 1&2: über alle Maschen, 3&4: bis 2. Markierer, 5&6: bis 1. Markierer, 7&8: über alle Maschen, 9&10: bis 1. Markierer, 11x12: über alle Maschen, 13&14: bis 2. Markierer. Viel spaß beim stricken!
04.02.2019 - 12:59
![]() Shah wrote:
Shah wrote:
Joli modèle, j'aimerais faire des manches longues, auriez vous des conseils ? D'avance merci
16.01.2019 - 14:59DROPS Design answered:
Bonjour Shah, nous ne sommes malheureusement pas en mesure de pouvoir adapter chacun de nos modèles à chaque demande, vous pouvez vous inspirer d'un modèle analogue et recalculer pour obtenir ce que vous souhaitez et/ou vous adresser à votre magasin - même par mail ou téléphone - pour toute assistance complémentaire. Bon tricot!
17.01.2019 - 08:41
![]() Chris wrote:
Chris wrote:
Wenn die verkürzten Reihen an den unteren Maschen erfolgen (gegen die Kante, 7 kraus,n.d.1. Markierung) wird es doch über den Schultern eng und am Hals weit. Es wird nur 1mal an d. 2. Markierung gewendet. Oder ist der 1. Markierer n.6M. u.d. 2. Markierer vor d. 7M.kraus?
28.07.2016 - 11:14DROPS Design answered:
Liebe Chris, die Markierungen werden von der Vorderseite eingezogen, also von der Unterkante gesehen, somit haben Sie unten mehr Weite als oben.
28.07.2016 - 15:02Mima Bnr wrote:
J adore ce modele il est magnifique ,merci.
03.12.2014 - 12:33
|
|||||||||||||||||||||||||||||||
Claddagh Rings#claddaghringscardigan |
|||||||||||||||||||||||||||||||
 |
 |
||||||||||||||||||||||||||||||
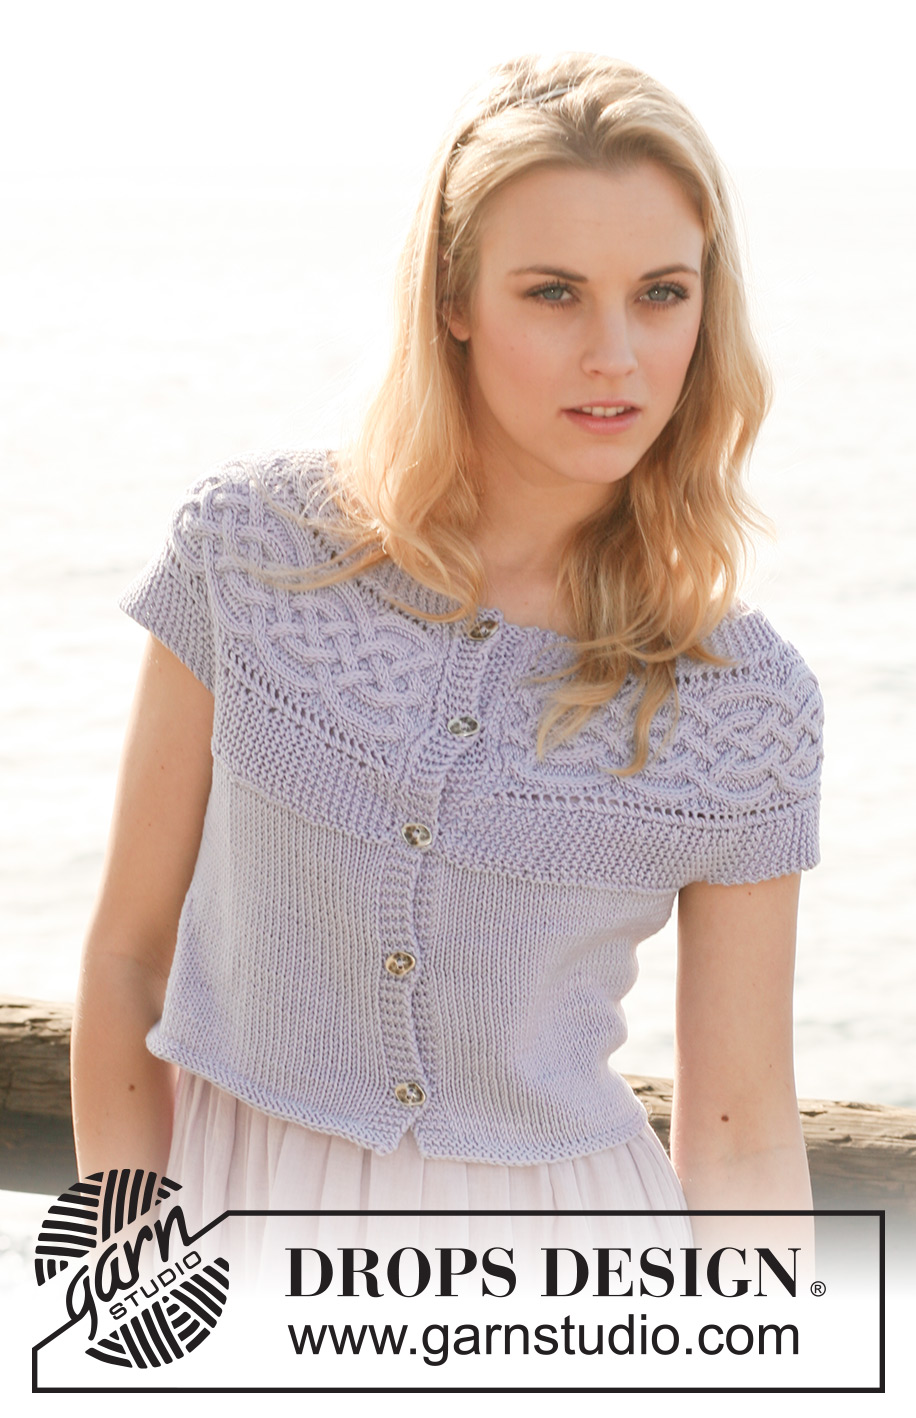
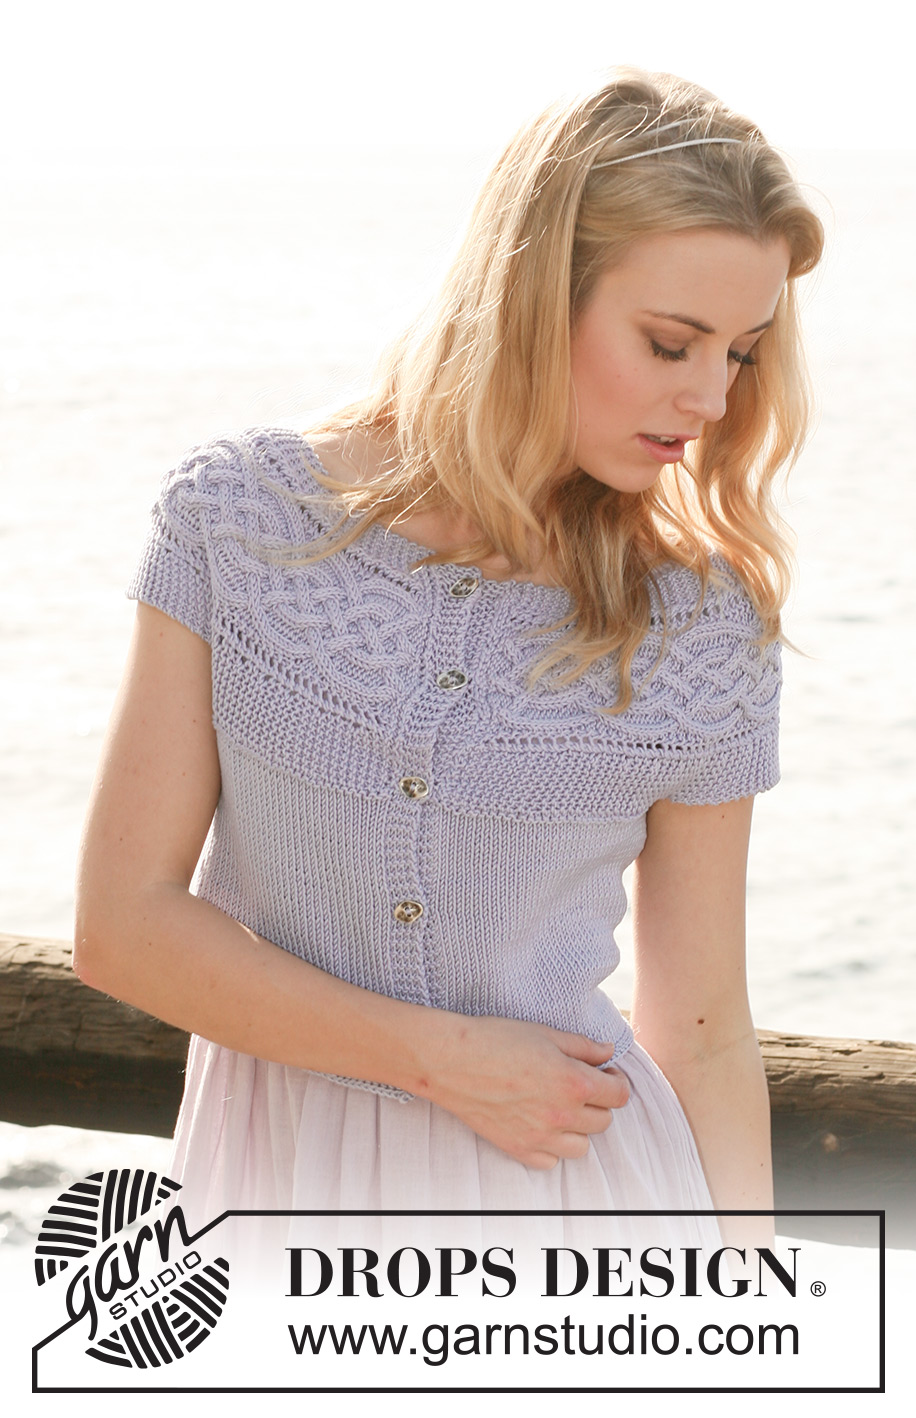
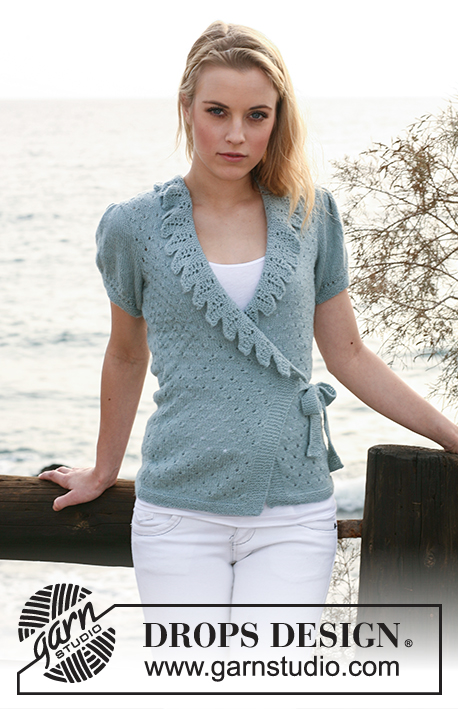
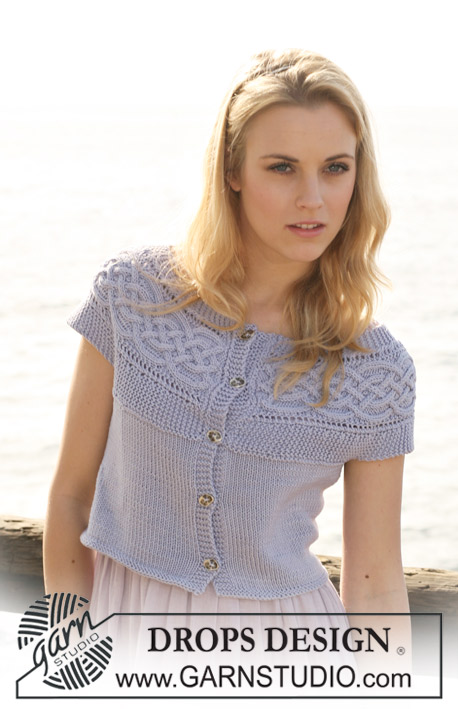
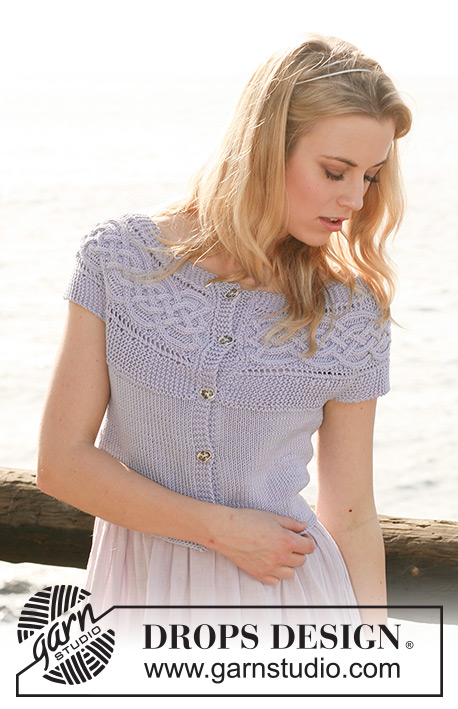
Short DROPS sleeveless jacket in ”Muskat” with yoke knitted from side to side with cables and shortened rows. Size S to XXXL.
DROPS 119-28 |
|||||||||||||||||||||||||||||||
|
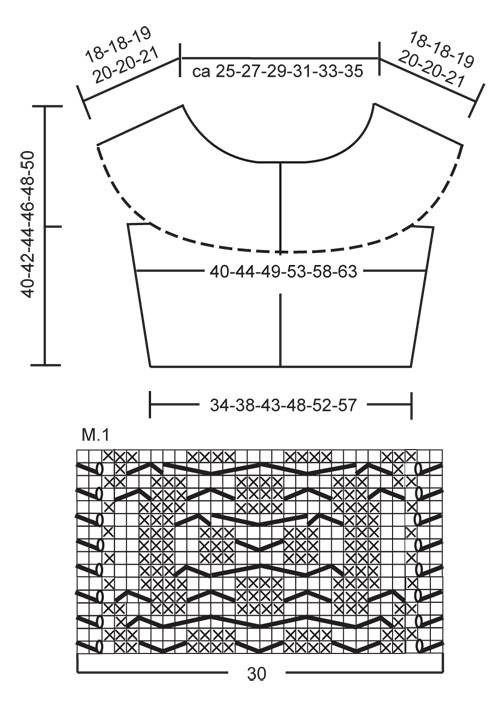
GARTER ST (back and forth on needle): K all rows. SHORTENED ROWS: To make yoke wider along bottom edge work shortened rows as follows: * Work 2 rows on all sts, work row to marker-2, turn, tighten thread and work return row, work row to marker-1, turn, tighten thread and work return row, work 2 rows on all sts, work row to marker-2, turn, tighten thread and work return row, work 2 rows on all sts, work row to marker-1, turn, tighten thread and work return row *, repeat from * -*, i.e. 1 repeat = 6 rows at the top and 14 rows at the bottom. PATTERN: See diagram M.1 - diagram is seen from RS and shows 1 pattern repeat. DECREASING TIP (applies to dec at the side): Make all dec from RS. Dec as follows BEFORE marker at the side: K2 tog. Dec as follows AFTER marker at the side: slip 1 st as if to K, K1, psso. BUTTONHOLES: Make buttonholes on right front band from WS. 1 BUTTONHOLE = K tog 3rd and 4th st from mid front and make 1 YO. Make buttonholes when piece measures: SIZE S and M: 7 and 15 cm. SIZE L, XL and XXL: 5, 12 and 19 cm. SIZE XXXL: 6, 13 and 21 cm. ---------------------------------------------------------- ---------------------------------------------------------- YOKE: Worked back and forth on needle from side to side from mid front. Cast on 37-38-39-41-42-43 sts on needle size 4 mm with Muskat. K 2 rows on all sts (first row beg at bottom edge). Work next row as follows (from RS): K 7-8-9-10-11-12, K2 tog, 1 YO, K1, P2, K2 in each of the next 2 sts (= K4), * P4, K2 in each of the next 2 sts (= K4) *, repeat from *-* a total of 2 times, P2, K1, 1 YO, slip 1 st as if to K, K1, psso, K 6-6-6-7-7-7 = 43-44-45-47-48-49 sts. Work next row as follows (from WS): K 6-6-6-7-7-7, P2, K3, P4, K4, P4, K4, P4, K3, P2 and K 7-8-9-10-11-12. Insert 2 markers in piece as follows (from RS): marker-1 after 7-8-9-10-11-12 sts and marker-2 after a total of 37-38-39-40-41-42 sts = 6-6-6-7-7-7 sts after marker-2 at the top. Now work SHORTENED ROWS – see above - and PATTERN as follows: 7-8-9-10-11-12 garter sts (= towards bottom edge), M.1 and 6-6-6-7-7-7 garter sts (= towards neck). REMEMBER THE KNITTING TENSION! When piece measures approx 116-126-136-146-156-166 cm at bottom edge (piece measures approx 50-54-58-63-67-71 cm at the top) – adjust to after a full repeat of diagram – work next row as follows (from RS): K 10-11-12-13-14-15, P2, * K2 tog, K2 tog, P4 *, repeat from *-* a total of 2 times, K2 tog, K2 tog, P2, K 9-9-9-10-10-10 = 37-38-39-41-42-43 sts. K 1 row on all sts from WS and cast off in K sts. Remove markers from piece and insert 4 new markers in the bottom edge of yoke as follows: MARKER-1 after 18-20-22-24-26-28 cm, MARKER-2: 22-23-24-25-26-27 cm from the first, MARKER-3: 36-40-44-48-52-56 cm from the second and MARKER-4: 22-23-24-25-26-27 cm from the third = approx 18-20-22-24-26-28 cm left after the last marker. BODY PIECE: Worked back and forth on circular needle. Cast on 5 sts with Muskat on circular needle size 4 mm (= front band), then pick up 1 st in every other row along bottom edge of yoke to MARKER-1 (= left front piece = approx 38 to 58 sts), cast on 8-8-10-12-14-16 new sts (= under sleeve), skip forward to MARKER-2, pick up 1 st in every other row to MARKER-3 (= back piece = approx 76 to 116 sts), cast on 8-8-10-12-14-16 new sts (= under sleeve), skip forward to MARKER-4, pick up 1 st in every other row on the rest of yoke (= right front piece = approx 38 to 58 sts), cast on 5 new sts at the end of row (= front band) = approx 178 to 274 sts in total. K 1 row from WS, AT THE SAME TIME adjust no of sts to 178-194-214-234-254-274 sts evenly (if you have less sts make a YO at evenly intervals across the row to make up the no of sts – work YO into back of loop on return row to avoid a hole – if you have too many sts K2 tog evenly across the row – do not inc/dec on front bands). NOW MEASURE PIECE FROM HERE! Continue in stocking st with 5 garter sts each side. Insert a marker 47-51-56-61-66-71 sts in from each side (to mark the sides). REMEMBER THE KNITTING TENSION! When piece measures 4 cm dec 1 st each side of both markers – SEE DECREASING TIP! Repeat the dec on every 3-3-3.5-3.5-4-4 cm a total of 6 times = 154-170-190-210-230-250 sts. AT THE SAME TIME when piece measures 7-7-5-5-5-6 cm make BUTTONHOLES on right front band – see above! When piece measures 21-23-24-25-27-28 cm change to circular needle size 3.5 mm, work 4 rows garter st and cast off loosely. LEFT FRONT BAND: Pick up 1 st in each of the 5 sts cast on for front band on left side of piece on needle size 4 mm. Work garter st until front band is approx 2 cm shorter than the yoke (front band should be stretched slightly when sewn on), cast off. Sew front band to yoke, edge to edge. RIGHT FRONT BAND: Like left front band but when front band measures 1-1-2-3-3-3 cm make 1 buttonhole in line with the others, and repeat when front band measures 8-8-9-10-10-11 cm and when 4 rows remain. ASSEMBLY: Sew on buttons. |
|||||||||||||||||||||||||||||||
Diagram explanations |
|||||||||||||||||||||||||||||||
|
|||||||||||||||||||||||||||||||
 |
|||||||||||||||||||||||||||||||
Have you finished this pattern?Tag your pictures with #dropspattern #claddaghringscardigan or submit them to the #dropsfan gallery. Do you need help with this pattern?You'll find 22 tutorial videos, a Comments/Questions area and more by visiting the pattern on garnstudio.com. © 1982-2026 DROPS Design A/S. We reserve all rights. This document, including all its sub-sections, has copyrights. Read more about what you can do with our patterns at the bottom of each pattern on our site. |
|||||||||||||||||||||||||||||||


With over 40 years in knitting and crochet design, DROPS Design offers one of the most extensive collections of free patterns on the internet - translated to 17 languages. As of today we count 325 catalogues and 12298 patterns translated into English (UK/cm).
We work hard to bring you the best knitting and crochet have to offer, inspiration and advice as well as great quality yarns at incredible prices! Would you like to use our patterns for other than personal use? You can read what you are allowed to do in the Copyright text at the bottom of all our patterns. Happy crafting!
Post a comment to pattern DROPS 119-28
We would love to hear what you have to say about this pattern!
If you want to leave a question, please make sure you select the correct category in the form below, to speed up the answering process. Required fields are marked *.