
Popular categories
Looking for a yarn?


Comments / Questions (117)
![]() Mireia wrote:
Mireia wrote:
Hola;mi duda es como se ensambla la pantunfla una vez terminada, no entiendo como se cose. Gracias
08.10.2012 - 21:28DROPS Design answered:
Hola Mireia, la costura principal está en centro arriba. Y hay una pequeña costura donde los dedos.
04.12.2012 - 10:11Alan wrote:
Just knit these up and felted them in my front loading washing machine, and they came out beautifully, so pleased, thank you.
02.06.2012 - 20:26
![]() Bettina wrote:
Bettina wrote:
Hallo, ich verstehe einen Teil der Anleitung nicht. Dort heisst es "Glatt mit je 2 M. Krausrippe auf beiden Seiten weiterstricken bis die Arbeit ca. 15,5-16,5-17,5-20,5 cm misst. Jetzt wird der Fuss gestrickt. Nach 22-23-24-27 cm, auf beiden Seiten die 5. und 6. M. zusammenstricken" Zwischen diesen beiden Schritten liegen einige Zentimeter. Strickt man an dieser Stelle einfach glatt weiter bis die gefragte Länge erreicht ist? Vielen Dank!
10.03.2012 - 22:32DROPS Design answered:
Ja, diese M. werden glatt fertig gestrickt.
12.03.2012 - 10:32
![]() DROPS Deutsch wrote:
DROPS Deutsch wrote:
Fersenkante = Öffnung ausser dem Fussrücken
12.01.2012 - 09:52
![]() Kerstin Böckmann wrote:
Kerstin Böckmann wrote:
Hallo liebes Strickteam. Habe gerade die Puschen fertig gestrickt. Bei der Fertigstellung habe ich leider ein Problem. Wie ist das mit der Fersenkante gemeint. Werde leider nicht schlau draus. Danke für eine Antwort und einen schönen Tag
12.01.2012 - 09:36
![]() Catherine wrote:
Catherine wrote:
Je vous remercie la reformulation est parfaite je vais passer mes pantoufles à la machine! Très bonne journée à vous.
22.08.2011 - 23:48
![]() Drops Design France wrote:
Drops Design France wrote:
Bonjour Catherine, l'assemblage du chausson a été reformulé pour vous permettre de mieux comprendre.
22.08.2011 - 12:20
![]() Catherine wrote:
Catherine wrote:
Hello everyone! Here is my problem: I am finding some difficulty to understand how the assembly works, so if anybody could precise me what exactly needs to be done? Thank you, have a good day!
21.08.2011 - 14:55
![]() Catherine wrote:
Catherine wrote:
Bonjour! Voilà: mon problème est que je ne comprends pas l'assemblage du chaussson, donc si uelqu'un pouvait m'aider? Merci d'avance!
21.08.2011 - 14:25
![]() Gonnie wrote:
Gonnie wrote:
Het is gelukt. Bedankt.
11.04.2011 - 21:10
|
|
Ruby Slippers#rubyslippers |
|
 |
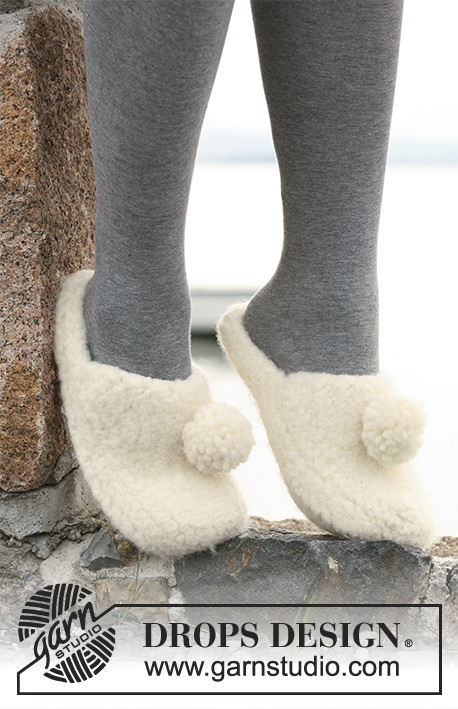 |
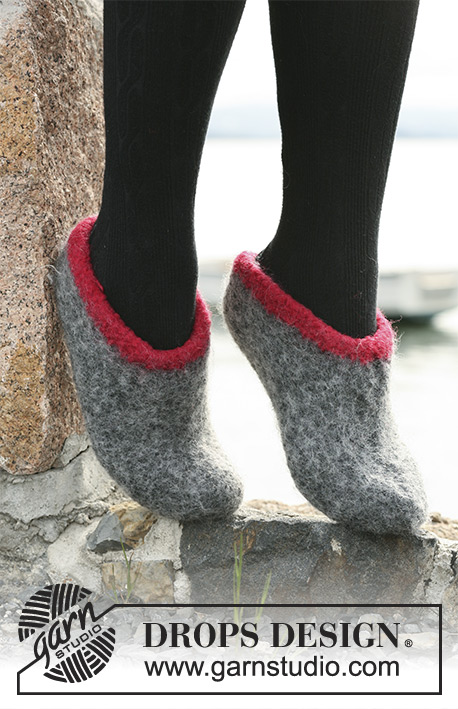
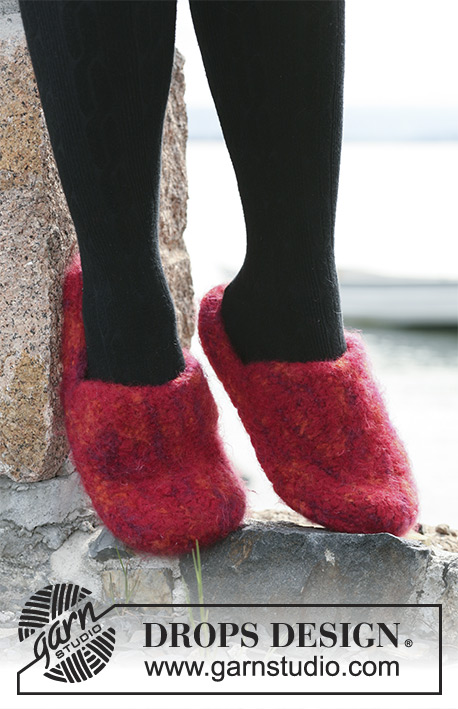
Felted DROPS slippers in 2 threads ”Snow”
DROPS 104-10 |
|
|
Knitting tension/gauge: 9 sts x 12 rows stocking sts with 2 threads Snow = 10 x 10 cm [4" x 4"] before felting. And 10 sts x approx 13.6 rows = 10 x 10 cm [4" x 4"] after felting. Slipper: Remember knitting tension/gauge! Knit slipper in one piece with seam mid top of foot, start at heel. Knit on needle size 10 mm [US 15] with 2 threads Snow: 2 threads of same colour or 1 thread of each colour. Cast on 9-9-11-11 sts. 1st row: First row: Knit while increasing 1 st at each end of row 2nd row: Knit. =11-11-13-13 sts. Change to stocking st. 3rd row: K3, Increase in next st. K to last 4 sts. Increase in the next st. K last 3 sts. 4th row: Purl. Repeat row 3 and 4 for 1-1-0-1 more time = 15-15-15-17 sts. Work in stocking stitch until the piece measures 8.5-7.5-8.5-11 cm [3,35"-2,95"-3,35"-4,3"]. When piece measures 8.5-7.5-8.5-11 cm [3,35"-2,95"-3,35"-4,3"] cast off first and last sts on row = 13-13-13-15 sts. On next row, cast on 1 new sts at beginning and end of row = 15-15-15-17 sts. Continue by working the first and last 2 sts in garter sts and the centre 11-11-11-13 sts in stocking st for the remainder of the slipper. On the next row and following alternate rows: Increase 1 st at beginning and end of row a total of 3-4-4-4 times = 21-23-23-25 sts. Knit 1 row without inc. Cast on 2 new sts at beginning of next 2 rows = 25-27-27-29 sts. Piece measures approx 15.5-16.5-17.5-20.5 cm [6,1"-6,5"-6,9"-8,1"]. Now knit foot. When piece measures 22-23-24-27 cm [8,7"-9,1"-9,45"-10,6"]ending on a WS row, K4, K2tog, K to last 6 sts, K2tog, K4 = 23-25-25-27 sts. Work until piece measures 28-29-31-34 cm [11"-11,4"-12,2"-13,4"] ending on a WS row. Next row: K4, K2tog, K to last 6 sts, K2tog, K4 = 21-23-23-25 sts. Work 1 row. Repeat last 2 rows = 19-21-21-23 sts once more. Work until piece measures approx 32.5-35.5-37.5-40.5 cm [12,8"-14"-14,8"-15,95"] ending on a WS row. (only 3 rows are left). K5, K2tog, K to last 7 sts, K2tog, K5 = 17-19-19-21 sts. Work 1 row. Next row: K2, K2 tog twice, K5-7-7-9 sts, K2tog twice, K2 = 13-15-15-17 sts. On next row bind off, piece measures approx 35-38-40-43 cm [13.8"-15"-15.75"-16.9"]. Assembly: The slipper is assemblied with WS out. Fold the foot part RS towards RS and sew the seam mid upon foot from the WS in the most outer sts. Lay the toe flat with the upper foot seam centered on top and sew toe together in most outer sts. Heel edge: Fold the edge at the heel towards the 3rd st on RS and sew it tight to atchive a bulky edge around the heel. FELTING: The piece can be felted either in the washing machine or the tumble dryer – read description below. Remember: Subsequent washes are as for a normal wool garment. IN WASHING MACHINE: Washing machines will vary when felting. If the piece is not felted enough, it can be felted again. If it is felted too much, it can be stretched to the correct size while still wet. DO THE FOLLOWING: Lay the piece in the washing machine, using a programme of approx. 40 minutes (not a wool programme). Wash at 40 degrees without pre-wash, detergent is optional. After washing, shape the piece while it is still wet. IN TUMBLE DRYER: Felting in a tumble dryer gives good control over the degree of felting. The tumble dryer can be opened during drying to check the size of the piece. If it is not felted enough it can be thoroughly wetted and felted again. If it is felted too much it can be stretched to the correct size while still wet. DO THE FOLLOWING: Lay the piece in water so it becomes completely wet, then place it in the tumble dryer and begin the drying process. Dry to the desired size, checking regularly. Pompom: Make a Pompom with a diameter of approx 5-6 cm in Snow – do not felt this. Sew onto mid top of slipper. |
|
Have you finished this pattern?Tag your pictures with #dropspattern #rubyslippers or submit them to the #dropsfan gallery. Do you need help with this pattern?You'll find 11 tutorial videos, a Comments/Questions area and more by visiting the pattern on garnstudio.com. © 1982-2026 DROPS Design A/S. We reserve all rights. This document, including all its sub-sections, has copyrights. Read more about what you can do with our patterns at the bottom of each pattern on our site. |
|


With over 40 years in knitting and crochet design, DROPS Design offers one of the most extensive collections of free patterns on the internet - translated to 17 languages. As of today we count 324 catalogues and 12290 patterns translated into English (UK/cm).
We work hard to bring you the best knitting and crochet have to offer, inspiration and advice as well as great quality yarns at incredible prices! Would you like to use our patterns for other than personal use? You can read what you are allowed to do in the Copyright text at the bottom of all our patterns. Happy crafting!
Post a comment to pattern DROPS 104-10
We would love to hear what you have to say about this pattern!
If you want to leave a question, please make sure you select the correct category in the form below, to speed up the answering process. Required fields are marked *.