
Popular categories
Looking for a yarn?


Comments / Questions (117)
![]() Esther Seyfried wrote:
Esther Seyfried wrote:
Wie muss ich die Größenangaben verstehen: die Größen 35 bis 40 sind farbig hinterlegt, nur dafür gibt es Mengenangabe für die Wolle und Anleitung? Wenn ja, gibt es irgendwo eine Anleitung und Mengenangabe für die größeren Größen wie 45? Danke!
01.11.2015 - 15:19DROPS Design answered:
Die Größen finden Sie oben im Kopf: 35/37 - 38/39 - 40/42 - 43/45. In dieser Reihenfolge sind auch die Zahlen in der Anleitung und die Mengenangaben zu verstehen. Die erste Zahl steht also z.B. immer für Gr. 35/37 und die letzte für Gr. 43/45. Die Farbalternativen können Sie also für jede der Größen stricken.
05.11.2015 - 13:12
![]() Dorte Rosenskjold wrote:
Dorte Rosenskjold wrote:
Jeg forstår ikke... retstrik 2 yderste masker - skal alle maskerne ikke retstrikkes? jeg er gået helt i står her, øv øv er der evt video? vh Dorte Fortsæt i glatstrik med de yderste 2 m i retstrik til færdig mål. Nu tages der 1 m ud i hver side ved at strikke 2 m i yderste m: 3-4-4-4 gange på hver 2.p = 21-23-23-25 m. Strik 1 p uden udtagning. På næste p slåes der 2 nye m op i starten og i slutningen af p = 25-27-27-29m.
15.09.2015 - 14:29
![]() Maj Jørgensen wrote:
Maj Jørgensen wrote:
Hejsa. Jeg forstår ikke helt det med hvordan tøflen skal syes sammen. Skal tåen løftes op på midt på foden og syes på der så tøflen bliver tykkere ved tåen? Eller hvordan skal det lige forståes. Hilsen Maj
01.01.2015 - 11:48DROPS Design answered:
Hej Maj, Nej du skal bare sy sømmen midt ovenpå foden først og så derefter syr du "sålen" til det øverste stykke yderst i tåen. God fornøjelse!
04.02.2015 - 16:08
![]() Christina wrote:
Christina wrote:
Hallo! Ich möchte dieses Model gerne nachstricken, habe aber Probleme mit der Anleitung: Jetzt wie folgt aufnehmen, indem man 2 M. in die äusserste M. strickt: bei jeder 2. R. 1 M. 3-4-4-4 Mal = 21-23-23-25 M. Bedeutet das ich stricke eine reihe normal, dann in der 2. Reihe stricke ich in die erste und in die letzte Masche 2 Maschen? Aber was bedeutet 3 bzw. 4 Mal? Liebe Grüße.
12.12.2014 - 17:04DROPS Design answered:
Ja genau, das haben Sie richtig verstanden. 3 bzw. 4 x heißt, dass Sie die Zunahmen in 3 bzw. 4 Reihen machen, mit jeweils einer R ohne Zunahmen dazwischen. Insgesamt haben Sie dann 6 bzw. 8 M zugenommen.
14.12.2014 - 10:20
![]() FLORENCE wrote:
FLORENCE wrote:
Bonjour, je ne comprends pas votre explication pour l'assemblage, pouvez vous m'aider, merci bien
12.12.2014 - 16:39DROPS Design answered:
Bonjour Florence, coudre sur l'envers les mailles du dessus du pied (en veillant que la couture ne soit pas trop épaisse) puis assemblez les mailles de la pointe entre elles - puis formez une petite bordure en pliant les côtés du talon à 3 m du bord. Bon tricot!
14.12.2014 - 16:58
![]() Ingunn Gjesdal wrote:
Ingunn Gjesdal wrote:
Kan dere hjelpe meg med monteringen av tøffelen?
18.11.2014 - 16:38DROPS Design answered:
Hej Ingunn, Vi har ingen video endnu, men således gør du: Sy sammen sømmen midt oppå foten i ytterste m slik sømmen ikke blir tykk! Legg tåen dobbel med sømmen midt oppå og sy tåen i ytterste m.
25.11.2014 - 15:22
![]() Ingunn Gjesdal wrote:
Ingunn Gjesdal wrote:
Kan dere lage heklet tovede tøffler.Ellers er disse tøfflene ok.
18.11.2014 - 12:06
![]() Cecilia wrote:
Cecilia wrote:
I have been reading through this pattern and the first section says "Work in stocking stitch until the piece measures 8.5-7.5-8.5-11 cm [3,35”- 2,95”- 3,35”- 4,3”]." I am confused by the fact that the 35/37 and 40/42 sizes are the same length there, I would have expected the first one to be smaller, are those lengths correct or is there a typo?
13.06.2014 - 16:35DROPS Design answered:
Dear Cecilia, pattern is correct, for the rest of pattern both sizes will have different measurements. Happy knitting!
13.06.2014 - 17:59
![]() Melanie wrote:
Melanie wrote:
"Glatt mit je 2 M. Krausrippe auf beiden Seiten weiterstricken. Jetzt wie folgt aufnehmen, indem man 2 M. in die äusserste M. strickt: bei jeder 2. R. 1 M. 3-4-4-4 Mal = 21-23-23-25 M. 1 R. stricken. Bei der nächsten R. am Anfang und am Schluss je 2 neue M. anschlagen = 25-27-27-29 M." = 1. R. normal mit Krausripprand, 2. R. 2 Maschen Krausripp in die äußerste Masche, 3. R. normal mit Kausripprand, 4. R. wie 2. R.?
15.07.2013 - 15:35DROPS Design answered:
Liebe Melanie, ja in jeder 2. R 2 M. in die äusserste M bedeutet 1 R ohne und 1 R mit Aufnahme stricken.
16.07.2013 - 08:56
![]() Silje wrote:
Silje wrote:
Hei! Hva menes med "strikk til ferdig mål"? Ut pinnen, eller hele lengden på strikketøyet?
27.11.2012 - 19:22DROPS Design answered:
Strik til hele lengden paa strikketøyet
28.11.2012 - 12:59
|
|
Ruby Slippers#rubyslippers |
|
 |
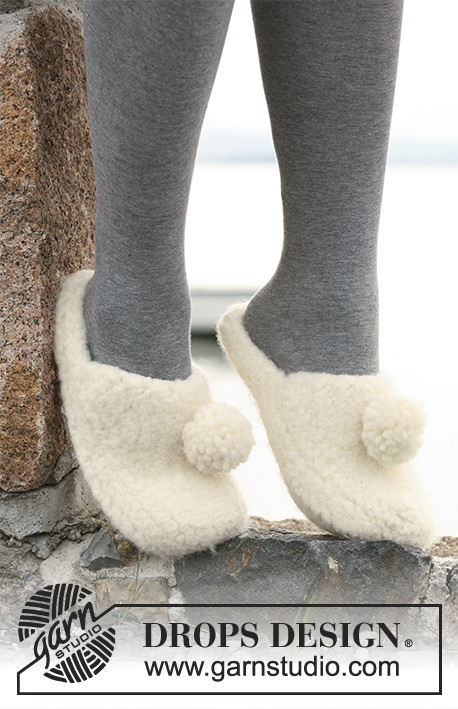 |
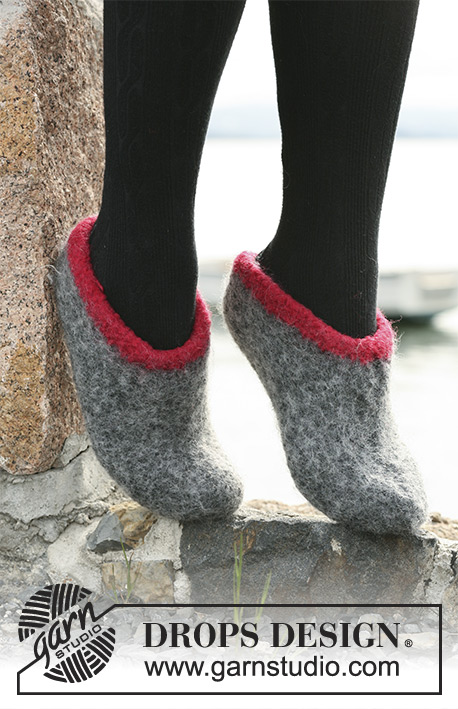
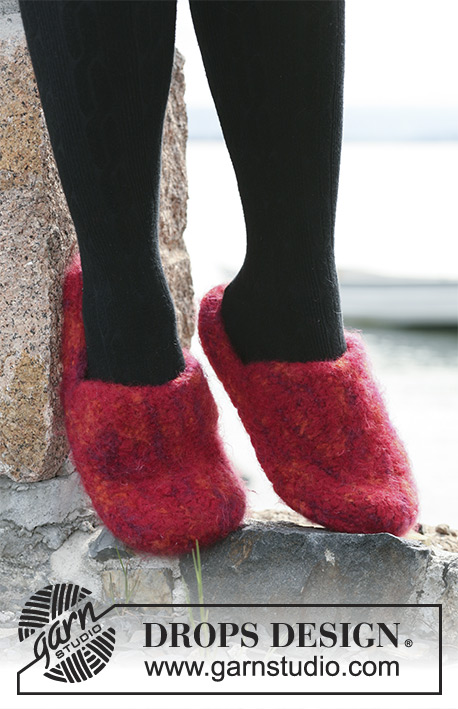
Felted DROPS slippers in 2 threads ”Snow”
DROPS 104-10 |
|
|
Knitting tension/gauge: 9 sts x 12 rows stocking sts with 2 threads Snow = 10 x 10 cm [4" x 4"] before felting. And 10 sts x approx 13.6 rows = 10 x 10 cm [4" x 4"] after felting. Slipper: Remember knitting tension/gauge! Knit slipper in one piece with seam mid top of foot, start at heel. Knit on needle size 10 mm [US 15] with 2 threads Snow: 2 threads of same colour or 1 thread of each colour. Cast on 9-9-11-11 sts. 1st row: First row: Knit while increasing 1 st at each end of row 2nd row: Knit. =11-11-13-13 sts. Change to stocking st. 3rd row: K3, Increase in next st. K to last 4 sts. Increase in the next st. K last 3 sts. 4th row: Purl. Repeat row 3 and 4 for 1-1-0-1 more time = 15-15-15-17 sts. Work in stocking stitch until the piece measures 8.5-7.5-8.5-11 cm [3,35"-2,95"-3,35"-4,3"]. When piece measures 8.5-7.5-8.5-11 cm [3,35"-2,95"-3,35"-4,3"] cast off first and last sts on row = 13-13-13-15 sts. On next row, cast on 1 new sts at beginning and end of row = 15-15-15-17 sts. Continue by working the first and last 2 sts in garter sts and the centre 11-11-11-13 sts in stocking st for the remainder of the slipper. On the next row and following alternate rows: Increase 1 st at beginning and end of row a total of 3-4-4-4 times = 21-23-23-25 sts. Knit 1 row without inc. Cast on 2 new sts at beginning of next 2 rows = 25-27-27-29 sts. Piece measures approx 15.5-16.5-17.5-20.5 cm [6,1"-6,5"-6,9"-8,1"]. Now knit foot. When piece measures 22-23-24-27 cm [8,7"-9,1"-9,45"-10,6"]ending on a WS row, K4, K2tog, K to last 6 sts, K2tog, K4 = 23-25-25-27 sts. Work until piece measures 28-29-31-34 cm [11"-11,4"-12,2"-13,4"] ending on a WS row. Next row: K4, K2tog, K to last 6 sts, K2tog, K4 = 21-23-23-25 sts. Work 1 row. Repeat last 2 rows = 19-21-21-23 sts once more. Work until piece measures approx 32.5-35.5-37.5-40.5 cm [12,8"-14"-14,8"-15,95"] ending on a WS row. (only 3 rows are left). K5, K2tog, K to last 7 sts, K2tog, K5 = 17-19-19-21 sts. Work 1 row. Next row: K2, K2 tog twice, K5-7-7-9 sts, K2tog twice, K2 = 13-15-15-17 sts. On next row bind off, piece measures approx 35-38-40-43 cm [13.8"-15"-15.75"-16.9"]. Assembly: The slipper is assemblied with WS out. Fold the foot part RS towards RS and sew the seam mid upon foot from the WS in the most outer sts. Lay the toe flat with the upper foot seam centered on top and sew toe together in most outer sts. Heel edge: Fold the edge at the heel towards the 3rd st on RS and sew it tight to atchive a bulky edge around the heel. FELTING: The piece can be felted either in the washing machine or the tumble dryer – read description below. Remember: Subsequent washes are as for a normal wool garment. IN WASHING MACHINE: Washing machines will vary when felting. If the piece is not felted enough, it can be felted again. If it is felted too much, it can be stretched to the correct size while still wet. DO THE FOLLOWING: Lay the piece in the washing machine, using a programme of approx. 40 minutes (not a wool programme). Wash at 40 degrees without pre-wash, detergent is optional. After washing, shape the piece while it is still wet. IN TUMBLE DRYER: Felting in a tumble dryer gives good control over the degree of felting. The tumble dryer can be opened during drying to check the size of the piece. If it is not felted enough it can be thoroughly wetted and felted again. If it is felted too much it can be stretched to the correct size while still wet. DO THE FOLLOWING: Lay the piece in water so it becomes completely wet, then place it in the tumble dryer and begin the drying process. Dry to the desired size, checking regularly. Pompom: Make a Pompom with a diameter of approx 5-6 cm in Snow – do not felt this. Sew onto mid top of slipper. |
|
Have you finished this pattern?Tag your pictures with #dropspattern #rubyslippers or submit them to the #dropsfan gallery. Do you need help with this pattern?You'll find 11 tutorial videos, a Comments/Questions area and more by visiting the pattern on garnstudio.com. © 1982-2026 DROPS Design A/S. We reserve all rights. This document, including all its sub-sections, has copyrights. Read more about what you can do with our patterns at the bottom of each pattern on our site. |
|


With over 40 years in knitting and crochet design, DROPS Design offers one of the most extensive collections of free patterns on the internet - translated to 17 languages. As of today we count 324 catalogues and 12290 patterns translated into English (UK/cm).
We work hard to bring you the best knitting and crochet have to offer, inspiration and advice as well as great quality yarns at incredible prices! Would you like to use our patterns for other than personal use? You can read what you are allowed to do in the Copyright text at the bottom of all our patterns. Happy crafting!
Post a comment to pattern DROPS 104-10
We would love to hear what you have to say about this pattern!
If you want to leave a question, please make sure you select the correct category in the form below, to speed up the answering process. Required fields are marked *.