
Popular categories
Looking for a yarn?


Comments / Questions (4)
![]() Kirsten wrote:
Kirsten wrote:
Das habe ich schon gemacht. Vorher hatten die Handschuhe die Größe, die einem Kindergarten Kind passen würden...☺️jetzt passen sie immerhin einem Schulkind.
15.01.2025 - 18:44
![]() Kirsten wrote:
Kirsten wrote:
Die Fäustlinge sind nach dem Waschen leider so sehr geschrumpft, dass sie nur noch einen Grundschulkind passen, obwohl ich genau nach Anleitung gefilzt habe. Was habe ich falsch gemacht?
15.01.2025 - 14:54DROPS Design answered:
Liebe Kirsten, wenn das Teil zu kräftig gefilzt wurde und deshalb zu klein geraten ist: Das Teil noch feucht auf das passende Maß ziehen (ggf. etwas kräftiger); falls das Teil schon getrocknet ist, es vorher gut durchfeuchten und dann auf das passende Maß ziehen.hier sehen Sie, wie man es vermeidet, daß der Daumen beim Filzen zusammenfilzt. Hoffentlich kann das Ihnen helfen.
15.01.2025 - 16:14
![]() Wiktoria wrote:
Wiktoria wrote:
Dzień dobry, mam pytanie do dodawania oczek na klinek kciuka. W rozmiarze S/M poprzez narzuty na klinek kciuka trzeba dodać 8 oczek. Natomiast we wzorze napisane jest aby dodawać tak samo z każdej strony poprzednio dodanych oczek, co brzmi jakbyśmy po pierwszym dodawaniu oczek z prawej i lewej strony makera, przy kolejnym dodawaniu mieli dodać oczka z lewej i prawej strony oczka które dodaliśmy po lewej i jeszcze dodać po prawej i lewej stronie od oczka dodanego po prawej
06.09.2024 - 14:35DROPS Design answered:
Witaj Wiktorio, dodajesz oczka po prawej stronie pierwszego z dodanych oczek i po lewej stronie ostatniego z dodanych oczek. Zobacz film TUTAJ - uwaga: na filmie te oczka są dodawane co 2 okrążenia, we wzorze, który wykonujesz robisz to co 4 okrążenia. Pozdrawiamy!
10.09.2024 - 10:43
![]() Vanessa Castleberry wrote:
Vanessa Castleberry wrote:
Warm and cozy mittens
04.08.2023 - 16:06
|
|
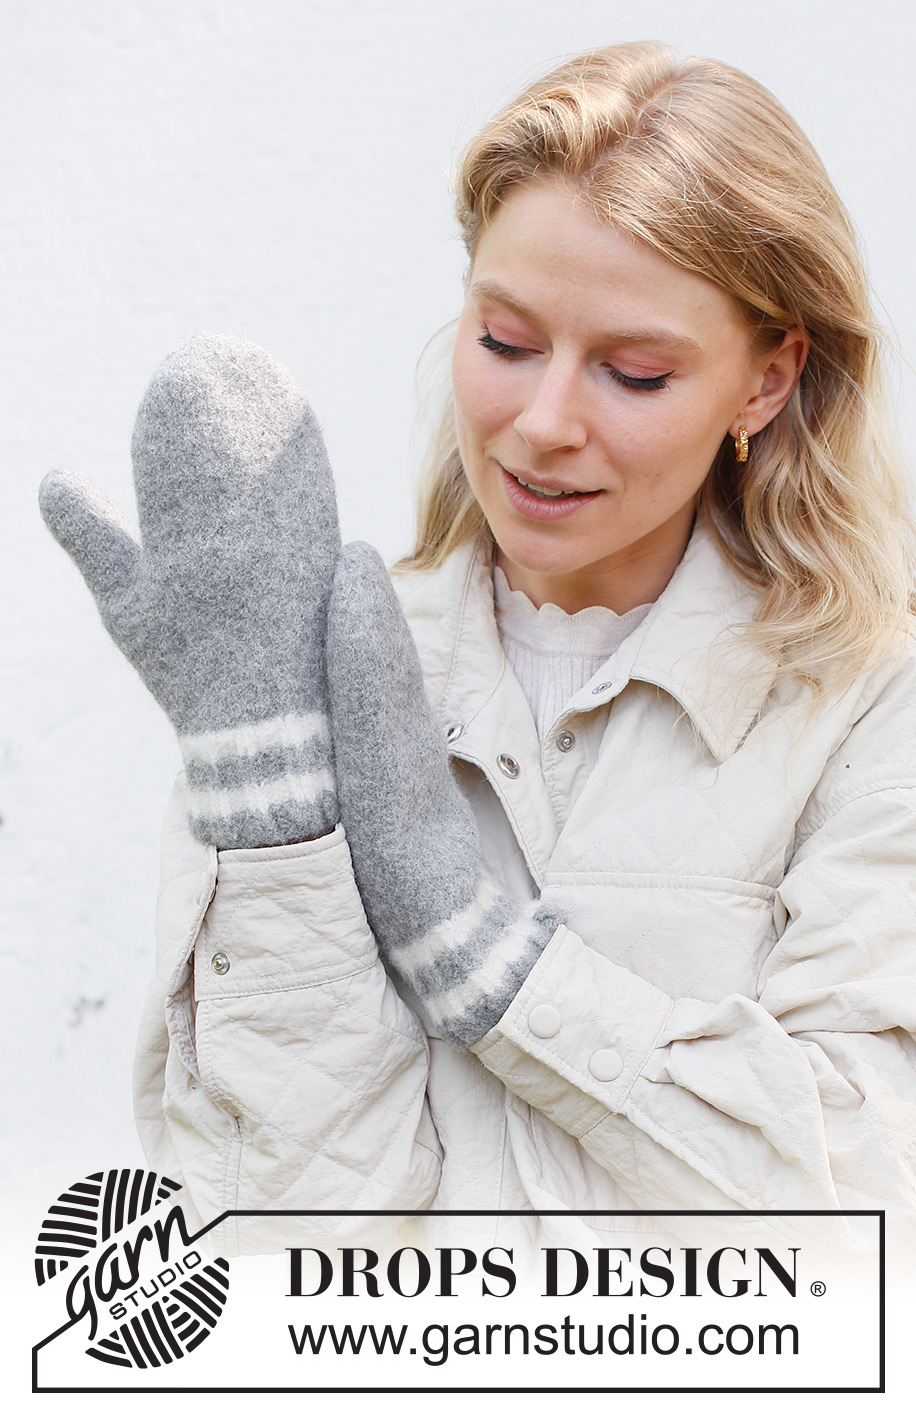
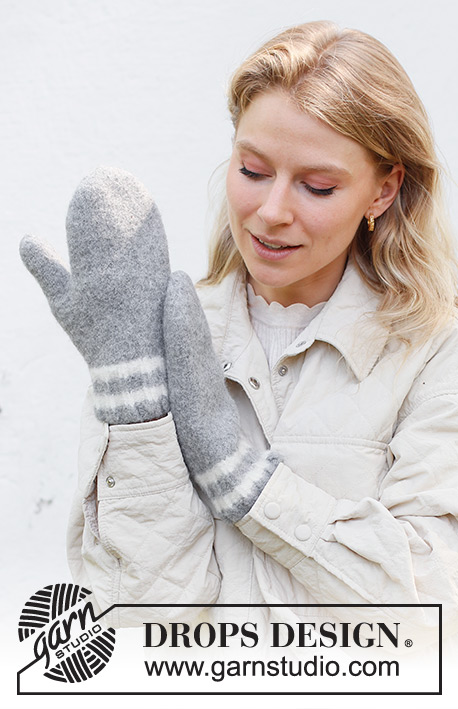
Grey Day Mittens#greydaymittens |
|
 |
 |
Knitted and felted mittens in DROPS Lima.
DROPS 242-50 |
|
|
------------------------------------------------------- EXPLANATIONS FOR THE PATTERN: ------------------------------------------------------- STRIPES (for rib): 5 rounds with colour grey 5 rounds with colour off white 5 rounds with colour grey 5 rounds with colour off white Finish with colour grey DECREASE TIP: Start 3 stitches before the stitch with a marker, knit 2 together, knit 3 (marker sits in the middle stitch), slip 1 stitch knit-wise, knit 1 and pass the slipped stitch over the knitted stitch (2 stitches decreased). INCREASE TIP (for thumb-gusset): Increase by making 1 yarn over, which is knitted twisted on the next round. ------------------------------------------------------- START THE PIECE HERE: ------------------------------------------------------- MITTENS - SHORT OVERVIEW OF THE PIECE: The piece is worked in the round with double pointed needles, bottom up. When finished the mittens are felted in the washing machine. LEFT MITTEN: Cast on 48-54 stitches with double pointed needles size 4.5 mm and DROPS Lima colour grey. Work rib in the round (knit 3 twisted, purl 3) and STRIPES – see description above. When the piece measures 2 cm, decrease as follows: *Knit 1 twisted, knit 2 twisted together, purl 3, * work from *-* to the end of the round = 40-45 stitches. Continue the new rib (knit 2 twisted, purl 3) until the rib measures 8 cm and the stripes are finished. Insert 1 marker in the last stitch on the round. Continue with stocking stitch and colour grey and increase for the thumb-gusset by increasing 1 stitch on each side of the marker-stitch - read INCREASE TIP! Increase like this on the outside of the previously increased stitches, every 4th round a total of 4-6 times = 48-57 stitches. REMEMBER THE KNITTING TENSION! When the piece measures 16-17 cm (the increases should be finished), place the marker-stitch + the increased stitches + 1 stitch on each side of these on a stitch holder = 11-15 stitches for the thumb. Continue with stocking stitch in the round and cast on 3 stitches over the stitches on the stitch holder = 40-45 stitches. Work until the mitten measures 11½-12 cm from the cast-on stitches by the thumb opening. The piece measures 27½-29 cm from the cast-on edge. Insert 1 marker in the first stitch and 1 marker after in the 21st-23rd stitch. On the first round decrease 1 stitch on each side of both markers (4 stitches decreased) – read DECREASE TIP. Decrease like this every 2nd round a total 5-4 times then every round 3-5 times = 8-9 stitches. Cut the strand, pull it through the remaining stitches, tighten and fasten well. The mitten measures approx. 32½-34 cm. THUMB: Place the 11-15 thumb-gusset stitches on double pointed needles size 4.5 mm. Knit up 1 stitch in each of the 3 stitches cast on behind the thumb = 14-18 stitches. Work stocking stitch in the round for 5-6 cm. Knit 1 round and decrease 3 stitches evenly spaced = 11-15 stitches. Work 3 rounds without decreasing. Knit 1 round and decrease 3-5 stitches evenly = 8-10 stitches. Continue working until the thumb measures 7½-8½ cm. Work 1 round where all stitches are knitted together 2 and 2 = 4-5 stitches. Cut the strand, pull it through the remaining stitches, tighten and fasten well. RIGHT MITTEN: Cast on 48-54 stitches with double pointed needles size 4.5 mm and DROPS Lima colour grey. Work rib in the round (knit 3 twisted, purl 3) and STRIPES. When the piece measures 2 cm, decrease as follows: * Knit 1 twisted, knit 2 twisted together, purl 3 *, work from *-* to the end of the round = 40-45 stitches. Continue the new rib (knit 2 twisted, purl 3) until the rib measures 8 cm and the stripes are finished. Insert 1 marker in the first stitch on the round. Continue with stocking stitch and colour grey and increase for the thumb-gusset by increasing 1 stitch on each side of the marker-stitch - remember INCREASE TIP! Increase like this on the outside of the previously increased stitches, every 4th round a total of 4-6 times = 48-57 stitches. When the piece measures 16-17 cm (the increases should be finished), place the marker-stitch + the increased stitches + 1 stitch on each side of these on a stitch holder = 11-15 stitches for the thumb. Continue with stocking stitch in the round and cast on 3 stitches over the stitches on the stitch holder = 40-45 stitches. Work until the mitten measures 11½-12 cm from the cast-on stitches by the thumb opening. The piece measures 27½-29 cm from the cast-on edge. Insert 1 marker in the 21st-23rd stitch and 1 marker in the last stitch. On the first round decrease 1 stitch on each side of both markers (4 stitches decreased) – remember DECREASE TIP. Decrease like this every 2nd round a total 5-4 times then every round 3-5 times = 8-9 stitches. Cut the strand, pull it through the remaining stitches, tighten and fasten well. The mitten measures approx. 32½-34 cm. Work the thumb in the same way as the left thumb. FELTING: To avoid the thumb being felted to the mitten, turn it inside out and fasten a small plastic bag/silk ribbon over the top of the thumb with a safety pin. The opening of the safety pin should point towards the tip of the thumb so it is easy to remove after felting. Turn the mitten back to the right side, with the bag/ribbon inside the thumb. The piece can be felted either in the washing machine or the tumble dryer – read description below. Remember: Subsequent washes are as for a normal wool garment. IN WASHING MACHINE: Washing machines will vary when felting. If the piece is not felted enough, it can be felted again. If it is felted too much, it can be stretched to the correct size while still wet. DO THE FOLLOWING: Lay the piece in the washing machine and use a programme of approx. 40 minutes (not a wool programme). Wash at 40 degrees without pre-wash, detergent is optional. After washing, shape the piece while it is still wet. IN TUMBLE DRYER: Felting in a tumble dryer gives good control over the degree of felting. The tumble dryer can be opened during drying to check the size of the piece. If it is not felted enough it can be thoroughly wetted and felted again. If it is felted too much it can be stretched to the correct size while still wet. DO THE FOLLOWING: Lay the piece in water so it becomes completely wet, then place it in the tumble dryer and begin the drying process. Dry to the desired size, checking regularly. |
|
Have you finished this pattern?Tag your pictures with #dropspattern #greydaymittens or submit them to the #dropsfan gallery. Do you need help with this pattern?You'll find 22 tutorial videos, a Comments/Questions area and more by visiting the pattern on garnstudio.com. © 1982-2026 DROPS Design A/S. We reserve all rights. This document, including all its sub-sections, has copyrights. Read more about what you can do with our patterns at the bottom of each pattern on our site. |
|


With over 40 years in knitting and crochet design, DROPS Design offers one of the most extensive collections of free patterns on the internet - translated to 17 languages. As of today we count 324 catalogues and 12290 patterns translated into English (UK/cm).
We work hard to bring you the best knitting and crochet have to offer, inspiration and advice as well as great quality yarns at incredible prices! Would you like to use our patterns for other than personal use? You can read what you are allowed to do in the Copyright text at the bottom of all our patterns. Happy crafting!
Post a comment to pattern DROPS 242-50
We would love to hear what you have to say about this pattern!
If you want to leave a question, please make sure you select the correct category in the form below, to speed up the answering process. Required fields are marked *.