
Popular categories
Looking for a yarn?


Comments / Questions (7)
![]() Arianna wrote:
Arianna wrote:
Buongiorno! In A3 nelle righe che non sono di diminuzione e in A2c nelle righe dopo la prima che viene mostrata, l’ultima maglia alta va fatta nell’ultima catenella (la 5* in A3 e la 3* in A2c) oppure dentro l’arco di catenelle? Grazie mille!
23.07.2024 - 07:01DROPS Design answered:
Buonasera Arianna, deve lavorare A.2 nell'arco. Buon lavoro!
09.08.2024 - 21:36
![]() Antonelli Antonella wrote:
Antonelli Antonella wrote:
Buonasera, sto realizzando il modello drops 240-10, ma non riesco a trovare la parte A.2, e' mancante o sono io che non capisco? gentilmente potreste aiutarmi? grazie, Antonella
22.08.2023 - 18:08DROPS Design answered:
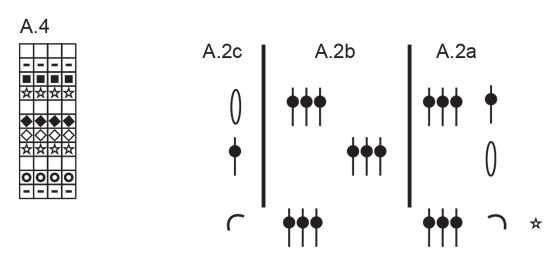
Buonasera Antonella, il diagramma A.2 è di fianco al diagramma A.4, sopra lo schema delle taglie. Buon lavoro!
22.08.2023 - 22:24
![]() Caro wrote:
Caro wrote:
Hallo liebes Drops Design Team, ich habe die Vorderseite erfolgreich gehäkelt. Nun komme ich bei den Seitenteilen nicht weiter. Ich verstehe nicht wie ich beginnen soll (A.2a) und wie die Reihe abgeschlossen wird ( A.2c). Auch eure Hilfe zur Hakelschrift konnen mir leider nicht helfen. Ich freue mich wenn ihr mir einen Tipp geben könnt damit ich dieses wunderschöne top doch noch fertig häkeln kann. Herzlichen Dank im Voraus :) Gruß Caro
17.06.2023 - 16:20DROPS Design answered:
Liebe Caro, die Reihe mit dem Sternchen zeigt die letzte Reihe vom Quadrat; dann häkelnSie A.2a =3 Luftmaschen um den Lm-Bogen in der Ecke; wierdholen Sie A.2b (= 3 Stb zwischen den Stb-Gruppen von vorrigen Runde, dh wie zuvor) und enden Sie die Reihe mit A.2c = 1 Stäbchen in die nächste Ecke/um die Luftmaschenbogen; bei den Rückreihen häkeln Sie A.2c am Anfang der Reihe, dann wiederholen Sie A.2b und enden Sie mit A.2a. Viel Spaß beim häkeln!
19.06.2023 - 08:34
![]() Emily wrote:
Emily wrote:
Hi, where is chart A2? the side portion is very confusing
19.05.2023 - 01:13DROPS Design answered:
Dear Emily, you will find diagrams A.2 just above measurement chart, next to the diagram A.4 (for stripes) - you will just work with dc groups as before but only along one side of square, starting with A.2a, repeating A.2b and ending with A.2c from right side (start with A.2c and end with A.2a from wrong side). Happy crocheting!
19.05.2023 - 08:48
![]() Karolina wrote:
Karolina wrote:
If made with only one colour, how many grams of DROPS Paris are needed?
06.05.2023 - 22:06DROPS Design answered:
Dear Karolina, you'd need approx. 150-200gr for the smallest size and 250-300 for the larger sizes. Take into account that for these approximate measurements we are using the gauge of the pattern; if your gauge is different you may need more or less yarn. Happy crocheting!
07.05.2023 - 13:27
![]() Vanessa wrote:
Vanessa wrote:
I'm unable to see the diagram A2, how many rows do I have to make for the side section? Thanks
24.04.2023 - 08:55DROPS Design answered:
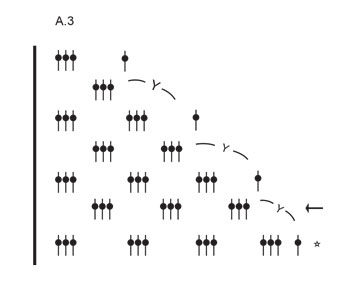
Dear Vanessa, you should work a total of 16-18-20-22-24-26 rows with A.2 (decreasing until 4 double crochets groups (US-English) remain), this should measure approx. 19-21-24-26-28-31 cm; continue A.2 without decreasing in the 3 larger sizes. Happy crocheting!
24.04.2023 - 10:31
![]() Amber wrote:
Amber wrote:
Summer dream
18.01.2023 - 21:00
|
|||||||||||||||||||||||||||||||||||||||||||||||||
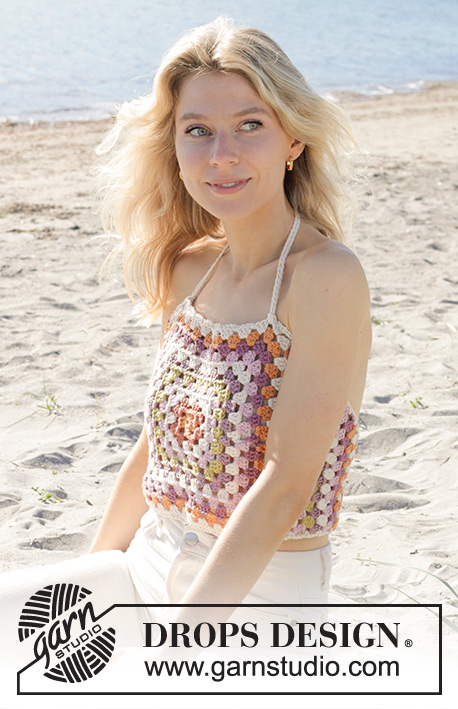
Stained Glass Top#stainedglasstop |
|||||||||||||||||||||||||||||||||||||||||||||||||
 |
 |
||||||||||||||||||||||||||||||||||||||||||||||||
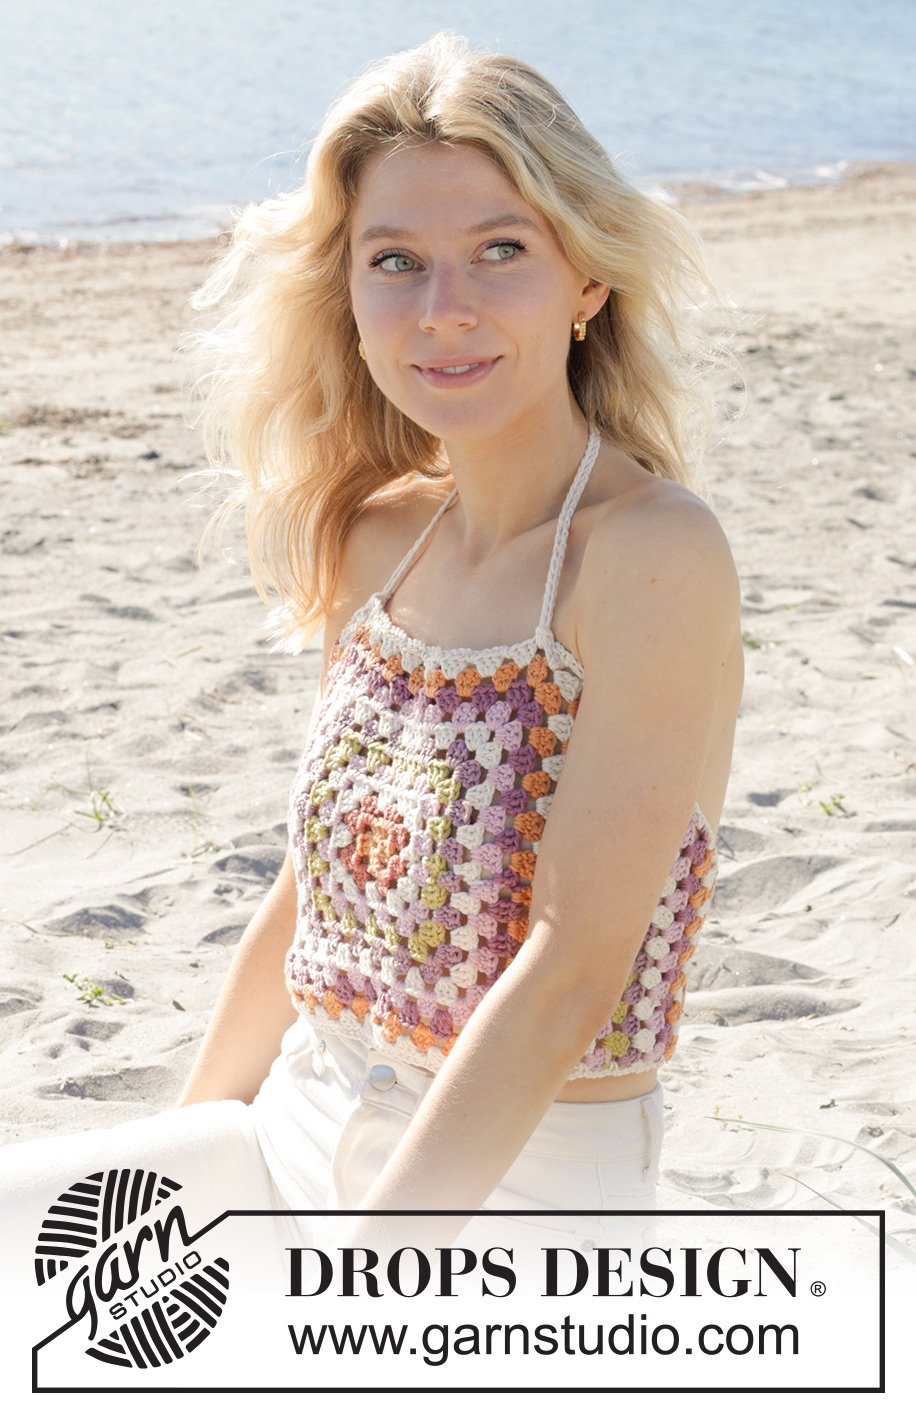
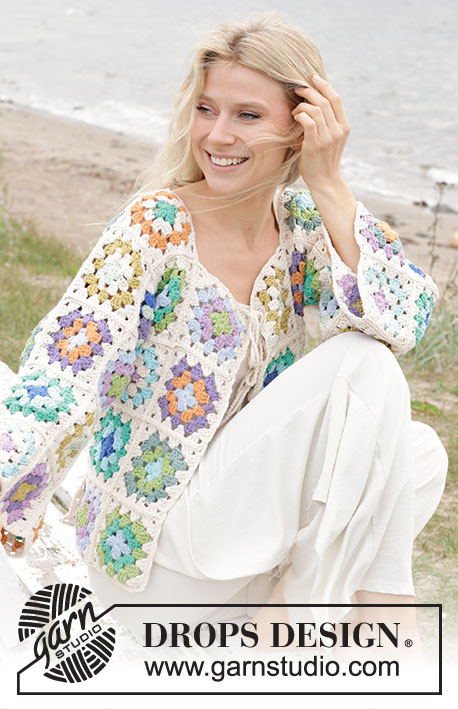
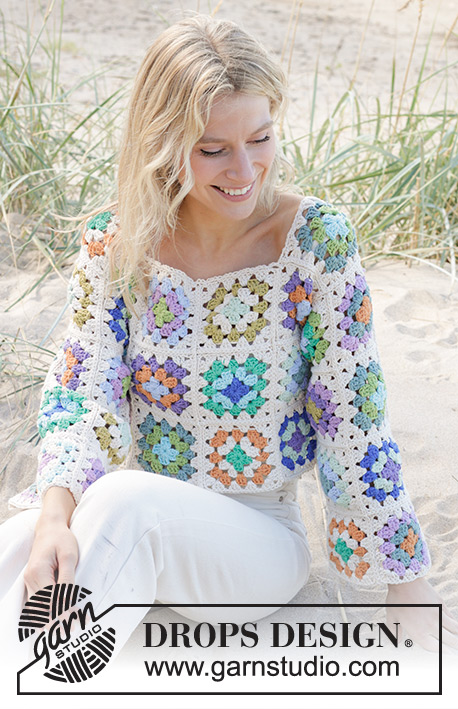
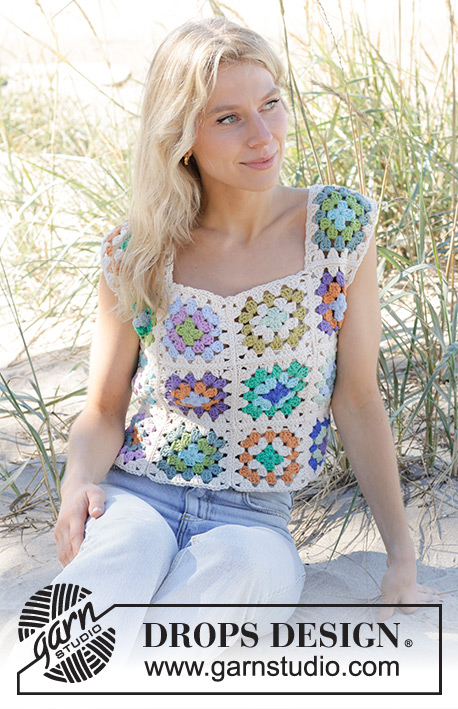
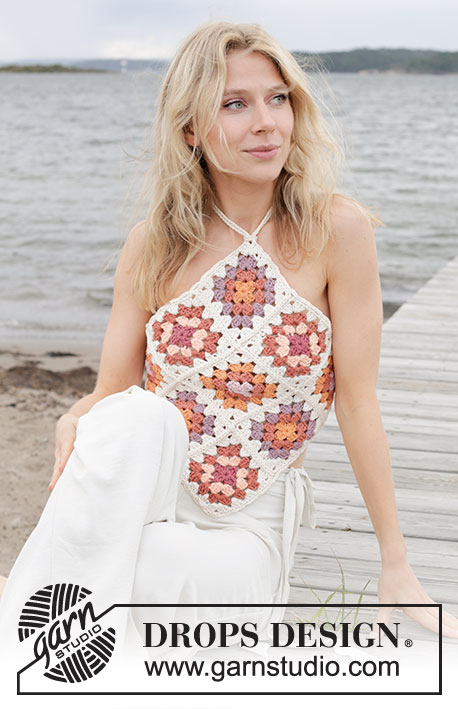
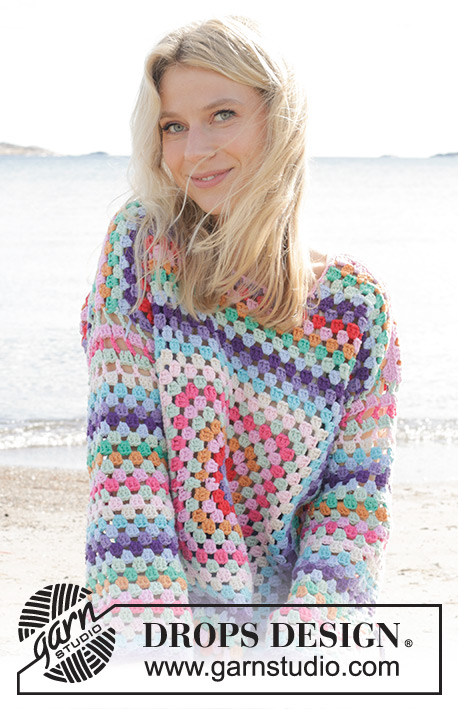
Crocheted top with square in DROPS Paris. The piece is worked from the middle out with stripes. Sizes S - XXXL.
DROPS 240-10 |
|||||||||||||||||||||||||||||||||||||||||||||||||
|
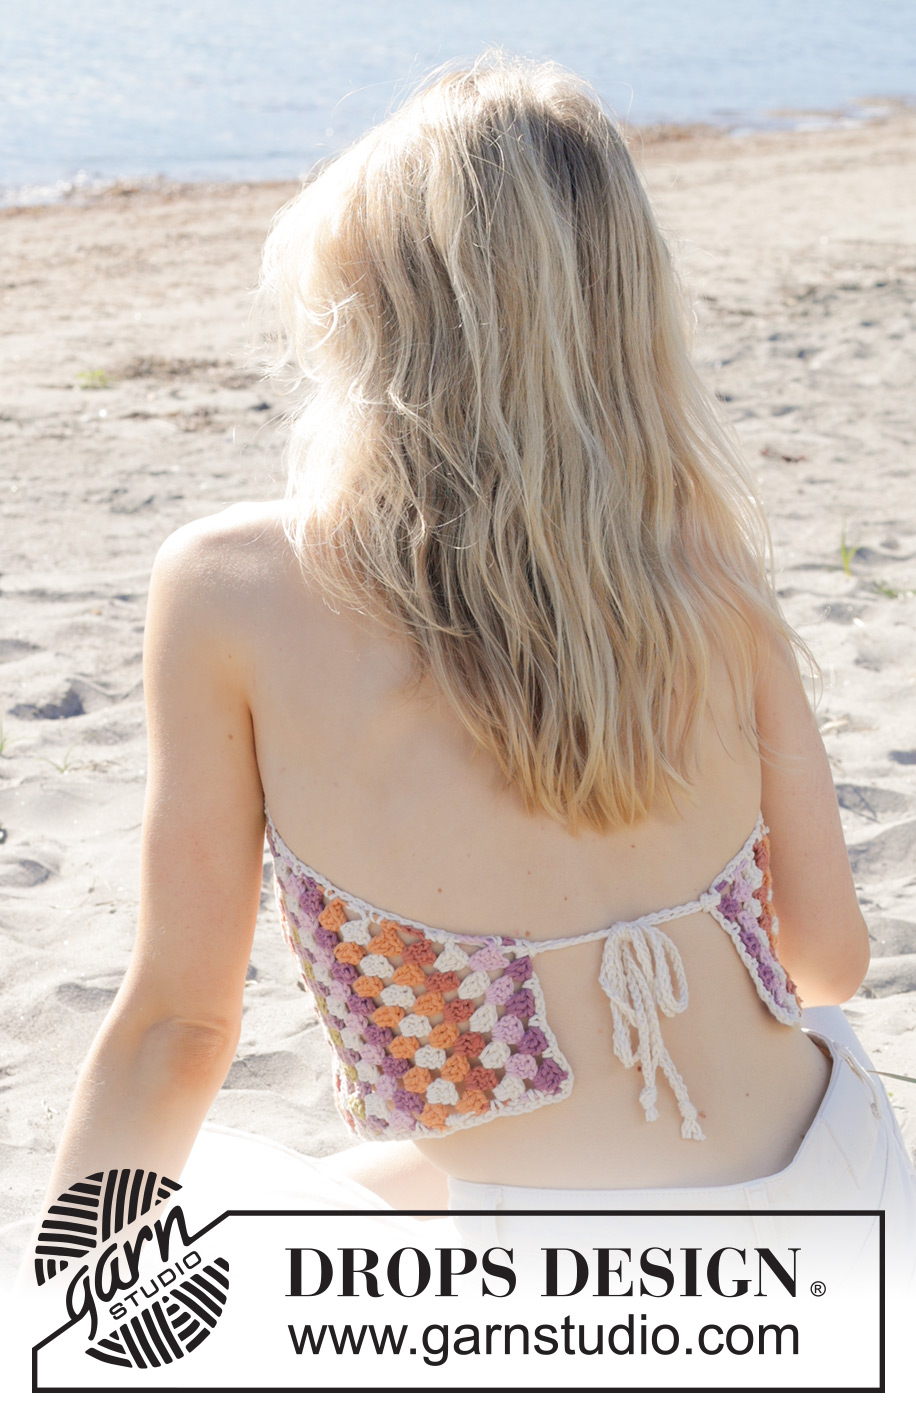
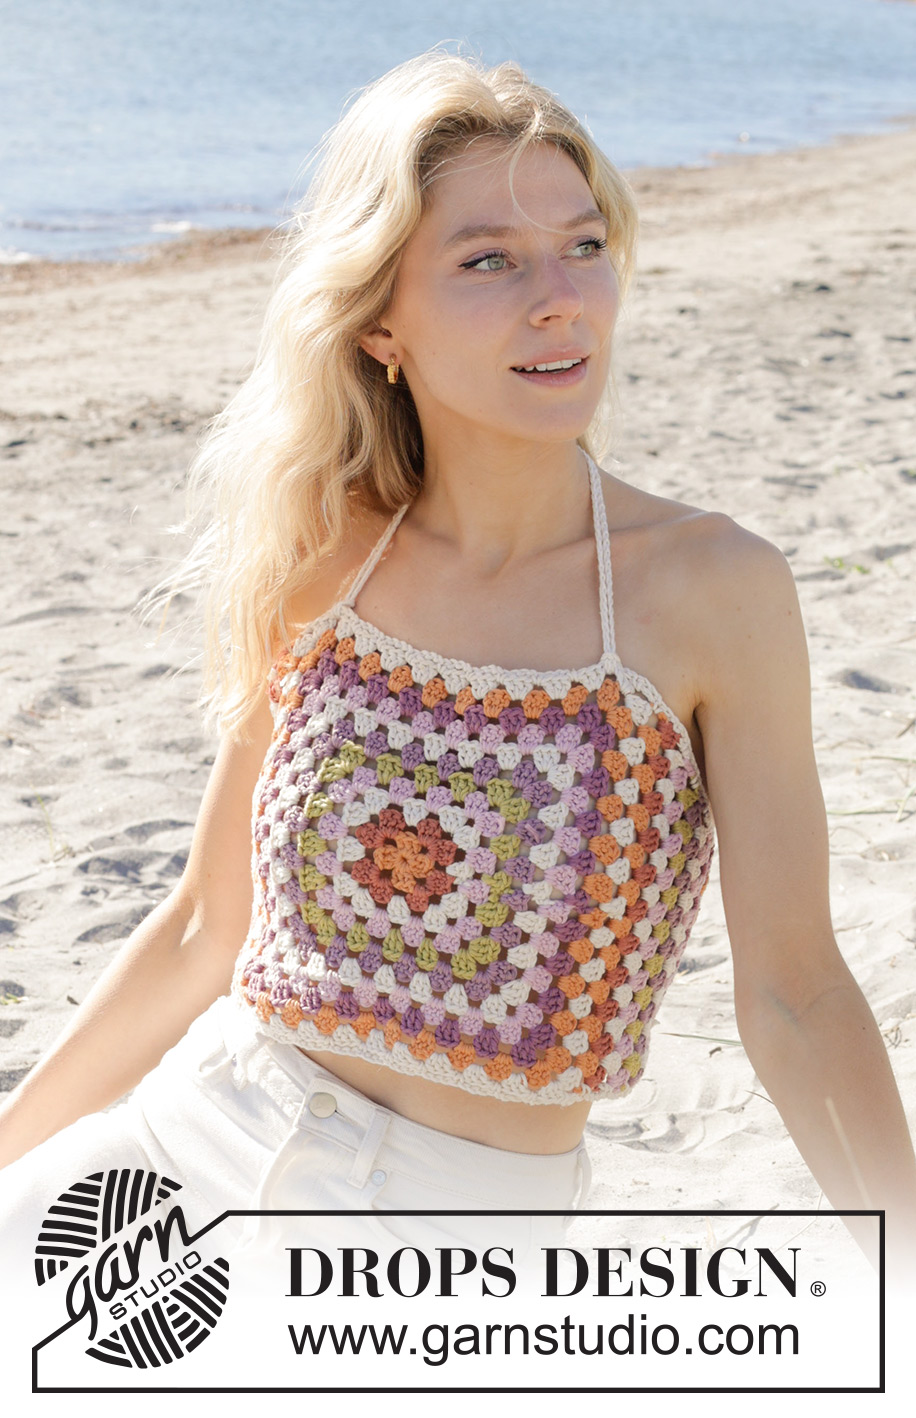
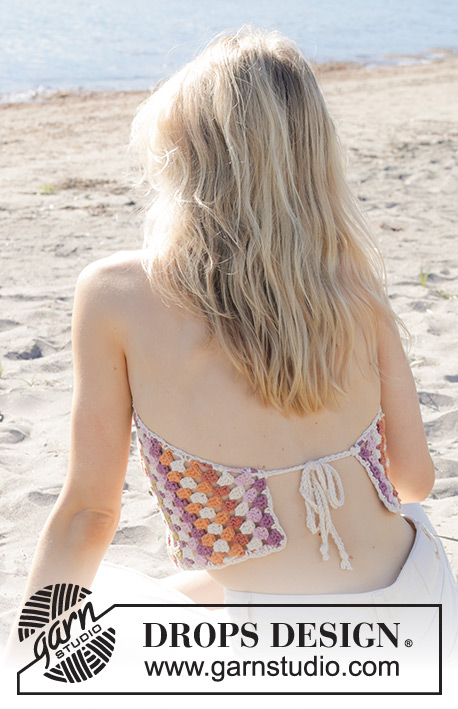
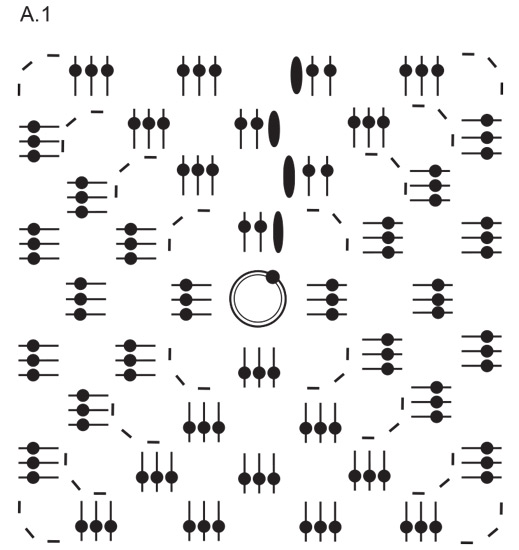
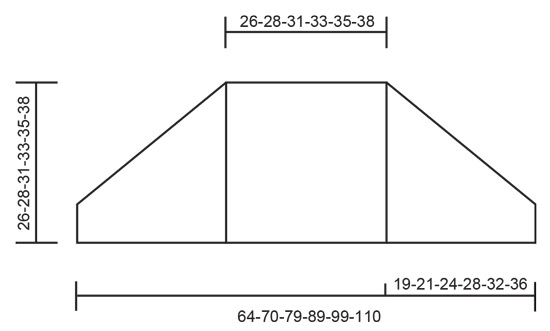
------------------------------------------------------- EXPLANATIONS FOR THE PATTERN: ------------------------------------------------------- CHAIN STITCH: If you work outermost on the hook the chain stitch will often be too tight; 1 chain stitch should be as long as 1 treble crochet is wide. PATTERN: See diagrams A.1 to A.3. A.1 shows the first 4 rows in the pattern. A.2 shows the pattern on each side of the square when working back and forth. A.3 shows decreases. STRIPES: See diagram A.4. 1 row in A.4 = 1 round/row in A.1/A.2/A.3. CROCHET INFORMATION: At the beginning of each round/row of treble crochets, work 3 chain stitches which replace the first treble crochet. When working in the round finish with 1 slip stitch in the 3rd chain stitch at the beginning of the round. CROCHET TIP: There is an opening mid-back of approx. 12-16 cm (depending on how tight the ties are). Try the top on and adjust the side sections to desired length as follows: LONGER SIDE SECTIONS: Continue A.2 back and forth over the 4 treble-crochet groups to desired length. SHORTER SIDE SECTIONS: Finish the pattern at desired length; in some sizes you will be left with more than 4 treble-crochet groups at the end of the row. ------------------------------------------------------- START THE PIECE HERE: ------------------------------------------------------- TOP – SHORT OVERVIEW OF THE PIECE: First 1 square is worked in the round and from the middle out. This is the front piece. Then side sections are worked back and forth on each side of the square. An edge is worked around the top and cords worked for the straps and ties mid-back. SQUARE: Work 4 CHAIN STITCHES – read description above, with hook size 5 mm and colour tangerine DROPS Paris. Form them into a ring with 1 slip stitch in the last chain stitch. Read CROCHET INFORMATION and work A.1 in the round, alternately working 1 round from the right side and 1 round from the wrong side - AT THE SAME TIME work STRIPES – read description above. REMEMBER THE CROCHET TENSION! NOTE: The first 4 rounds are drawn in A.1. When A.1 is finished continue in the same way until you have worked 10-11-12-13-14-15 rounds (A.4 is repeated in height). Work a final round with colour off white. Cut and fasten the strands. The square measures approx. 26-28-31-33-35-38 cm along each side. SIDE SECTION: Work back and forth along the side of the square which has the beginning of the round (so this is hidden). Continue the stripes as shown in A.4, repeating them to finished length. Start from the right side in the corner-space and work from top to bottom as follows: Work A.2a, A.2b as far as the next corner-space, work A.2c in the corner-space, turn. Work back as shown in A.2 (remember to change colour). Now start to decrease on one side of the side section, working as follows from the right side: A.3 (start on row with arrow), continue A.2b until there is 1 stitch left, A.2c. Continue this pattern back and forth until there are 4 treble-crochet groups left on the row = 16-18-20-22-24-26 rows. The side section measures approx. 19-21-24-26-28-31 cm and is finished in sizes S, M and L – read CROCHET TIP. SIZES XL, XXL, XXXL: Work A.2 back and forth over the 4 treble-crochet groups until the side section measures 28-32-36 cm – read CROCHET TIP. Work a side section in the same way along the other side of the square, from top to bottom but starting from the wrong side so the decreases match. EDGE: Start in one corner of the piece and work an edge, using hook size 5 mm and colour off white as follows: 1 double crochet in first stitch, * 4 chain stitches, skip 2 cm, 1 double crochet around the next treble crochet/between 2 treble-crochet groups *, work from *-* around the top, finishing with 4 chain stitches and 1 slip stitch in the first double crochet on the round. TIES ON NECK: Work a row of chain stitches, 100-100-110-110-120-120 cm long, with hook size 5 mm and colour off white. Fold the cord double and tie a knot in the end. Thread the loop through one corner-space at the top of the square or between 2 treble-crochet groups outermost on the corner (try the top on and position them as you wish), pull the ends through the loop. Make 1 more cord and fasten it to the corner-space/between 2 treble-crochet groups outermost on the other corner. The ties are tied behind the neck. TIES MID-BACK: Work a row of chain stitches, 70-75-80-85-90-95 cm long, with hook size 5 mm and colour off white. Fold the cord double and tie a knot in the end. Thread the loop through the corner at the top of the side section mid-back and pull the ends through the loop. Make 1 more cord and fasten it around the corner at the top of the other side section. The ties are tied mid-back. |
|||||||||||||||||||||||||||||||||||||||||||||||||
Diagram explanations |
|||||||||||||||||||||||||||||||||||||||||||||||||
|
|||||||||||||||||||||||||||||||||||||||||||||||||
 |
|||||||||||||||||||||||||||||||||||||||||||||||||
 |
|||||||||||||||||||||||||||||||||||||||||||||||||
 |
|||||||||||||||||||||||||||||||||||||||||||||||||
 |
|||||||||||||||||||||||||||||||||||||||||||||||||
Have you finished this pattern?Tag your pictures with #dropspattern #stainedglasstop or submit them to the #dropsfan gallery. Do you need help with this pattern?You'll find 10 tutorial videos, a Comments/Questions area and more by visiting the pattern on garnstudio.com. © 1982-2026 DROPS Design A/S. We reserve all rights. This document, including all its sub-sections, has copyrights. Read more about what you can do with our patterns at the bottom of each pattern on our site. |
|||||||||||||||||||||||||||||||||||||||||||||||||


With over 40 years in knitting and crochet design, DROPS Design offers one of the most extensive collections of free patterns on the internet - translated to 17 languages. As of today we count 324 catalogues and 12290 patterns translated into English (UK/cm).
We work hard to bring you the best knitting and crochet have to offer, inspiration and advice as well as great quality yarns at incredible prices! Would you like to use our patterns for other than personal use? You can read what you are allowed to do in the Copyright text at the bottom of all our patterns. Happy crafting!
Post a comment to pattern DROPS 240-10
We would love to hear what you have to say about this pattern!
If you want to leave a question, please make sure you select the correct category in the form below, to speed up the answering process. Required fields are marked *.