Comments / Questions (33)
![]() Denise Kelly wrote:
Denise Kelly wrote:
Is it yo k2tog, k1 yo slp1k1?
27.01.2022 - 17:21DROPS Design answered:
Dear Mrs Kelly, which row are you describing here? Have you read this lesson here to help you understanding how to read diagrams?
27.01.2022 - 17:45
![]() Denise Kelly wrote:
Denise Kelly wrote:
Is A1 A2 A3 the whole pattern? Or are they split ? I want this pattern written out. Is the back A2 then the sides A1 and A3?
08.01.2022 - 18:05DROPS Design answered:
Dear Mrs Kelly, A.1 shows how to start the lace pattern from RS, then you repeat A.2 over the number of sts stated (11 to 16 times on back piece for example) and end the lace pattern with A.3 (depending on the size you will start and end the row with more stitches). This lesson explains how to read diagrams and will help you to follow them. Happy knitting!
10.01.2022 - 08:11
![]() Katia wrote:
Katia wrote:
Bedankt voor je antwoord maar hoe moet ik dan verder breien aan de voorpanden als ik het achterpand heb afgewerkt. Daar hangt dan toch geen werkdraad meer aan? Ik vind nergens daar iets over terug. Waarschijnlijk een domme vraag en simpel op te lossen maar ik heb geen idee hoe ;-) Nogmaals bedankt voor je reactie. Katia
06.01.2022 - 10:07DROPS Design answered:
Dag Katia,
Je kan met een nieuwe bol of nieuwe draad beginnen als je verder breit aan het voorpand.
06.01.2022 - 10:39
![]() Katia wrote:
Katia wrote:
Hallo, ik ben dit patroon aan het breien maar ik kan niet verder; ik begrijp iets niet. Ik ben op het punt dat ik net de 10 steken aan elke kant voor de armsgaten heb afgekant. Ik denk te begrijpen dat ik nu eerst het achterpand apart moet afwerken terwijl de steken van de voorpanden gewoon op de naald blijven? Tot daar ben ik mee maar wat als dat achterpand klaar en afgekant is? Hoe kan ik dan verder breien aan 1 van de 2 voorpanden? Er hangt immers geen werkdraad mee aan. Bedankt
04.01.2022 - 23:05DROPS Design answered:
Dag Katia,
Je kan de steken van de voorpanden even tijdelijk op een andere naald of stekenhouder zetten, zodat je makkelijker het achterpand kunt breien. Nadat je beide schouders van het achterpand hebt afgekant kun je het linker voorpand gaan breien.
06.01.2022 - 09:39
![]() Alie Kiers wrote:
Alie Kiers wrote:
Ik wil maat XL breien. Maar kom in de steken verhouding van 'lijf niet uit. Als ik het eerste patroonrij wil breien, begin ik met 10 tricotsteken . Dat betekent dus, dat ik het eind van de pen 4 steken over houdt. Klopt dit? Maar S,M en L hebben telkens 14 steken verschil. Dat vind ik in de volgende maat niet terug Hoe los ik dit verder op .... Vriendelijke groet Aly Kiers
17.02.2021 - 19:24DROPS Design answered:
Dag Alie,
Wanneer je begint met het patroon heb je 211 steken op de naald. Je breit 6 voorbiessteken, 3 steken in tricotsteek, 5 steken A.1, 182 steken in A.2, 6 steken A.3, 3 steken in tricotsteek en 6 voorbiessteken. Hiermee kom je op een totaal van 211 steken.
21.02.2021 - 11:15
![]() Aly Kiers wrote:
Aly Kiers wrote:
Als ik het eerste patroonrij wil breien, begin ik met 10 tricotsteken . Dat betekent dus, dat ik het eind van de pen 3 steken over houdt. Klopt dit? Elke patroonlijn heeft dus 21
17.02.2021 - 15:44DROPS Design answered:
Dag Aly,
Je breit eerst 6 voorbiessteken (2 ribbelsteek, 2 recht, 2 averecht), dan 0-0-0-3-0-2 steken in tricotsteek, dan A.1, daarna herhaal je A.2 steeds in de breedte (over het aantal steken zoals aangegeven in jouw maat). Tot slot brei je A.3 ,dan 0-0-0-3-0-2 steken in tricotsteek en weer 6 voorbiessteken.
21.02.2021 - 11:04
![]() Jenni Dorndorf wrote:
Jenni Dorndorf wrote:
Hallo, zeigt das Diagramm nur die Hinrunde oder auch die Rückrunde? Wenn nur die Hinrunde, stricke ich die Maschen in der Rückrunde so wie sie erscheinen?
22.01.2021 - 05:12DROPS Design answered:
Liebe Frau Dorndorf, die Diagramme zeigen alle Reihen, die Hin- sowie die Rückreihen. Rückreihen lesen Sie links nach rechts. Hier lesen Sie mehr über Diagramme. Viel Spaß beim stricken!
22.01.2021 - 08:13
![]() Ann Jakobsson wrote:
Ann Jakobsson wrote:
Nu har jag stickat 12 cm och maskat av i sidorna. Det innebär ju att jag har färre maskor på stickan när jag ska sticka nästa rad hålmönstrar i diagrammet. Framsidan stämmer men sen kommer hålmönstrat närmare hålmönstrat under. Då kommer de ju inte att ligga mitt i mellan varandra? Jag ska minska flera gånger i sidan och då kommer väl hålmönstrat att ligga rakt över varandra tillslut?
05.10.2020 - 07:13DROPS Design answered:
Hej Ann, hulmønsteret skal være der det hele tiden har været, når du ikke har nok masker til et hulmønster i siden, så skal disse masker slätstickas. God fornøjelse!
07.10.2020 - 10:27
![]() Edith wrote:
Edith wrote:
I need help understanding this part of the pattern: Work 2 stitches in garter stitch, knit 2, purl 2 (= band), knit and decrease 13-11-13-11-13-11 Does this mean I decrease a stitch every 13 and 11 stitches?
23.09.2020 - 07:04DROPS Design answered:
Dear Edith, you work this row as follows: 2 sts in garter stitch, knit 2, purl 2, then knit the next stitches until 6 sts remain but decrease evenly 11 or 13 sts (see your size) over these stitches (see how to decrease evenly here), and work the last 6 sts = purl 2, knit 2, 2 sts in garter stitch. Happy knitting!
23.09.2020 - 08:23
![]() Sabrina wrote:
Sabrina wrote:
Thank you for your response, but I am still unclear. If I decrease one stitch on each side of the markers as instructed, it leaves me with 81 stitches in the middle and 46 stitches on each side. Neither of these numbers can fit any of the lace pattern equally?
21.09.2020 - 19:31DROPS Design answered:
Dear Sabrina, you have to line up the pattern worked on each piece (front piece/back piece/front piece) ie skip the decreased sts as if they were worked in pattern (but work them in stocking stitch if you cannot work them with the lace pattern = every yarn over should be compensated by a decrease). This means you will work lace pattern over the stitches as before, but on the side, pattern will not fit anymore, the number of sts between each repeat will be here different, most important is that it fits in height. Which size are you working on?
22.09.2020 - 11:22
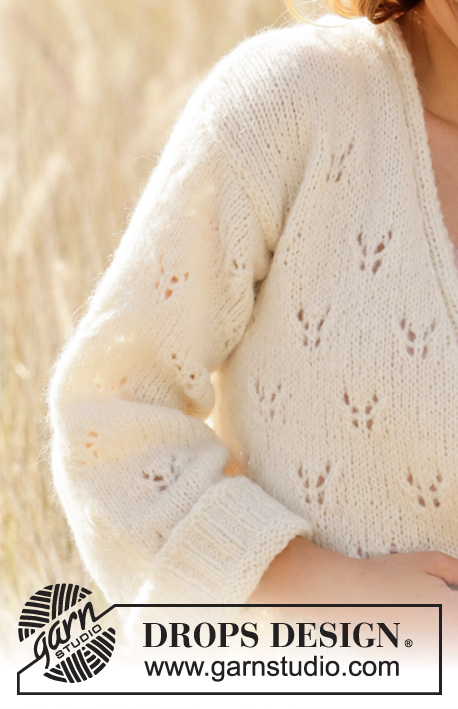
Dragonfly Wings Jacket#dragonflywingsjacket |
|||||||||||||
 |
 |
||||||||||||
Knitted long jacket in DROPS Air. Piece is knitted with lace pattern, shawl collar and V-neck. Size: S - XXXL
DROPS 212-27 |
|||||||||||||
|
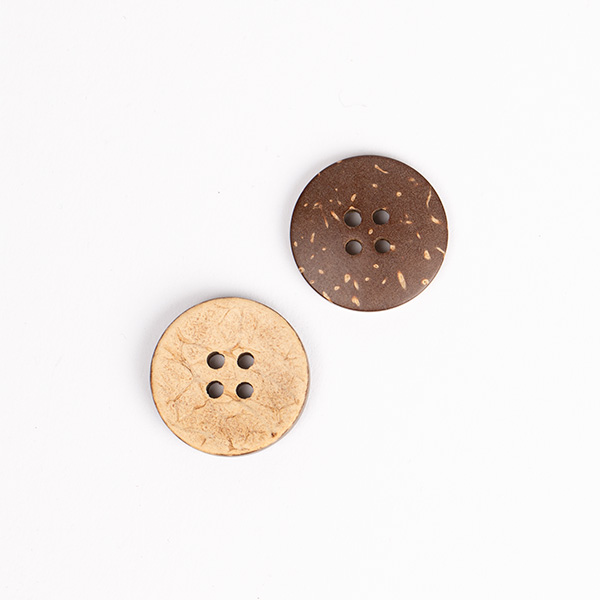
---------------------------------------------------------- EXPLANATION FOR THE PATTERN: ---------------------------------------------------------- GARTER STITCH (back and forth): Knit all rows. 1 ridge vertically = knit 2 rows. PATTERN: See diagrams A.1 to A.3. DECREASE TIP-1 (applies to sides): All decreases are done on a row from right side. Adjust to not decrease in the middle of a lace pattern, i.e. if there is a lace pattern right where decrease should be, decrease when lace pattern has been worked. Work until 4 stitches remain before marker thread in the side and knit 2 together, knit 4 (marker thread is in the middle of these stitches), slip 1 stitch knitwise, knit 1, pass slipped stitch over stitch worked. DECREASE TIP-2 (applies to V-neck): All decreases are done on a row from right side. Right front piece: Decrease at the beginning of row from right side: Work the 6 band stitches as before, slip 1 stitch knitwise, knit 1, pass slipped stitch over stitch worked. Left front piece: Decrease at the end of row from right side: Work until 8 stitches remain, knit 2 together, work the 6 edge stitches as before. CAST-OFF TIP: To avoid a tight cast-off edge you may use a larger needle. If this also is too tight, make 1 yarn over after approx. every 4th stitch and cast off these as regular stitches. BUTTONHOLES (bottom up): All decreases for buttonholes are done on a row from right side. Decrease for buttonholes on right band. 1 BUTTONHOLE = knit third and fourth stitch from edge together and make 1 yarn over. On next row (= from wrong side) purl yarn over = hole. Decrease for buttonholes when piece measures: S: 5, 14, 23, 31 and 39 cm M: 5, 14, 23, 32 and 41 cm L: 5, 14, 23, 32 and 41 cm XL: 5, 13, 21, 29, 36 and 43 cm. XXL: 5, 13, 21, 29, 36 and 43 cm. XXXL: 5, 13, 21, 29, 37 and 45 cm. ---------------------------------------------------------- START THE PIECE HERE: ---------------------------------------------------------- JACKET - SHORT OVERVIEW OF THE PIECE: Work body back and forth. Decrease stitches for V-neck, cast off stitches for armholes, and work front pieces and back piece separately until finished measurements. Work sleeves back and forth on needle. BODY: Cast on 190-202-218-222-246-262 stitches (including 6 band stitches in each side of piece) on circular needle size 4.5 mm with Air. Purl 1 row from wrong side. Then work rib as follows: Work 2 stitches in GARTER STITCH - read explanation above, * knit 2, purl 2 *, repeat from *-* until 4 stitches remain, finish with knit 2 and 2 stitches in garter stitch. When rib measures 5 cm, work next row from right side as follows: Work 2 stitches in garter stitch, knit 2, purl 2 (= band), knit and decrease 13-11-13-11-13-11 stitches evenly until 6 stitches remain, finish with purl 2, knit 2 and 2 stitches in garter stitches over band = 177-191-205-211-233-251 stitches. Switch to circular needle size 5.5 mm. Decrease for BUTTONHOLES on right band - read explanation above. Work 1 row from wrong side with knit over knit, purl over purl and garter stitch over garter stitch. Insert 1 marker thread 47-51-54-56-61-66 stitches in from each side, marker threads mark the sides of garment and should be used for decrease in each side later (= 83-89-97-99-111-119 stitches on back piece) On next row from right side work pattern as follows: Work 2 stitches in garter stitch, knit 2, purl 2 (= band), 0-0-0-3-0-2 stitches in stocking stitch, A.1 (= 5 stitches, work A.2 (= 14 stitches) over 154-168-182-182-210-224 stitches (= 11-12-13-13-15-16 times in width), A.3 (= 6 stitches), 0-0-0-3-0-2 stitches in stocking stitch and purl 2, knit 2, and 2 stitches in garter stitch over band. Continue pattern like this. REMEMBER THE KNITTING TENSION! READ ALL OF THE FOLLOWING SECTION BEFORE CONTINUING! Decrease stitches in each of the sides, decrease stitches for V-neck and cast off stitches for armholes as follows: If a whole lace pattern does not fit in width, work the remaining stitches in stocking stitch. DECREASE STITCHES IN THE SIDES AS FOLLOWS: When piece measures 12 cm, decrease 1 stitch on each side of each marker thread - read DECREASE TIP-1 (= 4 stitches decreased). Decrease like this every 4½-4½-5-5-5½-5½ cm 7 times in total. DECREASE STITCHES FOR V-NECK AS FOLLOWS: When piece measures 39-41-41-43-43-45 cm, begin decrease for V- neck on next row from right side as follows: Decrease 1 stitch inside 6 band stitches – read DECREASE TIP-2. Decrease like this every 4th row 6-5-7-7-8-8 times and every other row 8-11-8-9-8-9 times (= 14-16-15-16-16-17 stitches decreased in total). CAST OFF STITCHES FOR ARMHOLES AS FOLLOWS: When piece measures 43-44-45-46-47-48 cm, cast off stitches for armholes on next row from right side as follows: Cast off 3-4-5-5-5-6 stitches on each side of marker thread (= 6-8-10-10-10-12 stitches cast off for armholes in each side). Finish the part separately (continue to decrease for V-neck on front pieces). Cut the yarn. Leave the stitches for front pieces on needle while working over stitches on back piece. BACK PIECE: = 63-67-73-75-87-93 stitches. Continue pattern as before but work outermost stitch in each side in garter stitch. Work only lace pattern that fit in width, work the remaining stitches in stocking stitch. When piece measures 54-56-58-60-62-64 cm from cast-on edge, cast off the middle 25-27-27-27-29-29 stitches on next row from right side (= 19-20-23-24-29-32 stitches on each shoulder). Finish any started lace pattern vertically but do not work more repetitions vertically - work stitches in stocking stitch with 1 edge stitch in garter stitch in each side of piece onwards. Finish the shoulders separately. Cast off stitches on every row from the neck as follows: Cast off 1 stitch 2 times = 17-18-21-22-27-30 stitches. Cast off when piece measures 60-62-64-66-68-70 cm from cast-on edge. Work the other shoulder the same way. LEFT FRONT PIECE: Continue to decrease for V-neck on front piece, as explained above. When piece measures 54-56-58-60-62-64 cm from cast-on edge, finish any started lace patterns vertically but do not work more repetitions vertically – work stitches in stocking stitch with 1 edge stitch in garter stitch in each side of piece onwards. When all decreases for V-neck are done, 23-24-27-28-33-36 stitches remain on needle. When piece measures 60-62-64-66-68-70 cm from cast-on edge, cast off the first 17-18-21-22-27-30 stitches on next row from right side= 6 stitches remain for shawl collar. Continue with pattern as before over the 6 stitches until shawl collar measures approx. 6-7-7-7-9-9 cm. Cast off stitches with knit over knit, garter stitch over garter stitch and purl over purl. RIGHT FRONT PIECE: Work as left front piece until piece measures 60-62-64-66-68-70 cm from cast-on edge. On next row from right side work pattern over the first 6 stitches as before, cast off the remaining 17-18-21-22-27-30 stitches. Cut the yarn. Continue with pattern over the 6 stitches until shawl collar measures approx. 6-7-7-7-9-9 cm, adjust according to left front piece. Cast off stitches with knit over knit, garter stitch over garter stitch and purl over purl. SLEEVES: Cast on 62-66-66-66-70-70 stitches (including 1 edge stitch in each side) on circular needle size 4.5 mm with Air. Purl 1 row from wrong side. Then work as follows from right side: Work 1 edge stitch in garter stitch, knit 1, * purl 2, knit 2 *, repeat from *-* until 4 stitches remain, purl 2, knit 1 and 1 edge stitch in garter stitch. When rib measures 5 cm, knit 1 row from right side while at the same time decreasing 4-6-6-4-6-6 stitches evenly = 58-60-60-62-64-64 stitches. Switch to circular needle size 5.5 mm. Now work pattern as follows: Work 1 edge stitch in garter stitch, 0-1-1-2-3-3 stitches in stocking stitch, A.2 4 times in width in total, 0-1-1-2-3-3 stitches in stocking stitch and 1 edge stitch in garter stitch. Repeat pattern vertically. When sleeve measures 16 cm, increase 0-0-1-1-1-1 stitch in each side of piece inside 1 edge stitch (= 0-0-2-2-2-2 stitches increased). Increase like this every 6 cm 0-0-1-2-3-4 times in total = 58-60-62-66-70-72 stitches. Work the increased stitches in stocking stitch. When sleeve measures 47-46-45-44-43-41 cm from cast-on edge, insert 1 marker inside 1 edge stitch at the beginning of next row – marker marks where bottom of armhole begins. Do not start any more lace pattern, finish any patterns already started. Then work in stocking stitch with 1 edge stitch in garter stitch in each side. Cast off when sleeve measures 49-49-48-47-46-45 cm in total - read CAST-OFF TIP! Work the other sleeve the same way. ASSEMBLY: Sew shoulder seams inside cast-off edge. Sew shawl collar together mid back with grafting/kitchener stitches, and sew collar to neck line in the back of neck – the seam should be in towards the wrong side. Sew sleeve seam together but leave a vent 3-3-3-3-4-4 cm at the top of sleeve (i.e. up to marker on sleeve). Sew vent at the top of sleeve to the bottom of armhole and then sew sleeve in body. Sew the buttons on to the left band. |
|||||||||||||
Diagram explanations |
|||||||||||||
|
|||||||||||||
 |
|||||||||||||
 |
|||||||||||||
Have you finished this pattern?Tag your pictures with #dropspattern #dragonflywingsjacket or submit them to the #dropsfan gallery. Do you need help with this pattern?You'll find 22 tutorial videos, a Comments/Questions area and more by visiting the pattern on garnstudio.com. © 1982-2025 DROPS Design A/S. We reserve all rights. This document, including all its sub-sections, has copyrights. Read more about what you can do with our patterns at the bottom of each pattern on our site. |
|||||||||||||











Post a comment to pattern DROPS 212-27
We would love to hear what you have to say about this pattern!
If you want to leave a question, please make sure you select the correct category in the form below, to speed up the answering process. Required fields are marked *.