
Popular categories
Looking for a yarn?


Comments / Questions (86)
![]() Mary Ludwick wrote:
Mary Ludwick wrote:
Hi - First, thank you very much for such a wide variety of patterns!! I see the instructions in Assembly for a shawl collar, but I don't see one in the pictures? I don't want to have one either... is the colllar a different option? Also, I want to make a cardigan that is 100% side to side, including the sleeves... can you provide another option that has this? I'm happy to merge patterns 🤗 Thanks again! Mary
24.06.2017 - 06:45DROPS Design answered:
Dear Mary, this pattern is completely knitted side to side. The shawl collar is not a real- fold out collar, more like a band knitted on like we do a shawl-collar. As for another piece knitted sideways, you can always use the advanced search option at the upper right corner of teh pattern page, and use the filter "sideways". I hope this helps. Happy Knitting!
25.06.2017 - 20:12
![]() Solveig Frøhling wrote:
Solveig Frøhling wrote:
Hej jeg kunne godt tænke mig at strikke den jakke, men ville gerne strikke den i ensfarvet garn kan Fabel garnet evt. bruges venlig hilsen Solveig
27.01.2017 - 10:25DROPS Design answered:
Hej Solveig. Ja, det kan du sagtens. Husk at beregne hvor mange nögler du skal bruge (Fabel löber lidt laengere per 50 gr) og strik en pröve saa du er sikker paa strikkefastheden.
30.01.2017 - 15:46Mónica wrote:
Hola! Lamento insistir en mi consulta... en las instrucciones no aparece cómo tejer el cuello chal, sólo se menciona en el título y en el montaje y la verdad es que ni siquiera imagino cómo hacerlo, pues en mi país llamamos chal a una prenda generalmente triangular, que abriga la espalda.
04.09.2016 - 08:07DROPS Design answered:
Hola Monica. En el delantero izquierdo la parte del cuello chal empieza aquí: ...Ahora montar 23-23-23-23-28-28 nuevos pts al final de una hilera por el LR..... ; en el delantero derecho comenzamos con el cuello chal y se termina con las palabras: ... rematar los primeros 23-23-23-23-28-28 pts = 143-148-152-157-161-166 pts.
04.09.2016 - 22:25Mónica wrote:
Hola. Gracias por aclararme la duda acerca de los delanteros. Me quedó una consulta : al final de las instrucciones se habla de un cuello chal, en el diagrama también figura un cuello, pero el modelo de la fotografía no tiene cuello y así me gusta. Debo hacer algún cambio en las instrucciones para tejerlo? por ejemplo: no disminuir los 5 puntos en la espalda?
28.08.2016 - 23:46DROPS Design answered:
Hola Monica. Si quieres hacer otro escote si que tienes que hacer modificaciones, porque este patrón está escrito para el modelo con cuello chal. En la foto prácticamente no se aprecia porque es un pequeño cuello chal
29.08.2016 - 22:34Mónica wrote:
Ya entendí la diferencia del número de puntos de los delanteros. Hay alguna razón para comenzar uno por la sisa y el otro por el frente? Temo que queden de diferente largo, pues la tensión del urdido no es la misma que la tensión del cierre. Ante esto, se podrá confeccionar ambas piezas con las instrucciones de un solo lado, considerando que el punto musgo es reversible?
22.08.2016 - 02:03DROPS Design answered:
Hola Monica. La forma diferente al trabajar el delantero derecho y el delantero izquierdo se usa para que las filas acortadas en ambos delanteros queden lo más simétrico posible. Por el otro lado no se recomienda trabajar ambos delanteros de la misma manera porque después de dar la vta (es decir, que el LD se convierta en el LR) la fila de montaje que queda en el centro del delantero va a quedar diferente.
27.08.2016 - 23:26Mónica wrote:
Ayuda por favor. Muy lindo patrón, pero me parece que la foto no coincide con el diagrama. En las instrucciones se menciona un cuello chal, pero no está como se confecciona. Por otro lado los delanteros figuran con distintos números de puntos. En estos momentos estoy tejiendo la espalda, por lo que necesito me aclaren mis dudas. Gracias
20.08.2016 - 03:53DROPS Design answered:
Ver la respuesta arriba.
29.08.2016 - 22:59
![]() Gerda Kristensen wrote:
Gerda Kristensen wrote:
Hej Halsudskæringen på ryggen er 8 cm. der slås 23 masker op på hvert forstykke til sjalskraven, det giver meget mere end 8 cm. ??? m.v.h. Gerda
24.04.2016 - 18:52DROPS Design answered:
Hej Gerda. Sjalkragen er ikke halsudskaeringen
25.04.2016 - 14:05
![]() Karin Van Brederode wrote:
Karin Van Brederode wrote:
Hej, jeg vil strikke denne jakke--- men i tricostrik og med garn som selv skifter farve, mener det må kunne lade sig gøre. skal jeg bruge flere masker eller en størrelse større eller mindre? venlig hilsen karin
24.04.2016 - 13:38
![]() Jan Toth wrote:
Jan Toth wrote:
On back, after casting on all extra stitches on armhole side (making XL, it says I will have a total of 157 stitches). Says to work garter stitch until piece measures 4 3/4". Is that from original cast on or where I casted on enough to bring me to 157 stitches?
10.04.2016 - 19:46DROPS Design answered:
Dear Jan, the measure is from cast on row, see MEASURING TIP. Happy knitting!
11.04.2016 - 09:56Marisa Flores wrote:
El modelo podría hacerse en punto jersey en lugar de punto musgo?
14.03.2016 - 18:34DROPS Design answered:
Hola Marisa, este modelo sólo puede hacerse en punto musgo. La tensión del tejido y las filas acortadas variarían mucho en punto jersey.
16.03.2016 - 09:22
|
|
Magic Autumn#magicautumncardigan |
|
 |
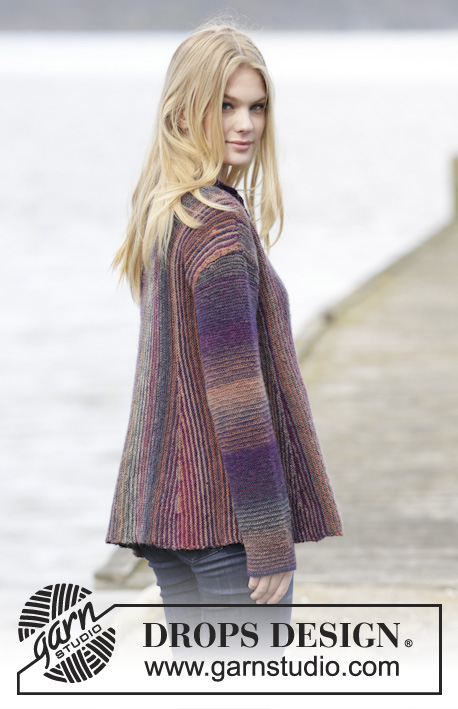 |
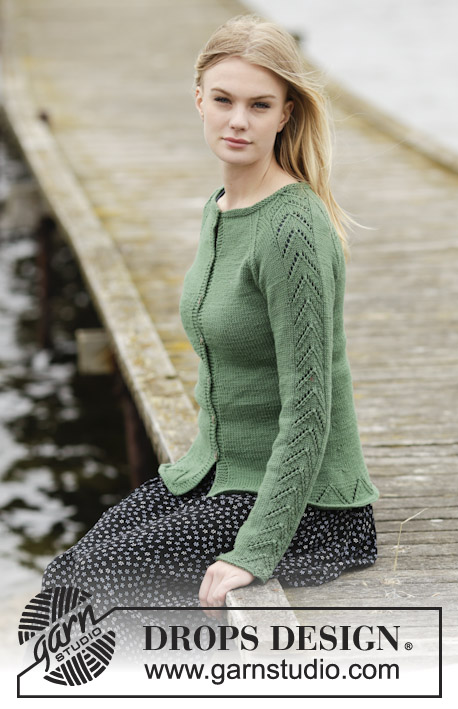
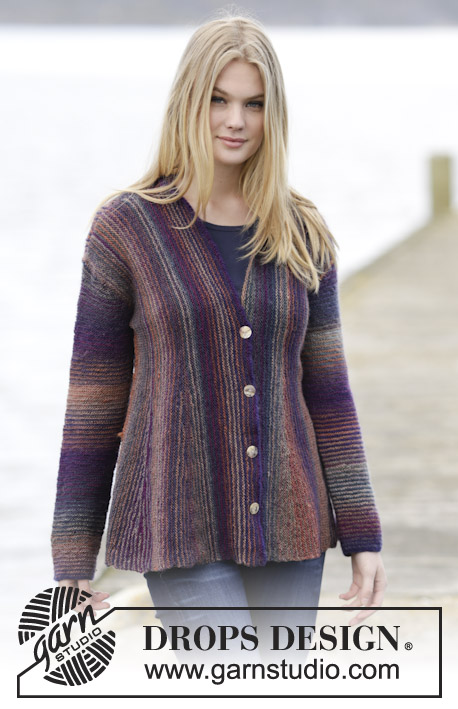
Knitted DROPS jacket in garter st with pleats and shawl collar, worked sideways in ”Delight”. Size: S - XXXL.
DROPS 164-15 |
|
|
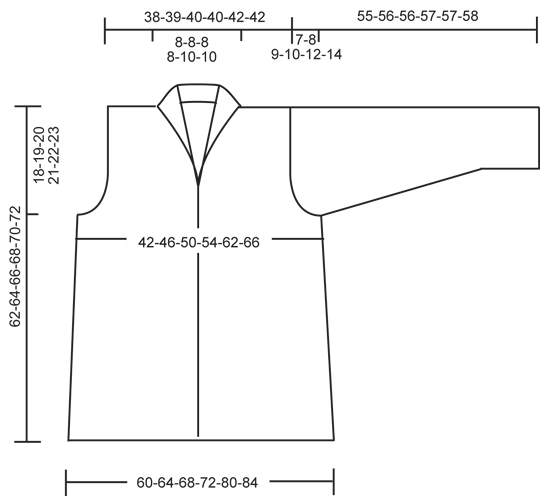
KNITTING TIP: Garter st is very elastic. The garment will therefore be somewhat longer and wider according to the measurements in chart. STRIPES: To get more stripes on garment work alternately with 2 balls. * Work 2 rows with the first ball, work 2 rows with the other ball *, repeat from *-*. Switch yarn at beg of a row from WS. Pull yarn upwards in bottom edge of garment/side of sleeve. PLEAT: Work 1 pleat with short rows as follows (1st row = WS): work 75 sts, turn and work back, work 68 sts, turn and work back, work 62 sts, turn and work back, work 55 sts, turn and work back, work 49 sts, turn and work back, work 42 sts, turn and work back, work 36 sts, turn and work back, work 29 sts, turn and work back, work 23 sts, turn and work back, work 16 sts, turn and work back, work over all sts on needle, turn and work back, work over all sts on needle, turn and work back, work 16 sts, turn and work back, work 23 sts, turn and work back, work 29 sts, turn and work back, work 36 sts, turn and work back, work 42 sts, turn and work back, work 49 sts, turn and work back, work 55 sts, turn and work back, work 62 sts, turn and work back, work 68 sts, turn and work back, work 75 sts, turn and work back. MEASURING TIP: Measure from cast-on edge. Measure where pleat is most narrow. ---------------------------------------------------------- BACK PIECE: Worked back and forth on circular needle. The whole piece is worked in garter st, i.e. K all rows. Beg working in the side. Read KNITTING TIP! Loosely cast on 102-104-106-109-111-113 sts on circular needle size 3.5 mm with Delight. Work STRIPES - see explanation above. Work 5-11-13-15-19-21 rows (1st row = RS). REMEMBER THE KNITTING TENSION At the end of next row (from WS), cast on 3 new sts for armhole. Then cast on new sts at the end of every 6th row (= from WS): 3 sts 0-0-1-2-4-5 times = 105-107-112-118-126-131 sts. On the end of next row from WS, cast on 38-41-40-39-35-35 sts = 143-148-152-157-161-166 sts. Continue to work in garter st over all sts until piece measures 9-10-11-12-14-16 cm (adjust so that next row is from RS). K 1 row from RS. Then work PLEAT - see explanation above. When pleat has been worked, work 1 row over all sts (from WS). Continue back and forth over all sts until piece measures 17-19-21-23-26-28 cm - READ MEASURING TIP. Now cast off 5 sts at beg of next row (from RS) for neck = 138-143-147-152-156-161 sts. Continue to work until piece measures 25-27-29-31-36-38 cm. Now cast on 5 sts at the end of row (from WS) = 143-148-152-157-161-166 sts. Continue back and forth over all sts until piece measures 32-35-38-41-47-49 cm (adjust so that next row is from RS). K 1 row from RS. Then work Pleat. When pleat is done, work 1 row over all sts. Work until piece measures approx. 40-43-45-47-52-54 cm. Now cast off 38-41-40-39-35-35 sts at beg of next row (from RS) for armhole = 105-107-112-118-126-131 sts. On next row (from RS) cast off 3 sts at beg of row. Then cast off at beg of every 6th row: 3 sts 0-0-1-2-4-5 times = 102-104-106-109-111-113 sts. Work back and forth until piece measures 42-46-50-54-62-66 cm. Loosely cast off. LEFT FRONT PIECE: Cast on and work from the side to mid front. Loosely cast on 102-104-106-109-111-113 sts on circular needle size 3.5 mm with Delight. Work stripes and cast on new sts for armhole as on back piece = 143-148-152-157-161-166 sts. When piece measures 6-7-8-9-12-14 cm, work pleat. When pleat has been worked, work 1 row over all sts (from WS). Continue back and forth over all sts. When piece measures 13-15-17-17-19-21 cm - READ MEASURING TIP, work pleat. When pleat has been worked, work 1 row over all sts (from WS). Work until piece measures 3-3-3-5-6-6 cm after last pleat (piece now measures approx. 17-19-21-23-26-28 cm in total). Now cast on 23-23-23-23-28-28 new sts at the end of a row from WS = 166-171-175-180-189-194 sts. Work back and forth over all sts for 6-6-6-6-8-8 cm. Loosely cast off. RIGHT FRONT PIECE: Cast on and work from mid front to the side. Loosely cast on 166-171-175-180-189-194 sts on circular needle size 3.5 mm with Delight. Work stripes back and forth over all sts for 3 cm. Now dec for buttonhole on a row from WS as follows: Work 24 sts, * K 2 tog, 1 YO, work 20-20-20-22-22-22 sts *, repeat from *-* 4 times, work the rest of row. ( = 4 buttonholes). Continue in garter st and stripes over all sts until piece measures 6-6-6-6-8-8 cm. On next row from RS, cast off the first 23-23-23-23-28-28 sts = 143-148-152-157-161-166 sts. Continue back and forth over all sts until piece measures approx. 9-9-9-11-12-13 cm. Then work pleat. When pleat has been worked, work 1 row over all sts (from WS). Continue back and forth over all sts until piece measures approx. 17-18-19-20-20-21 cm (adjust so that next row is from WS). Then work pleat. When pleat has been worked, work 1 row over all sts (from WS). AT THE SAME TIME when piece measures 4-4-3-2-2-2 cm after last pleat, cast off the first 38-41-40-39-35-35 sts (from RS) for armhole. On next row (from RS) cast off 3 sts at beg of row. Then cast off at beg of every 6th row: 3 sts 0-0-1-2-4-5 times = 102-104-106-109-111-113 sts. Continue back and forth over all sts until piece measures 6-7-8-9-12-14 cm after last pleat. Loosely cast off. SLEEVE: Worked back and forth in garter st. Loosely cast on 55-57-60-62-62-66 sts (incl 1 edge st in each side) on circular needle size 3.5 mm with Delight. Work stripes. When piece measures 5-5-5-7-9-7 cm, inc 1 st in each side every 5-4-3½-2½-2-2 cm 9-11-12-15-17-18 times in total = 73-79-84-92-96-102 sts. When piece measures 48-48-47-47-45-44 cm, cast off 3 sts in each side for sleeve cap. NOTE: Shorter measurements in the larger sizes because of longer sleeve cap and wider shoulders. Then cast off for sleeve cap in each side on every other row: 2 sts 2-2-2-2-1-0 times and 1 st 10-12-14-15-24-28 times. Then cast off 2 sts in each side until piece measures 54-55-55-56-56-57 cm. Now cast off 3 sts in each side 1 time. Cast off the remaining sts, piece measures approx. 55-56-56-57-57-58 cm. ASSEMBLY: Sew the shoulder seams. Sew in sleeves. Sew sleeve and side seams in one inside 1 edge st. Sew shawl collar tog mid back and sew it to the neckline. Sew the buttons on to the left band. |
|
 |
|
Have you finished this pattern?Tag your pictures with #dropspattern #magicautumncardigan or submit them to the #dropsfan gallery. Do you need help with this pattern?You'll find 18 tutorial videos, a Comments/Questions area and more by visiting the pattern on garnstudio.com. © 1982-2026 DROPS Design A/S. We reserve all rights. This document, including all its sub-sections, has copyrights. Read more about what you can do with our patterns at the bottom of each pattern on our site. |
|


With over 40 years in knitting and crochet design, DROPS Design offers one of the most extensive collections of free patterns on the internet - translated to 17 languages. As of today we count 324 catalogues and 12290 patterns translated into English (UK/cm). 12290
We work hard to bring you the best knitting and crochet have to offer, inspiration and advice as well as great quality yarns at incredible prices! Would you like to use our patterns for other than personal use? You can read what you are allowed to do in the Copyright text at the bottom of all our patterns. Happy crafting!
Post a comment to pattern DROPS 164-15
We would love to hear what you have to say about this pattern!
If you want to leave a question, please make sure you select the correct category in the form below, to speed up the answering process. Required fields are marked *.