
Popular categories
Looking for a yarn?


Comments / Questions (209)
![]() Kirsten Lysemose wrote:
Kirsten Lysemose wrote:
Hej Drops, jeg er uvenner med strømpepinde, så jeg vil høre om der er noget jeg skal tage højde for i opskriften hvis jeg vælger at strikke ærmerne på rundepinde (frem og tilbage) På forhånd tak for svar. Venlig hilsen Kirsten Lysemose
17.03.2021 - 10:14DROPS Design answered:
Hej Kirsten, det gør du bare som du vil :)
17.03.2021 - 14:50
![]() Debora wrote:
Debora wrote:
Is dit patroon van onder naar boven gebreid? Hoe maak ik dit vest iets langer?
02.02.2021 - 21:38
![]() Debora wrote:
Debora wrote:
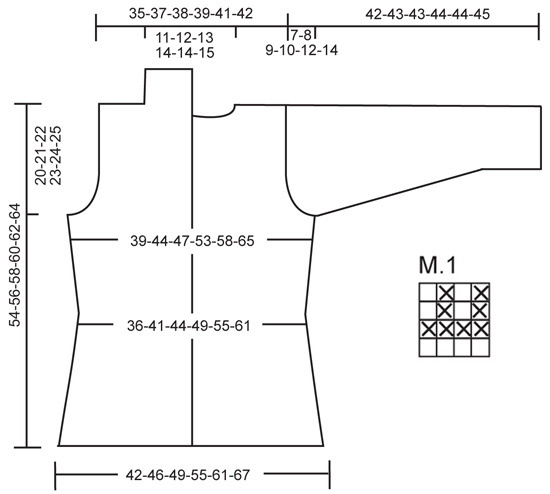
Goedenavond, Als ik kijk naar de tekening zijn dan de cijfers die het eerst onder de mouwen staan de bovenwijdte gemeten over de borsten? en de cijfers daaronder de taille?
02.02.2021 - 21:35DROPS Design answered:
Dag Debora,
Dat klopt inderdaad, de cijfers die helemaal onderaan staan in de breedte zijn de heupwijdte, die daar boven de taillewijdte (dus het smalste gedeelte) en de bovenste cijfers de buste.
06.02.2021 - 11:37
![]() Ann wrote:
Ann wrote:
Hur gör jag rent konkret när jag avmaskar den tredje maskan? Lyfter jag den stickade maska 2 över den stickade maska 3 eller gör jag på något annat sätt?
02.02.2021 - 13:56DROPS Design answered:
Hej Ann. Jag hade nog valt att sticka ihop maska 3 och 4 och sedan på varvet över lägga upp en maska över maska nr 3, men man kan göra det man själv tycket blir finast. Vi har även videor på hur man kan göra knapphål genom att sticka ihop 2 maskor och göra ett omslag direkt efter som ett alternativ. Mvh DROPS Design
03.02.2021 - 08:22
![]() Karin wrote:
Karin wrote:
Ska knapphålet endast vara över en maska?
01.02.2021 - 22:38DROPS Design answered:
Hej Karin. Ja det stämmer; 1 knapphål = avm den tredje framkantsm från mitt fram. På nästa v läggs det upp 1 ny m över den avm m. Mvh DROPS Design
02.02.2021 - 10:22
![]() Ann wrote:
Ann wrote:
Ska maska nummer två från kanten lyftas över maska nr 3 när man gör knapphål ?
01.02.2021 - 20:06DROPS Design answered:
Hej Ann. Det är den tredje maskan som ska avmaskas så du ska sticka 2 maskor som vanligt och sedan avmaska den tredje. Mvh DROPS Design
02.02.2021 - 12:01
![]() Sandrine wrote:
Sandrine wrote:
Bonjour A 5cm je fais les diminutions de chaque côté : je tricote les mailles 1 et 2 ensemble puis les mailles 192 et 193 (taille L) il reste 7m mousse de chaque côté A 7,5cm je fais pareil : il reste 6m mousse de chaque côté A 10cm il reste 5m mousse de chaque côté A 12,5 cm il reste 4m mousse de chaque côté A 15 cm il reste 3m mousse de chaque côté Je pense ne pas avoir compris l’explication D’avance merci de votre aide
27.01.2021 - 18:42DROPS Design answered:
Bonjour Sandrine, ce sont les 18 mailles point mousse sur les côtés du gilet que vous allez diminuer, autrement dit, vous diminuez à 5 cm ainsi: 2 m ens à l'end, 14 m end, 2 m ens à l'end = il reste 16 m (entre les M.1) Vous répétez ces diminutions encore 4 fois = il reste 8 mailles au point mousse sur les côtés du gilet (et vous avez diminué 20 m au total = 173 m). Vous augmentez ensuite le nombre de ces mailles 6 fois = vous aurez 14 m dans ces sections point mousse sur les côtés et 185 m. Bon tricot!
28.01.2021 - 09:24
![]() Elisabeth Gustavsson wrote:
Elisabeth Gustavsson wrote:
Hur jar jag om jag vill sticka koftan med vanliga stickor inte rundsticka? Hur ska jag räkna ut maskantalet på fram och bakstycket
27.01.2021 - 15:25DROPS Design answered:
Hei Elisabeth. Les oppskriften, finn det maskeantallet i den størrelsen du skal strikke som skal til forstykkene og til bakstykket. Legg evnt til en kantmaske i siden på forstykkene og i sidene på bakstykket som kan brukes til å sy sammen stykkene. God Fornøyelse!
27.01.2021 - 16:46
![]() Ann wrote:
Ann wrote:
I storlek M börjar man med 179 maskor, vilket enligt stickfastheten som anges till 18 maskor per decimeter borde ge en längd av 99,4 cm men det står i bilden att det ska vara 2*46 + ca 3 cm(överlapp vid knäppning) = 95 cm. Samma gäller i midjan där man får 88,3 cm med 159 maskor enligt stickfastheten men det står 2×41 +3 = 85 cm enligt bilden. Hur hänger det ihop. Tänker jag fel på något sätt?
09.01.2021 - 18:28DROPS Design answered:
Hej Anne, vi har räknat med 3 cm "extra" på varje framstycke. Lycka till :)
20.01.2021 - 07:52
![]() Ann wrote:
Ann wrote:
Vad gäller avmaskning för ärmkulle så står det att första avmaskningen om 3 maskor ska göras i varje sida och samtidigt står det att det ska avmaskas i början av varvet. Men om det är i varje sida så ska det väl göras både i början av varvet och i slutet av varvet? Mvh Ann
29.12.2020 - 15:49DROPS Design answered:
När man maskar av i varje sida måste detta göras i början på varje varv. Då maskar man ofta först av i början på varvet från rätsidan och sedan i början på följande varv från avigsidan. Ifall man skulle maska av i slutet på varvet så skulle man bli tvungen att klippa tråden för varje gång innan man kunde sticka vidare.
05.01.2021 - 19:05
|
|||||||
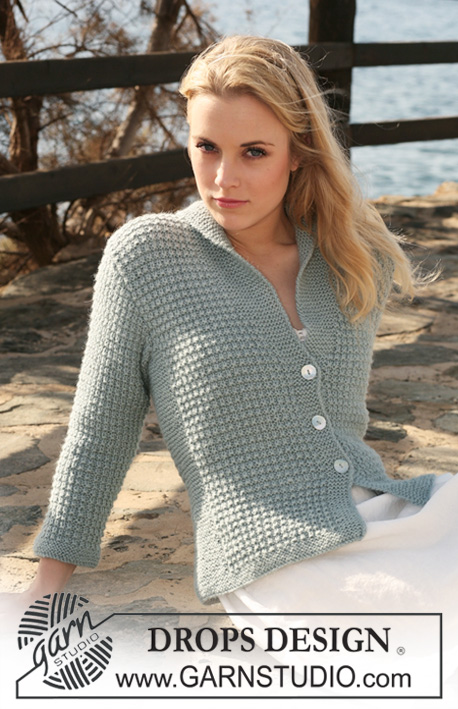
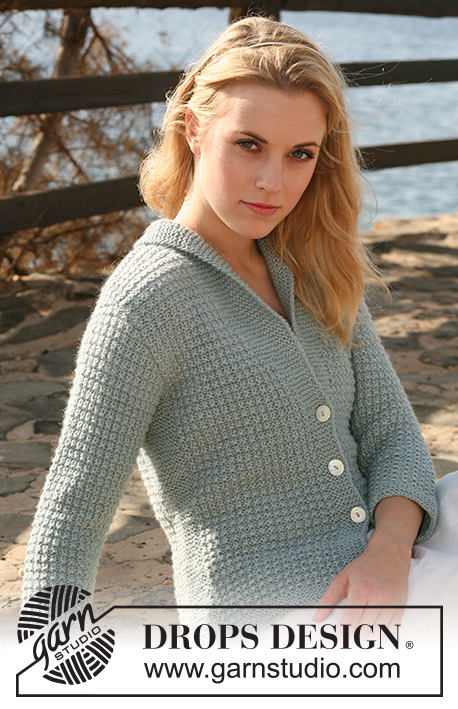
Marit#maritcardigan |
|||||||
 |
 |
||||||
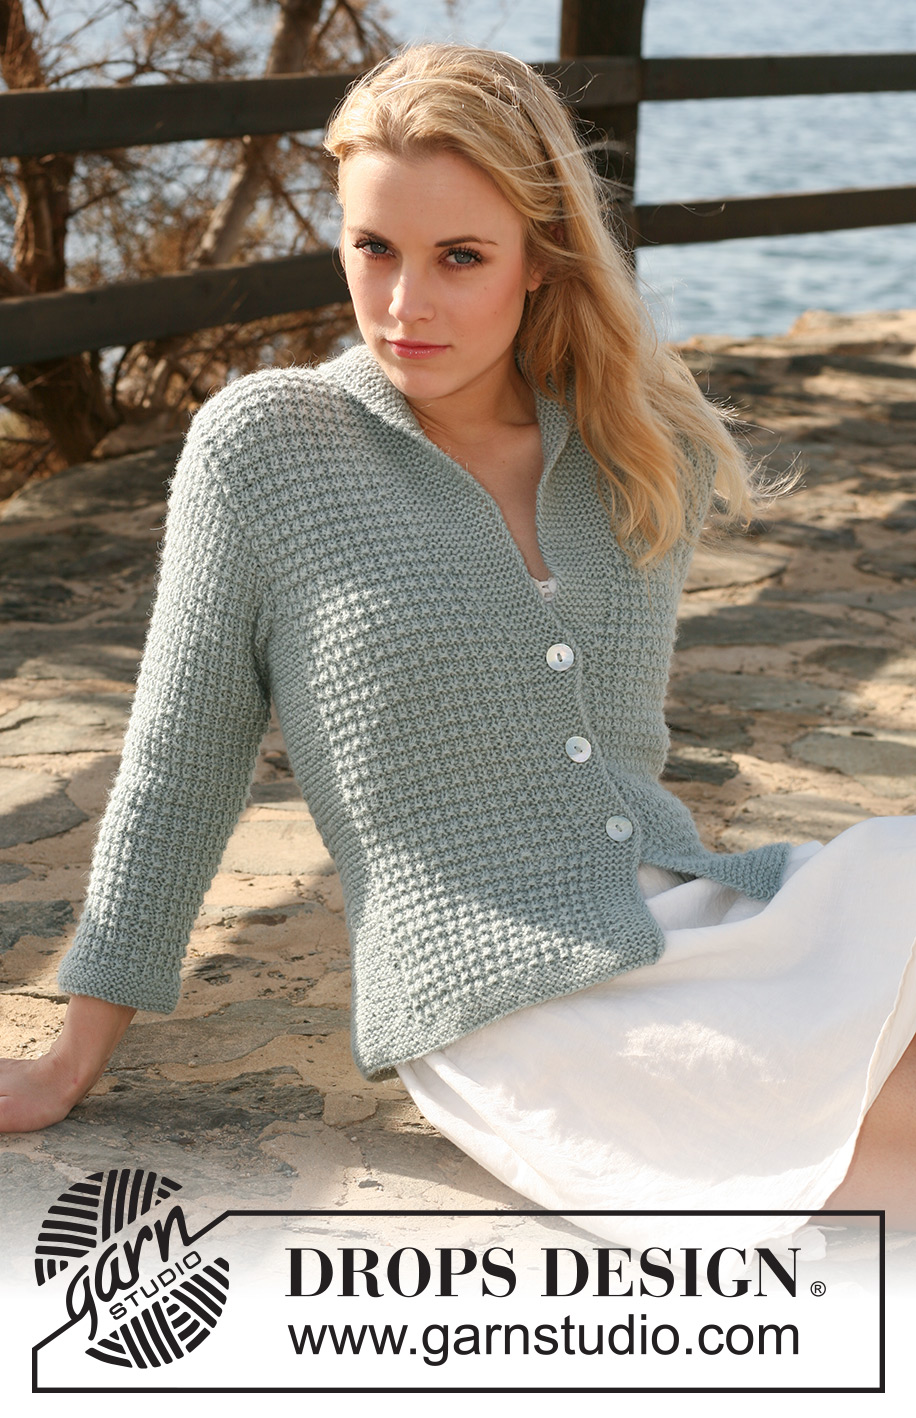
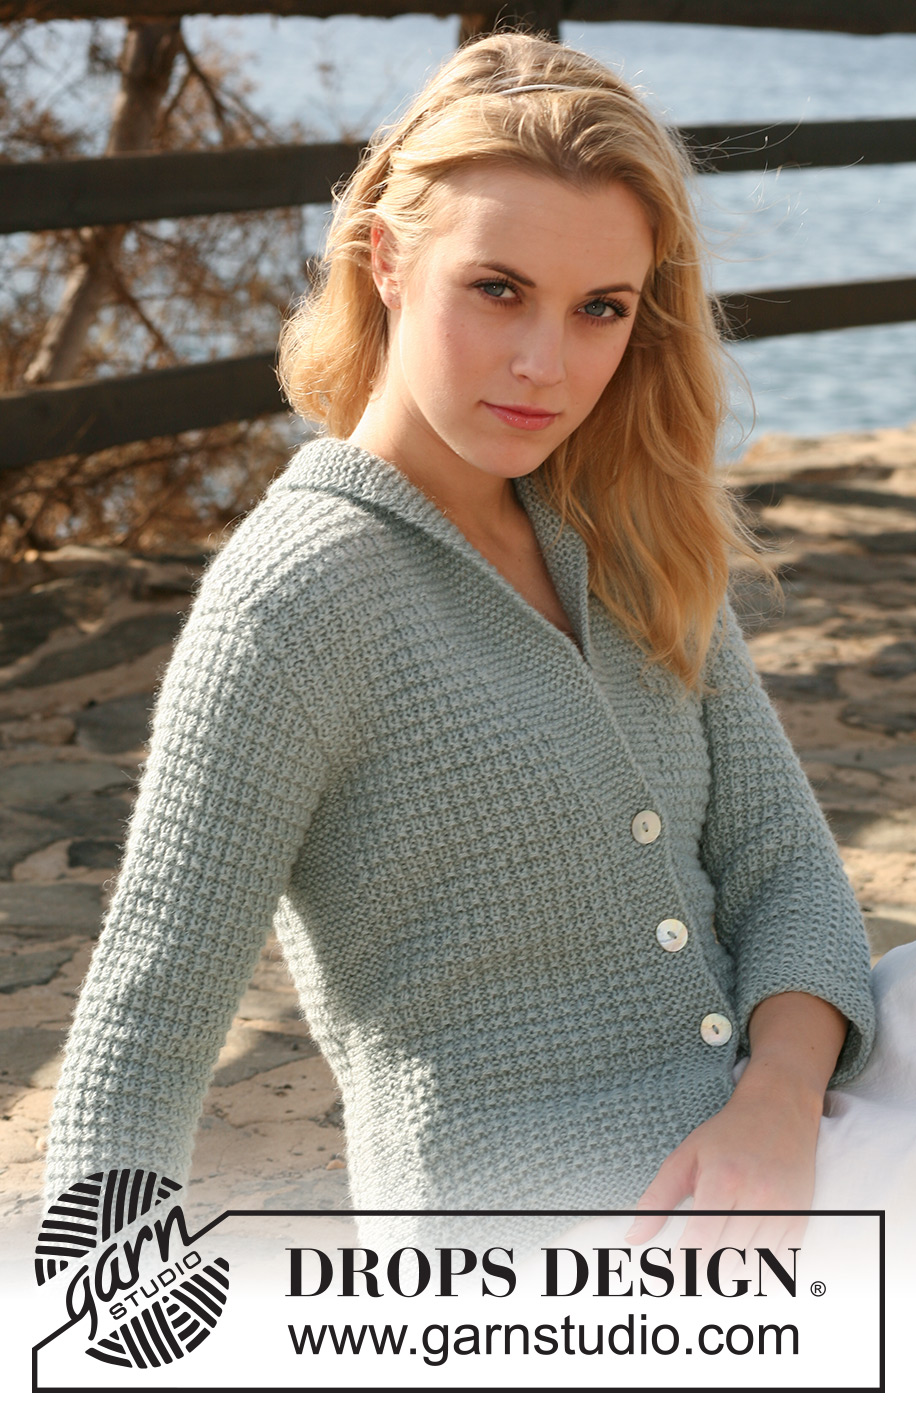
Knitted DROPS jacket with textured pattern and collar in 2 threads ”Alpaca”. Size S - XXXL.
DROPS 119-6 |
|||||||
|
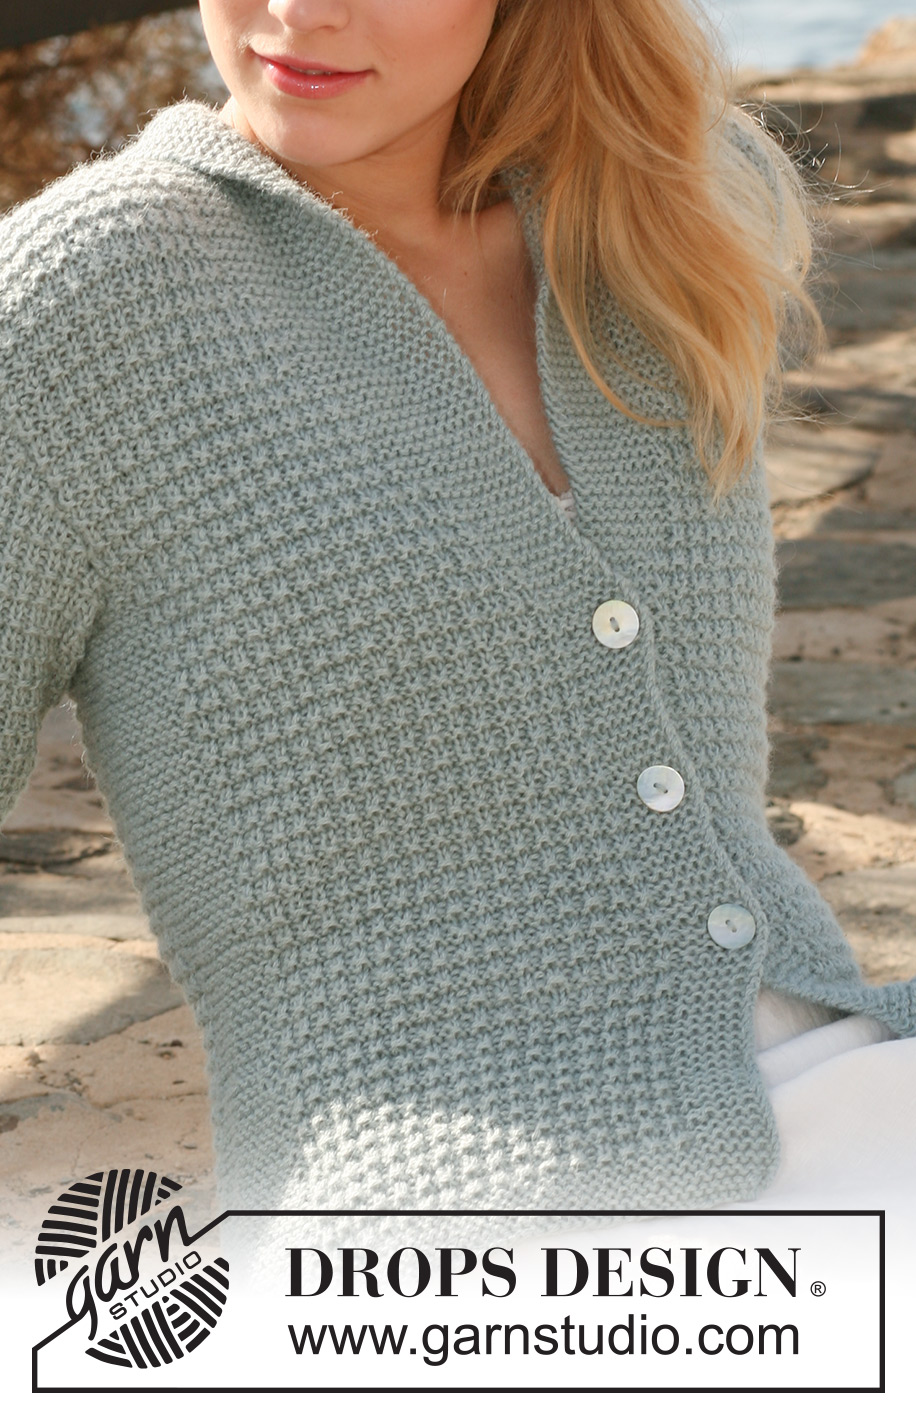
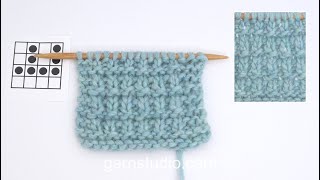
GARTER ST (back and forth on needle): K all rows. GARTER ST (in the round): K 1 round, P 1 round. PATTERN: See diagram M.1. Diagram shows the pattern from RS. BUTTONHOLES: Make buttonholes on right front band. 1 buttonhole = cast off 3rd front band st from mid front and cast on 1 new st on return row. Make buttonholes when piece measures: SIZE S: 14, 21 and 28 cm. SIZE M: 14, 21 and 28 cm. SIZE L: 14, 21 and 28 cm. SIZE XL: 15, 22 and 29 cm. SIZE XXL: 15, 22 and 29 cm. SIZE XXXL: 15, 22 and 29 cm. -------------------------------------------------------- -------------------------------------------------------- BODY PIECE: Worked back and forth on circular needle from mid front. Cast on 163-179-193-211-233-257 sts on circular needle size 4.5 mm with 2 threads Alpaca. Insert a marker 44-48-52-56-62-68 sts in from each side (back piece = 75-83-89-99-109-121 sts). Work 8 rows GARTER ST – SEE ABOVE, and continue as follows from RS: 6 garter sts, M.1 on the next 29-33-37-41-47-53 sts, 18 garter sts (marker sits in the middle of these sts), M.1 on the next 57-65-71-81-91-103 sts, 18 garter sts (marker sits in the middle of these sts), M.1 on the next 29-33-37-41-47-53 sts, and finish with 6 garter sts. REMEMBER THE KNITTING TENSION! Continue in pattern like this, AT THE SAME TIME when piece measures 5 cm dec 1 st each side of garter sts each side by K2 tog, repeat the dec on every 2.5 cm a total of 5 times = 143-159-173-191-213-237 sts. Remember BUTTONHOLES on right front band – SEE ABOVE!! When piece measures 20 cm inc 1 st each side of garter sts each side, and repeat the inc on every 6-6-6-7-7-7 cm a total of 3 times = 155-171-185-203-225-249 sts. AT THE SAME TIME when piece measures 28-28-28-29-29-29 cm work 1 st from M.1 into front band (i.e. number of sts remain the same but no of garter sts on front band inc and no of sts in M.1 dec), and repeat this on every 2 cm a total of 10-11-13-13-14-15 times (= 16-17-19-19-20-21 garter sts on front band). Continue in M.1 and garter st until piece measures 34-35-36-37-38-39 cm. Now cast off 6 sts each side for armhole (= 3 sts each side of marker) and complete each piece separately. BACK PIECE: = 65-73-79-89-99-111 sts. Continue in M.1 on all sts. Cast off for armhole each side at the beg of every row: 2 sts 0-1-2-3-4-6 times and 1 st 0-1-1-3-5-6 times = 65-67-69-71-73-75 sts. When piece measures 52-54-56-58-60-62 cm cast off the middle 17-19-21-23-23-25 sts for neck and complete each shoulder separately. Cast off 1 st on neckline on next row = 23-23-23-23-24-24 sts left on shoulder. Cast off when piece measures 54-56-58-60-62-64 cm. LEFT FRONT PIECE: Continue with garter st on front band and M.1 on remaining sts. Cast off for armhole at the side as described for back piece = 39-40-42-42-44-45 sts. When piece measures 54-56-58-60-62-64 cm cast off the first 23-23-23-23-24-24 sts from RS for shoulder = 16-17-19-19-20-21 sts left on collar. Work remaining sts on row. Now work shortened rows on collar (with start from WS) as follows: * 2 rows on the first 8-8-8-9-9-10 sts only, 2 rows on all sts *, repeat from *-* until collar measures approx 6-6-7-7-8-8 cm on the shorter side (measured from shoulder). Cast off. RIGHT FRONT PIECE: Like left front piece, but mirrored. SLEEVE: Worked in the round on double pointed needles. Cast on 44-46-48-50-52-54 sts on double pointed needles size 4.5 mm with 2 threads Alpaca. Insert a marker at beg of round = mid under sleeve. Work 8 rows GARTER ST – SEE ABOVE, and continue in M.1 on all sts. When piece measures 5 cm inc 1 st each side of marker, and repeat the inc on every 3-2.5-2-2-1.5-1.5 cm a total of 9-11-12-14-15-16 times = 62-68-72-78-82-86 sts. Incorporate inc sts in M.1 as you go along. When piece measures 35-35-34-34-32-31 cm - NOTE! Less for the larger sizes because of longer sleeve cap and wider shoulder – cast off for sleeve cap each side at the beg of every row: 3 sts 1 time, 2 sts 3 times, 1 st 0-1-2-4-5-7 times, then 2 sts each side until piece measures 41-42-42-43-43-44 cm, now cast off 3 sts 1 time each side and cast off remaining sts. Piece measures approx 42-43-43-44-44-45 cm. ASSEMBLY: Sew shoulder seams. Set in sleeves. Sew collar tog mid back and sew to neckline on back piece. Sew on buttons. |
|||||||
Diagram explanations |
|||||||
|
|||||||
 |
|||||||
Have you finished this pattern?Tag your pictures with #dropspattern #maritcardigan or submit them to the #dropsfan gallery. Do you need help with this pattern?You'll find 18 tutorial videos, a Comments/Questions area and more by visiting the pattern on garnstudio.com. © 1982-2026 DROPS Design A/S. We reserve all rights. This document, including all its sub-sections, has copyrights. Read more about what you can do with our patterns at the bottom of each pattern on our site. |
|||||||


With over 40 years in knitting and crochet design, DROPS Design offers one of the most extensive collections of free patterns on the internet - translated to 17 languages. As of today we count 325 catalogues and 12298 patterns translated into English (UK/cm). 12298
We work hard to bring you the best knitting and crochet have to offer, inspiration and advice as well as great quality yarns at incredible prices! Would you like to use our patterns for other than personal use? You can read what you are allowed to do in the Copyright text at the bottom of all our patterns. Happy crafting!
Post a comment to pattern DROPS 119-6
We would love to hear what you have to say about this pattern!
If you want to leave a question, please make sure you select the correct category in the form below, to speed up the answering process. Required fields are marked *.