
Popular categories
Looking for a yarn?


Comments / Questions (209)
![]() Cristina wrote:
Cristina wrote:
Donde indican el número de ovillos que necesitamos comprar para realizar el patrón.
18.09.2015 - 07:36DROPS Design answered:
Hola Cristina, el material siempre se pone en cantidad total de gramos. Debajo de los materiales te pone los gramos que tiene cada ovillo, con lo que puedes hacer el cálculo de los ovillos que necesitas. En este caso concreto puedes ver que los ovillos de DROPS ALPACA son de 50 gr cada uno, con lo que dependiendo de la talla puedes necesitar entre los 10 (500 gr) de la talla más pequeña y los 17 (850 gr) de la talla mayor.
23.09.2015 - 09:17
![]() Petra wrote:
Petra wrote:
Ich wollte die Jacke nacharbeiten, doch dann ist es eine warme Weste geworden, weil mich die Lust zum Ärmelstricken verlassen hat. Ich habe sie einfach weggelassen und das sieht gut aus. Die Jacke (Weste) hat einen tollen figurenbetonten Schnitt, das Muster macht sie sehr interessant und die Wolle ist angenehm weich. Das Teil ist beim Tragen etwas länger geworden, aber das ist in Ordnung.
05.09.2015 - 19:07
![]() Kate wrote:
Kate wrote:
Jeg kan ikke få pinde str. til at passe. Jeg har prøvet helt op i str. 6 uden at få de angivne mål.
24.04.2015 - 22:36DROPS Design answered:
Hej Kate. Det lyder meget underligt. Det skulle stemme med ca pind 4,5 - selvfölgelig afhaengigt hvordan du strikker. Husk du skal strikke med dobbelt traad og sörg for du strikker mönstret korrekt. Vask ogsaa pröven for rette maal. Tag eventuelt din pröve sammen med mönstret med hen i din DROPS butik og lad dem kigge paa det - det er svaert for os at vurdere paa afstand hvad der er galt.
30.04.2015 - 15:54
![]() Lil wrote:
Lil wrote:
Het lukt me niet op het telpatroon m1 goed te breien met de rondbreinaald. Kunt u me verder helpen?
20.04.2015 - 19:45DROPS Design answered:
Hoi Lil. Brei je in de rondte, dan komt elke naald op de goede kant. Je leest dan ook de teltekening alleen van de goede kant: 1 rij, lees je van rechts naar links, 2e, 3e en 4e rij ook. Rij 1 is dan recht breien, rij 2 av, rij 3 1 av, 1 r, enzovoort. Kijk ook hier hoe je de teltekeningen moet lezen.
21.04.2015 - 13:11
![]() Joke Specht wrote:
Joke Specht wrote:
Ik probeerde een video te bekijken ,maar geluid ontbreekt op pagina 7 eenvoudig patroon dacht eerst dat het aan ipad lag,maar pc ook niet.
31.03.2015 - 12:07DROPS Design answered:
Al onze video's zijn zonder geluid, maar waar nodig staat een uitleg in tekst bovenaan. Omdat al onze patronen en video's in 17 talen beschikbaar zijn, doen we dat zonder geluid, maar met duidelijke video's. Indien nodig wijzen de vlijtige vingers van onze collega's dingen aan. Succes!
31.03.2015 - 20:45
![]() Anneli Olausson Holmström wrote:
Anneli Olausson Holmström wrote:
Hur stämmer det angivna maskantalet efter minskning och ökning? Det ska i strl M minskas 2 maskor i varje sida totalt 5 ggr=10m. Från 179m borde det bli 169m och inte 159m, som det står i mönstret. Samma som för ökningen. 1m ökas i varje sida totalt 3 ggr=6m. Då borde det vara 175m kvar och inte 171m som det står i mönstret. Hoppas på snabbt svar! Hälsningar Anneli
03.03.2015 - 21:10DROPS Design answered:
Hej "Fortsätt detta mönstret, SAMTIDIGT när arb mäter 5 cm minskas 1 m i varje sida av de rätst partierna i varje sida genom att sticka 2 rm tills," Det ska minskas 1 maska i varje sida av de rätstickade partierna, och det är 2 rätstickade partier så det blir totalt 4 m minskning per varv. Lycka till!
15.05.2015 - 10:15
![]() Catherine wrote:
Catherine wrote:
Not sure I understand the patten, it's not working out for me... So I knit row 1, RS wound the RS be facing me? and row 2, I knit, would be the WS? and Rows 3 and 4 P1. K1, this is what I have been doing and it's not working as the picture in the patten. Please Help, Thanks Catherine
04.01.2015 - 18:37DROPS Design answered:
Dear Catherine, that's correct, that's how to work M1 - make sure the last st work in M1 is worked as in diagram, if you finish with P1 from RS, remember to work this st K1 from WS. Happy knitting!
05.01.2015 - 09:24
![]() Catherine wrote:
Catherine wrote:
I have just did my 4 rows of garter st. now on to the next, I understand the being and the end of each row. "Diagram M." not sure how to follow it? do I follow it from top to bottom, so would that be 4 rows to follow? Row 1 = Purl-1 Knit-1, row 2: Knit 1 Purl 1, Row 3:- all Purl, and 4th row: Knit? it just the M1 part I'm not sure of.
27.12.2014 - 21:50DROPS Design answered:
Dear Catherine, please click here to read more about diagrams. 1st row in M1= RS: Row 1= K all sts - Row 2= K all sts - Row 3: P1, K1 - Row 4: P1, K1. Happy knitting!
30.12.2014 - 13:39
![]() Heleen wrote:
Heleen wrote:
Hoeveel steken heb je over bij maat M aan het eind van de mouw? Er staat dat je de overgebleven steken moet afkanten, maar hoeveel zijn dat er? Het is trouwens een heel fijn vest om te breien. Het wordt erg mooi!
28.11.2014 - 18:35DROPS Design answered:
Hoi Heleen. Dat staat niet vermeld in het patroon omdat het niet van belang is. Heb je de juiste stekenverhouding, verwacht ik dat je rond 34-38 st zit als je gaat afkanten.
02.12.2014 - 16:37
![]() A. Roth wrote:
A. Roth wrote:
Hallo, sind bei den Mustern Hin- und Rückreihen gezeichnet wie z. B. bei Modell Nr. Z-472 oder nur die Hinreihen und die Rückreihen stricken wie sie erscheinen? Mit freundl Gruß A. Roth
15.10.2014 - 22:02DROPS Design answered:
Es sind alle Reihen im Diagramm eingezeichnet, die 1. R ist die Hin-R, die 2. R ist die Rück-R usw.
16.10.2014 - 14:24
|
|||||||
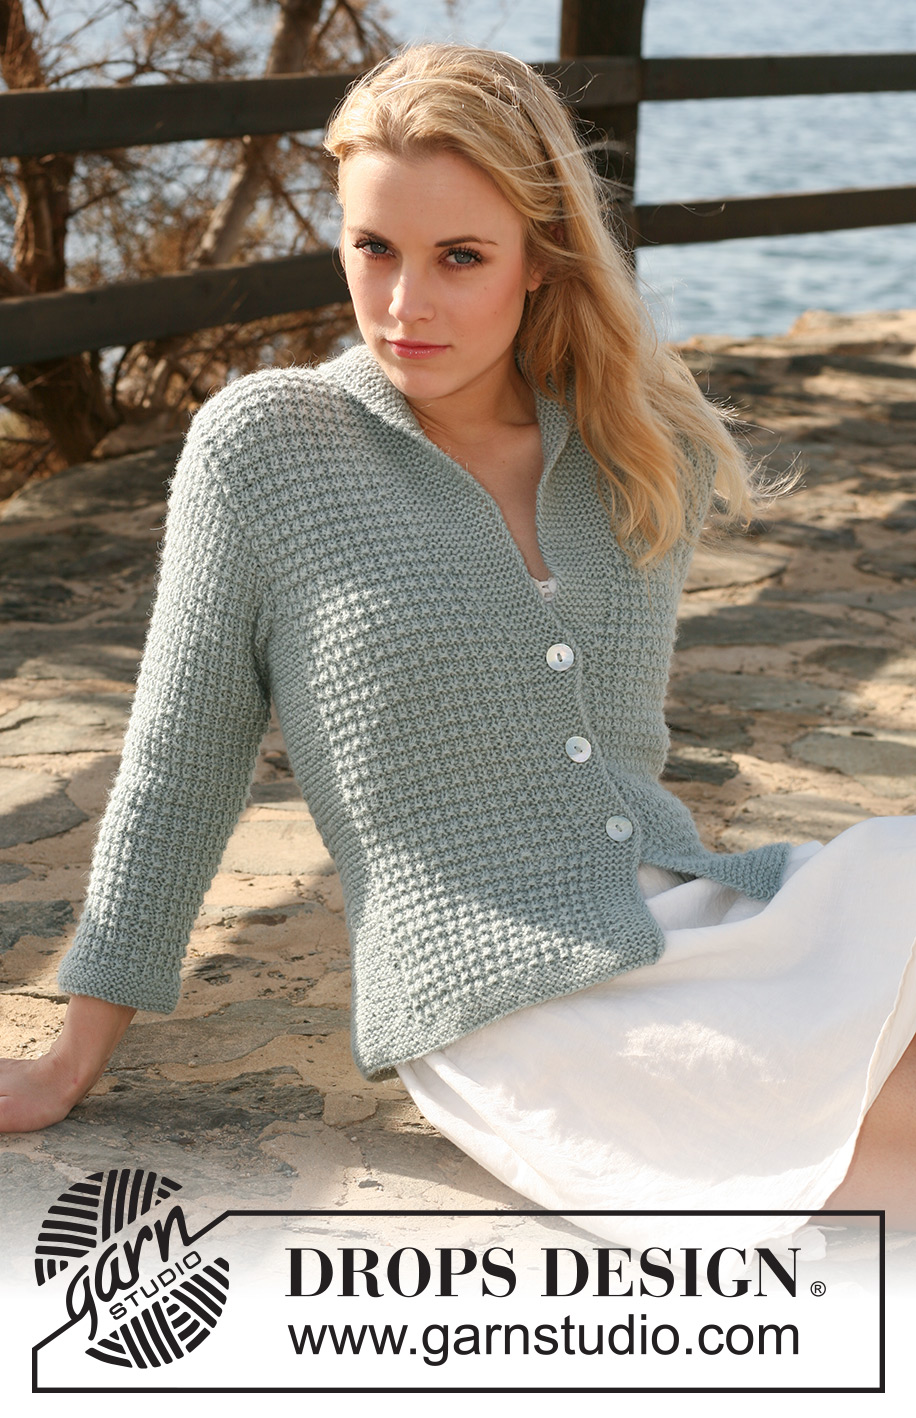
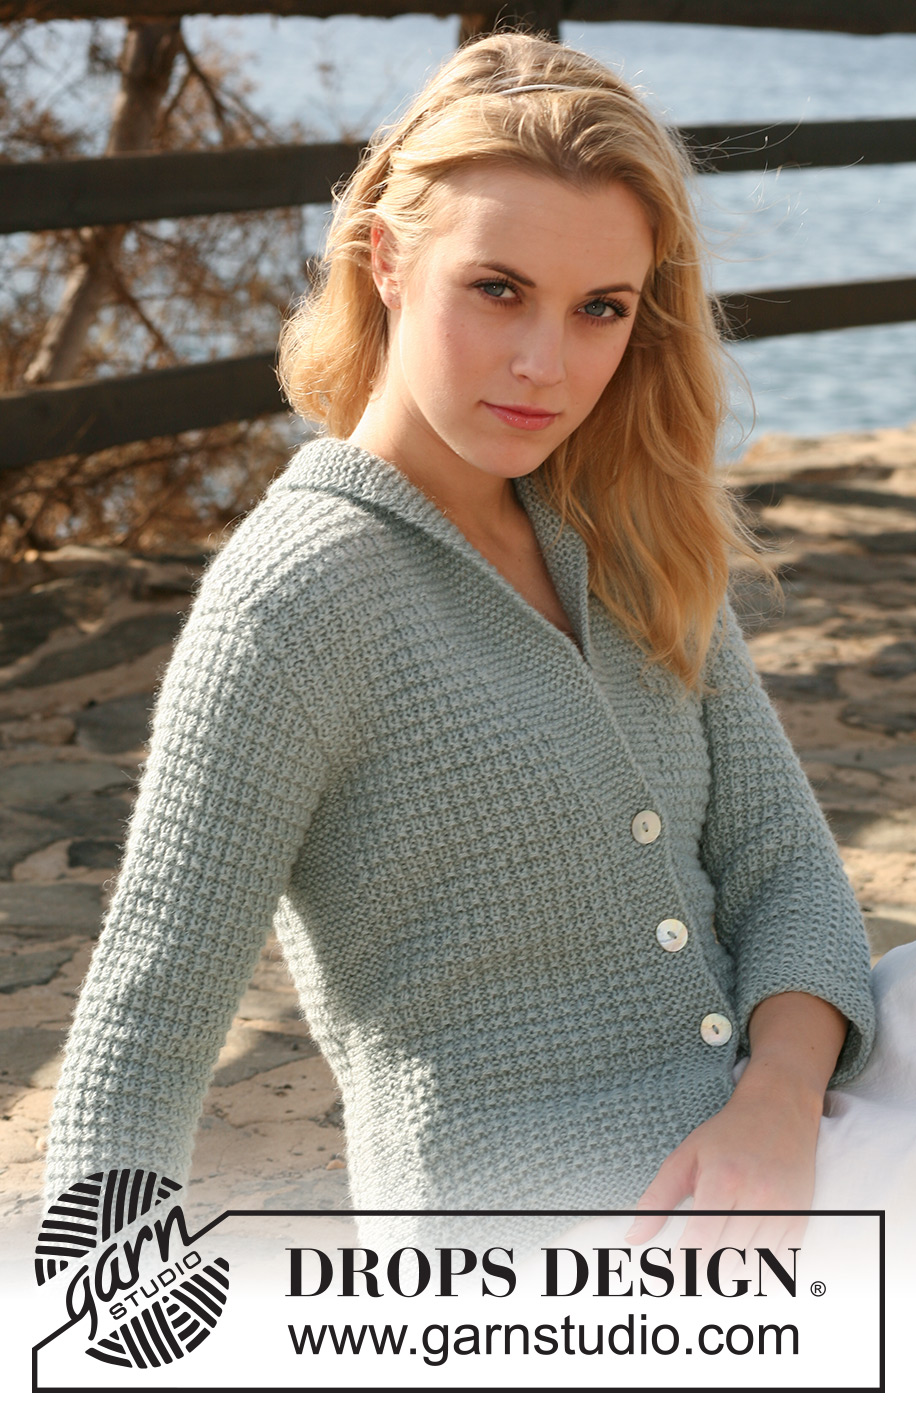
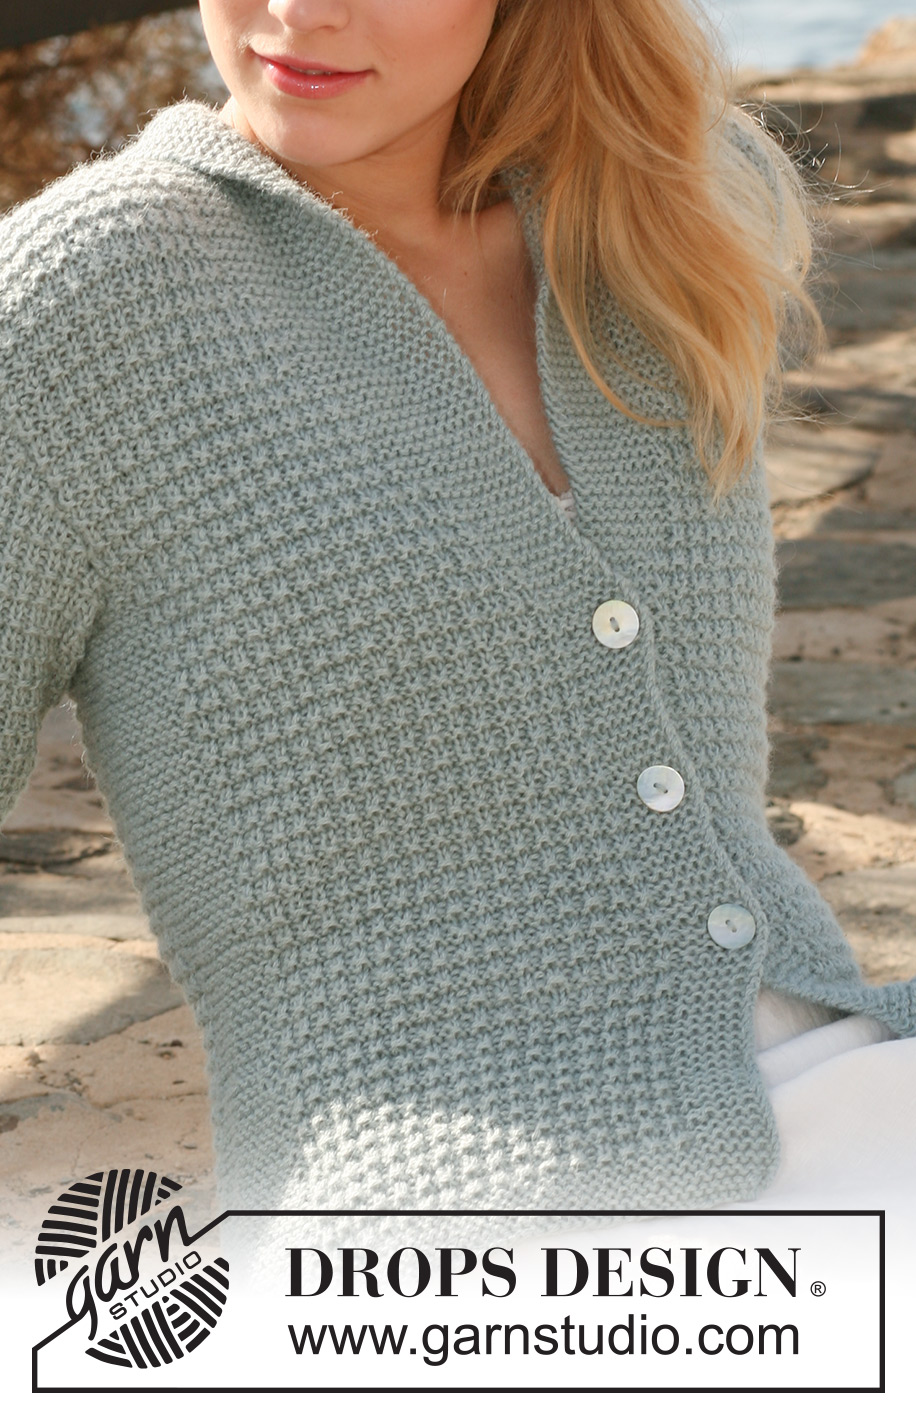
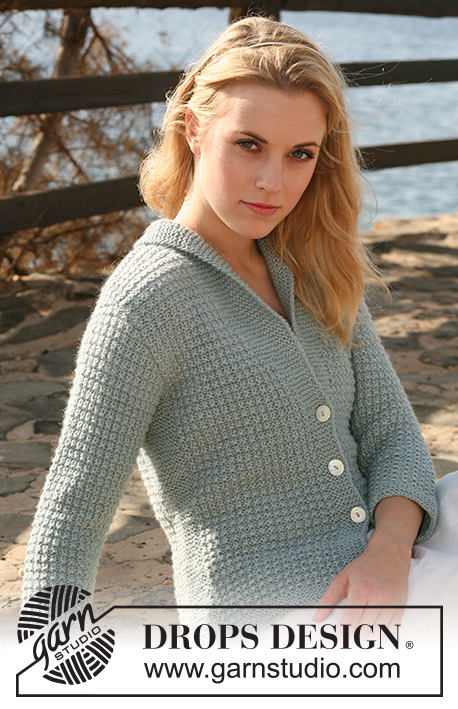
Marit#maritcardigan |
|||||||
 |
 |
||||||
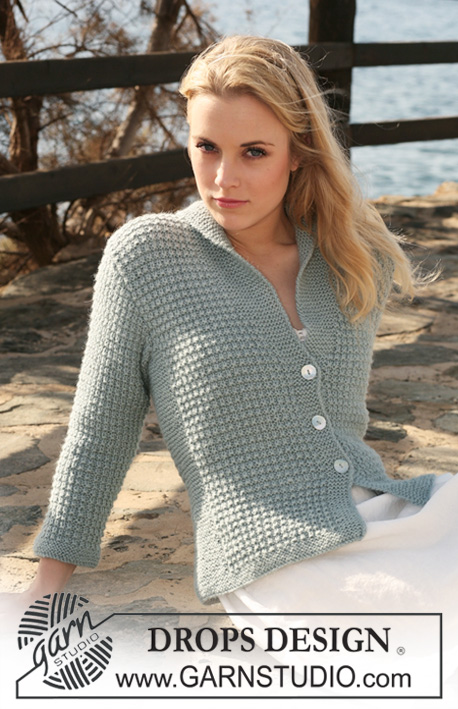
Knitted DROPS jacket with textured pattern and collar in 2 threads ”Alpaca”. Size S - XXXL.
DROPS 119-6 |
|||||||
|
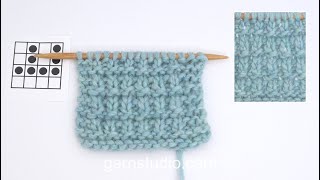
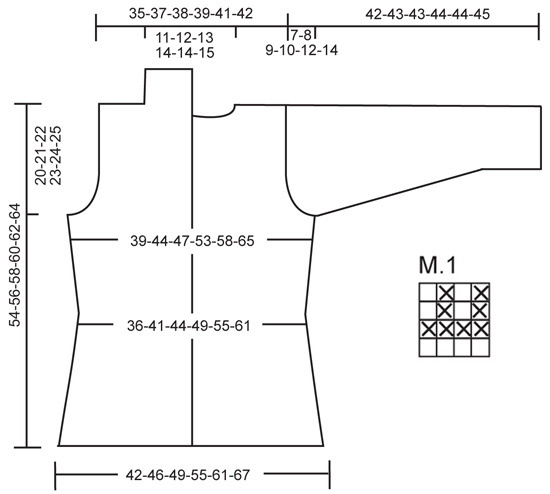
GARTER ST (back and forth on needle): K all rows. GARTER ST (in the round): K 1 round, P 1 round. PATTERN: See diagram M.1. Diagram shows the pattern from RS. BUTTONHOLES: Make buttonholes on right front band. 1 buttonhole = cast off 3rd front band st from mid front and cast on 1 new st on return row. Make buttonholes when piece measures: SIZE S: 14, 21 and 28 cm. SIZE M: 14, 21 and 28 cm. SIZE L: 14, 21 and 28 cm. SIZE XL: 15, 22 and 29 cm. SIZE XXL: 15, 22 and 29 cm. SIZE XXXL: 15, 22 and 29 cm. -------------------------------------------------------- -------------------------------------------------------- BODY PIECE: Worked back and forth on circular needle from mid front. Cast on 163-179-193-211-233-257 sts on circular needle size 4.5 mm with 2 threads Alpaca. Insert a marker 44-48-52-56-62-68 sts in from each side (back piece = 75-83-89-99-109-121 sts). Work 8 rows GARTER ST – SEE ABOVE, and continue as follows from RS: 6 garter sts, M.1 on the next 29-33-37-41-47-53 sts, 18 garter sts (marker sits in the middle of these sts), M.1 on the next 57-65-71-81-91-103 sts, 18 garter sts (marker sits in the middle of these sts), M.1 on the next 29-33-37-41-47-53 sts, and finish with 6 garter sts. REMEMBER THE KNITTING TENSION! Continue in pattern like this, AT THE SAME TIME when piece measures 5 cm dec 1 st each side of garter sts each side by K2 tog, repeat the dec on every 2.5 cm a total of 5 times = 143-159-173-191-213-237 sts. Remember BUTTONHOLES on right front band – SEE ABOVE!! When piece measures 20 cm inc 1 st each side of garter sts each side, and repeat the inc on every 6-6-6-7-7-7 cm a total of 3 times = 155-171-185-203-225-249 sts. AT THE SAME TIME when piece measures 28-28-28-29-29-29 cm work 1 st from M.1 into front band (i.e. number of sts remain the same but no of garter sts on front band inc and no of sts in M.1 dec), and repeat this on every 2 cm a total of 10-11-13-13-14-15 times (= 16-17-19-19-20-21 garter sts on front band). Continue in M.1 and garter st until piece measures 34-35-36-37-38-39 cm. Now cast off 6 sts each side for armhole (= 3 sts each side of marker) and complete each piece separately. BACK PIECE: = 65-73-79-89-99-111 sts. Continue in M.1 on all sts. Cast off for armhole each side at the beg of every row: 2 sts 0-1-2-3-4-6 times and 1 st 0-1-1-3-5-6 times = 65-67-69-71-73-75 sts. When piece measures 52-54-56-58-60-62 cm cast off the middle 17-19-21-23-23-25 sts for neck and complete each shoulder separately. Cast off 1 st on neckline on next row = 23-23-23-23-24-24 sts left on shoulder. Cast off when piece measures 54-56-58-60-62-64 cm. LEFT FRONT PIECE: Continue with garter st on front band and M.1 on remaining sts. Cast off for armhole at the side as described for back piece = 39-40-42-42-44-45 sts. When piece measures 54-56-58-60-62-64 cm cast off the first 23-23-23-23-24-24 sts from RS for shoulder = 16-17-19-19-20-21 sts left on collar. Work remaining sts on row. Now work shortened rows on collar (with start from WS) as follows: * 2 rows on the first 8-8-8-9-9-10 sts only, 2 rows on all sts *, repeat from *-* until collar measures approx 6-6-7-7-8-8 cm on the shorter side (measured from shoulder). Cast off. RIGHT FRONT PIECE: Like left front piece, but mirrored. SLEEVE: Worked in the round on double pointed needles. Cast on 44-46-48-50-52-54 sts on double pointed needles size 4.5 mm with 2 threads Alpaca. Insert a marker at beg of round = mid under sleeve. Work 8 rows GARTER ST – SEE ABOVE, and continue in M.1 on all sts. When piece measures 5 cm inc 1 st each side of marker, and repeat the inc on every 3-2.5-2-2-1.5-1.5 cm a total of 9-11-12-14-15-16 times = 62-68-72-78-82-86 sts. Incorporate inc sts in M.1 as you go along. When piece measures 35-35-34-34-32-31 cm - NOTE! Less for the larger sizes because of longer sleeve cap and wider shoulder – cast off for sleeve cap each side at the beg of every row: 3 sts 1 time, 2 sts 3 times, 1 st 0-1-2-4-5-7 times, then 2 sts each side until piece measures 41-42-42-43-43-44 cm, now cast off 3 sts 1 time each side and cast off remaining sts. Piece measures approx 42-43-43-44-44-45 cm. ASSEMBLY: Sew shoulder seams. Set in sleeves. Sew collar tog mid back and sew to neckline on back piece. Sew on buttons. |
|||||||
Diagram explanations |
|||||||
|
|||||||
 |
|||||||
Have you finished this pattern?Tag your pictures with #dropspattern #maritcardigan or submit them to the #dropsfan gallery. Do you need help with this pattern?You'll find 18 tutorial videos, a Comments/Questions area and more by visiting the pattern on garnstudio.com. © 1982-2026 DROPS Design A/S. We reserve all rights. This document, including all its sub-sections, has copyrights. Read more about what you can do with our patterns at the bottom of each pattern on our site. |
|||||||


With over 40 years in knitting and crochet design, DROPS Design offers one of the most extensive collections of free patterns on the internet - translated to 17 languages. As of today we count 324 catalogues and 12272 patterns translated into English (UK/cm). 12272
We work hard to bring you the best knitting and crochet have to offer, inspiration and advice as well as great quality yarns at incredible prices! Would you like to use our patterns for other than personal use? You can read what you are allowed to do in the Copyright text at the bottom of all our patterns. Happy crafting!
Post a comment to pattern DROPS 119-6
We would love to hear what you have to say about this pattern!
If you want to leave a question, please make sure you select the correct category in the form below, to speed up the answering process. Required fields are marked *.