
Popular categories
Looking for a yarn?


Comments / Questions (38)
DEREZANIN FRANCOISE wrote:
Bonjour je voudrais faire le modèle 170-24 mais je ne comprends pas vos explications. Je viens de commencer le demi dos gauche. Pourriez vous m'aider en me donnant le diagramme complet pour continuer ? Merci par avance
24.01.2018 - 17:04DROPS Design answered:
Bonjour Mme Derezanin, pour le demi-dos gauche, on va augmenter côté emmanchure (en début de rang sur l'endroit, après 3 m point mousse) et en même temps, d'abord diminuer puis augmenter en fin de rang sur l'endroit pour la fente d'encolure (pour qu'elle ait une forme de goutte). Bon tricot!
25.01.2018 - 08:03
![]() Sipos Anikó wrote:
Sipos Anikó wrote:
Most komolyan, ezeket a mintákat google fordítóval fordítják vagy egyáltalán átolvassa valaki, mi kerül ide? Rettentő. Nemcsak hogy a mintát nem értem, de időnként magát a mondatot sem. Bosszantó.
17.06.2017 - 14:29DROPS Design answered:
Kedves Anikó, sajnáljuk, hogy nem tetszenek a mintaleírások, amiket nem google fordító, hanem egy tapasztalt kötéssel foglalkozó, képzett fordító fordítja. Ha kérdése van, szívesen adunk választ, akár itt, akár a Facebook Magyar DROPS csoportjában.
19.06.2017 - 08:46
![]() Helene Trempe wrote:
Helene Trempe wrote:
Bonjour, je ne vois pas de mention pour l'échantillon pour ce patron. Merci de préciser.
02.05.2017 - 21:36DROPS Design answered:
Bonjour Mme Trempe, vous trouverez l'échantillon sous l'onglet "Fournitures" avec la taille de aiguilles, soit pour ce modèle: 21 m x 28 rangs en jersey = 10 x 10 cm. Bon tricot!
03.05.2017 - 09:12
![]() Elke Klünder wrote:
Elke Klünder wrote:
Sorry, ich hab Zweifel, ob mein Rückenteil so stimmt. Könnt ihr bitte eine Schnittzeichnung vom Rückenteil anfügen. Ich weiss nämlich nicht, ob mein Knopfloch stimmt. Was bedeutet " hintere Mitte"? Vielen Dank.
31.01.2017 - 07:42DROPS Design answered:
Liebe Frau Klünder, das Knopfloch muss bei der hinteren Mitte gestrickt werden, dh am Ende einer Hinreihe (von dem Schulter/Armausschnitt zur Schlitz. Viel Spaß beim stricken!
31.01.2017 - 09:28
![]() Irene wrote:
Irene wrote:
Als je A1 aan het breien bent, moet je dan 1 tricot steek aan het begin van de naald houden, of wordt het steeds meer door de meerderingen? Als je 1 tricotsteek houd gaan de gaatjes iets verspringen en dat zien ik niet op de foto
02.07.2016 - 10:11DROPS Design answered:
Hoi Irene. Ik zou de nieuwe st steeds in tricotst breien en gaandeweg meebreien in het patroon als de st passen en niet het patroon verspringen.
05.07.2016 - 15:08
![]() Corrie Janssen wrote:
Corrie Janssen wrote:
Kan deze top ook op gewone breinaalden gebreid worden. Zo ja, hoeveel steken moet ik dan op zetten
25.06.2016 - 15:20DROPS Design answered:
Hoi Corrie. Kijk hier hoe je een patroon kan aanpassen voor rechte naalden. Veel breiplezier!
27.06.2016 - 11:31
![]() Ernestina Jiménez Barroso wrote:
Ernestina Jiménez Barroso wrote:
Hola,he empezado el dros 170—24, pero creo que no esta bien,no me queda muy claro en que lado tengo que aumentar o disminuir y tiene una forma extraña,no habria ningún video por el que me pueda guiar? Muchas gracias
25.06.2016 - 04:11DROPS Design answered:
Hola Ernestina. El patrón está correcto. En la parte del material tienes el apartado "Vídeos" que te pueden ayudar a solucionar los problemas que surjan durante la realización del modelo. Te recomiendo marcar bien donde trabajas la sisa y donde el escote para no confundirte al trabajar las dism y los aumentos.
26.06.2016 - 09:23
![]() ErnestinaJimenez Barroso wrote:
ErnestinaJimenez Barroso wrote:
Hola!!!! no entiendo muy bien vuestro sistema, por ejemplo, este jersey me gusta mucho pero no puedo imprimirlo porque mi impresora no funciona, puedo pasarlo a un pendrive para imprimirlo en una copisteria? de que manera? y el precio que está arriba a la derecha es lo que tengo que pagar por el patrón?. me gustan muchos patrones y os agradeceria saber como tenerlos. Muchas gracias
22.05.2016 - 19:36DROPS Design answered:
Hola Ernestina. Los patrones de DROPS son todos gratis. Puedes imprimirlos directamente o pasarlos a un pendrive. Bajo el material tienes la pestaña "Patrón imprimir" o "Foto imprimir", sigue los pasos indicados. El precio que ves a la derecha arriba es el precio aprox del material necesario para hacer el modelo.
23.05.2016 - 08:03
![]() Julie West wrote:
Julie West wrote:
Hi can you tell me the approximate sizes of L and XL please. Many thanks
16.04.2016 - 19:05DROPS Design answered:
Hi Julie, you can find a measurement chart scrolling down the page: compare it with a garment you have and you can find the right size. Happy knitting!
17.04.2016 - 14:48
![]() Anne wrote:
Anne wrote:
De beschrijving van waar het knoopsgat moet komen is onduidelijk. In eerste instantie heb ik deze gebreid in op 1,5 cm in het linker schouderbandje, in plaats van bij de split. Hopelijk veranderen jullie dat in de beschrijving van het patroon, zodat anderen niet dezelfde fout maken. Ik zag bij de opmerkingen dat ik niet de enige was die daar tegenaan gelopen was. Aanpassen dus!
05.03.2016 - 15:05DROPS Design answered:
Hoi Anne. Er staat in het patroon: Maak 1 knoopsgat op het linkerachterpand aan de bovenkant van de split middenachter bij een hoogte van 1½ cm
09.03.2016 - 09:39
|
||||||||||||||||
Holiday Bliss#holidayblisstop |
||||||||||||||||
 |
 |
|||||||||||||||
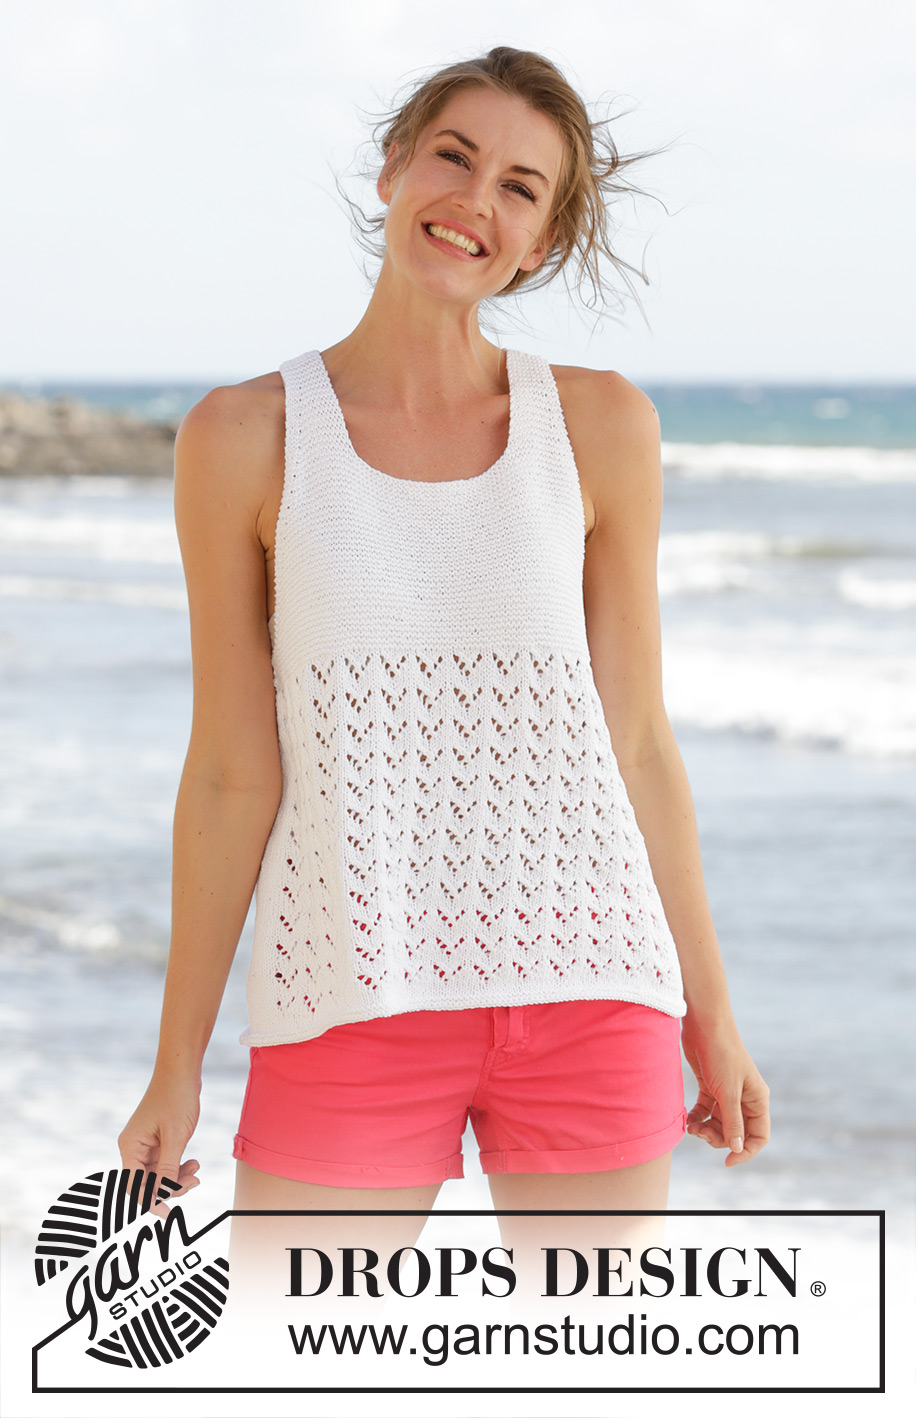
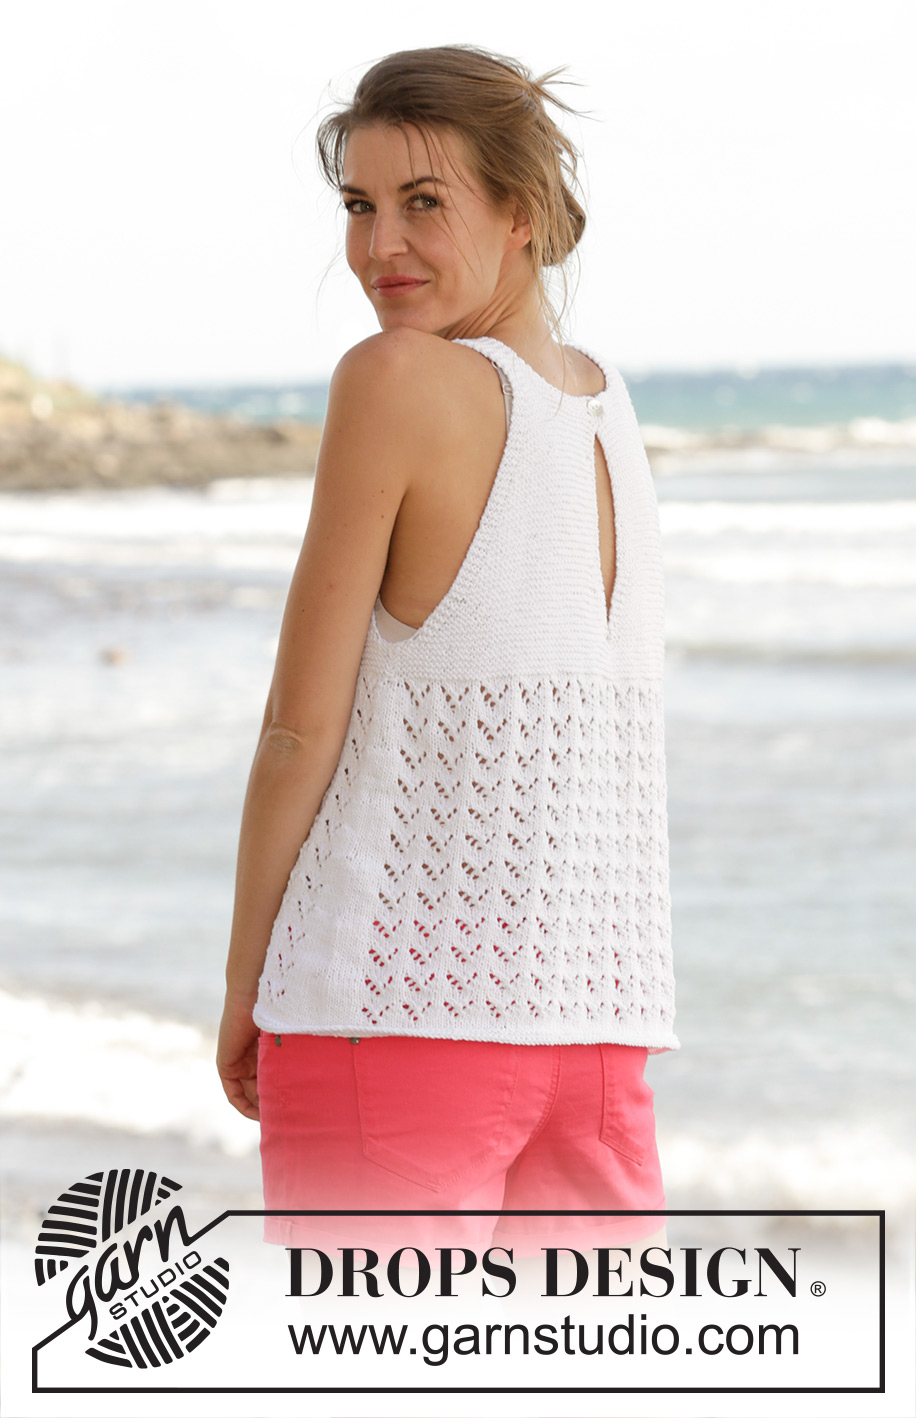
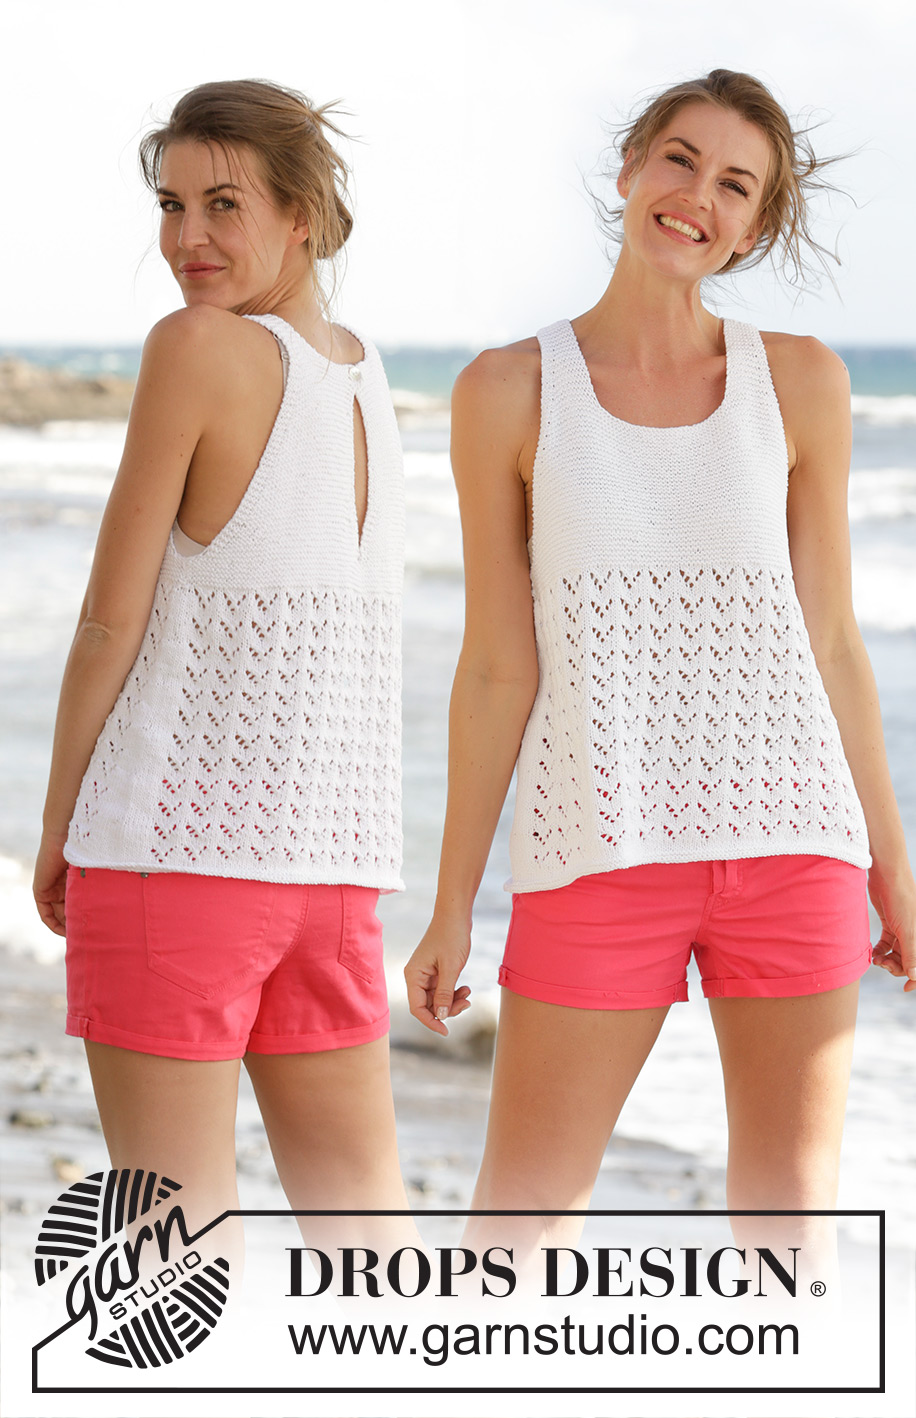
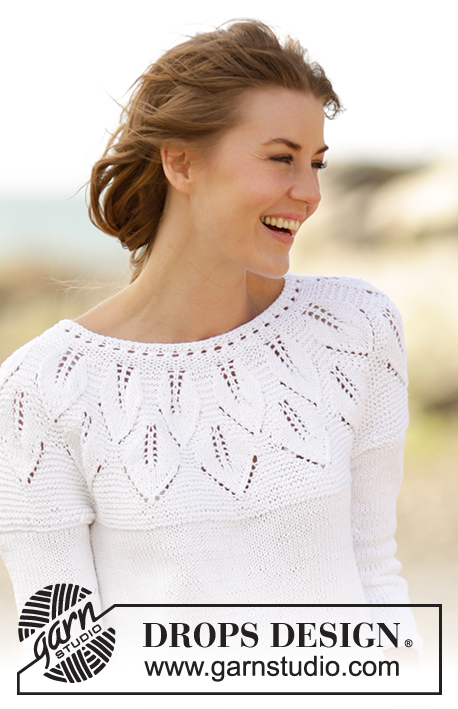
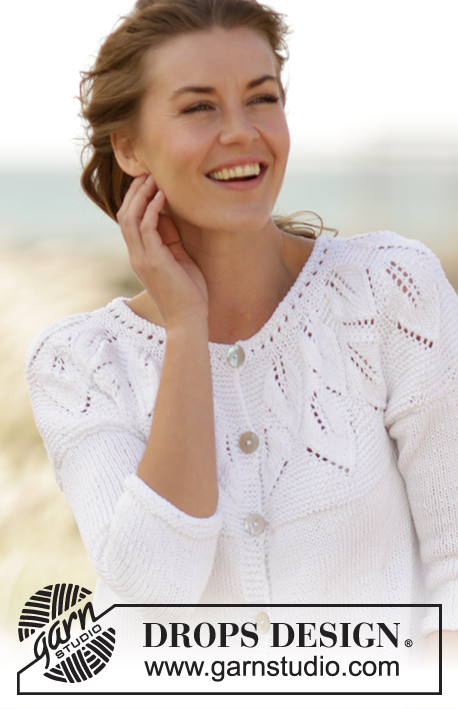
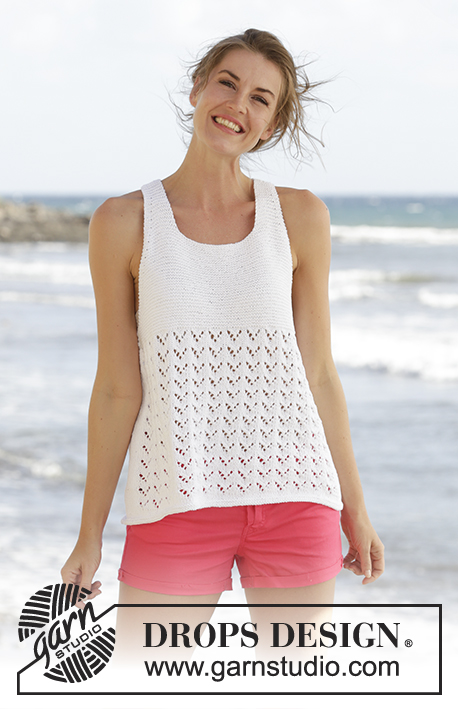
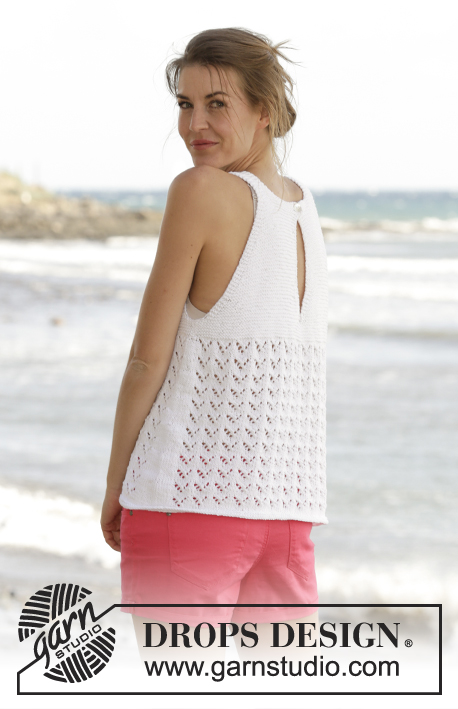
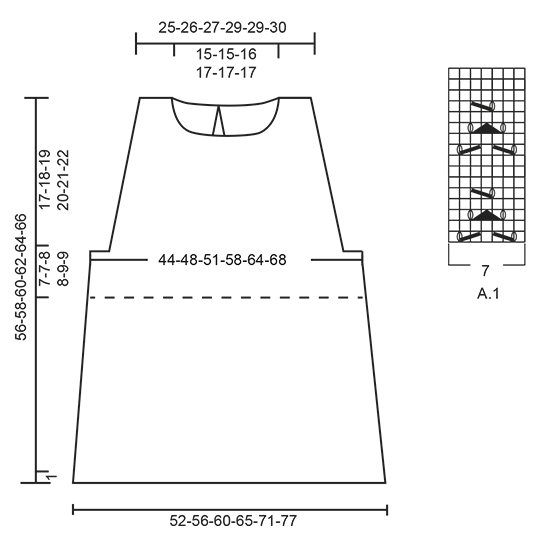
Knitted DROPS top in garter st with lace pattern and vent mid back in ”Cotton Light”. Worked top down. Size S-XXXL.
DROPS 170-24 |
||||||||||||||||
|
GARTER ST (back and forth): K all rows. 1 ridge = K2 rows. GARTER ST (worked in the round): 1 ridge = 2 rounds. * K 1 round and P 1 round *, repeat from *-*. PATTERN: See diagram A.1. INCREASE TIP-1: Inc 1 st by making a YO. On next row K YO twisted to avoid holes. INCREASE TIP-2: Work until 1 st remains before marker, 1 YO, work 2 sts in garter st (marker is between these 2 sts), 1 YO. On next round K YOs twisted to avoid holes. Then work the new sts in stockinette st. BUTTONHOLE: Dec for 1 buttonhole on left back piece at the top in vent mid back when piece measures 1½ cm / ½" as follows: K tog 3rd and 4th st from edge and make 1 YO. ---------------------------------------------------------- TOP: First worked back and forth on needle in parts, then work pattern in the round. The piece is worked top down. LEFT BACK PIECE: Cast on 10-12-12-13-13-14 sts on circular needle size 3.5 mm / US 4 with Cotton Light. Work in GARTER ST - see explanation above. Remember BUTTONHOLE - see explanation above. When piece measures 4 cm / 1½", inc for armhole as follows from RS: Work 3 sts in garter st, 1 YO (= 1 st inc) – READ INCREASE TIP-1, work in garter st over the remaining 7-9-9-10-10-11 sts and cast on 1 new st for neck at the end of row. Work 1 row. At the end of the next row from RS, cast on 14-15-15-16-16-17 new sts for neck = 26-29-29-31-31-33 sts. REMEMBER THE KNITTING GAUGE Then continue inc for armhole AT THE SAME TIME dec and inc for vent mid back as follows: ARMHOLE: Repeat inc for armhole every 4th row 10-12-13-11-6-6 more times and then every other row 7-5-6-12-24-26 times. VENT MID BACK: Dec for vent as follows (from RS): Work until 5 sts remain, K 2 tog, work 3 sts in garter st. Repeat this dec every 4th row 3 more times. Then when piece measures 9-10-11-12-13-14 cm / 3½"-4"-4⅜"-4¾"-5⅛"-5½" from the new sts cast on for neck, inc as follows (from RS): Work until 3 sts, 1 YO, work 3 sts in garter st. K YO twisted on next row to avoid hole. Repeat inc every 4th row 3 more times. When all inc for armholes are done, there are 43-46-48-54-61-65 sts on left back piece. Work last row from RS. Piece measures approx. 17-18-19-20-21-22 cm / 6¾"-7"-7½"-8"-8¼"-8¾". Put piece aside and knit right back piece. RIGHT BACK PIECE: Cast on and work as left back piece but reversed. I.e. inc for armhole inside 3 sts in garter st at the end of row from RS and cast on for neck at the end of row from WS. When all inc are done there are 43-46-48-54-61-65 sts on right back piece. Adjust according to left back piece. Work last row from RS, cast on 3-4-5-6-6-6 sts at the end of this row, turn piece and work as follows from WS: Work in garter st over the new 3-4-5-6-6-6 sts, in garter st over the 43-46-48-54-61-65 sts from right back piece, cast on 1-0-1-1-1-0 new sts, then work in garter sts over the next 43-46-48-54-61-65 sts from left back piece from WS, cast on 3-4-5-6-6-6 sts at the end of row. There are now 93-100-107-121-135-142 sts on back piece. Continue in garter st until piece measures 24-25-27-28-30-31 cm / 9½"-9¾"-10½"-11"-11¾"-12¼" from shoulder – adjust so that the last row is worked from WS. Slip all sts on a stitch holder and work the front piece. FRONT PIECE: Left shoulder: Cast on 10-12-12-13-13-14 sts on circular needle size 3.5 mm / US 4 with Cotton Light. Work in garter st. When piece measures 4 cm / 1½", work as follows on next row from RS: Work until 3 sts, 1 YO (= 1 st inc), work 3 sts in garter st. Now continue inc for armhole the same way as on right back piece, AT THE SAME TIME when piece measures 8-8-10-10-12-12 cm / 3"-3"-4"-4"-4¾"-4¾" - adjust so that last row is worked from WS, slip sts on a stitch holder and work right shoulder. Right shoulder: Cast on and work as left shoulder but reversed. Inc sts for armhole the same way as on left back piece (i.e. inside 3 sts in garter st at beg of row from RS). When piece measures 8-8-10-10-12-12 cm / 3"-3"-4"-4"-4¾"-4¾", cast on 31-32-33-35-35-36 sts for neck at the end of row from RS, then work sts from stitch holder (= left shoulder) on to needle. Continue back and forth in garter st. NOTE: Continue inc for armhole as before. When all inc for armholes are done, there are 87-92-97-109-123-130 sts on needle. Adjust so that last row is from WS, cast on 3-4-5-6-6-6 sts at the end of row, turn and K over all sts, cast on 3-4-5-6-6-6 sts at the end of row = 93-100-107-121-135-142 sts on front piece. Piece measures approx. 17-18-19-20-21-22 cm / 6¾"-7"-7½"-8"-8¼"-8¾". Continue in garter st until piece measures 24-25-27-28-30-31 cm / 9½"-9¾"-10½"-11"-11¾"-12¼" from shoulder – adjust according to back piece (last row is worked from WS). BODY: Now work in the round. Insert 1 marker in piece, NOW MEASURE PIECE FROM HERE. Switch to circular needle size 4 mm / US 6. Work as follows from RS: K the 93-100-107-121-135-142 sts on front piece, then work sts from stitch holder on back piece on to same circular needle = 186-200-214-242-270-284 sts on needle. Insert a marker in transition between front and back piece (= 93-100-107-121-135-142 sts between each marker). First marker is beg of round. K 1 round. Then work pattern as follows: 1 st in stockinette st, work A.1 (= 7 sts) 13-14-15-17-19-20 times in width, 1 st in stockinette st, (marker is here), 1 st in stockinette st, A.1 13-14-15-17-19-20 times in width, 1 st in stockinette st. Continue as follows. When piece measures 2 cm / ¾", inc 1 st on each side of marker in each side of piece - READ INCREASE TIP-2 (= 4 sts inc). Repeat inc every 3½-3-2½-3½-4-3 cm / 1¼"-1⅛"-⅞"-1¼"-1½"-1⅛" 7-8-9-7-6-9 more times = 218-236-254-274-298-324 sts. When piece measures 31-32-32-33-33-34 cm / 12¼"-12½"-12½"-13"-13"-13½" (adjust to finish nicely according to pattern), switch to circular needle size 3.5 mm / US 4. Work 2 ridges in GARTER ST - see explanation above. Bind off. The whole piece measures approx. 56-58-60-62-64-66 cm / 22"-22¾"-23⅝"-24⅜"-25¼"-26". ASSEMBLY: Sew the shoulder seams. Sew tog ridges under each armhole in outer loops of edge sts (= side seams). Sew on button at the top of vent on right back piece. |
||||||||||||||||
Diagram explanations |
||||||||||||||||
|
||||||||||||||||
 |
||||||||||||||||
Have you finished this pattern?Tag your pictures with #dropspattern #holidayblisstop or submit them to the #dropsfan gallery. Do you need help with this pattern?You'll find 24 tutorial videos, a Comments/Questions area and more by visiting the pattern on garnstudio.com. © 1982-2026 DROPS Design A/S. We reserve all rights. This document, including all its sub-sections, has copyrights. Read more about what you can do with our patterns at the bottom of each pattern on our site. |
||||||||||||||||


With over 40 years in knitting and crochet design, DROPS Design offers one of the most extensive collections of free patterns on the internet - translated to 17 languages. As of today we count 324 catalogs and 12290 patterns - 12280 of which are translated into English (US/in).
We work hard to bring you the best knitting and crochet have to offer, inspiration and advice as well as great quality yarns at incredible prices! Would you like to use our patterns for other than personal use? You can read what you are allowed to do in the Copyright text at the bottom of all our patterns. Happy crafting!
Post a comment to pattern DROPS 170-24
We would love to hear what you have to say about this pattern!
If you want to leave a question, please make sure you select the correct category in the form below, to speed up the answering process. Required fields are marked *.