
Popular categories
Looking for a yarn?


Comments / Questions (58)
![]() Lily wrote:
Lily wrote:
Ich habe Schwierigkeiten mehrere Maschen aus dem gleichen Querfaden aufzunehmen, besonders 17-18-...: "2-3-2-2-1-1 x 2 M, 2-1-1-1-1-0 x 4 M, 1 x 6 M, 1 x 8 M und 1 x 17-18-17-14-12-12 M" Bedeutet das, dass ich ... 17-18-... Maschen aus einem gleichen Querfaden zwischen den letzten und vorletzten Masche aufnehmen soll? Danke!
24.07.2015 - 01:18DROPS Design answered:
Sie müssen die M neu anschlagen, nicht aus dem Querfaden zunehmen. Wie Sie das im Prinzip machen, zeigt Ihnen das Video "Seitlich neue M anschlagen", das Sie im Kopf unter Videos neben dem Foto finden. Gutes Gelingen!
28.07.2015 - 17:13
![]() PITSCHON MARTINE wrote:
PITSCHON MARTINE wrote:
Merci pour votre réponse rapide ! je suis rassurée. Bonne journée MFP
23.02.2015 - 12:02
![]() PITSCHON MARTINE wrote:
PITSCHON MARTINE wrote:
Les caractéristiques de la laine KID-SILK sont : aiguilles 3,5 et échantillon 10X10cm = 23m X 30 rgs. Pourquoi des explications avec aig. n°4,5 et échantillon 17X34 pour ce modèle DROPS 155-23 ? Merci pour vos explications. MFP
22.02.2015 - 19:09DROPS Design answered:
Bonjour Mme Pitschon, on tricote ici volontairement plus souple (en déjaugé, c'est-à-dire avec des aiguilles plus grosses que d'habitude) pour avoir l'effet obtenu. Vérifiez bien que vous avez bien le bon échantillon soit 17 m x 34 rangs rangs point mousse = 10 x 10 cm avec les aiguilles 5,5 (ou plus ou moins grosses pour obtenir le bon échantillon). Bon tricot!
23.02.2015 - 10:31
![]() Pat Jarvis wrote:
Pat Jarvis wrote:
Have requested help in obtaining yarn, I would also need corrected pattern ( see comments re sleeves) thank you
17.06.2014 - 13:20DROPS Design answered:
Dear Mrs Jarvis, online pattern is correct as it is now. Happy knitting!
17.06.2014 - 18:00
![]() Atha wrote:
Atha wrote:
Goodmorning. I want to make this bolero with brushed alpaca silk. How many yarns do I need? Thanks for your time!
04.06.2014 - 10:38DROPS Design answered:
Dear Atha, click here to calculate the amount of yarn in an alternative yarn but this bolero is worked with 1 thread Kid-Silk (group A), while Brushed Alpaca Silk belongs to group C (= 2 strands group A). Your Drops store can help you if required. Happy knitting!
04.06.2014 - 12:09
![]() Ingrid wrote:
Ingrid wrote:
Leider spreche ich kein italienisch. Und die Antwort an mich war, dass sich das Design Team darum kümmert. Ich kann ein Strickmuster nur nach dem Bild auswählen und hier sind es lange Ärmel. Bei mir gehen die Ärmel nicht mal bis zum Ellbogen obwohl die Maschenprobe gestimmt hat.
03.06.2014 - 10:51Sandra wrote:
Siehe Antwort unten an Benedetta! Das Bild täuscht.
03.06.2014 - 10:23
![]() Ingrid wrote:
Ingrid wrote:
Hallo Sandra, auf dem Bild sind sie lang und wenn man nach Anleitung strickt sind sie nicht mal 3/4.
03.06.2014 - 08:06
![]() Sandra wrote:
Sandra wrote:
Die Ärmel sind ja nicht lang sondern 3/4.
02.06.2014 - 17:33
![]() Ingrid wrote:
Ingrid wrote:
Ich finde es sehr schade, dass es hier keine Lösung gibt. Es wird Sommer und ich sitze hier mit meinem halbfertigen Bolero und weiß leider nicht wie ich zu einem Bolero mit langen Ärmeln komme.
02.06.2014 - 16:34DROPS Design answered:
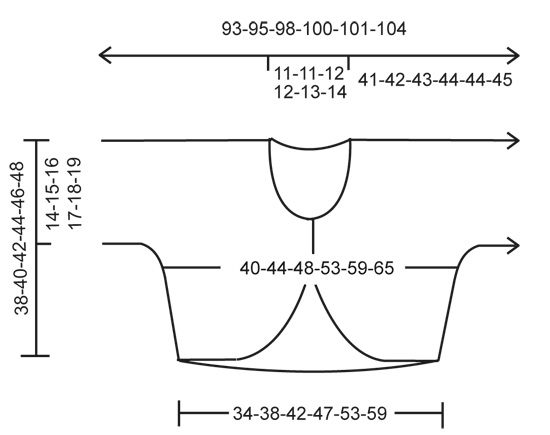
Liebe Ingrid, der Bolero soll tatsächlich so gestrickt werden wie beschrieben. Die Anleitung gilt für 3/4-lange Ärmel und sie werden beim Tragen wohl noch etwas länger. Die Ärmellänge ab dem Halsausschnitt ist übrigens in der Maßskizze eingezeichnet. Diese Länge passt zu den Angaben in der Anleitung. Stimmt denn Ihre Maschenprobe genau? Das ist bei diesem Modell für die Ärmellänge ja besonders wichtig.
03.06.2014 - 21:22
|
|
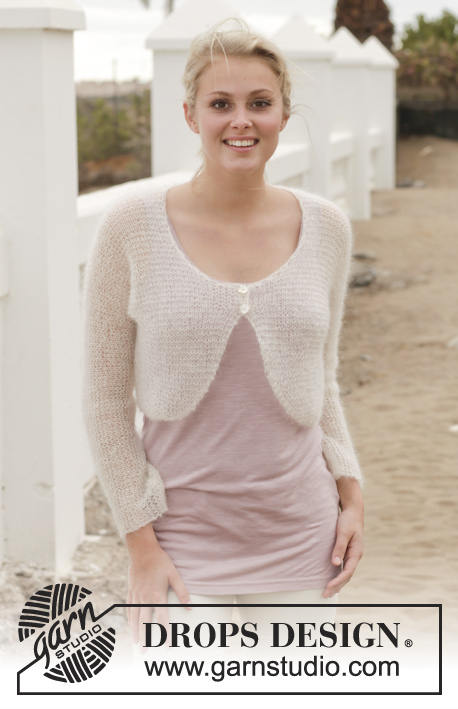
Paloma#palomabolero |
|
 |
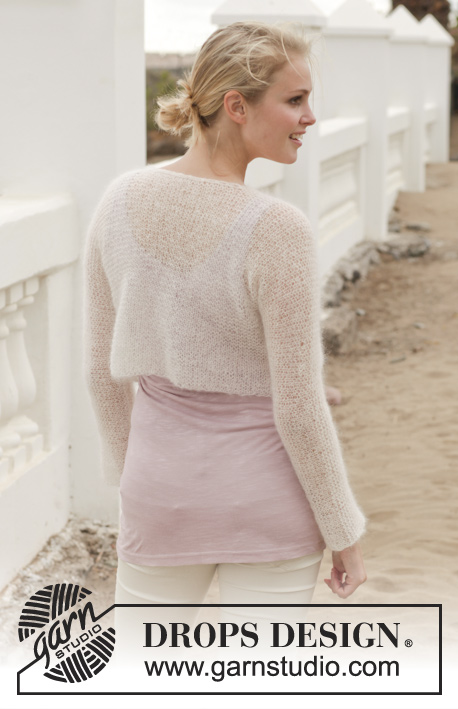 |
Knitted DROPS bolero in garter st in ”Kid-Silk”. Size: S - XXXL.
DROPS 155-23 |
|
|
GARTER ST (back and forth on needle): K all rows. 1 ridge = K2 rows. INCREASE TIP: Inc 1 st by getting yarn between 2 sts from previous row - K this st twisted, i.e. work in back loop of st instead of front to avoid holes. DECREASE TIP: Dec inside outermost st by K the second and third sts tog and the third last and next to last st. BUTTONHOLES: Dec for buttonholes on right band. 1 buttonhole = K tog second and third st from edge mid front and make 1 YO. Measure from last st cast on towards mid front and dec for buttonholes when piece measures: SIZE S: 1 and 4 cm / ½" and 1½". SIZE M: 1 and 4 cm / ½" and 1½". SIZE L: 1 and 4 cm / ½" and 1½". SIZE XL: 1 and 5 cm / ½" and 2". SIZE XXL: 1 and 5 cm / ½" and 2". SIZE XXXL: 1 and 5 cm / ½" and 2". ---------------------------------------------------------- BOLERO: The entire bolero is worked in one piece. Work from the bottom of the back piece, inc for sleeves, dec for neck, at the same time bind off the sleeves and work down the front piece. Worked back and forth on a circular needle to make room for all the sts. BACK PIECE: Cast on 60-66-74-82-92-102 sts (includes 1 edge st in each side) on circular needle size 5.5 mm / US 9 with Kid-Silk. Work in GARTER ST - see explanation above. REMEMBER THE GAUGE! When piece measures 4 cm / 1½", inc 1 st in each side - READ INCREASE TIP! Repeat inc every 3-3-3½-3½-4-4 cm / 1"-1"-1¼"-1¼"-1½"-1½" 4 more times (5 times in total) = 70-76-84-92-102-112 sts. When piece measures 19-20-21-22-23-24 cm / 7½"-8"-8¼"-8¾"-9"-9½", cast on new sts at the end of every row in each side as follows: 1 st 1-1-2-2-3-4 times, 2 sts 2-3-2-2-1-1 time, 4 sts 2-1-1-1-1-0 times, 6 sts 1 time, 8 sts 1 time and 17-18-17-14-12-12 sts 1 time = 158-162-166-168-172-176 sts in total on needle. Continue to work until piece measures 37-39-41-43-45-47 cm / 14½"-15¼"-16⅛"-17"-17¾"-18½". Now bind off the middle 18-18-20-20-22-24 sts for neck = 70-72-73-74-75-76 sts remaining on each shoulder/sleeve. Slip sts for left front piece on 1 stitch holder. RIGHT FRONT PIECE: = 70-72-73-74-75-76 sts. Work 1 cm / ½", insert 1 marker = mid on top shoulder. NOW MEASURE PIECE FROM HERE! Continue back and forth until 11 cm / 4½" have been worked from marker mid on top of shoulder. Then cast on new sts at the end of every row in towards neck as follows: 1 st 2 times, 2 sts 2 times, and 6-6-7-7-8-9 sts 1 time = 82-84-86-87-89-91 sts (includes 3 band sts in garter st), AT THE SAME TIME when piece measures 14-15-16-17-18-19 cm / 5½"-6"-6¼"-6¾"-7"-7½" bind off sleeve sts. REMEMBER BUTTONHOLES! Loosely bind off at the beg of every row from edge of sleeve: 17-18-17-14-12-12 sts 1 time, 8 sts 1 time, 6 sts 1 time, 4 sts 2-1-1-1-1-0 times, 2 sts 2-3-2-2-1-1 time, 1 st 1-1-2-2-3-4 times = 38-41-45-49-54-59 sts remain on needle. Continue to work. When piece measures 22-24-24-26-26-28 cm / 8¾"-9½"-9½"-10¼"-10¼"-11", dec 1 st in the side - SEE DECREASE TIP. Repeat the dec every 3-3-3½-3½-4-4 cm / 1"-1"-1¼"-1¼"-1½"-1½" 4 more times (5 times in total) - AT THE SAME TIME when piece measures 25-27-29-31-33-35 cm / 9¾"-10½"-11½"-12¼"-13"-13¾", dec 1 st on next row towards mid front (to curve the front piece) - SEE DECREASE TIP, repeat dec on every 4th row a total of 4-3-3-2-2-2 times, then on every other row a total of 6-7-6-8-7-5 times and lastly on every row a total of 11-13-15-15-17-21 times = 12-13-16-19-23-26 sts remain on needle, bind off these sts on next row. LEFT FRONT PIECE: Slip the stitches on the stitch holder back on needle and work as right front piece but reversed. ASSEMBLY: Fold the bolero double at the shoulder = where the marker is. Sew side and sleeve seams in outer loops of edge sts. Cut and fasten the yarn. NECK EDGE: Work an edge around the neck on hook size 4.5 mm/US 7 as follows: Fasten yarn with 1 sc on right front piece towards mid front, ch 2, skip 1.5 cm / ½", * 1 sc, ch 2, skip 1.5 cm / ½" *, repeat from *-* around the entire neck edge, finish with 1 sc. Cut and fasten the yarn. |
|
 |
|
Have you finished this pattern?Tag your pictures with #dropspattern #palomabolero or submit them to the #dropsfan gallery. Do you need help with this pattern?You'll find 15 tutorial videos, a Comments/Questions area and more by visiting the pattern on garnstudio.com. © 1982-2026 DROPS Design A/S. We reserve all rights. This document, including all its sub-sections, has copyrights. Read more about what you can do with our patterns at the bottom of each pattern on our site. |
|


With over 40 years in knitting and crochet design, DROPS Design offers one of the most extensive collections of free patterns on the internet - translated to 17 languages. As of today we count 324 catalogs and 12290 patterns - 12280 of which are translated into English (US/in).
We work hard to bring you the best knitting and crochet have to offer, inspiration and advice as well as great quality yarns at incredible prices! Would you like to use our patterns for other than personal use? You can read what you are allowed to do in the Copyright text at the bottom of all our patterns. Happy crafting!
Post a comment to pattern DROPS 155-23
We would love to hear what you have to say about this pattern!
If you want to leave a question, please make sure you select the correct category in the form below, to speed up the answering process. Required fields are marked *.