
Popular categories
Looking for a yarn?


Comments / Questions (35)
![]() Sara wrote:
Sara wrote:
Hallo! Ich verstehe bei M1 die erste Reihe nicht. Soll ich als erste Masche gleich einen Umschlag machen, dann 2x zwei Maschen zusammen stricken und dann am Ende nochmal einen Umschlag? Und noch eine Frage: Bei Muster steht man soll die Umschläge in R1 und R3 stricken wie gezeigt in R2 und R4. Das verstehe ich nicht. In R2 und R4 gibt's doch gar keine Umschläge. Danke für Antworten! Sara
03.12.2017 - 15:54DROPS Design answered:
Liebe Sara, die Umschläge sind bei Reihe 1 und 3, bei der 2. und 4. Reihe werden Sie gestrickt, wie im Diagram gezeigt = der 1. Umschlag in M.1 (1. R) wird links bei der Rückreihe und der 2. Umschlag in M.1 (1. R) wird rechts bei der Rückreihe gestrickt. Viel Spaß beim stricken!
04.12.2017 - 10:14
![]() Manuela Marzai wrote:
Manuela Marzai wrote:
Salve, vorrei realizzare questo bellissimo modello, ma non riesco in alcun modo a decifrare il diagramma M1...credo ci sia un errore...il doppio gettato presente nella leggenda dov'è segnato?...ho fatto varie prove, ma mi ritrovo con un reticolato ad x invece che a fori rettangolari...grazie
15.03.2017 - 15:45DROPS Design answered:
Buongiorno Manuela. Lo trova nella terza riga del diagramma, dopo le prime 2 m lavorate insieme a diritto. Buon lavoro!
15.03.2017 - 16:05
![]() Jennifer wrote:
Jennifer wrote:
I confirm this is a beautiful model - I made it with Fabel long print + Vivaldi and it is gorgeous !
06.05.2014 - 11:55
![]() DROPS Design wrote:
DROPS Design wrote:
Quand les 4 m point mousse sont rabattues pour l'encolure, on continue sans ces 4 m point mousse jusqu'à la fin. On relèvera ensuite les mailles autour de l'encolure (= au-dessus de cette partie sans les 4 m point mousse) pour le col. Bon tricot!
14.03.2014 - 13:42
![]() Coureaud Loredana wrote:
Coureaud Loredana wrote:
REbonjour. Je me permets de revenir vers vous car je suis tjr dans le brouillard.Vous dites " à 60-63-65-68-70-73 cm (cf taille), on rabat les mailles côté encolure, à ce niveau-là, on n'a plus les 4 m point mousse côté encolure » (voir msg precedent),mais l’explication dit apres avoir rabattu de « continuer en point fantaisie M1 au point mousse de CHAQUE coté jusquàa ce que l’ouvrage mesure 68-71-74-77-80-83cm;terminer ensuite au point mousse » . Merci pour votre patience.
11.09.2013 - 19:02DROPS Design answered:
Bonjour Mme Coureaud, votre question a été transmise à notre équipe de styliste, je reviens vers vous dès que possible. Merci pour votre compréhension.
18.09.2013 - 10:28
![]() Coureaud Loredana wrote:
Coureaud Loredana wrote:
Bonjour. Pour l’encolure,au début on rabat les 4m point mousse mais l’explication demande de poursuivre en point fantaisie M.1 avec toujours les 4m au point mousse?? alors qu’on relève les mailles autour de l’encolure pour le col.... Merci beaucoup!
11.09.2013 - 15:11DROPS Design answered:
Bonjour Mme Coureaud, On tricote le devant gauche avec 4 m point mousse de chaque côté, puis à 60-63-65-68-70-73 cm (cf taille), on rabat les mailles côté encolure, à ce niveau-là, on n'a plus les 4 m point mousse côté encolure. Bon tricot!
11.09.2013 - 16:47
![]() Coureaud wrote:
Coureaud wrote:
Bonjour. Concernant le devant gauche ,lorsqu’il faut rabattre coté encolure,faut’il reconstituer les 4m (point mousse) demandées au fur et a mesure? Il y aura des « escaliers »? Dans l’image je n’arrive pas a apercevoir comment c’est fait... Merci de votre reponse que j’èspere rapide.
23.08.2013 - 13:35DROPS Design answered:
Bonjour Mme Coureaud, pour l'encolure devant, on rabat les 4 m point mousse dès la 1ère "dim" d'encolure. Par la suite, on relève les mailles tout autour de l'encolure pour tricoter le col. Bon tricot!
23.08.2013 - 16:32B.morshinkhof wrote:
Prachtig patroon, maar ik heb een vraag;op de foto zijn de zijnaden duidelijk open. Dit staat niet in de werkwijze, en kun je dit ook op 2 nld. breien? Gr. Beppie Morshinkhof drops 138-16
23.07.2013 - 17:28DROPS Design answered:
Je breit dit model heen en weer op de nld, dus je kan gerust een rechte naald gebruiken. De zijnaden zijn open. Dit staat in de beschrijving onder AFWERKING: Naai de schoudernaden samen in de buitenste lusjes van de buitenste st. Naai de mouwen in het lijf en naai de naad onder de mouwen dicht (de zijkanten van de poncho blijven open).
15.08.2013 - 16:02
![]() Helle Lykke wrote:
Helle Lykke wrote:
Til model 138 - 16: Jeg kan ikke helt forstå diagrammet for den 4. af tingene indgår ikke umiddelbart i opskriften og da det er langhåret garn vil jeg helst ikke strikke forkert. skal jeg bare overse dette eller er der en rettelse til diagrammet jeg skal følge? Med venlig hilsen Helle Lykke
21.10.2012 - 14:52DROPS Design answered:
Du kan bare følge diagrammet her på nettet! God fornøjelse!
16.11.2012 - 09:47
![]() Pricken wrote:
Pricken wrote:
M1 fel på svenska (kolla gärna norska orig.) Tom ruta: am från avigsidan, ruta med prick: rm från avigsidan
02.05.2012 - 12:23DROPS Design answered:
Tack, diagram texten är ändrad :)
04.05.2012 - 21:15
|
||||||||||||||||
Beach Princess#beachprincessponcho |
||||||||||||||||
 |
 |
|||||||||||||||
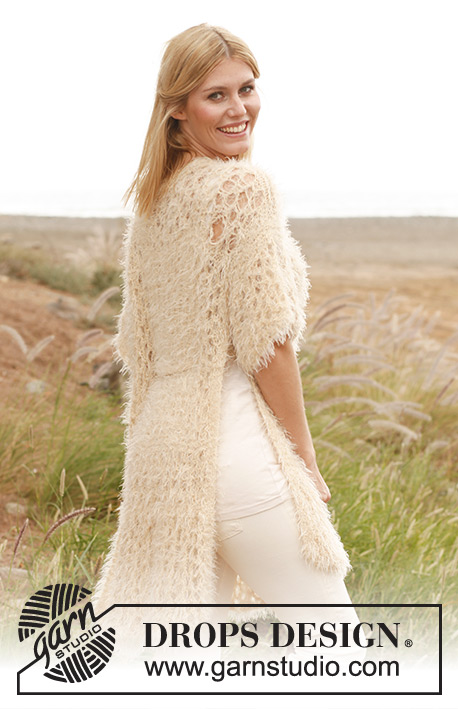
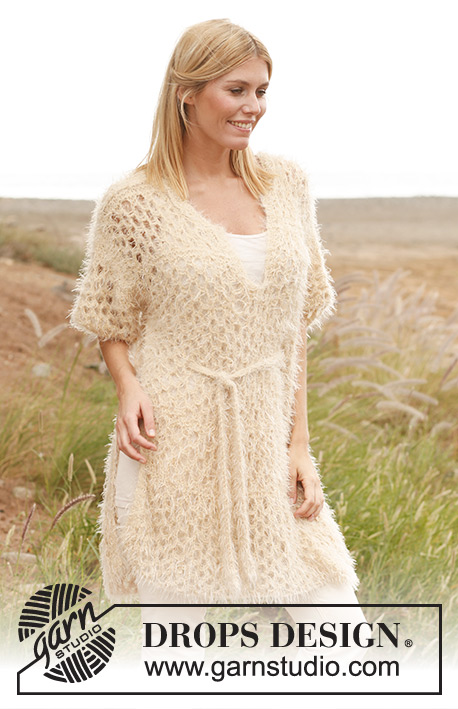
Knitted DROPS poncho with lace pattern in ”Symphony” or "Melody". Size: S - XXXL.
DROPS 138-16 |
||||||||||||||||
|
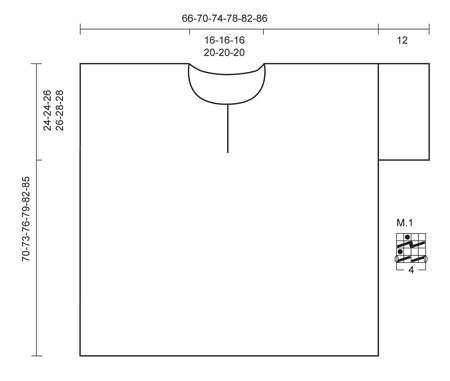
GARTER ST (back and forth on needle): K all rows. PATTERN: See diagram M.1 (diagram shows all rows in pattern seen from RS, YOs on 1st and 3rd row are worked as shown on 2nd and 4th row). KNITTING TIP: Always finish with last row in diagram M.1 before working rows in garter st. MEASURING TIP: Because of the weight of the yarn all measurements must be done by holding the piece up otherwise the garment will be too long when worn. -------------------------------------------------------- BACK PIECE: Worked back and forth on circular needle. Loosely cast on 68-72-76-80-84-88 sts on circular needle size 8 mm / US 11 with Symphony or Melody. Then work diagram M.1 with 4 sts in garter st - Read explanation above - in each side (1st row = RS). REMEMBER THE GAUGE! When piece measures approx. 20-20-22-22-24-24 cm / 8"-8"-8¾"-8¾"-9½"-9½" - Read KNITTING TIP and MEASURING TIP - work 4 rows in garter st over all sts. Then work diagram M.1 with 4 sts in garter st in each side until piece measures 32-32-35-35-38-38 cm / 12½"-12½"-13¾"-13¾"-15"-15", then work 4 rows in garter st over all sts. Continue to work diagram M.1 with 4 sts in garter st in each side until piece measures 56-59-61-64-66-69 cm / 22"-23¼"-24"-25¼"-26"-27⅛", then work 4 rows in garter st over all sts. Continue with diagram M.1 with 4 sts in garter st in each side until piece measures 68-71-74-77-80-83 cm / 26¾"-28"-29"-30½"-31½"-32¾". Then work in garter st until finished measurements - At the same time on 1st row in garter st, bind off the middle 20-20-22-22-24-24 sts for neck and finish each shoulder separately = 24-26-27-29-30-32 sts remain on each shoulder. Loosely bind off all sts when piece measures 70-73-76-79-82-85 cm / 27½"-28¾"-30"-31"-32¼"-33½". FRONT PIECE: Cast on and work as on back piece until piece measures 49-51-53-55-57-59 cm / 19¼"-20"-21"-21⅝"-22½"-23¼". LEFT FRONT PIECE: On next row from RS work vents as follows: Work 30-32-34-36-38-40 sts, work the next 4 sts in garter st (= band mid front) = 34-36-38-40-42-44 sts on needle, turn piece. Now finish each shoulder separately. Continue with diagram M.1 with 4 sts in garter st in each side until piece measures 56-59-61-64-66-69 cm / 22"-23¼"-24"-25¼"-26"-27⅛", then work 4 rows in garter st over all sts. Continue with diagram M.1 with 4 sts in garter st in each side until piece measures 60-63-65-68-70-73 cm / 23⅝"-24¾"-25½"-26¾"-27½"-28¾". Continue to bind off for neck at beg of every row from neck as follows: bind off 4 sts 1 time, 2 sts 2 times, and 1 st 2-2-3-3-4-4 times = 24-26-27-29-30-32 sts remain on shoulder. Continue with diagram M.1 with 4 sts in garter st in each side until piece measures 68-71-74-77-80-83 cm / 26¾"-28"-29"-30½"-31½"-32¾". Then work in garter st until finished measurements. Loosely bind off all sts when piece measures 70-73-76-79-82-85 cm / 27½"-28¾"-30"-31"-32¼"-33½". RIGHT FRONT PIECE: = 34-36-38-40-42-44 sts. Work the same way as on left front piece (with 4 sts in garter st in each side) but reversed. SLEEVE: Worked back and forth on needle. Cast on 50-50-54-54-58-58 sts on circular needle size 8 mm / US 11. Work diagram M.1 with 1 edge st in garter st in each side until piece measures 12 cm / 4¾", work 4 rows in garter st over all sts and then loosely bind off. ASSEMBLY: Sew shoulder seams in outer loop of edge sts. Sew in sleeves and sew seams under the sleeves (the sides on the poncho should be open). NECK EDGE: Worked back and forth on needle. Pick up from RS approx. 70 - 80 sts along the entire neck edge on circular needle size 8 mm / US 11. K next row - while at the same time adjusting no of sts to 70-70-76-76-80-80. Work 2 more rows in garter st (= 4 rows K in total), loosely bind off all sts. BELT: Cast on 5 sts on needle size 6 mm / US 10 and work rib as follows: K 1, * P 1, K 1 *, repeat from *-* one more time. Work rib like this for 180-180-190-190-200-200 cm / 70"-70"-75"-75"-79"-79", bind off. |
||||||||||||||||
Diagram explanations |
||||||||||||||||
|
||||||||||||||||
 |
||||||||||||||||
Have you finished this pattern?Tag your pictures with #dropspattern #beachprincessponcho or submit them to the #dropsfan gallery. Do you need help with this pattern?You'll find 15 tutorial videos, a Comments/Questions area and more by visiting the pattern on garnstudio.com. © 1982-2026 DROPS Design A/S. We reserve all rights. This document, including all its sub-sections, has copyrights. Read more about what you can do with our patterns at the bottom of each pattern on our site. |
||||||||||||||||


With over 40 years in knitting and crochet design, DROPS Design offers one of the most extensive collections of free patterns on the internet - translated to 17 languages. As of today we count 324 catalogs and 12290 patterns - 12280 of which are translated into English (US/in).
We work hard to bring you the best knitting and crochet have to offer, inspiration and advice as well as great quality yarns at incredible prices! Would you like to use our patterns for other than personal use? You can read what you are allowed to do in the Copyright text at the bottom of all our patterns. Happy crafting!
Post a comment to pattern DROPS 138-16
We would love to hear what you have to say about this pattern!
If you want to leave a question, please make sure you select the correct category in the form below, to speed up the answering process. Required fields are marked *.