
Popular categories
Looking for a yarn?


Comments / Questions (82)
![]() Ann Helen Eide Helland wrote:
Ann Helen Eide Helland wrote:
Stemmer det at ferdig strikket teppe har form som et parallellogram ?
09.11.2014 - 22:54DROPS Design answered:
Hej Ann Helen, ja i og med at man strikker det fra hjørne til højrne. God fornøjelse!
25.11.2014 - 10:45
![]() Wendy wrote:
Wendy wrote:
Kan je dit dekentje ook met rechte breinaalden breien? Of moet dit met een rondbreinaald zijn? Klopt het dat de wol normaal gezien met 3,5 mm moet gebreid worden, maar dat men hier 4,5 mm aangeeft?
30.10.2014 - 08:06DROPS Design answered:
Wij raden rechte breinaalden af omdat u in het midden van deze diagonaal gebreide deken erg veel steken hebt; het kan echter wel, want er wordt niet in de rondte gebreid. Garens hebben geen vaste maat breinaald, alleen een gemiddelde. Bijvoorbeeld een sokkengaren als Fabel breit men voor sokken op nld 2,5 mm (stevig en vast) en voor een trui op nld 3,5 mm (stevig maar soepel) en voor een sjaal of deken kan dat wel 4 of 5 mm zijn (soepel en losjes). Dit is dus geen fout.
30.10.2014 - 08:47
![]() Julia wrote:
Julia wrote:
Ich verstehe leider nicht wo genau ich die Höhe der Decke messen soll... Von der kurzen Seite bis zu Mitte?
28.10.2014 - 20:35DROPS Design answered:
Auf dem Foto können Sie ja erkennen, wie die Seiten der Decke zu den diagonalen Krausrippen liegen - Sie messen immer an den Seiten der Decke. Am Anfang wächst die Decke an beiden Seiten gleich, dann, wenn Sie Zunahmen und Abnahmen in derselben R (d.h. am Anfang und Ende der Hin-R) arbeiten, wächst die Längsseite der Decke, an der Sie nun weitermessen.
29.10.2014 - 00:20
![]() Anja Andersen wrote:
Anja Andersen wrote:
I oppskriften står det 2 ulike str..... Et til prematur og et vognteppe..... Hvilken str får jeg ved å følge oppskriften?
21.10.2014 - 12:05DROPS Design answered:
Hej Anja. Du faar begge. Du skal fölge mönstret og strikke til ca 51 ELLER 75 cm langs den lengste siden på teppet afhengigt hvilken str du vil lave.
21.10.2014 - 13:29
![]() Anna wrote:
Anna wrote:
Nerozumiem ako sa da upliest deka s tymto vzorom tak ako je na obrazku. Podla mna su tam dve licove strany, ako keby bola zhackovana z dvoch kusov. Ked pletiem vrubkovy vzor stale hladko a striedam farby, rub vyzera inak. Alebo je to nejaky iny sposob pletenia ?
08.10.2014 - 20:10DROPS Design answered:
Dobrý den, Anno! Tato deka je opravdu pletená jen stále hladce se střídáním barev, jak je uvedeno v návodu. Žádný zvláštní fígl v tom není. Možná vás trochu mate fotka... Líc a rub nejsou identické - tam, kde jsou v líci 2 řady první barvou a 1 řada druhou, jsou v rubu 2 řady druhou barvou a 1 tou první. Viz detail růžové deky, tam je to trochu zřetelnější. Hodně zdaru! Hana
08.10.2014 - 22:06
![]() Aia wrote:
Aia wrote:
Hej Jeg er i tvivl om hvilken side der menes, skal måles til 51-75cm i opskriften : Gentag indtagningen i beg af p og udtagningen i slutningen af p på hver 2.p (dvs på hver p fra retsiden - m-ant vil holdes konstant), til arb måler ca 51-75 cm langs den længste side på tæppet – afslut efter 4 p retstrik med natur. mvh Aia
06.10.2014 - 23:20
![]() Claartje wrote:
Claartje wrote:
Bij de omschrijving van het garen, wordt aangegeven dat je het beter iets te strak dan iets te los kunt breien. toch wordt er in het patroon een grotere breinaald aangehouden. wordt de deken zo niet te los gebreid met kans op verstrikte vingertjes in de gaatjes?
28.09.2014 - 20:51DROPS Design answered:
Hoi Claartje. Je moet dit deken juist losser breien ivm de strepen (onder STREPEN: zorg dat je de draad niet te strak aantrekt als je van kleur wisselt). De verwijzing op de kleurenkaart betreft de stekenverhouding - het kan lubberen als je te los breit. Klopt je stekenverhouding zoals aangegeven in dit patroon, dan komt het goed. En babyvingertjes zullen echt niet verstrikt raken in eventuele gaatjes.
29.09.2014 - 11:49
![]() Rannva wrote:
Rannva wrote:
Hej :) Synes ikke lige jeg kan læse mig til det, men er opskriften på det lille eller på det store tæppe?
27.08.2014 - 14:30DROPS Design answered:
Hej Rannva. Det er til begge str. Du skal strikke samme mönster, men strikke videre til 51 eller 75 cm. Det staar i opskriften. God fornöjelse.
27.08.2014 - 15:19
![]() Gerd wrote:
Gerd wrote:
Stämmer det att det ska vara 4,5 på stickorna?
11.08.2014 - 13:26DROPS Design answered:
Hej Gerd. Ja, du skal bruge pind 4,5 ELLER den pind som du skal bruge til den rette strikkefasthed til mönstret: 20 m x 39 p rillestrikk for 10 x 10 cm.
11.08.2014 - 16:05
![]() Christiane wrote:
Christiane wrote:
Vielen Dank hat alles gut geklappt und die Decke ist fertig.
28.06.2014 - 22:00
|
|
Dream Date#dreamdateblanket |
|
 |
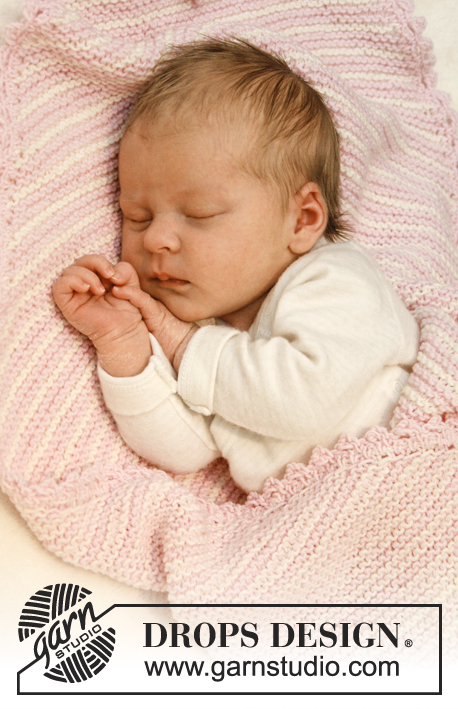 |
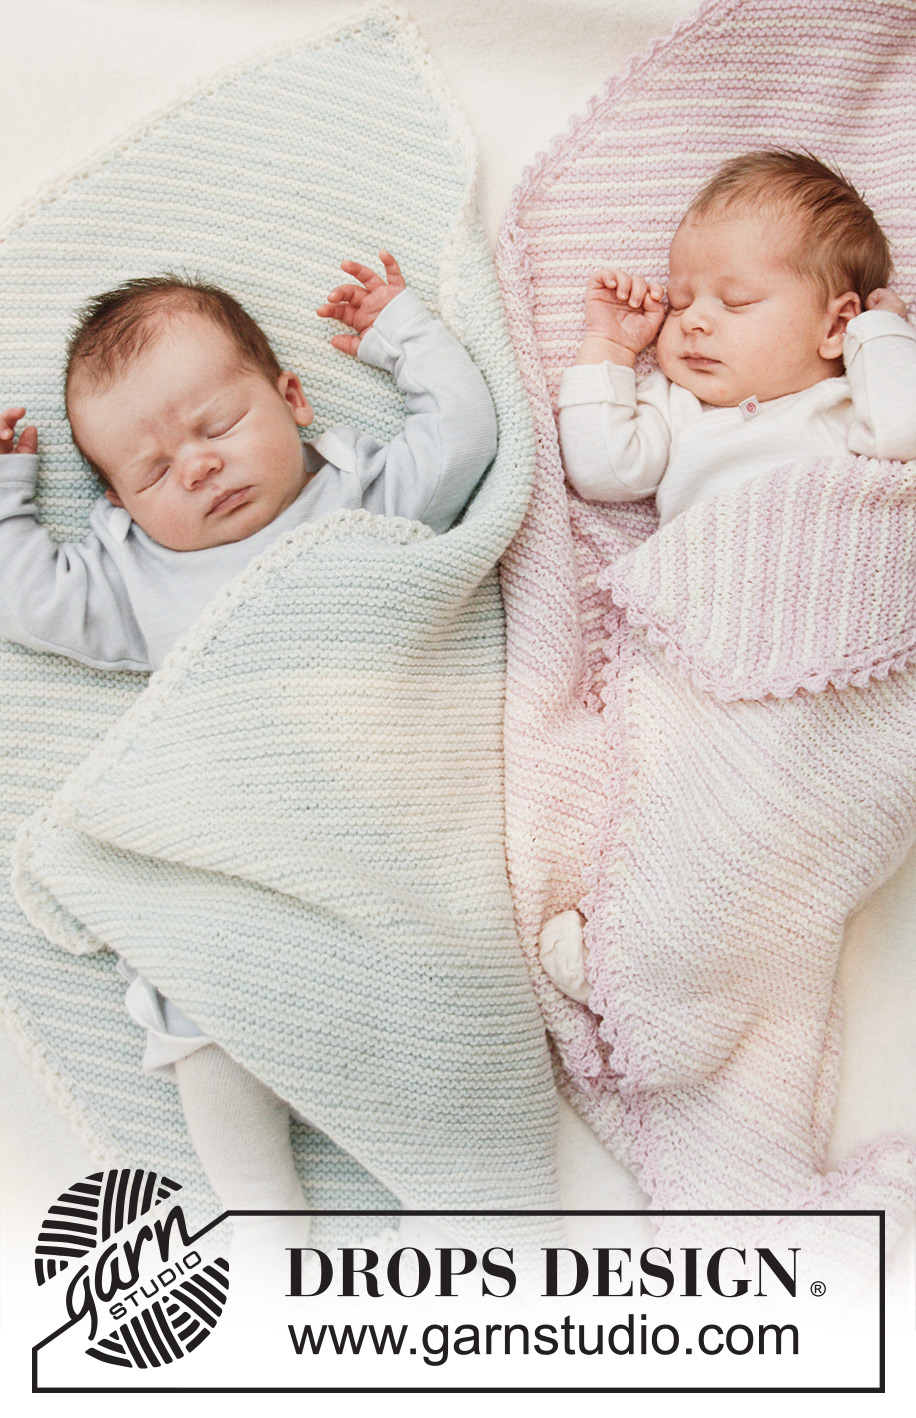
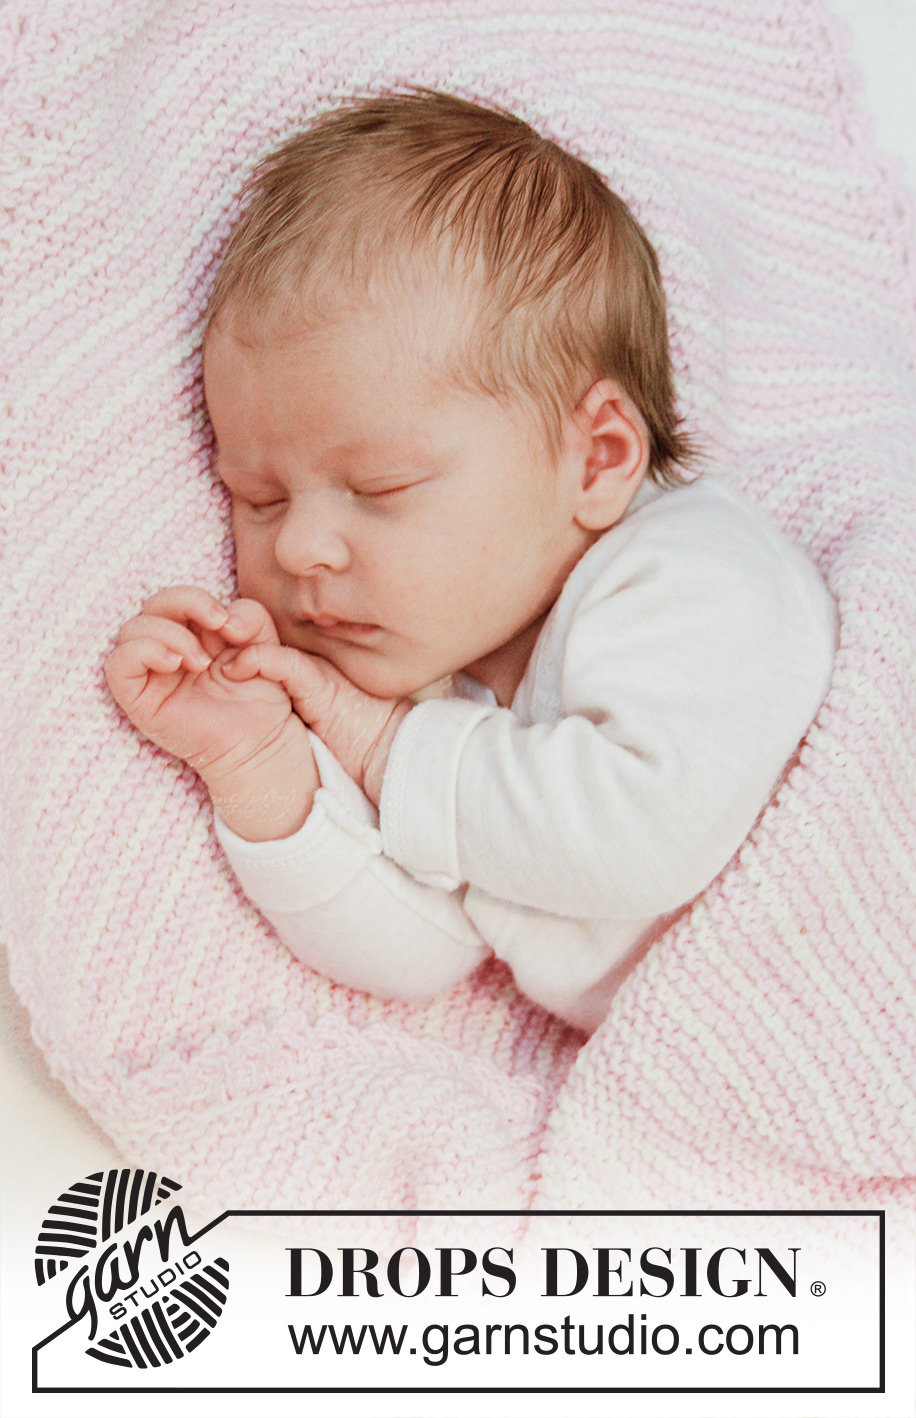
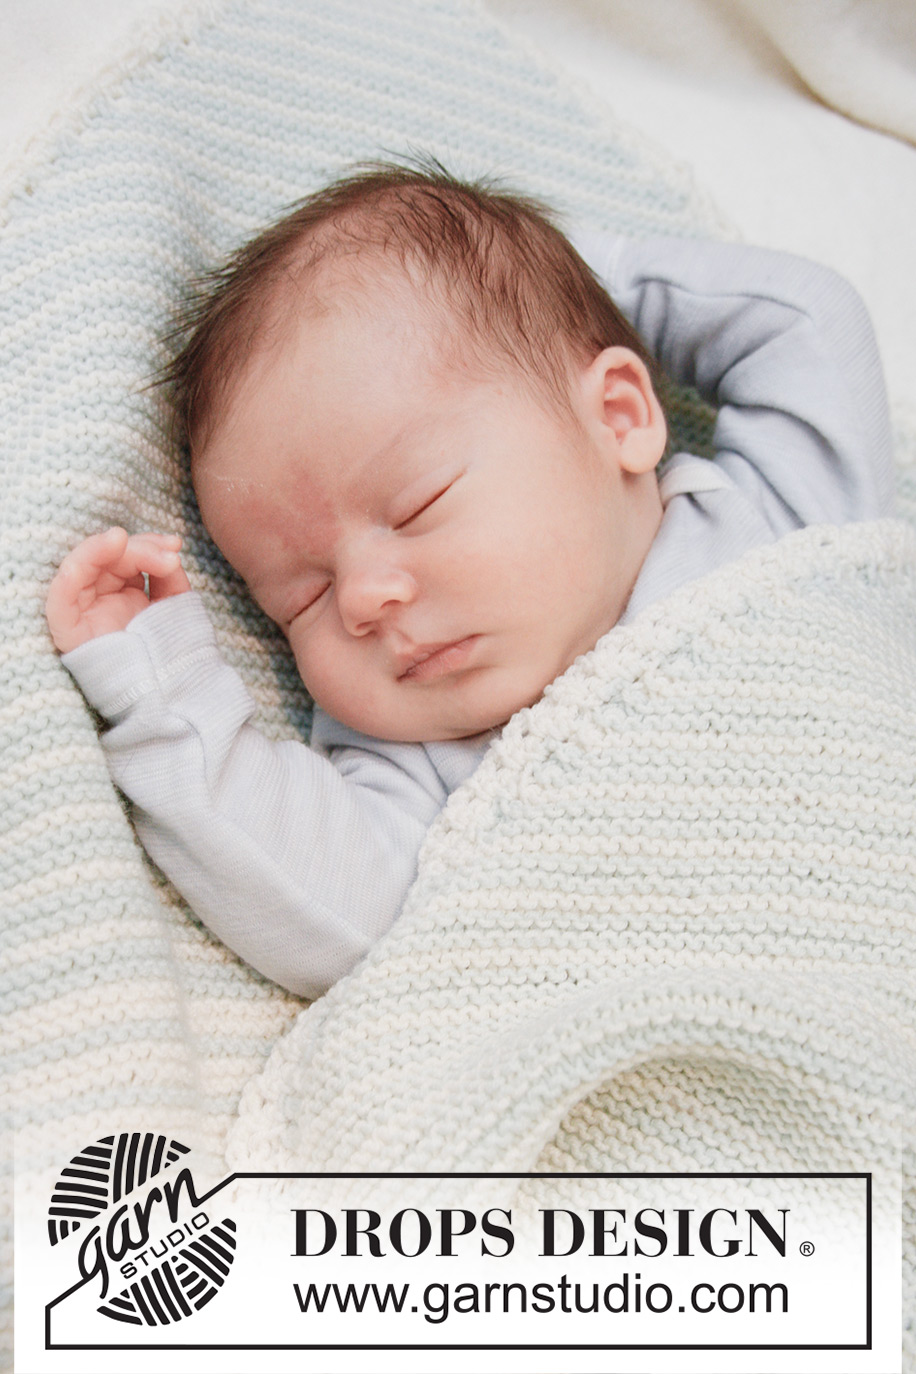
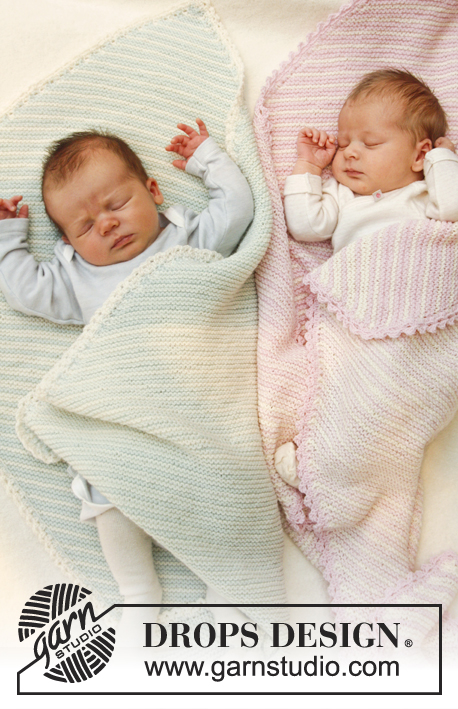
Knitted baby blanket in garter st with stripes – worked from corner to corner in DROPS BabyMerino
DROPS Baby 25-1 |
|
|
GARTER ST (back and forth on circular needle): K all rows. 1 ridge = 2 rows K. STRIPES 1: * Work 4 rows (= 2 ridges) with light mint or light pink, work 2 rows (= 1 ridge) with off white *, repeat from *-* (make sure not to tighten yarn when changing colour). STRIPES 2: * Work 2 rows (= 1 ridge) with light mint or light pink, work 4 rows (= 2 ridges) with off white *, repeat from *-* (make sure not to tighten yarn when changing colour). ---------------------------------------------------------- BLANKET: Work entire blanket in garter st from corner to corner. Cast on 3 sts on circular needle size 4.5 mm with light mint or light pink, and work 1 ridge in GARTER ST - see explanation above. Then work in garter st and STRIPES 1 – see explanation above, AT THE SAME TIME inc 1 st at beg of every row by making 1 YO inside 1 edge st. On next row K YO twisted to avoid holes. Repeat inc at beg of every row (both from RS and WS) until piece measures approx. 34-50 cm along both sides - finish after 2 ridges with light mint or light pink. Work 1 ridge with off white without inc. Then work STRIPES 2 – see explanation above, while AT THE SAME TIME dec 1 st at beg of row from RS by K the 2 outermost sts inside 1 edge st twisted tog. AT THE SAME TIME at the end of same row (i.e. at the end of row from RS) inc 1 new st by making 1 YO inside 1 edge st, turn and K back without dec/inc (K YOs twisted). Repeat dec at beg of row and inc at the end of row every other row upwards (i.e. on every row from RS - no of sts is constant), until piece measures approx. 51-75 cm along the longest side on blanket – finish after 2 ridges with off white. Then work STRIPES 1 again while AT THE SAME TIME dec 1 st at beg of every row by K 2 tog inside 1 edge st. Repeat dec at beg of every row (both from RS and WS) until 5 sts remain on row. Work next row from RS as follows: K 1, slip 1 st as if to K, K 2 tog, psso, K 1. Turn piece, K back and then cast off the last 3 sts. CROCHET EDGE: Crochet on hook size 4 mm with off white or light pink around the entire blanket as follows: ROUND 1: 1 dc in first st in garter st, * 1 ch, skip 1 ridge, 1 dc in next ridge *, repeat from *-* the entire round (make sure that 1 ch is in every corner on blanket), finish round with 1 sl st in first dc at beg of round. ROUND 2: 1 dc in first ch, * 3 ch, 1 dc in next ch *, repeat from *-* the entire round and finish with 1 sl st in first dc at beg of round. Fasten off. |
|
Have you finished this pattern?Tag your pictures with #dropspattern #dreamdateblanket or submit them to the #dropsfan gallery. Do you need help with this pattern?You'll find 17 tutorial videos, a Comments/Questions area and more by visiting the pattern on garnstudio.com. © 1982-2026 DROPS Design A/S. We reserve all rights. This document, including all its sub-sections, has copyrights. Read more about what you can do with our patterns at the bottom of each pattern on our site. |
|


With over 40 years in knitting and crochet design, DROPS Design offers one of the most extensive collections of free patterns on the internet - translated to 17 languages. As of today we count 325 catalogues and 12298 patterns translated into English (UK/cm). 12298
We work hard to bring you the best knitting and crochet have to offer, inspiration and advice as well as great quality yarns at incredible prices! Would you like to use our patterns for other than personal use? You can read what you are allowed to do in the Copyright text at the bottom of all our patterns. Happy crafting!
Post a comment to pattern DROPS Baby 25-1
We would love to hear what you have to say about this pattern!
If you want to leave a question, please make sure you select the correct category in the form below, to speed up the answering process. Required fields are marked *.