
Popular categories
Looking for a yarn?


Comments / Questions (26)
![]() Elke Epperlein wrote:
Elke Epperlein wrote:
Sehr geehrte Damen und Herren, Ich nutze eine App in die ich Anleitungen importieren kann. Ist das mit Ihren Anleitungen auch möglich, also Download statt Ausdruck? Liebe Grüße
09.05.2024 - 08:47DROPS Design answered:
Liebe Frau Epperlein, unsere Anleitungen können nur ausgedruckt werden, wenn Sie einen virtuellen Drucker benutzen können Sie dann die Anleitung als .PDF speichern, ob es klappt mit der App ist es aber leider nicht sicher. Viel Spaß beim Stricken!
10.05.2024 - 08:30
![]() Stine wrote:
Stine wrote:
Er der ikke byttet om på hvornår opskriften siger man skal strikke A1 og A2? På billedet ser det ud til at bikubemønsteret som er A2 er strikket først og herefter snoningsmønsteret A1.
25.04.2024 - 08:00DROPS Design answered:
Hej Stine, A.1 er bikubemønsteret :)
26.04.2024 - 11:33
![]() Dagmar Ka wrote:
Dagmar Ka wrote:
Dobrý den, proč se u schematu neukazuje schema vzoru? Mam rozpletený šátek a nemohu pokračovat, poradíte, prosím? Případně opravíte problém?
18.03.2024 - 17:26DROPS Design answered:
Dobrý den, chybu jsme opravili a schéma se již zobrazuje. Ať se Vám hezky plete!
21.03.2024 - 20:22
![]() Cloé G wrote:
Cloé G wrote:
Bonjour, J’ai une question concernant la partie rayons de miel. Le diagramme A1 est à suivre uniquement sur les rangs endroits (=36 rangs au total avec 18 à l’endroit et 18 à l’envers ) ou le diagramme A1 est à suivre à l’endroit et à l’envers (18 rangs en tout) ? Merci pour votre retour !
15.03.2024 - 20:32DROPS Design answered:
Bonjour Cloé, les diagrammes montrent tous les rangs des point fantaisie, autrement dit ,A.1 se tricote sur 18 rangs. Bon tricot!
18.03.2024 - 07:59
![]() Luscher Iri wrote:
Luscher Iri wrote:
Bonjour, je me demande si il ne manque pas une explication pour le diagramme A2, x = une maille endroit sur l envers, cependant les croix sont présente uniquement sur l endroit… et non sur l envers!? Et il n est pas indiqué ce que c’est sur l endroit?! Merci pour votre aide
21.01.2024 - 17:19DROPS Design answered:
Bonjour Mme Luscher, effectivement, nos stylistes vont vérifier cela, en attendant, vous pouvez effectivement probablement tricoter le 1er rang de A.2 avec les croix à l'envers sur l'endroit (ou bien tricoter 1 rang endroit sur l'endroit et continuer A.2 avec la légende). Bon tricot!
22.01.2024 - 10:20
![]() Dace wrote:
Dace wrote:
Pattern says: Knit 1, 1 yarn over, knit to the mid-stitch and increase 28 stitches evenly over these stitches, 1 yarn over, knit the mid-stitch, 1 yarn over, knit until there is 1 stitch left and increase 28 stitches evenly over these stitches, 1 yarn over and knit 1 = approx. 235 stitches. What do you mean by "increase 28 stitches evenly over these stitches" on both sides of the middle stitch?
08.11.2023 - 08:37DROPS Design answered:
Dear Dace, in this lesson we explain how to increase (or decrease) stitches evenly, it should help you to know where to place the increases. Happy knitting!
08.11.2023 - 15:39
![]() Dace wrote:
Dace wrote:
Hello, Pattern says: Repeat rows 3 and 4 until the piece measures 11 cm in the knitting direction. REMEMBER THE KNITTING TENSION! The shawl measures approx. 16 cm along the mid-stitch and there are approx. 175 stitches. Do I knit till piece measures 11cm lengthwise ( which is approx.12 rows or do I knittill I have aprox. 175 stitches?
08.11.2023 - 08:32DROPS Design answered:
Dear Mrs Dace, repeat row 3 and 4 until the piece measures approx. 11 cm in the knitting direction, this means approx 16 cm along the middle stitch, and this means you have increased enough stitches to get now approx. 175 stitches with the correct tension in both width and height. Happy knitting!
08.11.2023 - 08:39
![]() Tanja Martinovic wrote:
Tanja Martinovic wrote:
Ik snap dit stukje niet: "Herhaal naalden 3 en 4 tot het werk 11 cm meet in de breirichting. De omslagdoek meet ongeveer 16 cm over de middensteek ". Wat wordt bedoeld met de breirichting? Dat die ene middenstuk 16 cm lang moet zijn, dat snap ik. Maar WAT moet 11 cm lang zijn? Met vriendelijke groeten, Tanja
06.11.2023 - 12:23
![]() Tiny Tuip wrote:
Tiny Tuip wrote:
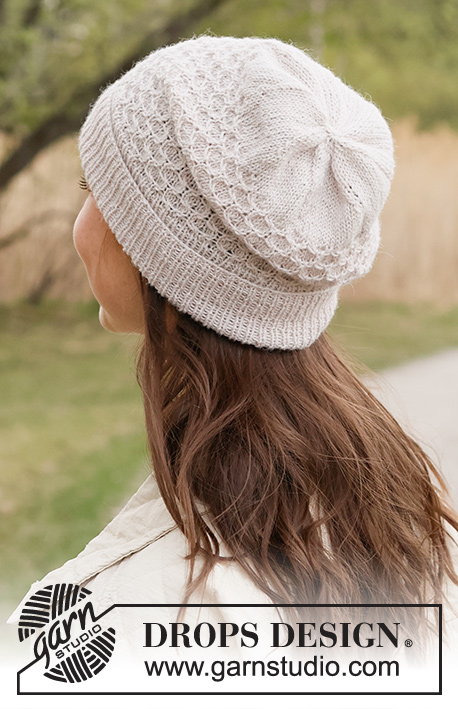
Fresh Rain by DROPS Design Gebreide omslagdoek in DROPS Flora. Het werk wordt van boven naar beneden gebreid, met honingraat- en reliëfpatroon. Trefwoorden: honinggraatpatroon, omslagdoek, reliëf, van boven naar beneden DROPS 234-35 Wordt dit patroon echt van boven naar onderen gebreid? je bgint met 7 steken en daarna vermeerderen, is het dan niet van onderen naar boven? vr gr Tiny DROPS Design: Patroon fl-076
22.09.2023 - 10:57
![]() JOSIANE Kurgouale wrote:
JOSIANE Kurgouale wrote:
Je ne comprends pas comment commencer le modèle 234.35.les explications ne correspondent pas à la photo du châle. Il y a des côtes alors que l on nous fait tricoter tout à l endroit. Merci de votre réponse
10.09.2023 - 19:40DROPS Design answered:
Bonjour Mme Kurgouale, ce châle se tricote de haut en bas, autrement dit, on commence par la partie point mousse (près du cou) pour terminer par les côtes de A.2. Vous allez augmenter 4 mailles tous les rangs sur l'endroit (1 m de chaque côté + 2 m au milieu du châle) et 2 mailles tous les rangs sur l'envers (1 m de chaque côté), et ainsi augmenter l'envergure du châle et la hauteur en même temps. Bon tricot!
11.09.2023 - 09:28
|
||||||||||||||||
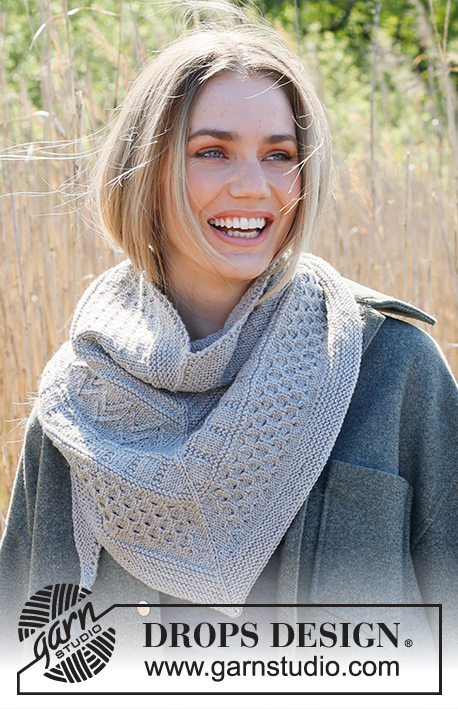
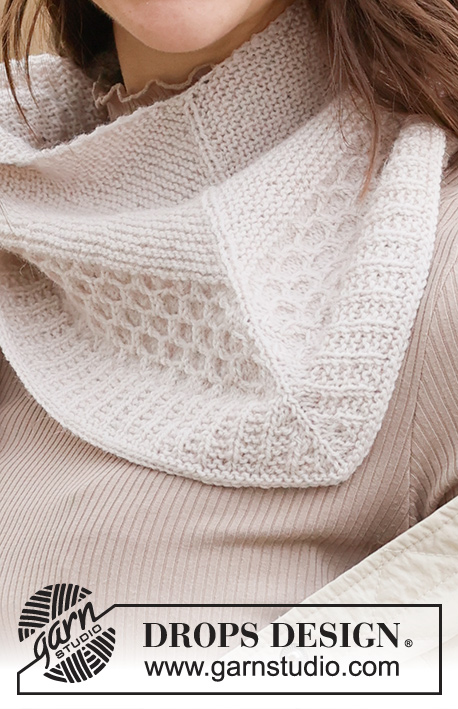
Fresh Rain#freshrainshawl |
||||||||||||||||
 |
 |
|||||||||||||||
Knitted shawl in DROPS Flora. The piece is worked top down, with honeycomb and relief-pattern.
DROPS 234-35 |
||||||||||||||||
|
RIDGE/GARTER STITCH (worked back and forth): Knit all rows. 1 ridge = knit 2 rows. PATTERN: See diagrams A.1 and A.2. The diagrams show all rows in the pattern from the right side. ------------------------------------------------------- START THE PIECE HERE: ------------------------------------------------------- SHAWL – SHORT OVERVIEW OF THE PIECE: The piece is worked back and forth, top down. SHAWL: Cast on 7 stitches with circular needle size 3 mm and DROPS Flora. Knit 1 row. Continue with GARTER STITCH – see description above and increase as follows – NB: yarn overs from the increases will always be worked twisted, they shouldn’t create holes. GARTER-STITCH SECTION: ROW 1 (right side): Knit 1, 1 yarn over, knit 2, 1 yarn over, knit 1 (mid-stitch – this stitch is always worked in stocking stitch), 1 yarn over, knit 2, 1 yarn over, knit 1 (= 4 stitches increased). ROW 2 (wrong side): Knit 1, 1 yarn over, knit to the mid-stitch, purl the mid-stitch, knit until there is 1 stitch left, 1 yarn over and knit 1 (= 2 stitches increased). ROW 3 (right side): Knit 1, 1 yarn over, knit to the mid-stitch, 1 yarn over, knit the mid-stitch, 1 yarn over, knit until there is 1 stitch left, 1 yarn over and knit 1 (= 4 stitches increased). ROW 4 (wrong side): Knit 1, 1 yarn over, knit to the mid-stitch, purl the mid-stitch, knit until there is 1 stitch left, 1 yarn over and knit 1 (= 2 stitches increased). Repeat rows 3 and 4 until the piece measures 11 cm in the knitting direction. REMEMBER THE KNITTING TENSION! The shawl measures approx. 16 cm along the mid-stitch and there are approx. 175 stitches. Now work as follows from the right side: Knit 1, 1 yarn over, knit to the mid-stitch and increase 28 stitches evenly over these stitches, 1 yarn over, knit the mid-stitch, 1 yarn over, knit until there is 1 stitch left and increase 28 stitches evenly over these stitches, 1 yarn over and knit 1 = approx. 235 stitches. Work the next row as follows from the wrong side: Knit 1, 1 yarn over, purl until there is 1 stitch left on the row, 1 yarn over and knit 1 (= 2 stitches increased). Now work the honeycomb pattern and increase as follows: HONEYCOMB PATTERN: ROW 1 (right side): Knit 1, 1 yarn over, knit 1, work A.1 as far as a complete repeat will go before the mid-stitch, knit the remaining stitches to the mid-stitch, 1 yarn over, knit the mid-stitch, 1 yarn over, knit the same number after the mid-stitch as before, work A.1 until there are 2 stitches left, knit 1, 1 yarn over and knit 1 (= 4 stitches increased). ROW 2 (wrong side): Knit 1, 1 yarn over, purl until there is 1 stitch left on the row, 1 yarn over and knit 1 (= 2 stitches increased). Repeat rows 1 and 2. NOTE: The increased stitches are worked into the honeycomb pattern as soon as there is room for a complete or half repeat in width. AT THE SAME TIME on the row marked with an arrow in A.1, decrease 60 stitches evenly spaced (30 stitches on each side of the mid-stitch). When A.1 is finished, there are approx 231 stitches. Work an edge as follows: EDGE: ROW 1 (right side): Knit 1, 1 yarn over, work A.2 to the mid-stitch, 1 yarn over, knit the mid-stitch, 1 yarn over, work A.2 until there is 1 stitch left (starting the pattern after the mid-stitch so it is the mirror image of the first side), 1 yarn over and knit 1 (= 4 stitches increased). ROW 2 (wrong side): Knit 1, 1 yarn over, purl until there is 1 stitch left on the row, 1 yarn over and knit 1 (= 2 stitches increased). Repeat rows 1 and 2 until A.2 measures 3 cm. NOTE: The increased stitches are worked into the pattern. The shawl measures approx. 28 cm down the mid-stitch and there are approx. 273 stitches. Work 1 ridge over all stitches (increasing as before on both rows). Cast off a little loosely with knit from the right side. |
||||||||||||||||
Diagram explanations |
||||||||||||||||
|
||||||||||||||||

|
||||||||||||||||
Have you finished this pattern?Tag your pictures with #dropspattern #freshrainshawl or submit them to the #dropsfan gallery. Do you need help with this pattern?You'll find 17 tutorial videos, a Comments/Questions area and more by visiting the pattern on garnstudio.com. © 1982-2025 DROPS Design A/S. We reserve all rights. This document, including all its sub-sections, has copyrights. Read more about what you can do with our patterns at the bottom of each pattern on our site. |
||||||||||||||||


With over 40 years in knitting and crochet design, DROPS Design offers one of the most extensive collections of free patterns on the internet - translated to 17 languages. As of today we count 314 catalogues and 11820 patterns translated into English (UK/cm). 11820
We work hard to bring you the best knitting and crochet have to offer, inspiration and advice as well as great quality yarns at incredible prices! Would you like to use our patterns for other than personal use? You can read what you are allowed to do in the Copyright text at the bottom of all our patterns. Happy crafting!
Post a comment to pattern DROPS 234-35
We would love to hear what you have to say about this pattern!
If you want to leave a question, please make sure you select the correct category in the form below, to speed up the answering process. Required fields are marked *.