
Looking for a yarn?


Comments / Questions (13)
![]() Kath wrote:
Kath wrote:
Bonjour! Je ne suis pas certaine de bien saisir pourquoi en tricotant une housse de coussin carré, nous devons faire des augmentations suite au montage initial et des diminutions vers la fin du tricot avant le rabattage. S'il est carré, ne devrait-il pas y avoir un nombre de mailles constant. Merci beaucoup pour les précisions.
30.11.2025 - 22:29DROPS Design answered:
Bonjour Kath, il faut plus de mailles pour tricoter des torsades que pour du jersey, ainsi, lorsque l'on monte le nombre de mailles requis, on va avoir la bonne largeur pour du jersey, mais il faudra ensuite augmenter pour conserver la même largeur quand on va faire les torsades, et, à la fin, il faudra donc diminuer les mailles augmentées pour éviter que le bord ne gondole/ne soit plus large que la partie torsades. Bon tricot!
01.12.2025 - 10:57
![]() Annabelle Garcia Y Vallejo wrote:
Annabelle Garcia Y Vallejo wrote:
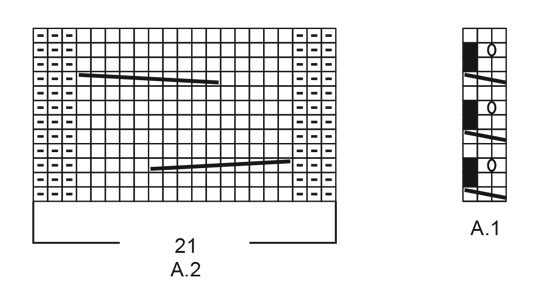
Bonjour, Concernant le diagramme A1 ligne 1 : faut il tricoter les mailles sur lesquelles on fait passer la maille? Ligne 2 sur la torsade ,tricote-t-on à l'endroit où à l'envers? Merci pour votre réponse
18.02.2025 - 11:02DROPS Design answered:
Bonjour Mme Garcia Y Vallejo, notez que la housse se tricote en rond = tous les tours à l'endroit; au 1er rang de A.1, tricotez les 3 mailles de A.1à l'endroit puis passez la 1ère de ces 3 mailles par-dessus les 2 autres, ainsi, il ne reste plus que 2 mailles. Au tour suivant, tricotez ces 2 mailles à l'endroit, puis au3ème tour, tricotez: 1 m end, 1 jeté, 1 m end = vous avez de nouveau 3 mailles, tricotez ces 3 mailles à l'endroit au rang suivant. Répétez ces 4 rangs. Retrouvez ici, en vidéo comment tricoter ce type de petite torsade. Bon tricot!
18.02.2025 - 17:17
![]() Rachel wrote:
Rachel wrote:
Hi. Am knitting Pillars of Valhalla . Am struggling with the no stitch squares. My reading about it seems to indicate that it balances out decreases, however there are no decreases only increases and I end up with extra stitches at the end of each row! Would love some help!!
18.01.2025 - 01:13DROPS Design answered:
Dear Rachel, the A.1 pattern have differents stitchcount in different rows. In the first row, you have 3 stitches, from which you decrease 1, thus in the 2-3. row you ill have 2 stitches there, but in the 3rd row, you make a YO (the little O sign between the two stitches on the diagram) between the two stitches so you will have 3 stitches again. Happy Knitting!
18.01.2025 - 01:54
![]() Rose wrote:
Rose wrote:
Hi, How do we follow the A.1 and A.2 pattern? From top to bottom? How do we follow A.1? Would it be for example: 1st A.1: K3 2nd A.1: K3 3rd A.1: skip and KYOK or 1st A.1: K3 2nd A.1: skip KYOK 3rd A.1: skip and K2 Thank you!
22.09.2024 - 11:44DROPS Design answered:
Dear Rose, you can read our lesson on knitting charts here: https://www.garnstudio.com/lesson.php?id=68&cid=19. The charts are read from the bottom up. Since it's worked in the round all rows of the chart are read from left to right. In the 1st row of A.1 you have: knit 3, pass the first stitch knitted over the other 2, so it lies around them (= 1 stitch decreased). On the next round, knit 2 (the black square is ignored, don't skip stitches). Happy knitting!
23.09.2024 - 01:11
![]() Genise Huey wrote:
Genise Huey wrote:
I am getting more decreases when I do as pattern says: I knit 2 stitches and then knit two together and then knit 3 and then knit two together. K2, k2tg k3, k2tg…..
17.09.2024 - 22:09DROPS Design answered:
Dear Mrs Huey, adjust the number of stitches worked between each decrease so that you decrease the correct number of stitches - read more here. Happy knitting!
18.09.2024 - 08:26
![]() Maureen Gillespie wrote:
Maureen Gillespie wrote:
For the pattern repeat, on the wrong side (even) rows, should I reverse the stokinette stitch to be p1, k1? [Original instructions show "11-20 stitches in stockinette stitch (*k1, p1*)"] Thank you!
08.11.2023 - 21:58DROPS Design answered:
Dear Mrs Gillepsie, there is no wrong side rows as the piece is worked in the round, diagrams are showing all the rows, so work all rows in diagram reading from right towards the left and knit all stitches in stocking stitch. Happy knitting!
09.11.2023 - 08:26
![]() Maureen wrote:
Maureen wrote:
NO STITCH: What do I do with the first stitch? K together with 2nd stitch? transfer to the right needle? drop? Thank you!
12.10.2023 - 22:05DROPS Design answered:
Dear Maureen, after you have worked 1st row in A.1 (= knit 3 and pass the first of these 3 sts over the 2 sts), there are only 2 sts left, just knit these 2 sts . On next round, you will then work K1, YO, K1 (there are 3 sts again). Happy knitting!
13.10.2023 - 08:45
![]() Maureen wrote:
Maureen wrote:
Pattern repeat *A1, A2* If A1 is hold 3 sticthes on cable needle, k3, then k3 from cable needle = 28 stitches (not 25)
12.10.2023 - 19:46DROPS Design answered:
Dear Maureen, A.1 is first worked over 3 stitches but on the first row you will decrease 1 stitch (knit 3, pass the first of these 3 sts over the next 2), and on row 2 you will make 1 yarn over to get 3 sts again - so that A.1 is counted over 3 sts. You will then work: A.1, A.2, A.1, A.2, A.1, A.2, A.1. = 3+21+3+21+3+21+3=75 sts in total. Happy knitting!
13.10.2023 - 08:35
![]() Judy wrote:
Judy wrote:
This pillow comes in two sizes which are accounted for in the two numbers of sts to cast on and work. However, when you get to the length of the pillow, there is only one number. Doesn't the larger pillow need to be made a little longer in order to make it square? I am assuming the 38 cm is for the smaller pillow. How long should I make it for the larger pillow?
06.10.2022 - 19:36DROPS Design answered:
Hi Judy, for the larger pillow you should work until work measures 43 cm - added on pattern,thanks for nociting. Happy knitting!
18.11.2022 - 14:26
![]() UteEspunkt wrote:
UteEspunkt wrote:
Tolle Anleitung! Perfekt beschrieben u einfach zum Nacharbeiten! Und ein wunderbares Garn (Nepal) .. meine Freundinnen sind ganz neidisch auf mein Kissen 😁
03.02.2021 - 18:34
|
||||||||||||||||||||||
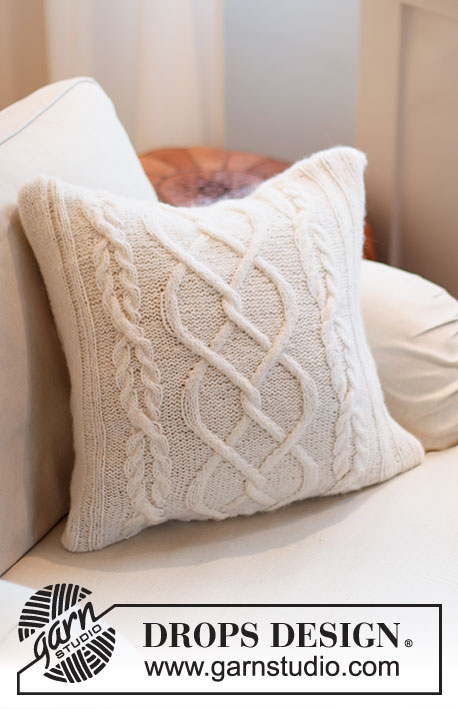
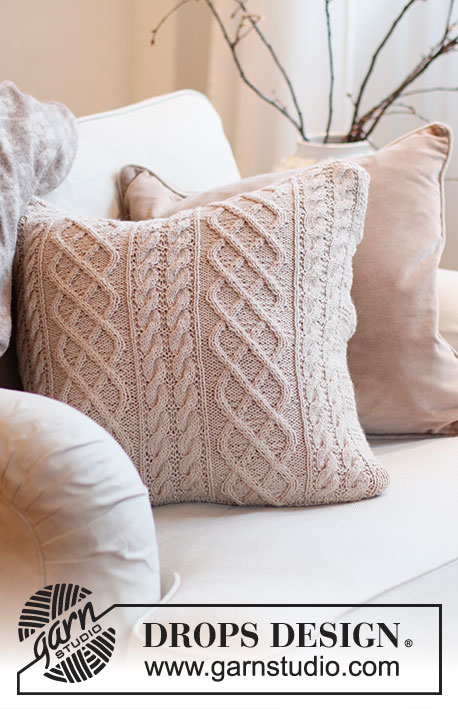
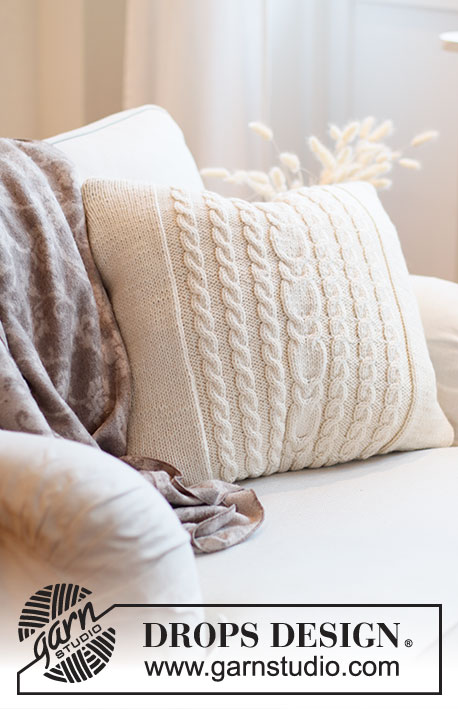
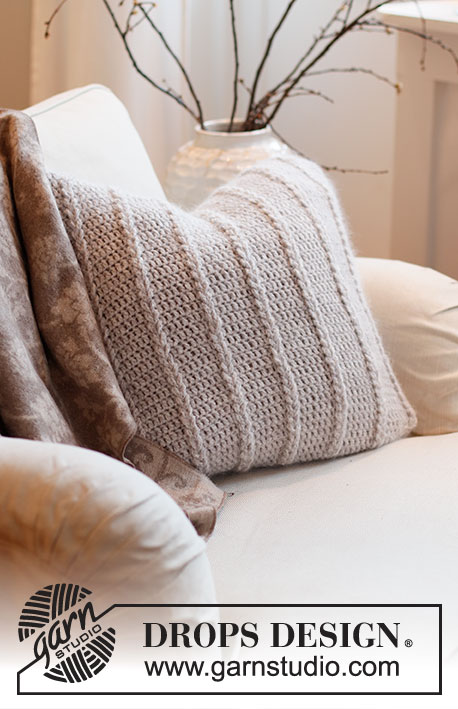
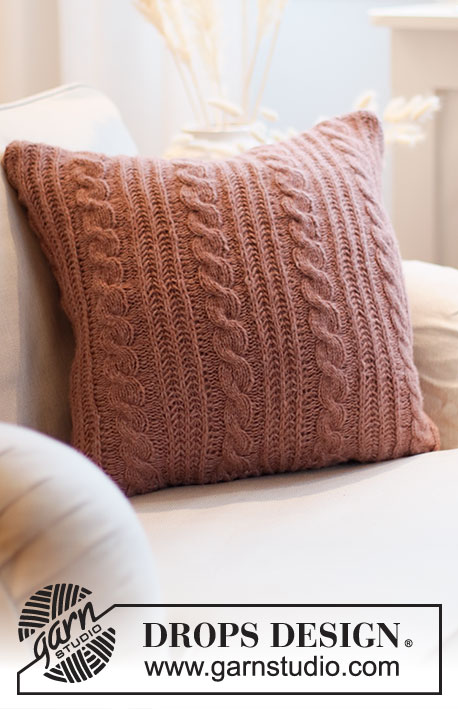
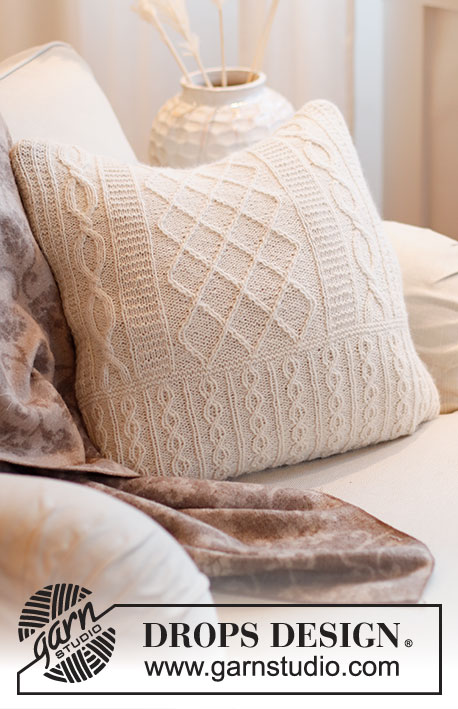
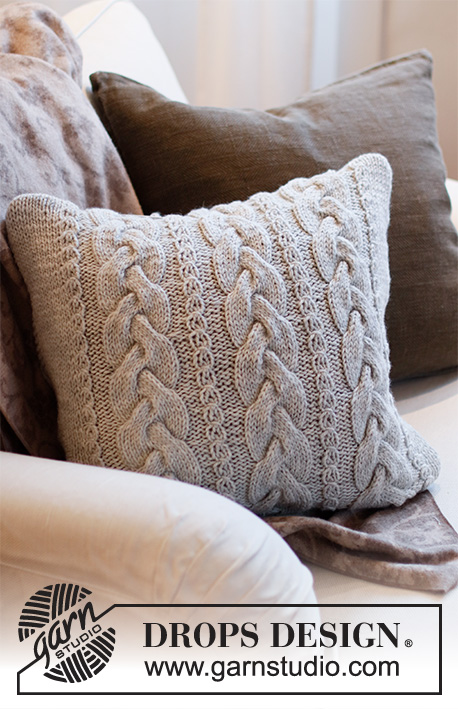
Columns of Valhalla Pillow#columnsofvalhallapillow |
||||||||||||||||||||||
 |
 |
|||||||||||||||||||||
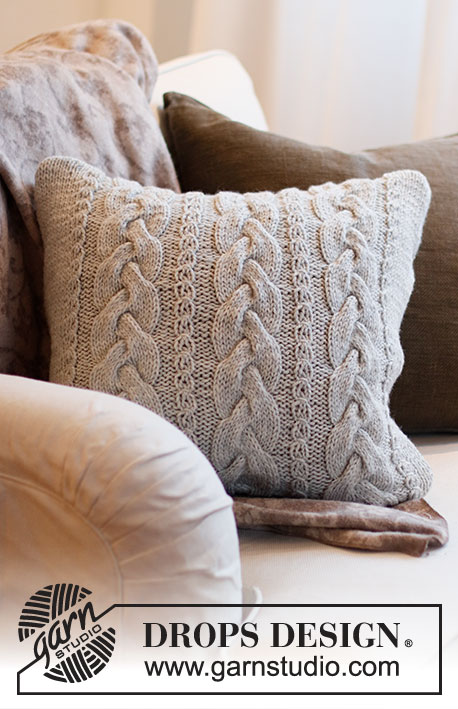
Knitted cushion cover with cables in DROPS Nepal.
DROPS 215-42 |
||||||||||||||||||||||
|
------------------------------------------------------- EXPLANATIONS FOR THE PATTERN: ------------------------------------------------------- RIDGE/GARTER STITCH (A) (worked in the round): 1 ridge in height = 2 rounds; Purl 1 round and knit 1 round. RIDGE/GARTER STITCH (B) (worked in the round): 1 ridge in height = 2 rounds; Knit 1 round and purl 1 round. INCREASE/DECREASE TIP (evenly spaced): To work out how to increase/decrease evenly, count the total number of stitches on needle (e.g. 61 stitches), and divide by the number of increases/decreases to be made (e.g. 14) = 4.3. INCREASE: Make 1 yarn over after alternately each 4th and 5th stitch. On the next row work the yarn overs twisted to avoid holes. DECREASE: Knit together alternately each 3rd and 4th stitch and each 4th and 5th stitch. PATTERN-REPEATS: See diagrams A.1 and A.2 – work the next 75 stitches as follows: A.1, A.2, A.1, A.2, A.1, A.2, A.1. ------------------------------------------------------- START THE PIECE HERE: ------------------------------------------------------- CUSHION COVER – SHORT OVERVIEW OF THE PIECE: The piece is worked in the round, with circular needle and bottom up. The top and bottom are sewn together to finish. Cables are worked front and back. COVER: Cast on 144-162 stitches with circular needle size 4.5 mm and work 2 RIDGES A – read description above. Then knit 1 round AT THE SAME TIME as you increase as follows: Over the first 61 stitches, increase 14 stitches evenly spaced – read INCREASE/DECREASE TIP (= 75 stitches), knit 11-20, over the next 61 stitches increase 14 stitches evenly spaced (= 75 stitches) and finish with knit 11-20 = 172-190 stitches. Continue as follows: Work 75 stitches of PATTERN REPEATS- read description above, 11-20 stitches in stocking stitch, 75 stitches in pattern-repeats and finish with 11-20 stitches in stocking stitch. REMEMBER THE KNITTING TENSION! Continue like this until the piece measures 38-43 cm – adjust to after round 4 or 12 in the pattern-repeats. On the next round decrease as follows. Knit 1 round where you decrease 14 stitches evenly over the first 75 stitches – read INCREASE/DECREASE TIP (= 61 stitches), knit 11-20 and then decrease 14 stitches evenly over the next 75 stitches (= 61 stitches), finish with knit 11-20 = 144-162 stitches. Work 2 RIDGES B – read description above and loosely cast off. ASSEMBLY: Fold the piece so the cables are mid-front and mid-back. Sew the cast-on edge together in the outermost loop of the outermost stitch, place the cushion in the cover and sew the cast-off edge together in the same way. |
||||||||||||||||||||||
Diagram explanations |
||||||||||||||||||||||
|
||||||||||||||||||||||
 |
||||||||||||||||||||||
Have you finished this pattern?Tag your pictures with #dropspattern #columnsofvalhallapillow or submit them to the #dropsfan gallery. Do you need help with this pattern?You'll find 18 tutorial videos, a Comments/Questions area and more by visiting the pattern on garnstudio.com. © 1982-2025 DROPS Design A/S. We reserve all rights. This document, including all its sub-sections, has copyrights. Read more about what you can do with our patterns at the bottom of each pattern on our site. |
||||||||||||||||||||||


With over 40 years in knitting and crochet design, DROPS Design offers one of the most extensive collections of free patterns on the internet - translated to 17 languages. As of today we count 320 catalogues and 12091 patterns translated into English (UK/cm). 12091
We work hard to bring you the best knitting and crochet have to offer, inspiration and advice as well as great quality yarns at incredible prices! Would you like to use our patterns for other than personal use? You can read what you are allowed to do in the Copyright text at the bottom of all our patterns. Happy crafting!
Post a comment to pattern DROPS 215-42
We would love to hear what you have to say about this pattern!
If you want to leave a question, please make sure you select the correct category in the form below, to speed up the answering process. Required fields are marked *.