
Popular categories
Looking for a yarn?


Comments / Questions (34)
![]() Trine Hjorth wrote:
Trine Hjorth wrote:
Falsk patent er 2 ret, 2 vrang på et ulige antal masker. Det bliver hele tiden forskudt og er bredt. Den her opskrift må være falsk halvpatent?
24.09.2024 - 20:16DROPS Design answered:
Hej Trine, du skal strikke ifølge diagrammet :)
10.10.2024 - 14:50
![]() Angela wrote:
Angela wrote:
Hallo! kann man den pullover trotzdem im halbpatent muster stricken? oder schaut der dann total anders aus? ich kenn mich leider nicht so gut aus und wüsste jetzt nicht wie ich das im falschen patent stricken soll. mfg
22.12.2021 - 11:58
![]() Kristy G wrote:
Kristy G wrote:
I found A.2. Sorry, must need new glasses :)
05.05.2021 - 21:00
![]() Kristy G wrote:
Kristy G wrote:
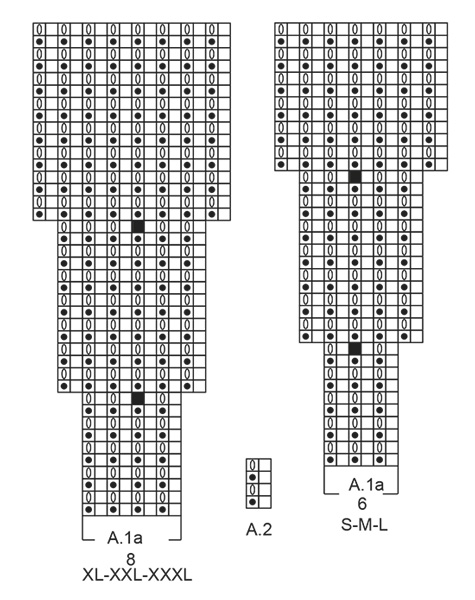
In the pattern it says: PATTERN: See diagrams A.1 and A.2. Choose diagram for your size. The yarn overs in the pattern are not counted as stitches. Work A.2 (= 2 stitches) over all stitches. When A.2 has been worked for approx. 6 cm / 2 3/8'' bind off with knit. But there is NO diagram for A.2 included in this pattern.
05.05.2021 - 20:57DROPS Design answered:
Dear Kristy, the small chart for diagram A.2 is just above the shematic drawing between the two different sized A.1a charts. Happy Knitting!
05.05.2021 - 21:18
![]() Kristy G wrote:
Kristy G wrote:
I cannot find the instructions for A.2 in this pattern.
03.05.2021 - 19:05DROPS Design answered:
Dear Kristy, explanations for the diagrams are just above the charts, symbols meaning the same in all charts. Happy Knitting!
03.05.2021 - 23:31
![]() Kerstin wrote:
Kerstin wrote:
Eine Frage zur Länge der Ärmel: kann es sein, dass der Ärmel in Größe S länger ist als bei den großen Größen? Es heißt, "bei einer Länge des Ärmels von 35 cm ab der Teilung...." in Gr. S. Das verstehe ich nicht. Besten Dank für eine Rückmeldung.
24.01.2021 - 13:32DROPS Design answered:
Liebe Kerstin, ja genau so stimmt es, bei den größren Größen ist die Passe länger, deshalb werden die Ärmel dann kürzer sein- schauen Sie mal die Maßen in die Skizze - länge können Sie auch gerne anpassen (Pullover anziehen, um die Länge zu prüfen). Viel Spaß beim stricken!
25.01.2021 - 09:52
![]() Hanne Hedeman wrote:
Hanne Hedeman wrote:
Jeg vil gerne lære,hvordan jeg finder ud af ,at fordele masker til bluse foroven ,f.eks halskant hvordan inddeler jeg hals ,for arme,ryg,arme eks Raglan ,har du 1 forslag til.bluse.sa.jeg.ksn se måskeantallet.fordelt jeg kan ikke.finde.ud af fordelingen af.makerne.mvh Hanne hedeman.
10.04.2020 - 17:06DROPS Design answered:
Hej Hanne, Fordelingen beskriver vi altid tydeligt i opskriften. Her ser du en generel video hvordan man gør
How to knit a jumper top down from Garnstudio Drops design on Vimeo.
24.04.2020 - 09:44
![]() Pia wrote:
Pia wrote:
Salve, ho finito il lavoro e mi è molto piaciuto. Tuttavia come tutti i modelli topdown lo scolo è uguale davanti e dietro. Dunque è troppo scollato dietro. Finito il lavoro è possibile creare una alzatina dietro? E come?
31.03.2020 - 22:47DROPS Design answered:
Buongiorno Pia. Potrebbe provare a riprendere le maglie intorno al collo e lavorare qualche giro a legaccio, con ferri accorciati sul dietro. Può contattare il suo rivenditore Drops di fiducia per ulteriore assistenza personalizzata. Buon lavoro!
01.04.2020 - 09:37
![]() Anneke wrote:
Anneke wrote:
Klopt het stekenaantal wel na de eerste keer meerderen in de pas, na A 1a? Er staat 154-168-182-176-192-208. Volgens mij zijn het derde en vierde getal omgedraaid.
20.03.2020 - 19:39DROPS Design answered:
Dag Anneke,
Het aantal opgegeven steken heb ik nagerekend en ze zijn juist. Let erop dat je het juiste telpatroon neemt voor jouw maat. Wanneer je A.1b boven A.1a hebt gebreid heb je wel weer meer steken in XL dan in L.
29.03.2020 - 12:55
![]() Vita Catania wrote:
Vita Catania wrote:
Dove trovo aggiungi ai preferiti? Grazie
03.01.2020 - 14:54DROPS Design answered:
Buongiorno Vita, per aggiungere il modello ai preferiti deve cliccare sul cuore che trova dopo la prima parte delle spiegazioni, e inserire la propria mail. Buon lavoro!
04.01.2020 - 10:47
|
||||||||||||||||
Fritid#fritidsweater |
||||||||||||||||
 |
 |
|||||||||||||||
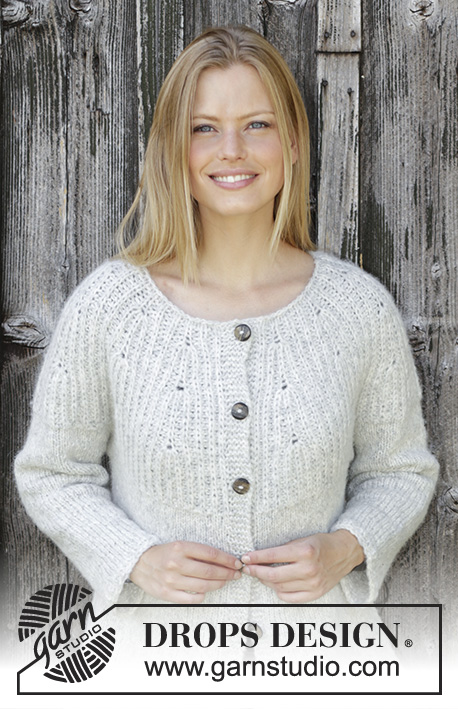
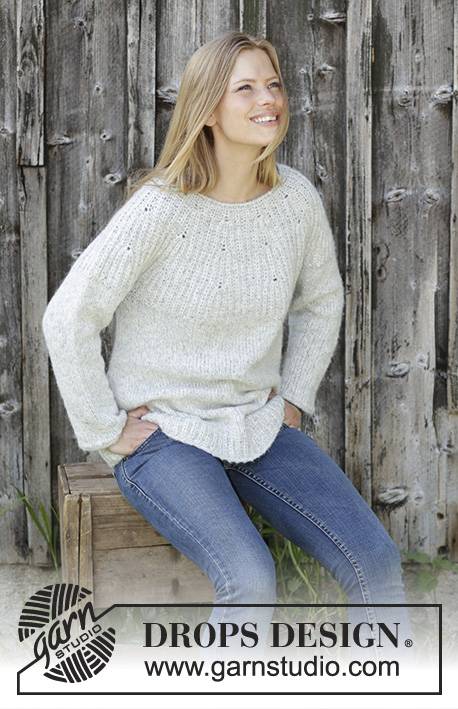
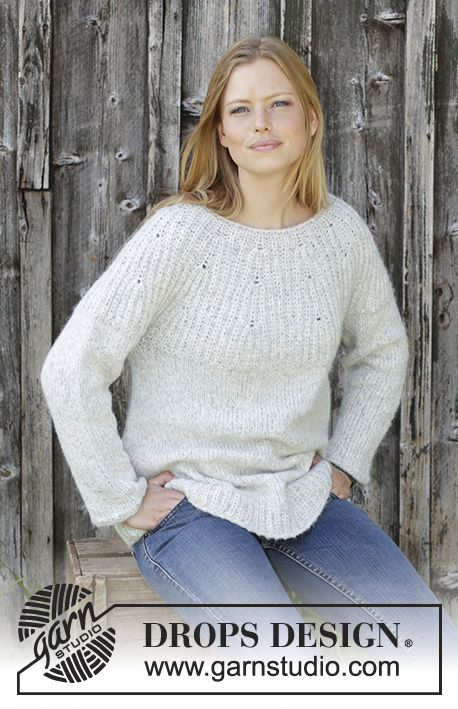
Knitted jumper with round yoke in DROPS Air. The piece is worked top down with false Enlgish rib and A-shape. Sizes S - XXXL.
DROPS 195-31 |
||||||||||||||||
|
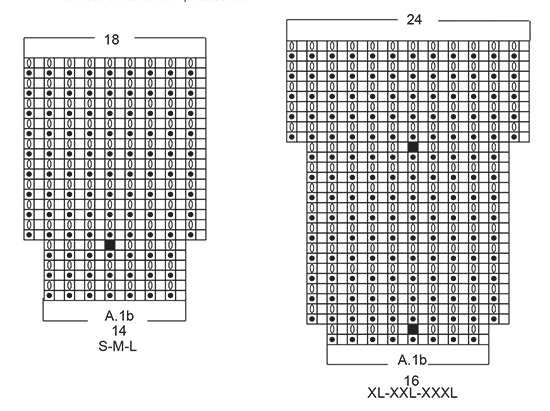
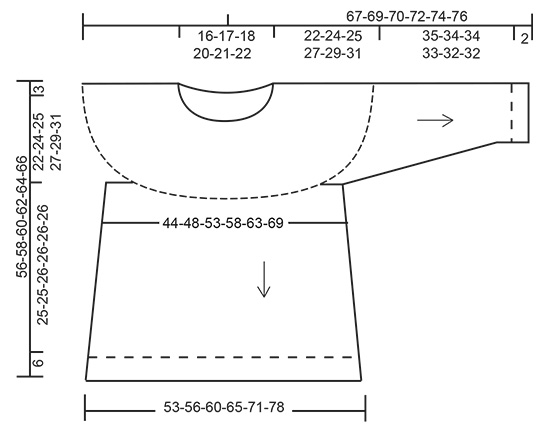
------------------------------------------------------- EXPLANATIONS FOR THE PATTERN: ------------------------------------------------------- PATTERN: See diagrams A.1 and A.2. Choose diagram for your size. The yarn overs in the pattern are not counted as stitches. INCREASE TIP-1 (evenly spaced): To work out how to increase evenly, count the total number of stitches on the needle (e.g. 82 stitches) and divide by the number of increases to be made (e.g. 7) = 11.7. In this example, increase by making 1 yarn over after approx. each 12th stitch. On the next round work the yarn overs twisted to avoid holes. INCREASE TIP-2 (for body): Work until there are 2 stitches left before the marker thread, 1 yarn over (= 1 stitch increased), knit 4 (the marker thread sits in the middle of these 4 stitches), 1 yarn over (= 1 stitch increased). Increase like this at both marker threads (= a total of 4 stitches increased). DECREASE TIP (for sleeves): Work until there are 3 stitches left before the marker thread, knit 2 together, knit 2 (marker thread sits in the middle of these 2 stitches), slip 1 stitch as if to knit, knit 1, pass the slipped stitch over the knitted stitch (= 2 stitches decreased). ------------------------------------------------------- START THE PIECE HERE: ------------------------------------------------------- JUMPER - SHORT OVERVIEW OF THE PIECE: The yoke is worked in the round with circular needle, top down in false English rib. Then the yoke is divided for body and sleeves. The body is continued in the round in stocking stitch with a false English rib edge. The sleeves are worked in the round with double pointed needles in stocking stitch and with a false English rib edge. YOKE: Cast on 66-72-78-82-85-91 stitches with circular needle size 5.5 mm and Air. Knit 2-2-2-4-4-4 rounds, AT THE SAME TIME on round 3 increase 0-0-0-6-11-13 stitches evenly on round – read INCREASE TIP-1 = 66-72-78-88-96-104 stitches. Work A.1a ( 6-6-6-8-8-8 stitches) a total of 11-12-13-11-12-13 times in width. Continue this pattern. REMEMBER THE KNITTING TENSION! Be careful, when increasing in the diagram, that the stitch you increase in is not tightened more than absolutely necessary; there will be a small hole in this stitch. When A.1a has been worked 1 time in height there are 154-168-182-176-192-208 stitches on the needle. Now work A.1b over A.1a. When A.1b has been completed in height there are 198-216-234-264-288-312 stitches on the needle. The piece measures approx. 20-20-20-24-24-24 cm from the cast-on edge. Repeat the last 2 rounds in A.1b until the piece measures 21-23-24-26-28-30 cm from the cast-on edge; adjust so that you finish with a round without yarn overs. Knit all stitches and increase 14-20-30-16-12-16 stitches evenly on round = 212-236-264-280-300-328 stitches. On the next round divide for body and sleeves as follows: Knit 31-34-38-41-45-50 stitches (= half back piece), place the next 44-50-56-58-60-64 stitches on a thread for sleeve and cast on 8-8-8-10-10-10 new stitches under the sleeve, knit 62-68-76-82-90-100 stitches (= front piece), place the next 44-50-56-58-60-64 stitches on a thread for sleeve and cast on 8-8-8-10-10-10 new stitches under the sleeve. Finish with knit 31-34-38-41-45-50 stitches (= half back piece) = 140-152-168-184-200-220 stitches. The yoke measures approx. 22-24-25-27-29-31 cm. BODY: Insert 1 marker thread in the middle of the 8-8-8-10-10-10 new stitches in each side of the piece (= 70-76-84-92-100-110 stitches on both front and back pieces). Continue with stocking stitch. When the piece measures 3 cm from where the body was divided from the sleeves, increase 1 stitch on each side of both marker threads – read INCREASE TIP-2! Increase like this every 3-3-4-4-3-3 cm a total of 7-7-6-6-7-7 times = 168-180-192-208-228-248 stitches. When the piece measures 25-25-26-26-26-26 cm from where the body was divided from the sleeves work an edge as follows: On the next round increase 10 stitches evenly on round = 178-190-202-218-238-258 stitches. Work A.2 (= 2 stitches) over all stitches. When A.2 has been worked for approx. 6 cm cast off with knit. The piece measures approx. 56-58-60-62-64-66 cm from the shoulder down. SLEEVE: Place the 44-50-56-58-60-64 stitches from the thread on the one side of the piece on double pointed needles size 5.5 mm and knit up 1 stitch in each of the 8-8-8-10-10-10 stitches cast on under the sleeve = 52-58-64-68-70-74 stitches. Insert 1 marker thread in the middle of the 8-8-8-10-10-10 new stitches. Work stocking stitch in the round. When the sleeve measures 3 cm from where it was divided from the body, decrease 1 stitch on each side of the marker thread – read DECREASE TIP. Decrease like this every 4-3-2½-2-2-1½ cm a total of 7-9-11-13-13-14 times = 38-40-42-42-44-46 stitches. When the sleeve measures 35-34-34-33-32-32 cm from where it was divided from the body, work A.2 over all stitches. Cast off with knit when A.2 has been worked 1 time in height. Work the other sleeve in the same way. |
||||||||||||||||
Diagram explanations |
||||||||||||||||
|
||||||||||||||||
|
||||||||||||||||
|
||||||||||||||||
|
||||||||||||||||
Have you finished this pattern?Tag your pictures with #dropspattern #fritidsweater or submit them to the #dropsfan gallery. Do you need help with this pattern?You'll find 23 tutorial videos, a Comments/Questions area and more by visiting the pattern on garnstudio.com. © 1982-2025 DROPS Design A/S. We reserve all rights. This document, including all its sub-sections, has copyrights. Read more about what you can do with our patterns at the bottom of each pattern on our site. |
||||||||||||||||


With over 40 years in knitting and crochet design, DROPS Design offers one of the most extensive collections of free patterns on the internet - translated to 17 languages. As of today we count 314 catalogues and 11821 patterns translated into English (UK/cm).
We work hard to bring you the best knitting and crochet have to offer, inspiration and advice as well as great quality yarns at incredible prices! Would you like to use our patterns for other than personal use? You can read what you are allowed to do in the Copyright text at the bottom of all our patterns. Happy crafting!
Post a comment to pattern DROPS 195-31
We would love to hear what you have to say about this pattern!
If you want to leave a question, please make sure you select the correct category in the form below, to speed up the answering process. Required fields are marked *.