
Popular categories
Looking for a yarn?


Comments / Questions (30)
![]() Wohlschläger Silvia wrote:
Wohlschläger Silvia wrote:
Ich möchte gerne das Muster (Diagramm) länger stricken da der Rock für mich zu kurz ist. Wie muss ich weiterstricken wenn ich mehr als 8 cm Länge haben möchte. Vielen Dank Silvia Wohlschlaeger
14.01.2025 - 12:21DROPS Design answered:
Liebe Frau Wohlschläger, je nach der gewünschten fertigen Länge können Sie wahrscheinlich entweder A.1 wiederholen oder vielleicht länger Glattrechts stricken. Je nach Wunsch anpassen, und vielleicht auch im Verlauf der Arbeit ab und den Rock anprobieren um die Länge/Breite zu probieren/anpassen. Viel Spaß beim Stricken!
15.01.2025 - 07:45
![]() Tiziana wrote:
Tiziana wrote:
Buonasera. Perchè si suddividono le diminuzioni in questo modo? Le devo fare tutte su una riga o devo alternare sulle 4 volte che devo diminuire? Grazie
26.10.2024 - 16:06DROPS Design answered:
Buonasera Tiziana, deve seguire quanto riportato nel SUGGERIMENTO PER LE DIMINUZIONI e ripeterlo per il numero di volte indicato per la sua taglia. Buon lavoro!
27.10.2024 - 23:40
![]() Rivka wrote:
Rivka wrote:
I think there's a mistake. According to the gauge swatch, 15 rows makes 10cm but the cast on and the first knit row, the chart and then the first decrease row are already 19 rows, so how are we supposed to start the decreases at 10cm? Or is it 10cm measured from the top of the lace pattern??
29.12.2023 - 22:18DROPS Design answered:
Dear Rivka, the wave pattern is supposed to measure 8 cm (see chart - A.1 is not only stocking stitch, but includes 3 ridges, the tension in stocking stitch doesn't apply in height here), so that the decrease will start approx. 2 cm after the end of A.1. Happy knitting!
02.01.2024 - 10:32
![]() Rosalind wrote:
Rosalind wrote:
Are the measurements in the drawing of the skirt (under the wave pattern diagram) in cm?
12.06.2023 - 08:09DROPS Design answered:
Dear Rosalind, yes all measurements in chart are in cm - convert into inches here. Happy knitting!
12.06.2023 - 09:13
![]() Sandra Seltzer wrote:
Sandra Seltzer wrote:
I would love to have this pattern for a lighter weight cotton on number 4mm needles please
31.05.2022 - 20:46DROPS Design answered:
Dear Mrs Seltzer, we are unfortunately not able to adjust every pattern to every single request, but maybe you can take inspiration from our skirt patterns worked with a yarn group B. Happy knitting!
01.06.2022 - 08:08
![]() Maud wrote:
Maud wrote:
Bonjour, lorsqu'on a terminé le motif A1 et que l'on passe en jersey, au 1er tour, nous devons faire 20 diminutions à répartir sur les 136 mailles. Quelle diminution conseillez-vous (2 mailles ensemble à gauche ? à droite ? ou encore la méthode 1 m glissée, 1 m end, rabattre sur la maille ?) Pouvez-vous me dire aussi pourquoi nous plaçons les 6 marqueurs si tôt dans l'ouvrage ? Merci d'avance pour votre aide Cordialement Maud
28.02.2022 - 19:37DROPS Design answered:
Bonjour Maud, diminuez avec 2 mailles ensemble à l'endroit, c'est suffisant, cette leçon indique comment répartir des diminutions à intervalles réguliers. Si vous préférez mettre vos marqueurs après, à vous de voir, c'est une question de choix, vous en aurez besoin quand la jupe mesure 10 cm de hauteur totale. Bon tricot!
01.03.2022 - 09:48
![]() Margery Ross wrote:
Margery Ross wrote:
About rather sea foam green miniskirt. Can you help me with the same features as a tube skirt? ( I woke up from a nap with the image of a knit tube skirt that color exactly, and something like that bottom pattern. Not really sure how to proceed but don’t get many post-nap knitting projects assigned either.)
13.12.2020 - 14:45DROPS Design answered:
Dear Mrs Ross, we are unfortunately not able to adjust every pattern to every single request - thanks for your comprehension. You might find help with this pattern adding the wave pattern? Your yarn store should be able to help you even per mail or telephone. Happy knitting!
14.12.2020 - 09:05
![]() Marika wrote:
Marika wrote:
Salve, nella caso della taglia L, bisogna dividere 153 maglie per 13, il risultato è 11,7. Significa che bisogna lavorare insieme tra l' 11° e la 12°?
10.10.2020 - 12:20DROPS Design answered:
Buongiorno Marika, può diminuire in questo modo: 9 maglie diritto, 2 maglie insieme a diritto (9 maglie diritto, 2 maglie insieme a diritto) fino a quando rimangono 10 maglie, 10 maglie diritto. Buon lavoro!
12.10.2020 - 10:39
![]() Mudite wrote:
Mudite wrote:
Takk for oppskriften! Jeg strikket i gråfarge , lengde til knær med bølgene i tynnere ulltrå med grader farge fra mørke grå nederst til en myk overgang til samme gråfarge som er i hele lengden. . Tråden snurret jeg i kombo med den mørke tråden. Dette ble lekkert . Vellykket resultat
13.02.2020 - 17:33
![]() Phyll wrote:
Phyll wrote:
How do I order patterns and download them?
28.04.2019 - 02:19DROPS Design answered:
Dear Phyll, you do not need to order our patterns - its free and you can print it directly from our web or save it as favorite and print later. The only way to download is to "print it" as .pdf, so the file will convert to .pdf format and you should be able to save it. Happy crafting!
28.04.2019 - 11:53
|
|||||||||||||
Sea Foam#seafoamskirt |
|||||||||||||
|
|
|||||||||||||
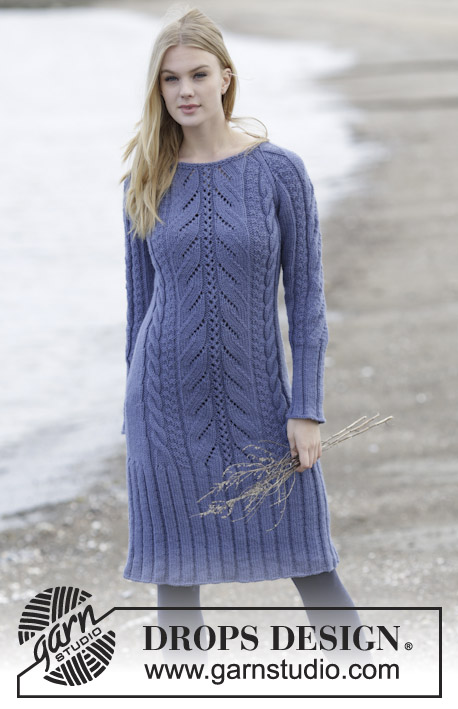
Knitted DROPS skirt with wave pattern and rib in "Andes". Size: S - XXXL.
DROPS 164-37 |
|||||||||||||
|
PATTERN: See diagram A.1. DECREASE TIP: Dec 1 st after 1st, 2nd, 4th and 5th marker as follows: Slip 1 st as if to K, K 1, psso. Dec 1 st before 3rd, 4th, 6th and 1st marker as follows: Beg 2 sts before marker and K 2 tog. ---------------------------------------------------------- SKIRT: Worked bottom up, in the round on circular needle. Cast on 136-136-153-170-187-204 sts on circular needle size 8 mm with Andes. K 1 round. Work A.1 over all sts. After A.1 continue in stocking st AND AT THE SAME TIME on first round dec evenly 20-12-13-22-19-28 sts = 116-124-140-148-168-176 sts. Now insert 6 markers in the piece as follows: Insert 1st marker at beg of round (= side), 2nd marker after 18-19-22-23-26-27 sts, 3rd marker after the next 22-24-26-28-32-34 sts, 4th marker after the next 18-19-22-23-26-27 sts (= side), 5th marker after the next 18-19-22-23-26-27 sts, 6th marker after the next 22-24-26-28-32-34 sts (18-19-22-23-26-27 sts remain on round after last marker). Work in stocking st and move the markers upwards when working. REMEMBER THE KNITTING TENSION When piece measures 10 cm, dec 1 st on each side of 1st and 4th marker, dec 1 st after 2nd and 5th marker and 1 st before 3rd and 6th marker – READ DECREASE TIP (= 8 sts dec). Repeat dec every 5-5½-5-5½-5-5 cm 4-4-5-5-6-6 more times = 76-84-92-100-112-120 sts. When piece measures 33-35-37-39-41-43 cm, switch to circular needle size 7 mm. Work 2 rounds rib K 2/P 2 over all sts. Work next round as follows: * K 2, 1 YO, P 2 tog *, repeat from *-*. On next round continue rib as before, P YOs, they should make holes. Work rib for 7 cm in total, then cast off with K over K and P over P. TWINED STRING: Cut 2 lengths of 3 metres each with Andes. Twine the strands tog until they resist, fold the string double so that it twines again. Make a knot at each end. Thread the tie up and down through the eyelet holes on rib. Fasten a pompom with an approx. diameter of 6 cm in each end and tie a bow at the front. |
|||||||||||||
Diagram explanations |
|||||||||||||
|
|||||||||||||

|
|||||||||||||

|
|||||||||||||
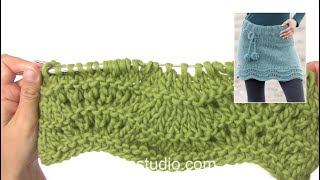
Have you finished this pattern?Tag your pictures with #dropspattern #seafoamskirt or submit them to the #dropsfan gallery. Do you need help with this pattern?You'll find 22 tutorial videos, a Comments/Questions area and more by visiting the pattern on garnstudio.com. © 1982-2025 DROPS Design A/S. We reserve all rights. This document, including all its sub-sections, has copyrights. Read more about what you can do with our patterns at the bottom of each pattern on our site. |
|||||||||||||


With over 40 years in knitting and crochet design, DROPS Design offers one of the most extensive collections of free patterns on the internet - translated to 17 languages. As of today we count 314 catalogues and 11822 patterns translated into English (UK/cm).
We work hard to bring you the best knitting and crochet have to offer, inspiration and advice as well as great quality yarns at incredible prices! Would you like to use our patterns for other than personal use? You can read what you are allowed to do in the Copyright text at the bottom of all our patterns. Happy crafting!
Post a comment to pattern DROPS 164-37
We would love to hear what you have to say about this pattern!
If you want to leave a question, please make sure you select the correct category in the form below, to speed up the answering process. Required fields are marked *.