
Popular categories
Looking for a yarn?


Comments / Questions (48)
![]() Beáta Birta wrote:
Beáta Birta wrote:
Nagyon szép ez a minta. Nincs esetleg minta rajz a bikini alsó hoz?
23.06.2024 - 12:07DROPS Design answered:
Kedves Beáta, örülünk, hogy tetszik a minta. Az alsóhoz is csak a leírás van, rajz nincsen. Sikeres kézimunkázást!
23.06.2024 - 15:20
![]() Dybas wrote:
Dybas wrote:
Hi, I have followed the pattern, but after doing it the fans at cups are not quite aligning with the body and they don't cover sides of the breasts properly. Do you have any idea how it could be fixed?
30.08.2023 - 20:29DROPS Design answered:
Dear Mrs Dybas, you can continue working treble crochets (UK-English)/double crochets (US-English) until you reach the required measurements and then finish with fan pattern M.2, making sure your number of stitches is divisible by 4 + 1. Happy crocheting!
31.08.2023 - 09:04
![]() Fianna Joy wrote:
Fianna Joy wrote:
Jeg har et spørgsmål om udtagningen på bagstykket på bikinitusserne. (laver en størelse s) Jeg forstår ikke hvordan man skal lave "Tag 1 fm ud i hver side på hver række totalt 0 gange, på hver 2.række totalt 26 gange, på hver 4.række 1 gange = 75 fm." hvordan skal jeg hækle det? Mvh Fianna
19.01.2022 - 13:56DROPS Design answered:
Hei Fianna. Du hekler str. S og da skal det ikke tas ut på hver rad, slik det skal i str. M-L-XL (4-4-6 ganger). Du skal ta ut i hver side på hver 2.rad totalt 26 ganger og på hver 4.rad 1 gang = 75 fastmasker. Det økes 1 maske i hver side på en rad slik: hekle 2 masker i første maske. Hekle 1 maske i hver maske til det gjenstår 1 maske, hekle 2 masker i siste maske. mvh DROPS Design
25.01.2022 - 10:36
![]() Maja wrote:
Maja wrote:
Når der står: "Hækl næste række således: * hækl 1 fm i hver fm rækken ud, men i m med mærketråd (= den midterste m) hækles der 3 fm *. Gentag fra *-* " Skal man så vende arbejde ligesom man gjorde lige før man starter på dette, eller hækler man bare rundt? Jeg har bare hæklet rundt, men får ligesom sådan en bule ud i den ende hvor man ikke hækler ekstra masker ved mærketråden. Og tænker ikke det bliver så pænt når man har den på.
28.01.2021 - 23:38DROPS Design answered:
Hei Maja. Du skal hekle frem og tilbake, ikke rundt. Det økes kun på den ene siden. mvh DROPS design
01.02.2021 - 13:07
![]() Karen Monge wrote:
Karen Monge wrote:
Según entendí, en talla S, después de las 5 vueltas de P.A 10 filas de P.B con disminución al inicio y al final=31P.B Pero luego dice que haga 6 filas con disminuciones al inicio y al final ¿Entonces en total son 16 filas iguales?
01.04.2019 - 08:10DROPS Design answered:
Hola Karen. Si, en realidad hay 16 filas con disminuciones, pero las primeras 10 disminuciones trabajamos cada 2ª fila/vuelta ( mira el patrón) y las siguientes 6 disminuciones trabajamos CADA fila/vuelta.
02.04.2019 - 14:50
![]() JUDY GATES wrote:
JUDY GATES wrote:
This is a question about the bikini bottom...When the instructions say dec 1 sc each side, is that really 1 sc dec at the begining of each row? so you are really dec-ing 1 sc per row? It would also help if there were a diagram of the bikini bottom with measurements . Also I would like to know how many sc's in the with of the crotch area and how long is that strip? Thank you Judy
30.07.2018 - 00:13DROPS Design answered:
Dear Mrs Gates, when decreasing 1 sc on each side you dec 2 sc per row - see how to decrease under DECREASE ON SC ROW. You first decrease every othere row then every row, after last dec you should have 19-21-21-25-27 sc. Happy crocheting!
31.07.2018 - 09:30Saretha Sandham wrote:
I haven't crocheted with a pattern in a long time and now I am trying to make this bikini for my daughter. I don't understand the instructions for decreasing on dc row. What does YO mean? Do I decrease the same as in the tutorial video or is it different for this pattern?
20.04.2018 - 07:31DROPS Design answered:
Dear Mrs Sandham, YO means yarn over - decrease as explained in text ie as shown in videobelow. Happy crocheting!
20.04.2018 - 09:00Alicia wrote:
Is the back of the bikini bottom meant to be skimpier than the front or have I done something wrong?
31.03.2017 - 09:55DROPS Design answered:
Dear Alicia, the front will be smaller than the back, as for any bikini bottom. Happy crocheting!
31.03.2017 - 13:32
![]() Marlene Foulk wrote:
Marlene Foulk wrote:
How many inches will a size S-M-L-XL be for each cup on top?
09.03.2016 - 15:18DROPS Design answered:
Dear Mrs Foulk, you can get the width of the cup for each size checking the number of rows worked and calculating with the tension ie 26 sc x 28 rows (24 dc x 13 rows) = 10 x 10 cm / 4'' x 4''. Happy crocheting!
09.03.2016 - 17:43KAMI wrote:
Hi, I made the top according to the instructions. I made both cups but am unable to complete the top of the bikini. The instructions given ended up having the top increase into a triangle but the fan pattern is only at the top. What is the trick to this?
04.09.2015 - 00:36DROPS Design answered:
Dear Kami, fan border is worked along both sides of triangle. When working when working 2nd row, work 5tr, 1 ch 5 tr in dc with marker (and continue row to the end), and when working 3rd row of fan pattern work 5 tr in the top ch of previous row (= in the tip, mid on top of cup), and finish row. Happy crocheting!
04.09.2015 - 09:44
|
||||||||||||||||||||||
Sunny Season#sunnyseasonbikini |
||||||||||||||||||||||
 |
 |
|||||||||||||||||||||
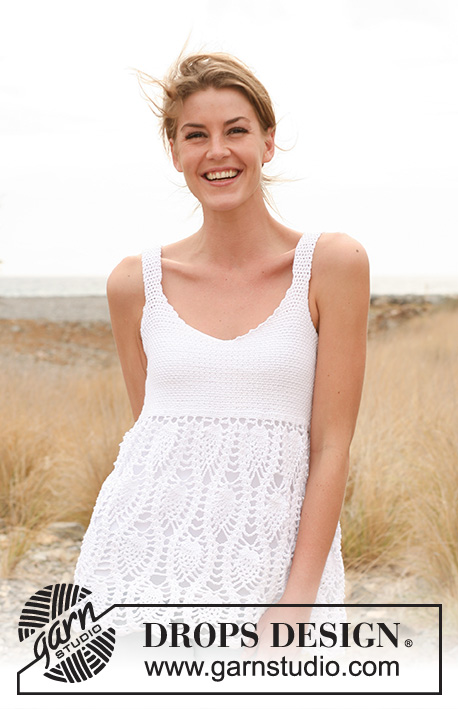
Crochet DROPS bikini with fan edge in ”Safran”. Size: XS - XL.
DROPS 128-26 |
||||||||||||||||||||||
|
CROCHET INFO: DC ROW: Start every row with 1 ch before continuing with dc in every st. NOTE! When inc on dc row, work 2 ch at beg of row (instead of 1 ch). DECREASE ON DC ROW: Dec 1 dc in each side on a row as follows: Work 1 dc, * insert hook in next st, get thread *, repeat from *-*, make a YO and pull thread through all 3 sts on hook. Then work 1 dc in every st until 3 sts remain on row, repeat dec in the next 2 sts, 1 dc in last st. TR ROW: Start every row with 3 ch before continuing with tr in every st. DECREASE ON TR ROW: Dec 1 tr in each side on a row as follows: Work 1 tr, * make a YO, insert hook in next st, get thread, make a YO and pull thread through the first 2 sts on hook *. Repeat from *-*, make a YO and pull thread through all 3 sts on hook. Then work 1 tr in every st until 3 sts remain on row, repeat dec in the next 2 sts, 1 tr in last st. INCREASE: Inc 1 st in each side on a row as follows: Work 2 sts in first st. Work 1 st in every st until 1 st remains, work 2 sts in last st. FAN PATTERN 1: See diagram M.1. (no of sts can be divided by 6 + 1) ROW 1: Work 1 ch, 1 dc in first st on row, * skip 2 sts, 5 tr in next st, skip 2 sts, 1 dc in next st *, repeat from *-* the entire row. Finish with 1 dc in last st, turn piece. ROW 2: Work 3 ch, 2 tr in first dc on row, * 1 dc in the middle tr of the 5 tr from previous row, 5 tr in next dc *, repeat from *-* the entire row. Finish with 1 dc in the middle tr of the 5 tr from previous row, 3 tr in last dc on row, turn piece. ROW 3: Work 1 ch, 1 dc in first tr on row, * 5 tr in next dc, 1 dc in the middle tr of the 5 tr from previous row *, repeat from *-* the entire row. Finish with 1 dc in 3rd ch from beg of previous row. FAN PATTERN 2: See diagram M.2. (no of sts can be divided by 4 + 1) ROW 1: Work 1 ch, 1 dc in first st on row, * skip 1 st, 5 tr in next st, skip 1 st, 1 dc in next st *, repeat from *-* the entire row. Finish with 1 dc in last st, turn piece. ROW 2-3: Work as 2nd and 3rd row in FAN PATTERN 1. -------------------------------------------------------- BIKINI TROUSERS: Start at top of front piece and work in one until back piece. Work 55-61-67-73-79 ch + 3 ch to turn with on hook size 3 mm with Safran. Work first row as follows: 1 tr in 4th ch from hook, then work 1 tr in every ch on row = 55-61-67-73-79 tr (no of sts can be divided by 6 + 1), turn piece - READ TR ROW. Continue to work as follows: * Dec 1 tr in each side on next row - READ DECREASE ON TR ROW, work another tr row *. Repeat from *-* one more time = 51-57-63-69-75 tr (5 tr rows). Now continue with dc - READ DC ROW - while AT THE SAME TIME dec on 1st dc row 1 dc in each side - READ DECREASE ON DC ROW. Repeat dec in each side on every other row a total of 10-10-9-10-12 times = 31-37-45-49-51 dc. REMEMBER THE CROCHET TENSION! Then dec 1 dc in each side on every row a total of 6-8-12-12-12 times = 19-21-21-25-27 dc. Continue to work dc rows. When piece measures 19-21-23-24-26 cm, beg back piece and now measure piece from here. Continue and now start to inc 1 dc in each side - READ INCREASE. Repeat inc as follows: Inc 1 dc in each side on every row a total of 0-0-4-4-6 times, on every other row a total of 22-26-26-27-27 times, on every 4th row 3-1-0-0-0 times = 69-75-81-87-93 dc. Now work tr rows until finished measurements. After a tr row work as follows: * Inc 1 tr in each side on next row, work another tr row *. Repeat from *-* one more time = 73-79-85-91-97 tr (no of sts can be divided by 6 +1). Continue to work tr rows until back piece measures 24-24-24-25-26 cm, do not cut the thread. FAN EDGE AND TIES: Work row 1-3 in Fan pattern 1 - READ EXPLANATION ABOVE. Then repeat 2nd row: 0-0-0-1-1 time, do not cut the thread. Then work ch for approx. 28-29-30-32-34 cm. Turn piece and work 1 sl st in every ch, cut and fasten the thread. Work another tie the same way and fasten it to the other corner of the fan edge. Work the fan edge and the ties the same way on front piece. BIKINI TOP: Work 23-25-28-31-32 ch on hook size 3 mm with Safran. Worked back and forth on both sides of the ch row in the middle. Work first row as follows: Work 1 dc in 2nd ch from hook, 1 dc in every ch until 1 ch remains on row, work 3 dc in the last ch, then work 1 dc in every ch on the other side of the ch row = 45-49-55-61-63 dc on row. Insert a marker in the middle dc (= 22-24-27-30-31 dc on each side of dc with marker). Turn piece. Work next row as follows: * Work 1 dc in every dc the entire row but work 3 dc in st with marker (= the middle st) *. Repeat from *-* until a total of 6-7-9-11-14 rows have been worked = 55-61-71-81-89 dc on row (= 27-30-35-40-44 dc on each side of dc with marker). Then work 3 tr rows as follows: * 1 tr in every st the entire row but work 3 tr in st with marker (= the middle st) *. Repeat from *-* 2 more times but on last tr row work 5 tr in st with marker (instead of 3 tr) - while AT THE SAME TIME inc 2-4-2-0-0 sts evenly on row = 65-73-81-89-97 tr (no of sts can be divided by 4 + 1). Then work 1st row in Fan pattern 2 - READ EXPLANATION ABOVE, insert a marker in the middle dc (mid on top of cup). Then work 2nd row in M.2 but work 5 tr, 1 ch, 5 tr in dc with marker (instead of 5 tr). Then work 3rd row in fan pattern (= RS), work 5 tr in the top ch from previous row. Cut and fasten the thread. Crochet another cup the same way. FAN EDGE AND TIES IN THE SIDE: Work ch for approx. 37-38-39-41-43 cm (= right tie) on hook size 3 mm with Safran. Continue to work 34-36-38-44-50 dc at the bottom along the edge of the cup (work in front loop of st from RS). Then work ch for 2 cm, continue to work 34-36-38-44-50 dc at the bottom along the edge of the other cup (from RS). Then work ch for approx. 37-38-39-41-43 cm (= left tie). Turn piece. On next row work dc in every st the entire row, turn piece. On next row (= last row) work sl st in every dc for approx. 17-18-19-21-23 cm, then work 1st row in M.2 (start with 1 dc) until approx. 17-18-19-21-23 cm remain of ch row, work sl st in every dc the entire row. Cut and fasten the thread. TIES AROUND THE NECK: Work ch for approx. 48-49-50-52-54 cm on hook size 3 mm with Safran. Turn piece, work 1 sl st in every ch, then work 1 sl st in the middle tr of the 5 tr mid on top of cup. Turn piece, work 1 sl st in same st and then work 1 sl st in every ch on the other side of ch row. Cut and fasten the thread. Work the same way and fasten in the other cup. |
||||||||||||||||||||||
Diagram explanations |
||||||||||||||||||||||
|
||||||||||||||||||||||

|
||||||||||||||||||||||
Have you finished this pattern?Tag your pictures with #dropspattern #sunnyseasonbikini or submit them to the #dropsfan gallery. Do you need help with this pattern?You'll find 9 tutorial videos, a Comments/Questions area and more by visiting the pattern on garnstudio.com. © 1982-2025 DROPS Design A/S. We reserve all rights. This document, including all its sub-sections, has copyrights. Read more about what you can do with our patterns at the bottom of each pattern on our site. |
||||||||||||||||||||||


With over 40 years in knitting and crochet design, DROPS Design offers one of the most extensive collections of free patterns on the internet - translated to 17 languages. As of today we count 314 catalogues and 11822 patterns translated into English (UK/cm).
We work hard to bring you the best knitting and crochet have to offer, inspiration and advice as well as great quality yarns at incredible prices! Would you like to use our patterns for other than personal use? You can read what you are allowed to do in the Copyright text at the bottom of all our patterns. Happy crafting!
Post a comment to pattern DROPS 128-26
We would love to hear what you have to say about this pattern!
If you want to leave a question, please make sure you select the correct category in the form below, to speed up the answering process. Required fields are marked *.