Sunny Season by DROPS Design

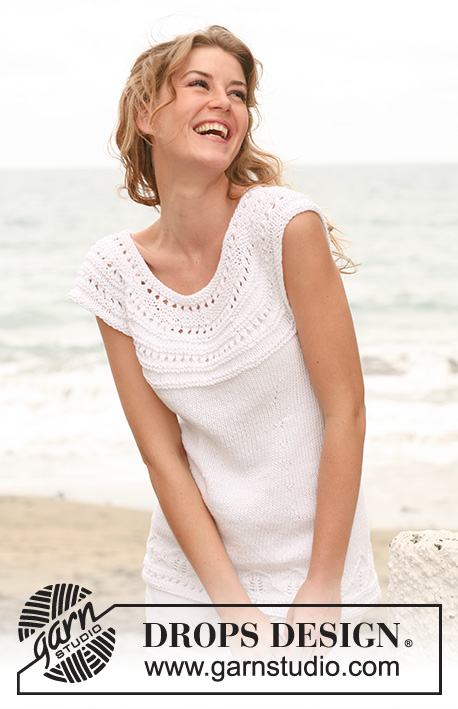
DROPS háčkované bikiny s krajkovým lemem z příze „Safran“. Velikost XS – XL.

Tagy: bikini
DROPS 128-26
DROPS design: Návod č. E-174
-------------------------------------------------------

BIKINY KALHOTKY:
Velikost: XS - S - M - L – XL
Materiál: DROPS SAFRAN firmy Garnstudio
100-100-100-100-100 g, barva č. 17, bílá
BIKINY PODPRSENKA:
Velikost: XS - S - M - L – XL
Materiál: DROPS SAFRAN firmy Garnstudio
50-50-50-50-100 g, barva č. 17, bílá
DROPS HÁČEK č. 3 – nebo velikosti potřebné k uháčkování zkušebního vzorku o rozměrech 26 KS x 28 řad (24 DS x 13 řad) = 10 x 10 cm.

-------------------------------------------------------

Náhradní příze – Podívejte se, jak změnit přízi
Skupina přízí A až F – Neměňte návod, změňte přízi
Spotřeba příze při použití náhradní příze – Využijte náš převodník

-------------------------------------------------------


100% bavlna
od 43.00 Kč /50g
DROPS Safran uni colour DROPS Safran uni colour 43.00 Kč /50g
Ganella
Objednat
needles Jehlice a háčky Objednat
Přízi na tento model můžete mít už za 129Kč. Více zde.

Návod

TIP NA HÁČKOVÁNÍ:
ŘADA KS:
Každou řadu začínáme 1.řo, následně háčkujeme KS do každého oka. POZN! Při přidávání v řadě z KS, uháčkujeme na začátku řady 2 řo (místo 1 řo).
UJÍMÁNÍ V ŘADĚ KS:
Ujímáme na každé straně řady: 1 KD, * háček vpíchneme do dalšího oka, nabereme přízi*, mezi *-* opakujeme, přízi nahodíme na háček a protáhneme všemi 3 smyčkami na háčku. Dále háčkujeme do každého oka 1 KS až v řadě zbývají 3 oka, opakujeme ujímání, do posledního oka háčkujeme KS.
ŘADA DS:
Každou řadu začínáme 3 řo, následně háčkujeme do každého oka DS.
UJÍMÁNÍ V ŘADĚ DS:
Ujímáme na každé straně řady: 1 DS, * nahodíme, háček vpíchneme do následujícího oka, nabereme přízi, nahodíme a protáhneme přízi skrz dvě smyčky na háčku*, mezi *-* opakujeme, nahodíme a přízi protáhneme skrz 3 smyčky na háčku. Dále háčkujeme do každého oka 1 DS až v řadě zbývají 3 oka, opakujeme ujímání, do posledního oka háčkujeme DS.
PŘIDÁVÁNÍ:
Přidáváme z každé strany řady: Do prvního oka háčkujeme 2 oka. Do každého oka háčkujeme 1 oko, až v řadě zbývá 1 oko, do posledního oka háčkujeme 2 oka.
KRAJKOVÝ VZOR 1: Viz schéma M. 1 (počet oka je dělitelný 6 + 1).
1. řada: 1 řo, do prvního oka v řadě háčkujeme 1 KS, * vynechat 2 oka, 5 DS do následujícího oka, vynechat 1 oka, do následujícího oka háčkujeme 1 KS*, mezi *-* opakujeme. Řadu končíme KS do posledního oka. Práci otočíme.
2. řada: 3 řo, do prvního KS v řadě háčkujeme 2 DS, *KS do středu 5 DS z minulé řady, vynechat 2 oka, do následujícího oka KS*, mezi *-* opakujeme. Řadu končíme KS do středu 5 DS z minulé řady, 3 DS do posledního KS v řadě, práci otočíme.
3. řada: řo, do prvního DS v řadě háčkujeme KS, * 5 DS do následujícího KS, KS do středu 5 DS z minulé řady*, mezi *-* opakujeme. Řadu končíme KS do třetího řo ze začátku předchozí řady.
KRAJKOVÝ VZOR 2: Viz schéma M. 2 (počet ok je dělitelný 4 + 1).
1. řada: řo, do prvního oka v řadě háčkujeme KS, * vy, vynechat 1 oko, 5 DS do následujícího oka, vynechat 1 oko, do následujícího oka háčkujeme KS*, mezi *-* opakujeme, řadu končíme KS do posledního oka, práci otočíme.
2. -3. řada: háčkujeme stejně jako řadu 2. a 3. KRAJOVÉHO VZORU 1.
----------------------------------------------------------------------

BIKINY KALHOTKY:
Začínáme na předním díle a spolu se zadním dílem háčkujeme jako jeden kus. Začneme háčkem č. 3 přízí Safran na 55-61-67-73-79 řo + 3 řo na otočení. První řadu háčkujeme: do 4.řo od háčku háčkujeme 1 DS, dále do každého řo v řadě háčkujeme vždy 1 KS = 55-61-67-73-79 DS (počet ok je dělitelný 6 + 1), práci otočíme – viz ŘADA DS. Pokračujeme: * v následující řadě ujmeme z každé strany 1 DS – viz UJÍMÁNÍ V ŘADĚ DS, háčkujeme jednu řadu DS*, mezi *-* opakujeme ještě jednou = 51-57-63-69-75 DS (5 řad z DS).
Pokračujeme KS – viz ŘADA DS – SOUČASNĚ ujmeme v první řadě z každé strany 1 KS – viz UJÍMÁNÍ V ŘADĚ KS. Ujímání opakujeme v každé druhé řadě z každé strany celkem 10-10-9-10-12 krát = 31-37-45-49-51 KS. PAMATUJTE NA SPRÁVNÉ NAPĚTÍ PŘÍZE!
V každé druhé řadě pak ujmeme z každé strany 1 KS celkem 6-8-12-12-12 krát = 19-21-21-25-27 KS. Pokračujeme v háčkování KS. Ve výšce 19-21-23-24-26 cm, začátek zadního dílu a další měření provádíme od tohoto místa.
Začínáme z každé strany přidávat – viz PŘIDÁVÁNÍ. Přidávání opakujeme: V každé řadě přidáme z každé strany 1 KS celkem 0-0-4-4-6 krát, v každé druhé řadě ještě 22-26-26-27-27 krát a v každé 4. řadě 3-1-0-0-0 krát = 69-75-81-87-93 KS.
Nyní háčkujeme DS až do požadované výšky. V následující řadě háčkujeme: * na každé straně přidáme 1 DS, uháčkujeme jednu řadu DS*, mezi *-* opakujeme ještě 1 krát = 73-79-85-91-97 DS (počet je dělitelný 6 + 1). DS háčkujeme, až díl měří 24-24-24-25-26 cm, přízi neodstřiháváme!

KRAJKOVÝ LEM A ŠŇŮRKY:
Háčkujeme řadu 1 – 3 KRAJKOVÝM VZOREM 1 – viz popis výše. Zopakujeme 2. řadu: 0-0-0-1-1 krát, přízi neodstřihujeme. Dále háčkujeme řetízek z řo o délce asi 28-29-30-32-34 cm. Práci otočíme, do každého řo háčkujeme pevné oko, přízi ustřihneme, zapošijeme. Druhou šňůrku uháčkujeme stejně a přišijeme do druhého rohu krajkového lemu. Krajkový lem uháčkujeme i na předním díle.

BIKINY PODPRSENKA:
Háčkem č. 3 přízí Safran uháčkujeme 23-25-28-31-32 řo. Háčkujeme lícové a rubové řady. První řadu háčkujeme: do druhého řo od háčku háčkujeme 1 KS, do každého řo pak háčkujeme KS, do posledního řo háčkujeme 3 KS, do každého řo z druhé strany háčkujeme KS = 45-49-55-61-63 KS v řadě. Značku umístíme do středu KS (=22-24-27-30-31 KS z každé strany značky). Práci otočíme.
Následující řadu háčkujeme: * do každého KS háčkujeme KS, do označeného KS háčkujeme 3 KS (= středové oko)*, mezi *-* opakujeme, až máme 6-7-9-11-14 řad = 55-61-71-81-89 KS v řadě (=27-30-35-40-44 KS na každou stranu od značky).
Následují 3 řady DS: * 1 DS do každého oka v řadě, do označeného oka háčkujeme 3 DS (=středové oko)*, mezi *-* opakujeme ještě 2krát, v poslední řadě háčkujeme do označeného oka 5 DS (namísto 3 DS) – SOUČASNĚ rovnoměrně v řadě přidáme 2-4-2-0-0 ok = 65-73-81-89-97 DS (počet ok je dělitelný 4 + 1).
Následuje první řada KRAJKOVÉHO VZORU 2 – viz popis výše, značku umístíme do středního KS (střed – vrchol košíčku). Dále háčkujeme druhou řadu vzorem M. 2, 5 DS, 1 řo, 5DS do označeného KS (namísto 5 DS). Dále uháčkujeme třetí řadu krajkového vzoru (= lícová řada), do řo z předchozí řady háčkujeme 5 DS. Přízi ustřihneme a zapošijeme.
Druhý košíček uháčkujeme stejně.

KRAJKOVÝ LEM A ŠŇŮRKY PO STRANÁCH:
Háčkujeme háčkem č. 3 přízí Safran uháčkujeme řetízek z řo asi 37-38-39-41-43 cm (= pravá šňůrka). Pokračujeme 34-36-38-44-50 KS podél spodní části košíčku (háčkujeme z lícové strany). Pokračujeme 2 cm z řo, 34-36-38-44-50 KS podél spodní části druhého košíčku (z lícové strany). Dále uháčkujeme asi 37-38-39-41-43 cm řetízkovými oky (levá šňůrka). Práci otočíme. Další řadu háčkujeme pouze KS. Díl otočíme.
V následující řadě (=poslední řada) háčkujeme v délce asi 17-18-19-21-23 cm do každého KS pevné oko, dále háčkujeme první řadu vzoru M. 2 (začínáme 1 KS) až zbývá asi 17-18-19-21-23 cm, háčkujeme do zbývajících KS pevná oka. Přízi ustřihneme a zapošijeme.

RAMÍNKO OKOLO KRKU:
Háčkem č. 3 přízí Safran uháčkujeme řetízek z řetízkových ok v délce asi 48-49-50-52-54 cm. Práci otočíme, do každého řo háčkujeme pevné oko, následuje pevné oko mezi 5 DS ve vrcholu košíčku. Práci otočíme, do stejného oka uháčkujeme pevné oko, a dále následují pevná oka z druhé strany řetízku. Přízi ustřihneme, zapošijeme. Druhé ramínko uháčkujeme stejně.

Návod byl opraven. .

Poslední úpravy: 12.07.2011
BIKINI BOTTOMS: .....Work first row as follows: 1 tr in 4th ch from hook, then work 1 tr in every ch on row = 55-61-67-73-79 tr...

Schéma

symbols = KS - krátký sloupek
symbols = DS - dlouhý sloupek
symbols = řo - řetízkové oko
symbols = 1.řada
symbols = 2.řada
symbols = 3.řada
symbols = začátek
diagram

Potřebujete poradit s tímto návodem?

Děkujeme, že jste si vybrali návod DROPS Design. Zakládáme si na tom, že dáváme k dispozici návody ověřené a snadno srozumitelné. Všechny návody jsou přeložené z norského originálu a tak si můžete kdykoli srovnat rozměry a počty s původním návodem (DROPS 128-26) .

Máte s návodem potíže? Níže najdete seznam odkazů, které vám pomohou dokončit vaše dílo co nejdříve - nebo se třeba přiučit něco nového.

signature-image signature

Máte s návodem potíže? Níže najdete seznam odkazů, které vám pomohou dokončit vaše dílo co nejdříve - nebo se třeba přiučit něco nového.

Máme takopodrobné rozpisy různých technik a postupů krok za krokem - najdete je zde.

1) Why is the knitting/crochet tension so important?

Knitting tension is what determines the final measurements of your work, and is usually measured per 10 x 10 cm. It is provided like so: number of stitches in width x number of rows in height - eg: 19 stitches x 26 rows = 10 x 10 cm.

The knitting tension is very individual; some people knit/crochet loosely while others work tightly. You adjust the knitting tension with the needle size, which is why the suggested needle size only serve as a guide! You need to adjust this (up or down) to ensure that YOUR knitting tension matches the knitting tension provided in the pattern. If you work with a different knitting tension than provided you will have a different yarn consumption, and your work will have different measurements than what the pattern suggests.

The knitting tension also determines which yarns can replace each other. As long as you achieve the same knitting tension you can replace one yarn with another.

See DROPS lesson: How to measure your tension/gauge

See DROPS video: How to make a gauge tension swatch

nahoru

2) What are the yarn groups?

All our yarns are categorised into yarn groups (from A to F) according to thickness and knitting tension – group A contains the thinnest yarns and group F the thickest. This makes it easier for you to find alternative yarns to our patterns, should you wish to switch yarn. All yarns within the same group have a similar knitting tension and can easily replace each other. However, different yarn qualities have different structures and properties which will give the finished work a unique look and feel.

Click here for an overview of the yarns in each yarn group

nahoru

3) Can I use a different yarn than what the pattern suggests?

The important thing when changing from one yarn to another is that the knitting/crochet tension remains the same. This is so that the measurements of the finished piece will be the same as on the sketch provided. It is easier to achieve the same knitting tension using yarns from the same yarn group. It is also possible to work with multiple strands of a thinner yarn to achieve the knitting tension of a thicker one. Please try our yarn converter. We recommend you to always work a test swatch.

Please NOTE: when changing yarn the garment might have a different look and feel to the garment in the photo, due to individual properties and qualities of each yarn.

See DROPS lesson: Can I use a different yarn than the one mentioned in the pattern?

nahoru

4) How do I use the yarn converter?

At the top of all our patterns you’ll find a link to our yarn converter, which is a helpful tool should you wish to use a different yarn than suggested. By filling in the yarn quality you wish to replace, the amount (in your size) and number of strands, the converter will present good alternative yarns with the same knitting tension. Additionally it will tell you how much you’ll require in the new qualities and whether you’ll need to work with multiple strands. Most skeins are 50g (some are 25g or 100g).

If the pattern is worked with multiple colours, every colour will have to be converted separately. Similarly, if the pattern is worked with several strands of different yarns (for example 1 strand Alpaca and 1 strand Kid-Silk) you will have to find alternatives for each, individually.

Click here to see our yarn converter

nahoru

5) Why do I get the wrong knitting tension with the suggested needle size?

The needle size provided in the pattern serves only as a guide, the important thing is to follow the knitting tension. And since knitting tension is very individual, you will have to adjust the needle size to ensure that YOUR tension is the same as in the pattern – maybe you’ll have to adjust 1, or even 2 needle sizes, up or down to achieve the correct tension. For this, we recommend that you work test swatches.

Should you work with a different knitting tension than the one provided, the measurements of the finished garment might deviate from the measurement sketch.

See DROPS lesson: How to measure your tension/gauge

See DROPS video: How to make a gauge tension swatch

nahoru

6) Why is the pattern worked top-down?

Working a garment top-down provides more flexibility and room for personal adjustment. For example it is easier to try the garment on while working, as well as making adjustments to length of yoke and shoulder caps.

The instructions are carefully explaining every step, in the correct order. Diagrams are adjusted to the knitting direction and are worked as usual.

nahoru

7) Why are the sleeves shorter in larger sizes?

The total width of the garment (from wrist-to-wrist) will be larger in the larger sizes, despite the actual sleeves being shorter. The larger sizes have longer sleeve caps and wider shoulders, so there will be a good fit in all sizes.

nahoru

8) What is a repeat?

Diagrams are often repeated on the round or in height. 1 repeat is the diagram the way it appears in the pattern. If it says to work 5 repeats of A.1 in the round, then you work A.1 a total of 5 times after/next to each other in the round. If it says to work 2 repeats of A.1 vertically/in height you work the entire diagram once, then begin again at the start and work the entire diagram one more time.

nahoru

9) How do I work according to a knitting diagram?

The diagram depicts all rows/rounds, and every stitch seen from the right side. It is read from bottom to top, from right to left. 1 square = 1 stitch.

When working back and forth, every other row is worked from the right side and every other row is worked from the wrong side. When working from the wrong side, the diagram will have to be worked reversed: from left to right, knit stitches are purled, purl stitches are knit etc.

When working in the round every round is worked from the right side and the diagram are worked from right to left on all rounds.

See DROPS lesson: How to read knitting diagrams

nahoru

10) How do I work according to a crochet diagram?

The diagram depicts all rows/rounds, and every stitch seen from the right side. It is worked from bottom to top, from right to left.

When working back and forth every other row is worked from the right side: from right to left and every other row is worked from the wrong side: from left to right.

When working in the round, every row in the diagram are worked from the right side, from right to left.

When working a circular diagram you start in the middle and work your way outwards, counter clockwise, row by row.

The rows usually start with a given number of chain stitches (equivalent to the height of the following stitch), this will either be depicted in the diagram or explained in the pattern.

See DROPS lesson: How to read crochet diagrams

nahoru

11) How do I work several diagrams simultaneously on the same row/round?

Instructions for working several diagrams after each other on the same row/round, will often be written like so: “work A.1, A.2, A.3 a total of 0-0-2-3-4 times". This means you work A.1 once, then A.2 is worked once, and A.3 is repeated (in width) the number of times provided for your size – in this case like so: S = 0 times, M = 0 times, L=2 times, XL= 3 times and XXL = 4 times.

The diagrams are worked as usual: begin with the first row in A.1, then work the first row in A.2 etc.

See DROPS lesson: How to read knitting diagrams

See DROPS lesson: How to read crochet diagrams

nahoru

12) Why does the piece start with more chain stitches than it’s worked with?

Chain stitches are slightly narrower than other stitches and to avoid working the cast-on edge too tight, we simply chain more stitches to begin with. The stitch count will be adjusted on the following row to fit the pattern and measurement sketch.

nahoru

13) Why increase before the rib edge when the piece is worked top-down?

The rib edge is more elastic and will contract slightly compared to, for example, stocking stitch. By increasing before the rib edge, you avoid a visible difference in width between the rib edge and the rest of the body.

nahoru

14) Why increase in the cast-off edge?

It’s very easy to cast off too tightly, and by making yarn overs while casting off (and simultaneously casting these off) you avoid a too tight cast off edge.

See DROPS video: How to bind off with yarn overs (yo)

nahoru

15) How do I increase/decrease on every 3rd and 4th row/round alternately?

To achieve an even increase (or decrease) you can increase on, for example: every 3rd and 4th row alternately, like so: work 2 rows and increase on the 3rd row, work 3 rows and increase on the 4th. Repeat this until the increase is complete.

See DROPS lesson: Increase or decrease 1 st on every 3rd and 4th row alternately

nahoru

16) Why is the pattern slightly different than what I see in the photo?

Pattern repeats can vary slightly in the different sizes, in order to get the correct proportions. If you’re not working the exact same size as the garment in the photo, yours might deviate slightly. This has been carefully developed and adjusted so that the complete impression of the garment is the same in all sizes.

Make sure to follow instructions and diagrams for your size!

nahoru

17) How can I work a jacket in the round instead of back and forth?

Should you prefer to work in the round instead of back and forth, you may of course adjust the pattern. You’ll need to add steeks mid-front (usually 5 stitches), and follow the instructions. When you would normally turn and work from the wrong side, simply work across the steek and continue in the round. At the end you’ll cut the piece open, pick up stitches to work bands, and cover the cut edges.

See DROPS video: How to knit steeks and cut open

nahoru

18) Can I work a jumper back and forth instead of in the round?

Should you prefer to work back and forth instead of in the round, you may of course adjust the pattern so you work the pieces separately and then assemble them at the end. Divide the stitches for the body in 2, add 1 edge stitch in each side (for sewing) and work the front and back pieces separately.

See DROPS lesson: Can I adapt a pattern for circular needles into straight needles?

nahoru

19) Why do you show discontinued yarns in the patterns?

Since different yarns have different qualities and textures we have chosen to keep the original yarn in our patterns. However, you can easily find options among our available qualities by using our yarn converter, or simply pick a yarn from the same yarn group.

It is possible that some retailers still have discontinued yarns in stock, or that someone has a few skeins at home that they would like to find patterns for.

The yarn converter will provide both alternative yarn as well as required amount in the new quality.

nahoru

20) How do I make a women’s size garment into a men’s size one?

If you have found a pattern you like which is available in women’s size it’s not very difficult to convert it to men’s size. The biggest difference will be the length of sleeves and body. Start working on the women size that you think would fit across the chest. The additional length will be worked right before you cast off for the armhole/sleeve cap. If the pattern is worked top-down you can add the length right after the armhole or before the first decrease on sleeve.

Regarding additional yarn amount, this will depend on how much length you add, but it is better with a skein too many than too few.

nahoru

21) How do I prevent a hairy garment from shedding?

All yarns will have excess fibres (from production) that might come off as lint or shedding. Brushed yarns (ie hairier yarns) have more of these loose, excess fibres, causing more shedding.

Shedding also depends on what is worn under or over the garment, and whether this pulls at the yarn fibres. It’s therefore not possible to guarantee that there will be no shedding

Below are some tips on how to get the best result when working with hairier yarns:

1. When the garment is finished (before you wash it) shake it vigorously so the looser hairs come off. NOTE: do NOT use a lint roller, brush or any method that pulls at the yarn.

2. Place the garment in a plastic bag and put it in your freezer - the temperature will cause the fibres to become less attached to each other, and excess fibres will come off easier.

3. Leave in the freezer for a few hours before taking it out and shaking it again.

4. Wash the garment according to the instructions on the yarn label.

nahoru

22) Where on the garment is the length measured?

The measurement sketch/schematic drawing provides information regarding the full length of the garment. If it’s a jumper or a jacket the length is measured from the highest point on the shoulder closest to the neckline, and straight down to the bottom of the garment. It is NOT measured from the tip of shoulder. Similarly, the length of yoke is measured from the highest point on the shoulder and down to where yoke is split into body and sleeves.

On a jacket measures are never taken along bands, unless specifically stated. Always measure inside band stitches when measuring the length.

See DROPS lesson: How to read a schematic drawing

nahoru

23) How do I know how many balls of yarn I need?

The required amount of yarn is provided in grams, eg: 450 g. To calculate how many balls you’ll need you first need to know how many grams are in 1 ball (25g, 50g or 100g). This information is available if you click on the individual yarn quality on our pages. Divide the amount required with the amount of each ball. For example, if each ball is 50g (the most common amount), the calculation will be as follows: 450 / 50 = 9 balls.

nahoru

Pořídili jste si přízi DROPS na tento model? Pak máte taky právo žádat po svém prodejci, u něhož jste nakoupili, pomoc a rady. Seznam DROPS obchodů najdete tady!
Pořád se nemůžete dobrat odpovědi, kterou hledáte? Pak posuňte stránku dolů a napište nám svůj dotaz, naši specialisté se vám pokusí poradit. Obvykle to zvládneme během 5 až 10 pracovních dnů.. Mezitím si můžete pročíst otázky a odpovědi, které k tomuto modelu položili ostatní, nebo navštívit skupinu DROPS Workshop na Facebooku, kde vám může poradit některá spřízněná duše!

Komentáře / Otázky (46)

country flag Fianna Joy wrote:

Jeg har et spørgsmål om udtagningen på bagstykket på bikinitusserne. (laver en størelse s) Jeg forstår ikke hvordan man skal lave "Tag 1 fm ud i hver side på hver række totalt 0 gange, på hver 2.række totalt 26 gange, på hver 4.række 1 gange = 75 fm." hvordan skal jeg hækle det? Mvh Fianna

19.01.2022 - 13:56

DROPS Design answered:

Hei Fianna. Du hekler str. S og da skal det ikke tas ut på hver rad, slik det skal i str. M-L-XL (4-4-6 ganger). Du skal ta ut i hver side på hver 2.rad totalt 26 ganger og på hver 4.rad 1 gang = 75 fastmasker. Det økes 1 maske i hver side på en rad slik: hekle 2 masker i første maske. Hekle 1 maske i hver maske til det gjenstår 1 maske, hekle 2 masker i siste maske. mvh DROPS Design

25.01.2022 kl. 10:36

country flag Maja wrote:

Når der står: "Hækl næste række således: * hækl 1 fm i hver fm rækken ud, men i m med mærketråd (= den midterste m) hækles der 3 fm *. Gentag fra *-* " Skal man så vende arbejde ligesom man gjorde lige før man starter på dette, eller hækler man bare rundt? Jeg har bare hæklet rundt, men får ligesom sådan en bule ud i den ende hvor man ikke hækler ekstra masker ved mærketråden. Og tænker ikke det bliver så pænt når man har den på.

28.01.2021 - 23:38

DROPS Design answered:

Hei Maja. Du skal hekle frem og tilbake, ikke rundt. Det økes kun på den ene siden. mvh DROPS design

01.02.2021 kl. 13:07

country flag Karen Monge wrote:

Según entendí, en talla S, después de las 5 vueltas de P.A 10 filas de P.B con disminución al inicio y al final=31P.B Pero luego dice que haga 6 filas con disminuciones al inicio y al final ¿Entonces en total son 16 filas iguales?

01.04.2019 - 08:10

DROPS Design answered:

Hola Karen. Si, en realidad hay 16 filas con disminuciones, pero las primeras 10 disminuciones trabajamos cada 2ª fila/vuelta ( mira el patrón) y las siguientes 6 disminuciones trabajamos CADA fila/vuelta.

02.04.2019 kl. 14:50

country flag JUDY GATES wrote:

This is a question about the bikini bottom...When the instructions say dec 1 sc each side, is that really 1 sc dec at the begining of each row? so you are really dec-ing 1 sc per row? It would also help if there were a diagram of the bikini bottom with measurements . Also I would like to know how many sc's in the with of the crotch area and how long is that strip? Thank you Judy

30.07.2018 - 00:13

DROPS Design answered:

Dear Mrs Gates, when decreasing 1 sc on each side you dec 2 sc per row - see how to decrease under DECREASE ON SC ROW. You first decrease every othere row then every row, after last dec you should have 19-21-21-25-27 sc. Happy crocheting!

31.07.2018 kl. 09:30

Saretha Sandham wrote:

I haven't crocheted with a pattern in a long time and now I am trying to make this bikini for my daughter. I don't understand the instructions for decreasing on dc row. What does YO mean? Do I decrease the same as in the tutorial video or is it different for this pattern?

20.04.2018 - 07:31

DROPS Design answered:

Dear Mrs Sandham, YO means yarn over - decrease as explained in text ie as shown in videobelow. Happy crocheting!

20.04.2018 kl. 09:00

Alicia wrote:

Is the back of the bikini bottom meant to be skimpier than the front or have I done something wrong?

31.03.2017 - 09:55

DROPS Design answered:

Dear Alicia, the front will be smaller than the back, as for any bikini bottom. Happy crocheting!

31.03.2017 kl. 13:32

country flag Marlene Foulk wrote:

How many inches will a size S-M-L-XL be for each cup on top?

09.03.2016 - 15:18

DROPS Design answered:

Dear Mrs Foulk, you can get the width of the cup for each size checking the number of rows worked and calculating with the tension ie 26 sc x 28 rows (24 dc x 13 rows) = 10 x 10 cm / 4'' x 4''. Happy crocheting!

09.03.2016 kl. 17:43

KAMI wrote:

Hi, I made the top according to the instructions. I made both cups but am unable to complete the top of the bikini. The instructions given ended up having the top increase into a triangle but the fan pattern is only at the top. What is the trick to this?

04.09.2015 - 00:36

DROPS Design answered:

Dear Kami, fan border is worked along both sides of triangle. When working when working 2nd row, work 5tr, 1 ch 5 tr in dc with marker (and continue row to the end), and when working 3rd row of fan pattern work 5 tr in the top ch of previous row (= in the tip, mid on top of cup), and finish row. Happy crocheting!

04.09.2015 kl. 09:44

Anagnostopoulou Magda wrote:

Hello!! I have a problem with the top. You say in the crochet info, dc row, that we start the rows with 1ch and if there is an increase then we do 2ch. In the pattern there is nothing like this. we start at once with dc. What am i gonna do? because the first time i did it with the chains i have at last more stiches, and i did it once again without chains but the shape of my crochet was not right. Please help!!!

13.06.2015 - 00:14

DROPS Design answered:

Dear Mrs Anagnostopoulou, this crochet info applies to the bikini trousers, not to the top. You crochet here a fundation ch then 1 dc in each dc along to the last ch, 3 dc in last ch, rotate and work 1 dc in the opposite side of fundation ch. Happy crocheting!

13.06.2015 kl. 10:30

Magda wrote:

Hello!! I have a problem with the top. You say in the crochet info, dc row, that we start the rows with 1ch and if there is an increase then we do 2ch. In the pattern there is nothing like this. we start at once with dc. What am i gonna do? because the first time i did it with the chains i have at last more stiches, and i did it once again without chains but the shape of my crochet was not right. Please help!!!

10.06.2015 - 15:07

Přidejte komentář k návodu DROPS 128-26

Rádi bychom věděli, co si o tomto modelu myslíte!

Pokud se chcete na něco zeptat, dbejte prosím na to, abyste ve formuláři níže vybrali správnou kategorii - díky tomu se dříve dozvíte, co potřebujete vědět. Povinná pole jsou označena *.

Z galerie #dropsfan

Sunny Season

Tara, United States

Sunny Season

Lynne, Canada