
Popular categories
Looking for a yarn?


Comments / Questions (55)
![]() Hello wrote:
Hello wrote:
Vilka maskor ska man virka i?
21.11.2024 - 08:41
![]() Andrea Kieslich wrote:
Andrea Kieslich wrote:
In der Beschreibung beim Rücken des Bikini steht, in der 5.LM beginnen. Soll das LM Bogen heißen ? Liebe Grüße Andrea
08.07.2024 - 18:17DROPS Design answered:
Liebe Andrea, ja, es ist richtig, es muss Lm-Bogen heißen. Die Anleitung wurde korrigiert und auch stellenweise sprachlich verbessert. Viel Spaß beim Weiterhäkeln!
12.07.2024 - 10:57
![]() NUNZIA RUBERTO wrote:
NUNZIA RUBERTO wrote:
Salve \r\nSto seguendo lo schema della gonna ma la larghezza del bordo superiore è stretta e non si riesce ad infilare dal basso. Per farla infilare anche la larghezza della vita deve essere come quella dei fianchi. Ho sbagliato qualcosa?
29.04.2024 - 21:56DROPS Design answered:
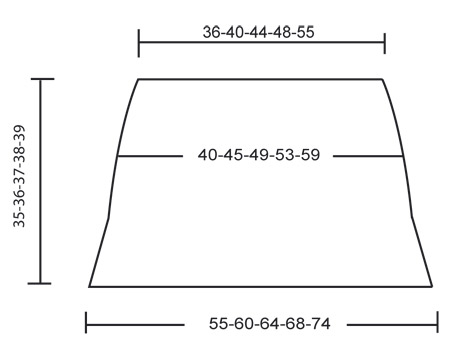
Buonasera Nunzia, trova lo schema delle misure in fondo alla pagina. Buon lavoro!
01.05.2024 - 21:37
![]() Michelle Hunt wrote:
Michelle Hunt wrote:
Hi, I am crocheting your DROPS crochet bikini top and skirt in “Muskat”pattern. I am unfamiliar with the binding off process. Is there a video to demonstrate this process, if not can you make one? Is the binding off tips the same as the crochet info in this pattern?
20.02.2024 - 06:19DROPS Design answered:
Dear Mrs Hunt, in This video we show how to decrease double crochet (US-crochet terminology) at the beginning and at the end of a row. Happy crocheting!
20.02.2024 - 08:46
![]() Valeria wrote:
Valeria wrote:
Salve sto facendo la gonna ed ho fatto il laccetto, ma rispettando le misure indicate viene molto più corto di quello della foto, sidovrebbe partire da 4 metri invece che da 3. Poi dalla foto si vede che la parte più bassa della gonna è fatta con un punto più fitto rispetto al resto, mentre nelle istruzioni è indicata tutta uguale. Che punto è? Grazie mille. Saluti.
18.02.2024 - 22:23DROPS Design answered:
Buonasera Valeria, se preferisce può partire da 4 m per fare il cordino. Non ci sono correzioni per la parte inferiore della gonna. Buon lavoro!
25.02.2024 - 16:21
![]() Isabelle Desert wrote:
Isabelle Desert wrote:
Bonjour je suis entrain de faire le bonnet et je ne comprends pas le rang 4 . doit on faire 3 ml ensuite maille suivante une bride et maille suivante une ms ? merci pour votre aide.
10.06.2023 - 11:07DROPS Design answered:
Bonjour Mme Desert, commencez le tour par 1 maille en l'air plutôt car c'est un tour de mailles serrées et répétez ainsi* 4 ml, sautez 1 bride, 1 maille serrée dans la bride suivante*. Bon crochet!
12.06.2023 - 09:39
![]() Mary Manoly wrote:
Mary Manoly wrote:
Hii its lovely i need to know in first increase of skirt the 15 stiches is devided over 3 rounds or all in one round .same as the 48 stiches for 2nd increase its all in one round?regards
17.05.2022 - 05:31DROPS Design answered:
Dear Mrs Manoly, when piece measures 10 cm, you increase 5 sts evenly, when piece measures 15 cm, you increase 5 sts evenly, when piece measures 20 cm, you increase 5 sts evenly. When piece measures 25-29 sts (see size), you increase 48 sts evenly. Read how to increase evenly on a round here. Happy crocheting!
17.05.2022 - 09:15
![]() Mary Manoly wrote:
Mary Manoly wrote:
Bonjours je vois que vous aver rajouter au jupe une augmentation do 3×5 c.est effectuee sur 3 ligne ou une seule? et le 48 m deusieme augmentation dans la même ligne? ou divise merci bien c.est adorable
17.05.2022 - 05:28DROPS Design answered:
Bonjour Mme Manoly et merci, si la réponse précédente n'a pas pu vous aider, n'hésitez pas à nous en informer. Bon crochet!
17.05.2022 - 09:16
![]() Carin wrote:
Carin wrote:
Sorry to be a pain so do you do a decrease double on the first and last stitches of strap row to decrease and then keep crocheting 4 across till strap length is right?
11.05.2022 - 16:07DROPS Design answered:
Dear Carin, decrease as explained at the beg of the pattern, ie under Binding off tip: crochet 2 slip sts at the beg of the row to decrease 2 dc, then stop the row when 2 sts remain at the end of the row, turn and work next row. Happy crocheting!
11.05.2022 - 16:09
![]() Carin wrote:
Carin wrote:
I don't understand the cup strap for shoulder/neck strap. The part I don't understand is the binding off on the beginning of strap and then how to make the strap as shown. Is it possible to get a couple minute video on that section. Thanks
11.05.2022 - 13:51DROPS Design answered:
Dear Carin, first work the strap (row 1 = 12 sts, row 2 = 8 sts, row 3 = 4 sts) to the required length, then work the Crochet border (see some lines down in the pattern) along all edges, including straps (= * 1 sc, skip 2 cm [3/4’’], 6 dc in the same dc, skip 2 cm [3/4’’]*, repeat from *-*.). Happy crocheting!
11.05.2022 - 15:54
|
|
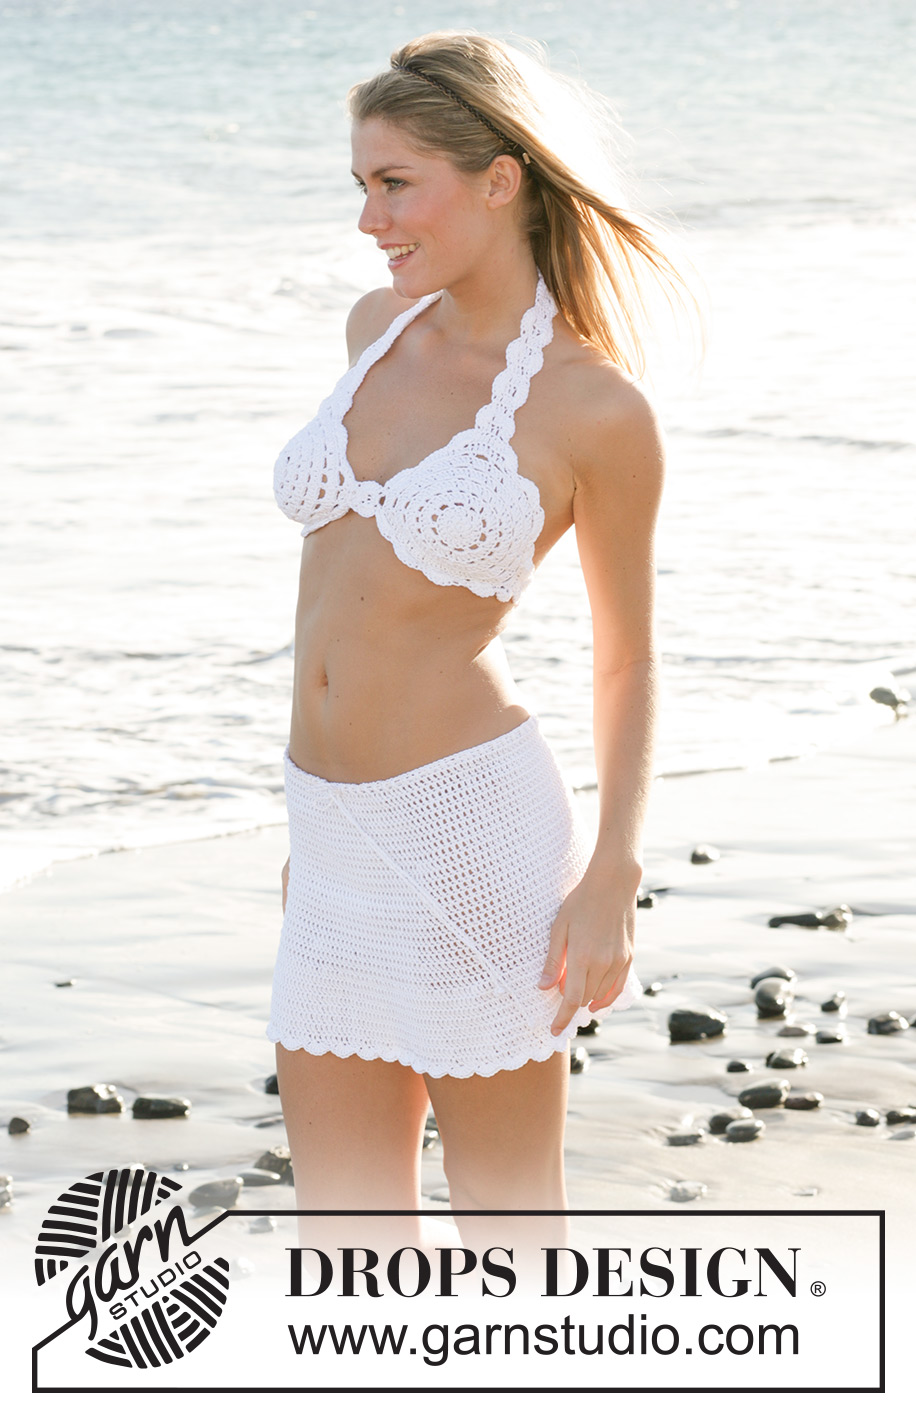
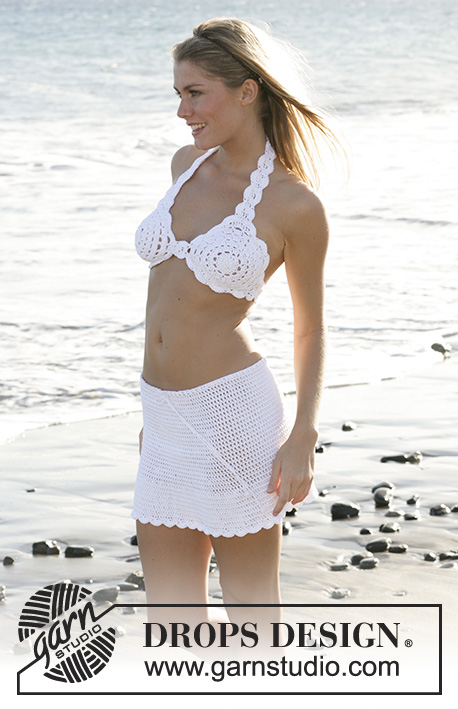
Summer Sweetheart#summersweetheartbikini |
|
 |
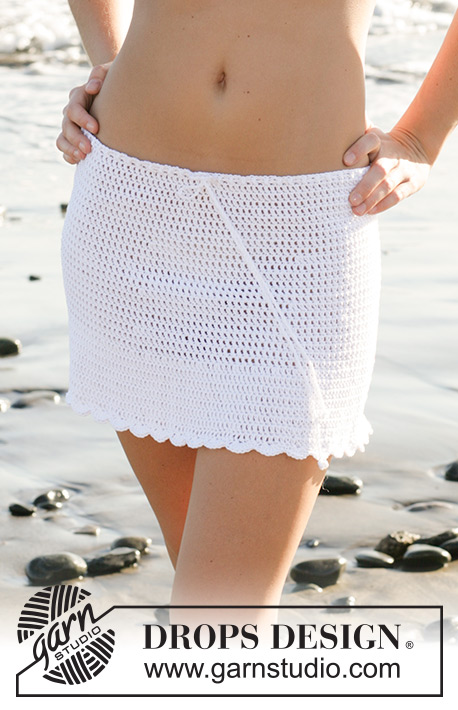 |
DROPS crochet bikini top and skirt in “Muskat” .
DROPS 99-28 |
|
|
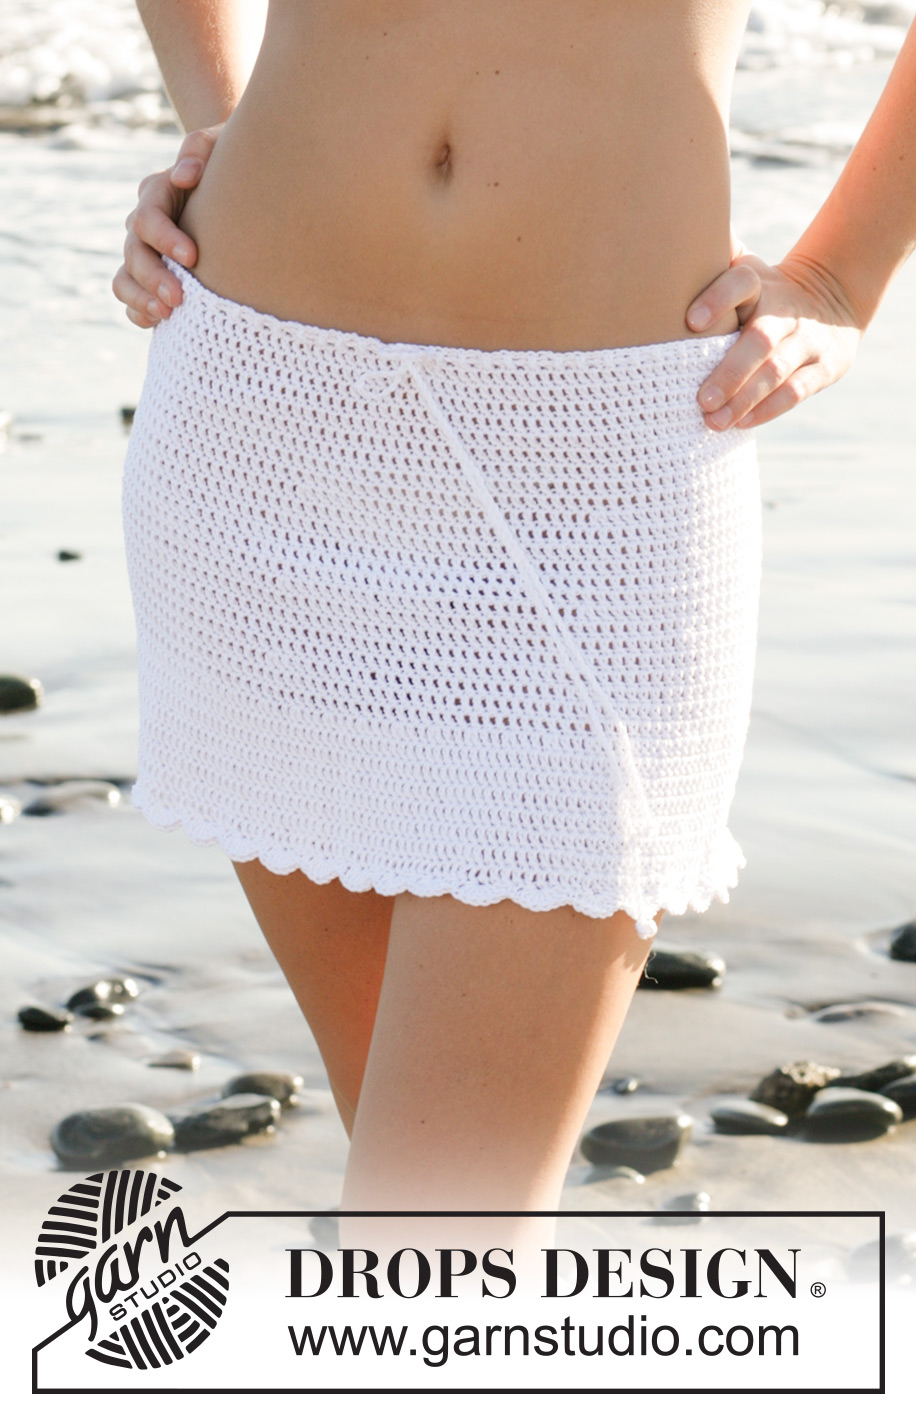
Crochet tension: 16 tr x 10 rows = 10 x 10 cm. Crochet info: Replace the first tr on each round with 3 ch. Replace first dc on round with 1 ch. Finish each round with 1 sl st in first tr/dc/ch. Casting off tip (apply to bikini top): Cast off as follows at beg of row: crochet sl sts on the number of tr to be cast off. Cast off as follows at the end of row: Turn piece when number of tr to be cast off are left on row. Increasing tip (apply to skirt): Inc by crocheting 2 tr in 1 tr. Bikini top: Right cup: A-cup: crochet round 1 to 10, B cup: crochet round 1-12, C cup crochet round 1-14. Right cup: Crochet 4 ch with crochet hook size 4 mm and form a ring with a sl st. Continue as follows: Round 1: 5 dc in ring Round 2: 2 tr in each dc = 10 tr Round 3: 2 tr in each tr = 20 tr Round 4: *4 ch, skip 1 tr, 1 dc in next tr*, repeat from *-*, = 10 ch-loops Round 5: 4 tr in each ch-loop = 40 tr Round 6: *3 ch, skip 1 tr, 1 dc in next tr*, repeat from *-*, = 20 ch-loops Round 7: 3 tr in each of the first 2 ch-loops, *2 tr in next ch-loop, 3 tr in each of the next 2 ch-loops*, repeat from *-*, = 54 tr Round 8: *3 ch, skip 2 tr, 1 dc in next tr, 3 ch, skip 2 tr, 1 dc in next tr, 3 ch, skip 1 tr, 1 dc in next tr*, repeat from *-* and finish round with 3 ch, skip 2 tr, 1 dc in next tr, 3 ch, skip 2 tr and 1 sl st = 20 ch-loops Round 9: 3 tr in first ch-loop, *4 tr in next ch-loop, 3 tr in next ch-loop*, repeat from *-* and finish round with 4 tr in the last ch-loop = 70 tr Round 10: *3 ch, skip 2 tr, 1 dc in next tr, 3 ch, skip 3 tr, 1 dc in next tr*, repeat from *-* = 20 ch-loops (Cup size A finishes here) Round 11: 4 tr in each ch-loop = 80 tr Round 12: 4 ch, skip 3 tr, 1 dc in next tr*, repeat from *-* = 20 ch-loops (Cup size B finishes here) Round 13: Like round 11 = 80 tr Round 14: Like round 12 = 20 ch-loops (Cup size C finishes here) Now crochet shoulder/neck strap. Continue from last round on cup and crochet back and forth. Row 1: 3 tr in first ch-loop, 1 tr in first dc, *3 tr in next ch-loop, 1 tr in next dc*, repeat from *-* a total of 2 times = 12 tr. Turn piece. Row 2: 1 tr in each tr, but cast off 2 tr each side – see Casting off tip = 8 tr. Turn piece Row 3: 1 tr in each tr, but cast off 2 tr each side = 4 tr. Turn piece Row 4: 1 tr in each tr, and continue until strap measures approx 28 cm, or required length. Cut the thread and sew. Now crochet back strap as follows: Crochet as follows in the 5th ch-loop to the left of shoulder/neck strap: Row 1: 4 tr, 1 tr in next dc and 4 tr in next ch-loop = 9 tr Row 2: 1 tr in each tr, but cast off 2 tr each side – see Casting off tip = 5 tr. Turn piece Row 3: 1 tr in each tr, but cast off 1 tr each side = 3 tr. Turn piece Row 4: 1 tr in each tr, and continue until strap measures approx 30 cm, or required length. Cut the thread and sew. Left cup: Like right cup, but crochet back strap in the 5th ch-loop to the right of shoulder/neck strap. Now crochet the 2 cups tog as follows: beg at right cup. Crochet 4 tr in the 4th ch-loop from shoulder strap on the opposite side of back strap. Crochet 5 rows with 1 tr in each tr. Sew this piece to left cup. Crochet border: Crochet round all edges, incl straps and piece between cups, as follows: * 1 dc, skip 2 cm, 6 tr in the same tr, skip 2 cm*, repeat from *-*. Buttons: Sew on 1 button on shoulder/neck strap and 1 button on back strap. Use crochet border as buttonholes. Skirt: Crochet in the round from top down. Read Crochet Info! Crochet 151-171-187-203-231 ch on crochet hook size 4 mm and form a ring with a sl st. Crochet 1 tr in each of the first 3 ch, *skip 1 ch, 1 tr in each of the next 3 ch*, repeat from *-* and finish with 1 sl st in first tr from beg of round = 114-129-141-153-174 tr. Continue with 1 tr in each tr. When piece measures 10, 15 and 20 cm inc 5 tr evenly on round – see Increasing tip = 129-144-156-168-189 tr. When piece measures 25-26-27-28-29 cm inc 48 tr evenly = 177-192-204-216-237 tr. When piece measures 35-36-37-38-39 cn crochet a border along the bottom edge as follows: *1 dc, skip 2 cm, 6 tr in the same tr, skip 2 cm*, repeat from *-*. Cut the thread and sew. Ribbon: Cut 2 threads measuring approx 300 cm each. Twist until they resist and fold them double. Tie a knot either end and pull ribbon through the second row at top of skirt, beg mid front. |
|
|
|
Have you finished this pattern?Tag your pictures with #dropspattern #summersweetheartbikini or submit them to the #dropsfan gallery. Do you need help with this pattern?You'll find 11 tutorial videos, a Comments/Questions area and more by visiting the pattern on garnstudio.com. © 1982-2025 DROPS Design A/S. We reserve all rights. This document, including all its sub-sections, has copyrights. Read more about what you can do with our patterns at the bottom of each pattern on our site. |
|


With over 40 years in knitting and crochet design, DROPS Design offers one of the most extensive collections of free patterns on the internet - translated to 17 languages. As of today we count 314 catalogues and 11821 patterns translated into English (UK/cm).
We work hard to bring you the best knitting and crochet have to offer, inspiration and advice as well as great quality yarns at incredible prices! Would you like to use our patterns for other than personal use? You can read what you are allowed to do in the Copyright text at the bottom of all our patterns. Happy crafting!
Post a comment to pattern DROPS 99-28
We would love to hear what you have to say about this pattern!
If you want to leave a question, please make sure you select the correct category in the form below, to speed up the answering process. Required fields are marked *.