
Looking for a yarn?


Comments / Questions (98)
![]() Claudia wrote:
Claudia wrote:
Hallo, häkelt man die feste Masche um den Luftmaschenbogen wie in der Anleitung angegeben oder in die dritte Masche wie auf der Zeichnung bzw Agenda angegeben?? Ist das relevant??? Vielen Dank
17.06.2025 - 21:42DROPS Design answered:
Liebe Claudia, häkeln Sie die feste Masche in die Luftmaschenbogen, dh um die Maschen und nicht in die Mittlere Luftmasche. Viel Spaß beim Häkeln!
18.06.2025 - 07:32
![]() Fiona wrote:
Fiona wrote:
Thanks for the explanation. The diagram and the verbal instructions didn't line up. Now I have it. Thanks for the help🙏
26.11.2024 - 14:37
![]() Fiona wrote:
Fiona wrote:
I'm stuck with not understanding the instructions on binding the sleeveless crocheted top particularly concerning the armholes at this point. Please advise. Thanks, Fiona
26.11.2024 - 01:30DROPS Design answered:
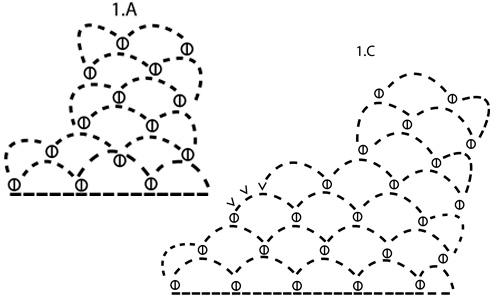
Dear Fiona, decrease 1 chain space as shown in diagram 1.B: crochet the row to the end, ending with 1 sc (US crochet terminology) in the last chain space, turn and crochet 3 slip stitches in the first chain space, then continue working chain spaces as before and repeat at the end of the row, that way you have decreased 1 chain space on each side. Happy crocheting!
26.11.2024 - 09:58
![]() Amy wrote:
Amy wrote:
I'm having trouble understanding how to bind off for the arm holes. I see I am supposed to Crochet until last ch-loop, turn the work, sl st to center of 1st ch-loop, continue with ch-loops. I have done that. BUT how do I bind off at the other side? Please help!!! (The answer may be here somewhat but many comments are in languages other than English. )
02.08.2024 - 18:05DROPS Design answered:
Dear Amy, you decrease on the other side the same way (the pattern says "repeat dec in the other side"). Happy Stitching!
04.08.2024 - 18:32
![]() Christina Blomkvist wrote:
Christina Blomkvist wrote:
Hej! Jag förstår inte diagrammet för halsringningen. Kan någon förklara?
20.06.2024 - 10:46DROPS Design answered:
Hej Christina, hvilken størrelse, hvilket diagram? Og hvad er det du ikke forstår?
25.06.2024 - 12:30
![]() Cassandra Rudolph wrote:
Cassandra Rudolph wrote:
4.5 sc loop for 10 rows \r\nHow do I set the swatch up to make that what rows am I following to match your gauge ? \r\nHow to I set my swatch up
28.05.2024 - 12:48
![]() Nora Rmz wrote:
Nora Rmz wrote:
Hola no entiendo el diagrama para empezar la sisa habrá algún video?
07.05.2024 - 04:30DROPS Design answered:
Hola Nora, para la sisa puedes usar las explicaciones escritas o el diagrama. Estas dependen de la talla que estés trabajando. En las tallas pequeñas, sigues trabajando como antes pero te saltas el último arco de la fila, giras, trabajas con p.e hasta el centro del 1º arco y trabajas como se ha establecido antes hasta el último arco de la 2ª fila, que también saltas y trabajas de vuelta como en la 1ª fila. En las siguientes tallas, aparte de esto, vuelves a disminuir de esta forma pero sin trabajar p.e hasta el centro del arco, sino que saltar y trabajar normal de vuelta. En las tallas más grandes trabajas la misma disminución que en las pequeñas pero dos veces.
12.05.2024 - 23:26
![]() Marlies Van Dijk wrote:
Marlies Van Dijk wrote:
Beste Drops Zou nog antwoord willen geven op mijn laatste vraag van 31 maart?
09.04.2024 - 14:10DROPS Design answered:
Dag Marlies,
Er staan inderdaad geen vasten getekend in 1.A, maar je kunt na het keren van het werk vasten haken tot het midden van het lossenboogje waar het begin van de toer zou moeten zijn. In de teltekening zie je waar de boogjes moeten komen.
09.04.2024 - 20:31
![]() Marlies Van Dijk wrote:
Marlies Van Dijk wrote:
Beste Drops, Kan het zijn dat er een fout zit in de Nederlandse vertaling van de afkanting armsgaten vest maat S ? Er staat: Maat S: Haak totdat er nog 1 l-boogje op de nld is, keer het werk en haak hv tot het midden van het eerste l-boogje. Haak door met de l-boogjes en herhaal het afkanten op de ander kant – Zie eventueel teltekening 1A. Er staan echter geen halve vasten op teltekening 1A. De Duitse en Engelse vertaling zijn zonder de halve vasten. Vandaar mijn vraag.
31.03.2024 - 23:53DROPS Design answered:
Dag Marlies,
Toch is het de bedoeling om halve vasten te haken tot het midden van het boogje. (Zo staat het ook in de Engelse en de Noorse versie.)
07.04.2024 - 19:01
![]() Marlies Van Dijk wrote:
Marlies Van Dijk wrote:
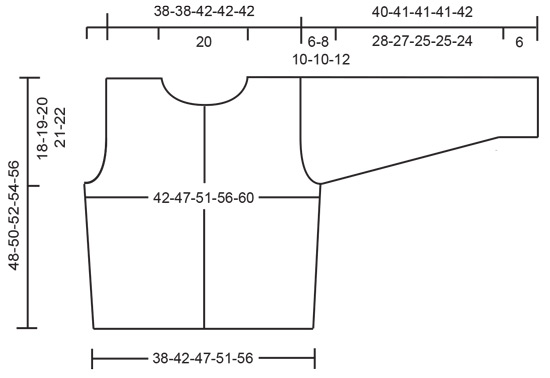
Er staat het volgende beschreven: De afmetingen op de schematekening kunnen klein lijken, maar de kleding wordt erg elastisch en zal zich ca 5-8 cm rekken in vergelijking met de schematekening. Betekent dit dat de kleding dus 5-8 cm wijder wordt dan op de schema tekening staat?
17.03.2024 - 14:15DROPS Design answered:
Dag Marlies,
Ja, dat klopt inderdaad. Je kan de afmetingen zoals beschreven in het patroon en bij de maattekening aanhouden. Bij het dragen rekt het ietwat uit en komen de maten overeen met standaard confectiematen.
17.03.2024 - 18:59
|
||||||||||
Catch of the Day |
||||||||||
 |
 |
|||||||||
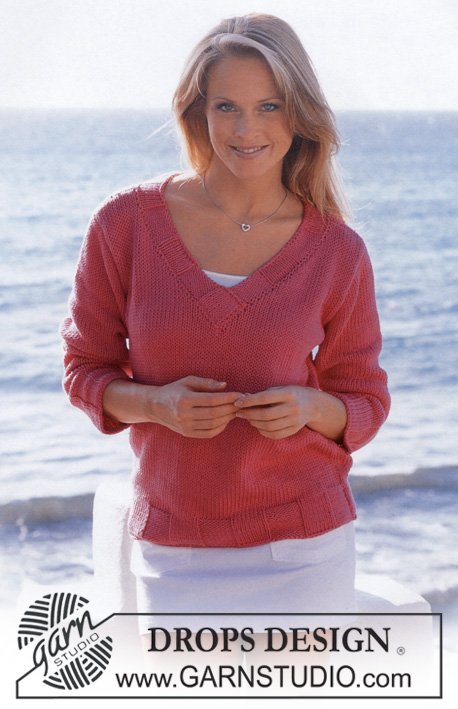
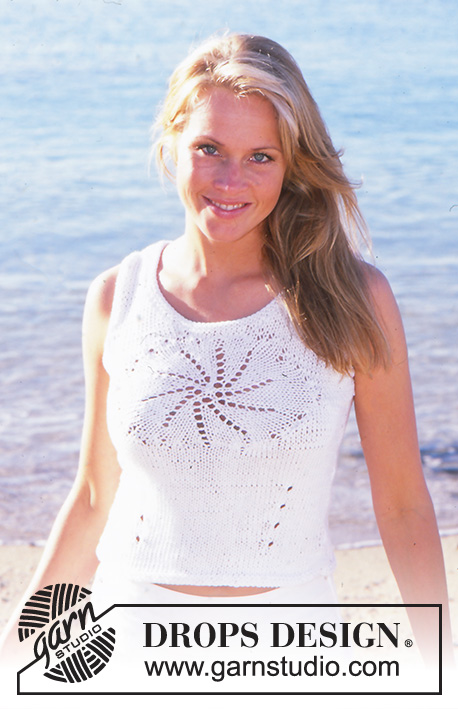
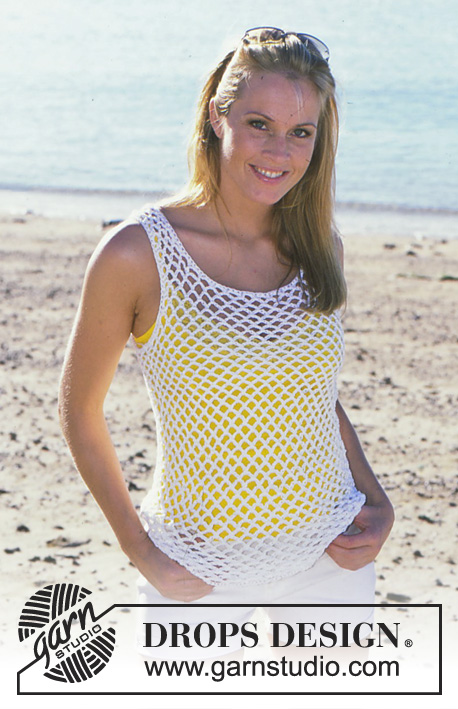
DROPS Crocheted Top and Cardigan in Muskat
DROPS 82-6 |
||||||||||
|
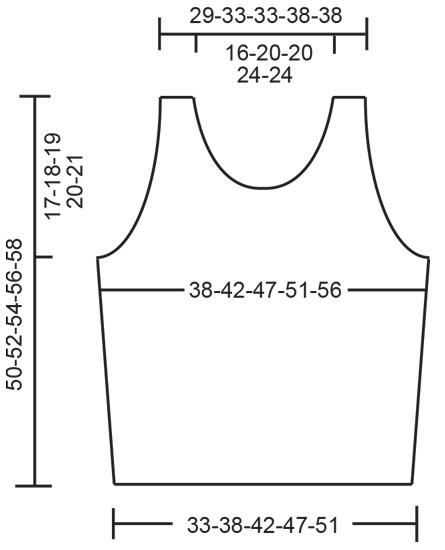
TOP: Crochet gauge: 4.5 ch-loops x 10 rows = 10 x 10 cm. Crochet tips for binding off: See diagrams. Front: Ch 91-103-115-127-139. Crochet the first row as follows: 1 sc in 7th ch from hook, * ch 5, skip over 5 ch, 1 sc in the next ch *, repeat from * - * = 15-17-19-21-23 ch-loops, turn the work. Crochet the 2nd row as follows: ch 6, 1 sc in first ch-loop , * ch 5, 1 sc in the next ch-loop *, repeat from * - * across row and turn the work. Repeat 2nd row until the piece measures 15 cm. Now inc 1 loop at each side by crochet 1 extra ch-loop in the next to last ch-loop at each side = 17-19-21-23-25 ch-loops. Armhole: When the piece measures 33-34-35-36-37 cm bind off for armhole as follows: Size S + M: Crochet until last ch-loop, turn the work, sl st to center of 1st ch-loop, continue with ch-loops and repeat bind off at the other side – see diagr 1B. Size L + XL: Follow bind off instructions for size S + M 1 time, turn the piece and crochet back to last ch-loop, turn the work, continue with ch-loops and repeat bind off at the other side – see diagr. 1C. Size XXL: Follow bind off for size S + M: 2 times– see diagr 1D. You have now bound off 2-2-3-3-4 ch-loops at each side = 13-15-15-17-17 ch-loops remain on row. Crochet as before until the piece measures 36-38-40-42-44 cm, then bind off for the neck as follows: 4 ch-loops, turn the work, sl st to center of first ch-loop and continue with ch-loops = 3 ch-loops on shoulder. Continue as before until the piece measures 50-52-54-56-58 cm. Repeat at the other side of neck. Back: Crochet the same as the front. Bind off for armholes as on front. When the piece measures 48-50-52-54-56 cm bind off all sts for the neck by crocheting 2 rows over only 3 ch-loops each shoulder (do not crochet over the center 7-9-9-11-11 ch-loops). The piece measures approx. 50-52-54-56-58 cm, cut yarn. Assembly: Crochet shoulders together as follows: 1 sl st in first ch-loop on back, ch 3, 1 sc in first ch-loop on front, ch 3, 1 sc in the next ch-loop on back, and so on. Crochet sides together in the same manner. Neckband and armhole: Crochet 1 row of hdc around the neck and both armholes as follows: * 1 hdc in sc, 2 hdc in ch-loop *, repeat from * - * and finish with 1 sl st in first hdc on row. CARDIGAN: Sizes: S - M - L - XL - XXL Finished measurements: Bust: 84-94-102-112-120 cm [33" - 37" - 40-⅛" - 44" - 47.25"] Hem: 76-84-94-102-112 cm [29-⅞" - 33" - 37" - 40-⅛" - 44"] Materials: DROPS MUSKAT from Garnstudio 300-350-350-400-450 gr nr 18, white DROPS 4.5 mm [US G] crochet hook, or size needed to obtain correct gauge. 5 DROPS Silver buttons, nr 534 Crochet gauge: 4.5 ch-loops x 10 rows = 10 x 10 cm. Crochet tips for binding off: See the diagrams. Back: Ch 103-115-127-139-151. Crochet the first row as follows: 1 sc in 7th ch from hook, * ch 5, skip over 5 ch, 1 sc in the next ch *, repeat from * - * = 17-19-21-23-25 ch-loops, turn the work. Crochet the next row as follows: ch 6, 1 sc in first ch-loop, * ch 5, 1 sc in the next ch-loop *, repeat from * - * across the row and turn the work. Repeat second row until the piece measures 15 cm, then inc 1 loop at each side by crocheting 1 extra ch-loop in the next to last loop at each side = 19-21-23-25-27 ch-loops. Armholes: When the piece measures 30-31-32-33-34 cm bind off for armholes as follows: Size S: Crochet to last ch-loop, turn the work, continue with ch-loops and repeat bind off at the other side – see diagr 1A. Size M + L: Crochet until last ch-loop, turn the work, sl st to center of 1st ch-loop, continue with ch-loops and repeat bind off at the other side – see diagr 1B. Size XL: Follow bind off for size M + L: 1 time and then bind off for size S: 1 time – see diagr 1C. Size XXL: Follow bind off for size M + L: 2 times– see diagr 1D. You have now bound off 1-2-2-3-4 ch-loops at each side = 17-17-19-19-19 ch-loops remain on row. Continue as before until the piece measures 46-48-50-52-54 cm, then bind off for the neck by crocheting 2 rows over only 4-4-5-5-5 ch-loops for each shoulder (do not crochet over the center 9 ch-loops). The piece measures approx. 48-50-52-54-56 cm, cut yarn. Right front: Ch 55-61-67-73-79, then crochet as on back = 9-10-11-12-13 ch-loops. When the piece measures 15 cm inc 1 ch-loop at the side as on back = 10-11-12-13-14 ch-loops. When the piece measures 30-31-32-33-34 cm bind off for armhole at side as on back = 9-9-10-10-10 ch-loops. When the piece measures 34-36-38-40-42 cm bind off for the neck as follows: Follow armhole bind off on diagr 1D 1 time and diagr 1A 1 time. You have now bound off 5 loops and 4-4-5-5-5 loops remain on shoulder. Continue until the piece measures 48-50-52-54-56 cm, cut yarn. Left front: Crochet the same as the right, reversing shaping. Sleeve: Ch 67-73-73-79-85, then crochet as on Body = 11-12-12-13-14 ch-loops. When the piece measures 6 cm inc by crocheting 1 extra ch-loop in the next to outermost loop at one side, then crochet 5 rows and inc on the other side. Repeat inc at each side 1 time with 5 rows between each inc = 15-16-16-17-18 ch-loops on row. Continue until the piece measures 34-33-31-31-30 cm. Now bind off for sleeve cap by crocheting 6-8-10-10-12 rows with 1 ch-loop less at the end of every row, cut yarn. The piece measures approx. 40-41-41-41-42 cm. Assembly: Crochet together the shoulders as follows: 1 sl st in first ch-loop on back, ch 3, 1 sc in first ch-loop on front, * ch 3, 1 sc in the next ch-loop on back, ch 3, 1 sc in the next ch-loop on front *, repeat * - *. Crochet the sleeve and side seams in the same manner. Then crochet in the sleeves in the same manner. Neckband: Crochet 2 rows sc around the neck – crochet approx. 3 sc in each ch-loop – be sure that the edge is neither too tight nor too loose. Left button band: Crochet 4 rows sc over all sts along left front (incl. over neckband) – crochet approx. 3 sc in each ch-loop = approx. 102-126 sc, turn each row with ch 1. Right button band: Crochet the same as the left, but after the 2nd row make 5 buttonhole evenly spaced along buttonband. The bottom buttonhole should be approx. 10 cm from lower edge and the top one 2 sts from top edge.1 buttonhole = ch 2, skip over 2 sc, 1 sc in the next st. On the next row 2 sc in the ch 2 from previous row. Sew on buttons. |
||||||||||
Diagram explanations |
||||||||||
|
||||||||||
|
||||||||||
|
||||||||||
|
||||||||||

|
||||||||||
Have you finished this pattern?Tag your pictures with #dropspattern or submit them to the #dropsfan gallery. Do you need help with this pattern?You'll find 4 tutorial videos, a Comments/Questions area and more by visiting the pattern on garnstudio.com. © 1982-2025 DROPS Design A/S. We reserve all rights. This document, including all its sub-sections, has copyrights. Read more about what you can do with our patterns at the bottom of each pattern on our site. |
||||||||||


With over 40 years in knitting and crochet design, DROPS Design offers one of the most extensive collections of free patterns on the internet - translated to 17 languages. As of today we count 314 catalogs and 11822 patterns - 11812 of which are translated into English (US/in).
We work hard to bring you the best knitting and crochet have to offer, inspiration and advice as well as great quality yarns at incredible prices! Would you like to use our patterns for other than personal use? You can read what you are allowed to do in the Copyright text at the bottom of all our patterns. Happy crafting!
Post a comment to pattern DROPS 82-6
We would love to hear what you have to say about this pattern!
If you want to leave a question, please make sure you select the correct category in the form below, to speed up the answering process. Required fields are marked *.