
Popular categories
Looking for a yarn?


Comments / Questions (11)
![]() Janina Ahner wrote:
Janina Ahner wrote:
Liebes Team, wenn man den Ärmel zur Runde schließt, soll man tatsächlich Nadelstärke 5 nehmen, wo man doch mit Nr. 4 begonnen hat und bei dem Bündchen Nr. 3 nimmt. Danke und liebe Grüße Janina
15.02.2024 - 22:27DROPS Design answered:
Liebe Frau Ahner, ja genau, danke für den Hinweis, eine Korrektur erfolgt. Viel Spaß beim stricken!
16.02.2024 - 07:50
![]() Małgorzata wrote:
Małgorzata wrote:
Witam, nie mogę zrozumieć nabierania oczek na rękaw, od dołu pod pachą do markera którym wyznaczyliśmy linie ramienia 56 oczek i dalej 32 oczka ,czy rzędy skrócone będą równe? na tyle i przodzie robótki?
20.01.2024 - 14:53DROPS Design answered:
Witaj Małgorzato, rzędy skrócone będą równe i symetryczne, ponieważ będziesz je odliczać od markera, który umieścisz na środku na górze rękawa, czyli za 44 oczkami, licząc od początku okrążenia (środek pod spodem rękawa). Pozdrawiamy!
22.01.2024 - 09:04
![]() Ines wrote:
Ines wrote:
Guten Tag, wie kann ich die benötigte Menge Wolle ausrechnen, wenn mein Pullover 51 cm breit und 61 cm hoch werden sollte und ich ihn in Cotton Merino stricken möchte. Vielen Dank
23.11.2023 - 11:05DROPS Design answered:
Liebe Ines, leider haben wird nur die Garnmenge für die passenden Maßen in der Maßskizze; aber gerne kann Ihnen Ihr DROPS Laden damit (auch per Telefon oder per E-Mail) weiterhelfen - Viel Spaß beim stricken!
23.11.2023 - 15:38
![]() Henny wrote:
Henny wrote:
Moeten er bij de boord aan het voorpand ook steken gemeerderd worden?
06.10.2023 - 19:35DROPS Design answered:
Dag Henny,
Ja, je breit het voorpand op dezelfde manier als het achterpand, dus je meerdert ook steken voordat je de boord breit.
08.10.2023 - 16:32
![]() De Candia Fernanda wrote:
De Candia Fernanda wrote:
Perché secondo le istruzioni per la manica si utilizzano ferri da 5 mm quando tutto il resto è lavorato con i 4 mm? non si parla di ferri 5 nella parte che indica l occorrente da usare. Gradirei chiarimenti grazie
05.10.2023 - 18:46DROPS Design answered:
Buonasera Fernanda, abbiamo inviato la sua segnalazione al settore design: se ci dovessero essere delle correzioni le troverà direttamente online. Buon lavoro!
05.10.2023 - 21:02
![]() Kristin wrote:
Kristin wrote:
Deep Breath Blouse
21.01.2023 - 11:06
![]() McKenna wrote:
McKenna wrote:
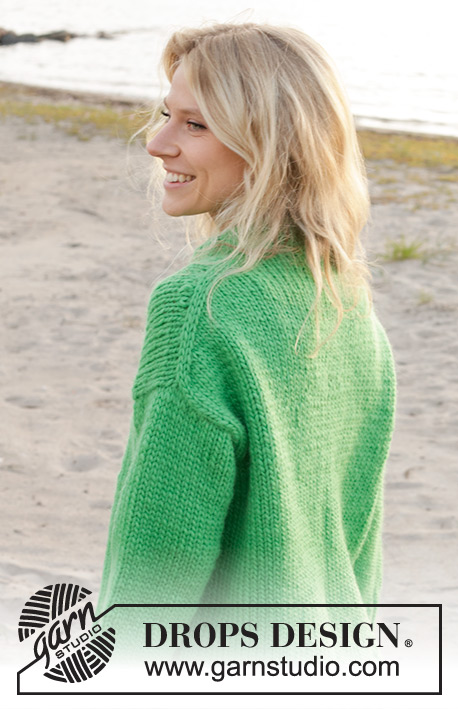
Walk Along the Beach Jumper
20.01.2023 - 22:05
![]() Jenny Peters wrote:
Jenny Peters wrote:
Everyday top
19.01.2023 - 21:13
![]() Perfect Summernight wrote:
Perfect Summernight wrote:
Perfect summernight
19.01.2023 - 09:41
![]() Alina Baltariu wrote:
Alina Baltariu wrote:
Soft clouds
17.01.2023 - 22:23
|
||||||||||
Idle Summer#idlesummersweater |
||||||||||
 |
 |
|||||||||
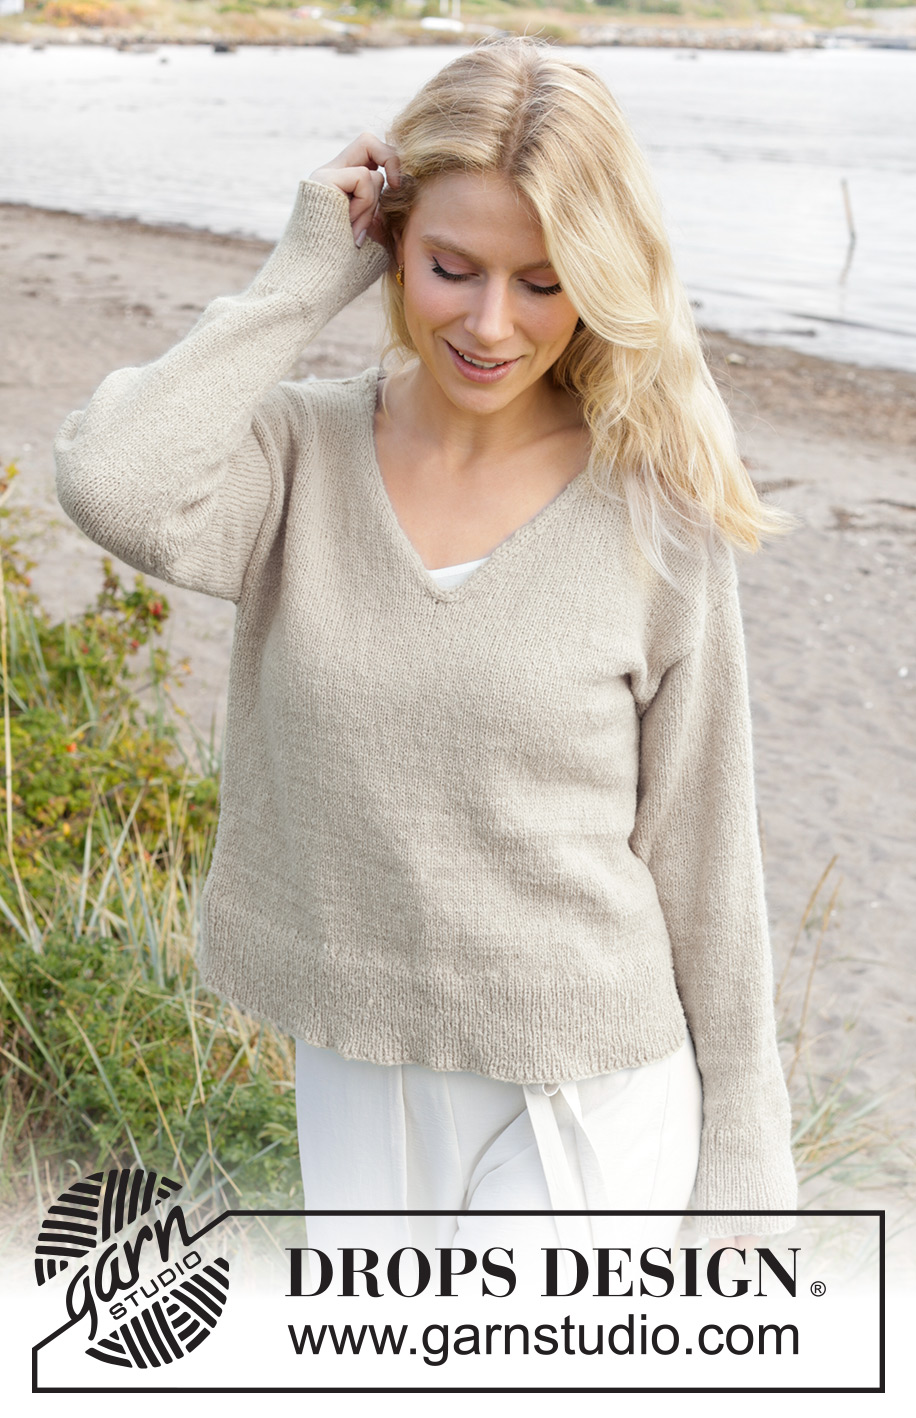
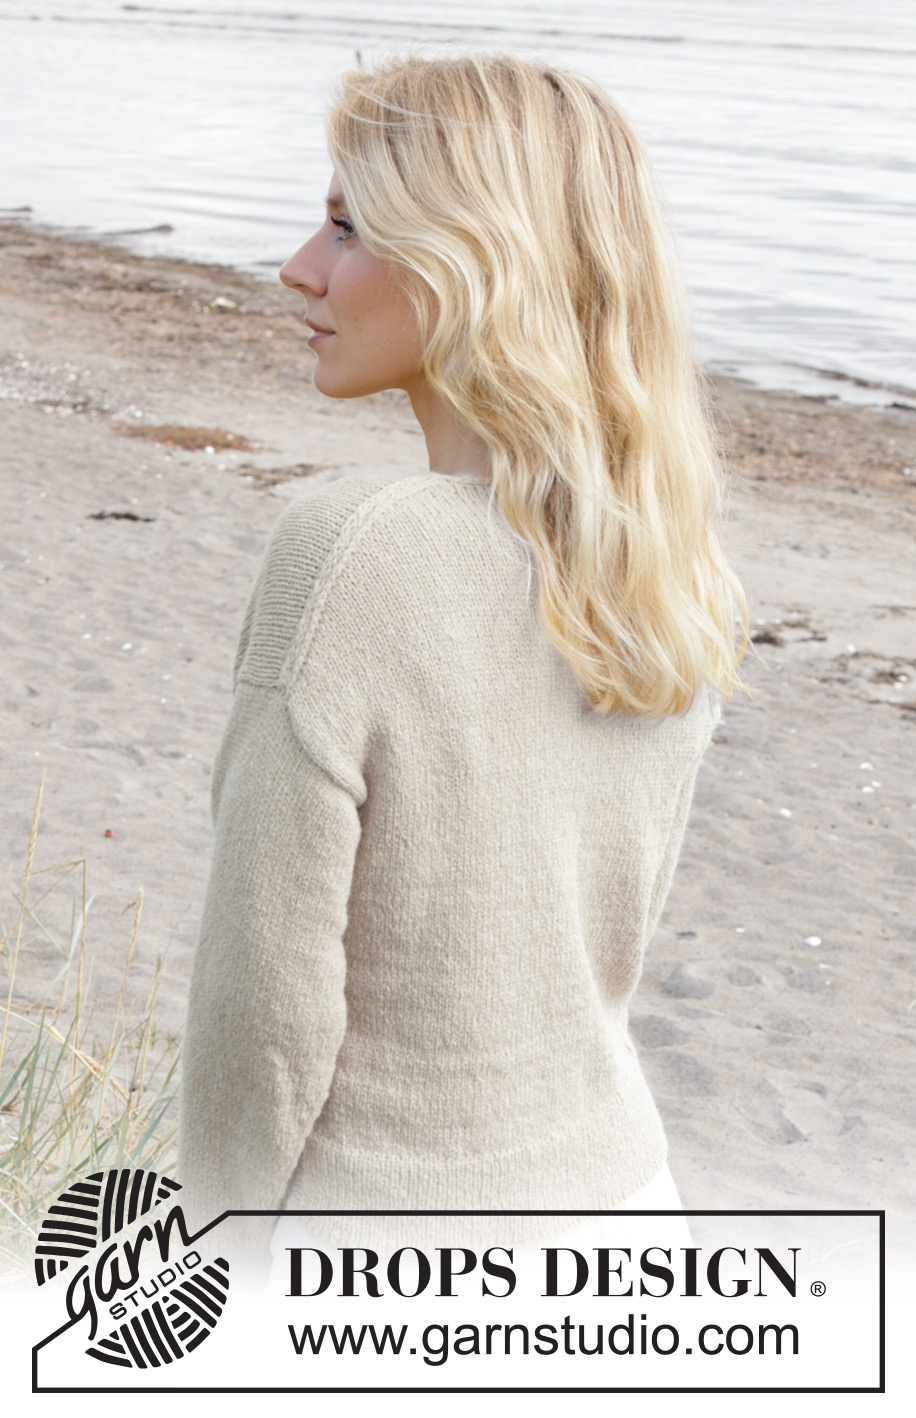
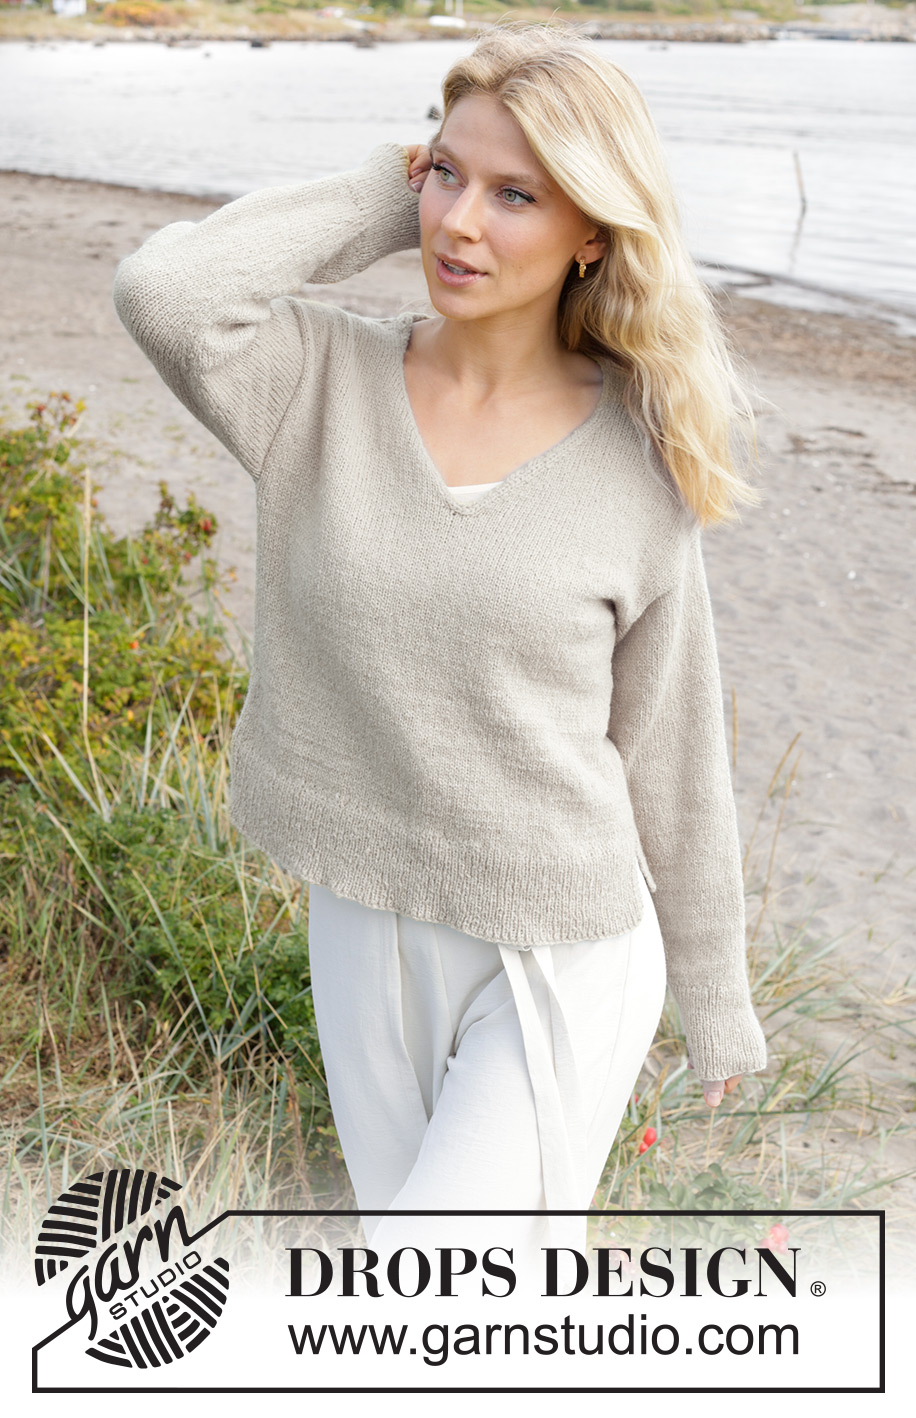
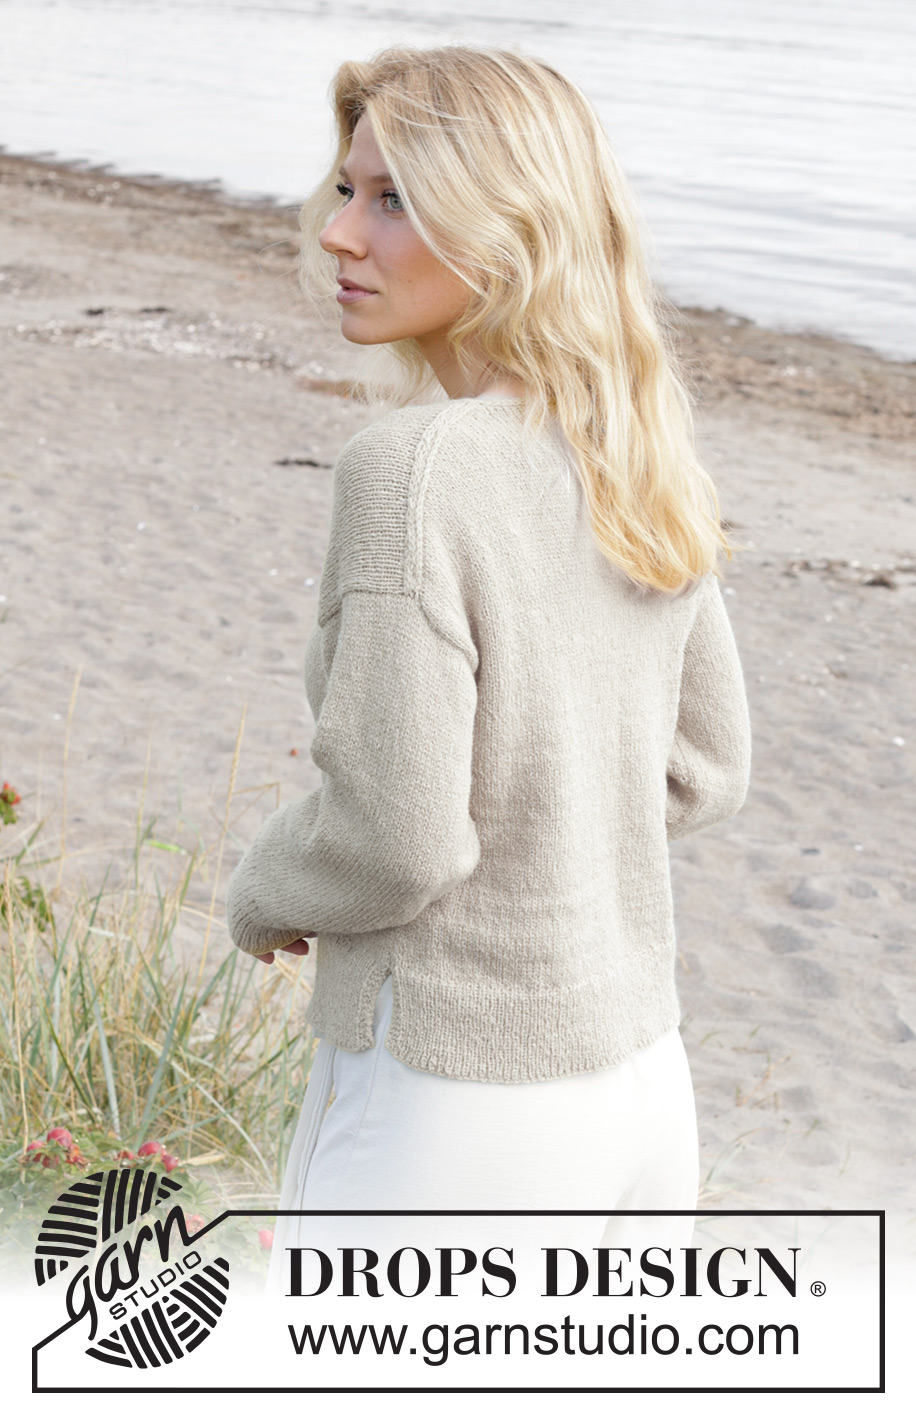
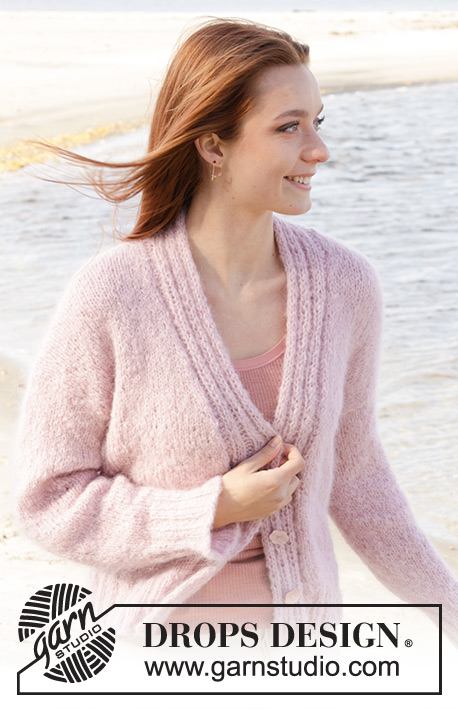
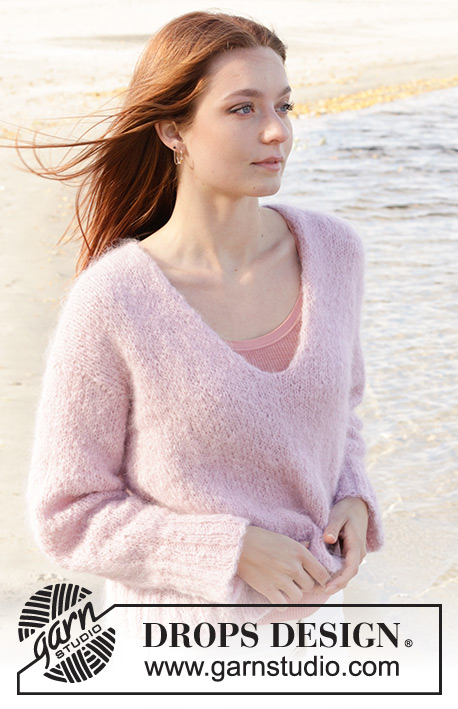
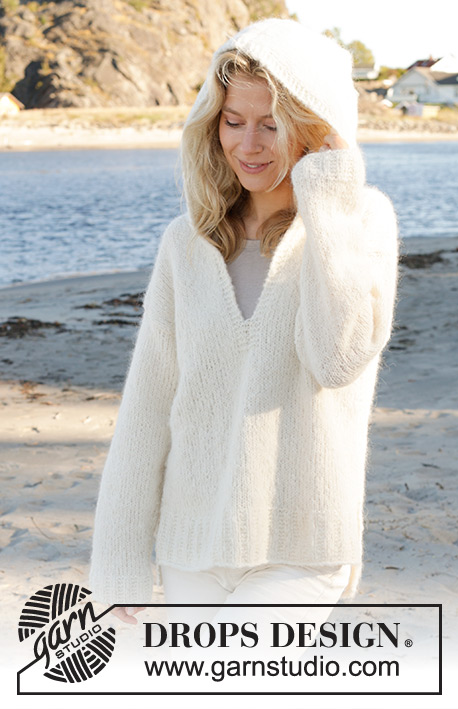
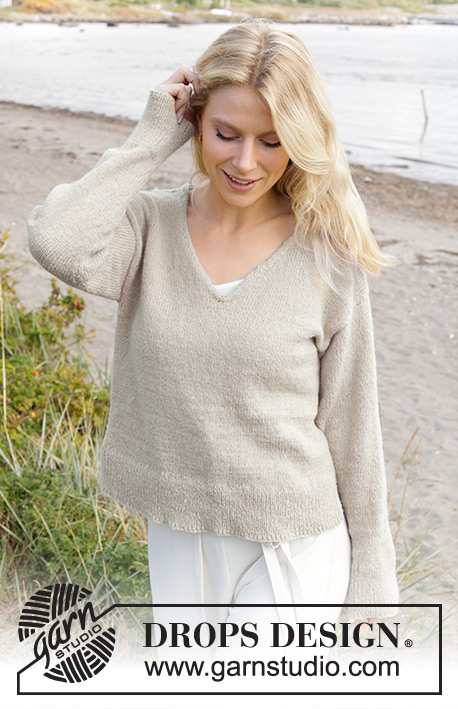
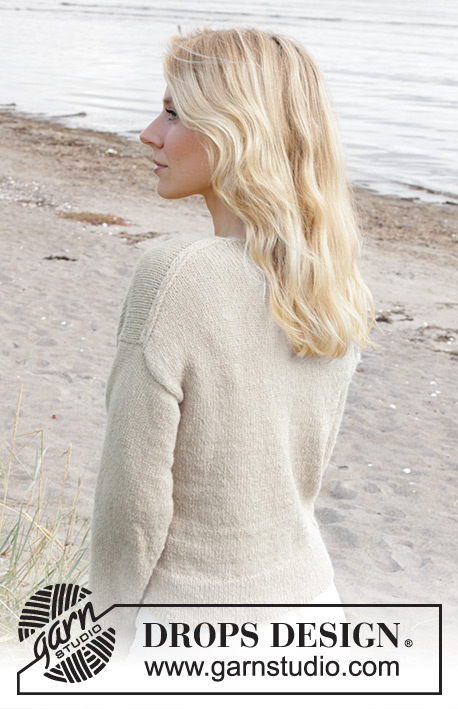
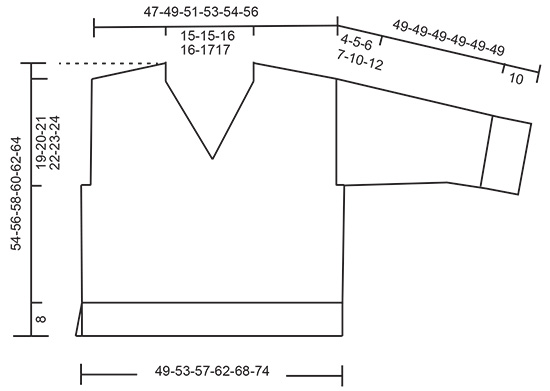
Knitted jumper in DROPS Sky or DROPS Daisy. Piece is knitted top down with European shoulder / diagonal shoulder, V-neck and i-cord. Size: S - XXXL
DROPS 239-30 |
||||||||||
|
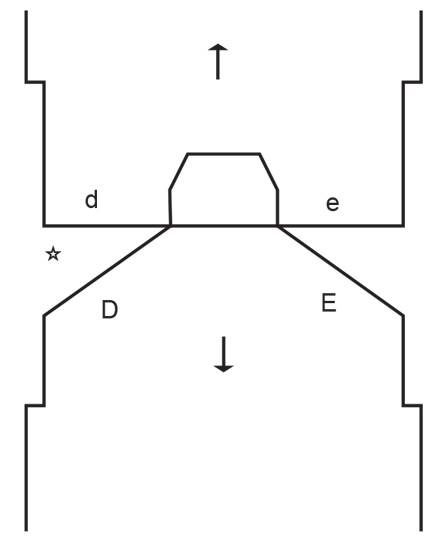
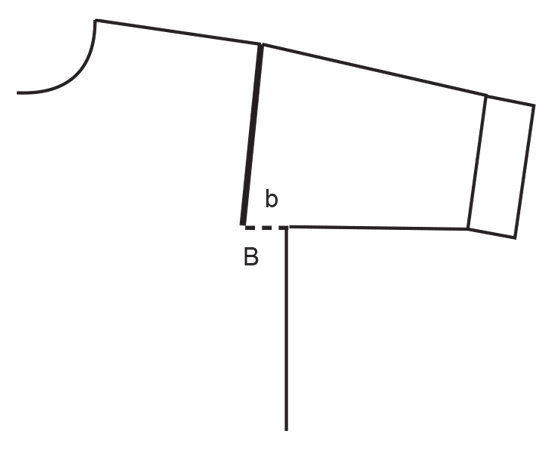
---------------------------------------------------------- EXPLANATION FOR THE PATTERN: ---------------------------------------------------------- GARTER STITCH (back and forth): Knit all rows. 1 ridge vertically = knit 2 rows. INCREASE TIP FROM RIGHT SIDE: Increase towards the left AFTER EDGE STITCHES: Use left needle to pick up yarn between 2 stitches from row below, pick up yarn from the front and knit stitch in back loop of stitch. Increase towards the right BEFORE EDGE STITCHES: Use left needle to pick up yarn between 2 stitches from row below, pick up yarn from the back and knit stitch in front loop of stitch. INCREASE TIP FROM WRONG SIDE: Increase towards the left AFTER EDGE STITCHES: Use left needle to pick up yarn between 2 stitches from row below, pick up yarn from the back and purl stitch in front loop of stitch. Increase towards the right BEFORE EDGE STITCHES: Use left needle to pick up yarn between 2 stitches from row below, pick up yarn from the front and purl stitch in back loop of stitch. DECREASE TIP (applies to mid under sleeves): Decrease 1 stitch on each side of marker thread as follows: Work until 3 stitches remain before marker thread and knit 2 together, knit 2 (marker thread is between these 2 stitches), slip 1 stitch knitwise, knit 1, pass slipped stitch over stitch worked. ---------------------------------------------------------- START THE PIECE HERE: ---------------------------------------------------------- JUMPER - SHORT OVERVIEW OF THE PIECE: Work top part of back piece back and forth on circular needle, top down until armholes. Then pick up stitches along each shoulder, increase for V-neck and work front piece back and forth on circular needle, top down until armholes. Slip front and back piece together. Work body in the round on circular needle before dividing the piece again for vents. Pick up stitches around each armhole. Work sleeves in the round on double pointed needles/a short circular needle. Finish with an i-cord around the entire neck. BACK PIECE: Cast on 34-34-36-36-38-38 stitches on circular needle size 4 mm with DROPS Sky or DROPS Daisy. Purl 1 row from wrong side. Now work in stocking stitch back and forth while AT THE SAME TIME increasing AFTER 4 edge stitches at the beginning of row and BEFORE 4 edge stitches at the end of row - read INCREASE TIP FROM RIGHT SIDE. On next row (wrong side) increase the same way – read INCREASE TIP FROM WRONG SIDE. Continue like this and increase this same way from both right side and wrong side 32-34-36-38-38-40 times in total. REMEMBER THE KNITTING TENSION! After last increase there are 98-102-108-112-114-118 stitches on needle. NOW MEASURE PIECE FROM HERE! Then work in stocking stitch back and forth until piece measures 13-14-15-15-16-17 cm, measured along the edge of armhole. Slip stitches on a thread and put piece aside, and work front piece as explained under. FRONT PIECE: Begin with left shoulder (when garment is worn). Use circular needle size 4 mm and pick up 32-34-36-38-38-40 stitches inside 1 edge stitch along left shoulder on back piece (i.e. pick up 1 stitch in every row from edge at the top of back piece) with DROPS Sky or DROPS Daisy. Work in stocking stitch back and forth. When piece measures 5-6-6-8-8-9 cm from where stitches were picked up, increase stitches towards the neck. Increase at the beginning of row from right side - remember INCREASE TIP FROM RIGHT SIDE, increase after 2 edge stitches (increase only from right side). Increase 1 stitch every 4th row 9-9-10-10-10-10 times in total, then increase every other row 8-8-8-8-9-9 times in total = 49-51-54-56-57-59 stitches. Piece measures approx. 23-24-26-28-29-30 cm. Slip stitches on a thread and put piece aside when last row has been work from wrong side. Then work right shoulder as explained below. Use circular needle size 4 mm and pick up 32-34-36-38-38-40 stitches inside 1 edge stitch along right shoulder on back piece. Work in stocking stitch back and forth. When piece measures 5-6-6-8-8-9 cm from where stitches were picked up, increase stitches towards the neck. Increase at the end of every row from right side - remember INCREASE TIP FROM RIGHT SIDE, increase before 2 edge stitches (increase only from right side). Increase 1 stitch every 4th row 9-9-10-10-10-10 times in total, then increase every other row 8-8-8-8-9-9 times in total = 49-51-54-56-57-59 stitches. After last increase work back from wrong side. Piece measures approx. 23-24-26-28-29-30 cm. Work next row as follows from right side: Work in stocking stitch over the 49-51-54-56-57-59 stitches from right front piece, slip stitches from left shoulder on left needle and then work them in stocking stitch = 98-102-108-112-114-118 stitches. Work in stocking stitch back and forth until piece measures 25-26-27-29-30-31 cm - measured along the edge of armhole and adjust so that next row is from right side. Now put front piece and back piece together for body as explained below. BODY: Work over the 98-102-108-112-114-118 stitches from front piece, cast on 4-10-12-18-28-38 new stitches at the end of row (in the side), slip the 98-102-108-112-114-118 stitches from back piece on left needle and work them in stocking stitch, cast on 4-10-12-18-28-38 new stitches at the end of row = 204-224-240-260-284-312 stitches. Insert a marker thread in the middle of the 4-10-12-18-28-38 stitches cast on in each side - move the marker threads upwards, they will be used when working vents. Work in stocking stitch until piece measures 48-50-52-54-56-58 cm - measured from the top point on shoulder on front piece (towards neck). Now divide the piece at the marker threads, continue front piece and back piece separately, work the 102-112-120-130-142-156 stitches for front piece and slip them on a thread. BACK PIECE: = 102-112-120-130-142-156 stitches. Knit 1 row from right side while increasing 21-21-21-25-27-29 stitches evenly = 123-133-141-155-169-185 stitches. Switch to circular needle size 3 mm and work rib as follows, work first row from wrong side: Work 3 edge stitches in GARTER STITCH - read explanation above, work rib (purl 1/knit 1) until 4 stitches remain, purl 1 and 3 edge stitches in garter stitch. Work rib for 8 cm. Cast off stitches with knit over knit and purl over purl. Jumper measures approx. 54-56-58-60-62-64 cm from the highest point on shoulder. FRONT PIECE: Slip the 102-112-120-130-142-156 stitches from thread on circular needle size 3 mm. Work the same way as on back piece. LEFT SLEEVE: Use circular needle size 4 mm and DROPS Sky eller DROPS Daisy. Pick up from right side 52-54-56-60-62-64 stitches from bottom of armhole and up to shoulder (along front piece) and 28-30-32-32-34-36 stitches from shoulder and down to the bottom of armhole on the other side (along back piece) = 80-84-88-92-96-100 stitches along the armhole. Insert 1 marker in the middle of the stitches picked up. Work now back and forth in stocking stitch with short rows for the sleeve cap, to gives a better shape to the sleeve. 1st row (from wrong side): work to 18 stitches after marker, turn. 2nd row (from right side): work to 18 stitches after marker, turn. 3rd row (from wrong side): work to 22 stitches after marker, turn. 4th row (from right side): work to 22 stitches after marker, turn. 5th row (from wrong side): work to 26 stitches after marker, turn. 6th row (from right side): work to 26 stitches after marker, turn. 7th row (from wrong side): work to the beginning of the row. Work stocking stitch back and forth for 4-5-6-7-10-12 cm, measure from where the stitches were picked up (all length are measured mid on top of sleeve). Now put piece together on a short circular needle or double pointed needles size 4 mm - work the rest of sleeve in the round in stocking stitch. Insert 1 marker thread at the beginning of round (mid under sleeve). Move marker thread upwards when working. Begin round at the marker thread and work in stocking stitch. When sleeve measures 6-7-8-9-12-14 cm in total, decrease on the underside of sleeve - read DECREASE TIP. Decrease like this every 2½-2-2-1½-1½-1 cm 13-14-15-16-16-17 times in total = 54-56-58-60-64-66 stitches. Work until sleeve measures 39 cm in all sizes from where stitches were picked up for sleeve. 10 cm remain until finished measurements. Try the jumper and work to desired length before rib. Knit 1 round while increasing 12 stitches evenly = 66-68-70-72-76-78 stitches. Switch to double pointed needles size 3 mm. Work rib (knit 1/purl 1) for 10 cm. Cast off stitches with knit over knit and purl over purl. Sleeve measures approx. 49 cm in all sizes. RIGHT SLEEVE: Work the other sleeve the same way, but pick up stitches as follows: pick up 28-30-32-32-34-36 stitches from the bottom of armhole and up to shoulder (along back piece) and 52-54-56-60-62-64 stitches from shoulder and down to the bottom of armhole on the other side (along front piece). ASSEMBLY: Sew bottom of armholes into body - see chart. I-CORD NECK EDGE: Use circular needle size 4 mm and cast on 3 stitches on needle with DROPS Sky or DROPS Daisy, then pick up stitches around the entire neck, begin at one shoulder line from right side inside 1 edge stitch. Pick up in total approx. 138-168 stitches. Cut the yarn. Now work i-cord while at the same time casting off stitches - make sure to work somewhat loosely to avoid a tight edge. Work as follows from right side: * Knit 2, knit 2 twisted together, move the stitches back on left needle in the same order, do not turn the piece. * Work from *-* until all except 3 stitches remain on round. Cast off the last stitches by knitting from right side and fasten these stitches to the stitches that were cast on at the beginning of round - use grafting/kitchener stitches to make the transition as invisible as possible. |
||||||||||
Diagram explanations |
||||||||||
|
||||||||||
|
||||||||||
|
||||||||||
|
||||||||||
Have you finished this pattern?Tag your pictures with #dropspattern #idlesummersweater or submit them to the #dropsfan gallery. Do you need help with this pattern?You'll find 32 tutorial videos, a Comments/Questions area and more by visiting the pattern on garnstudio.com. © 1982-2025 DROPS Design A/S. We reserve all rights. This document, including all its sub-sections, has copyrights. Read more about what you can do with our patterns at the bottom of each pattern on our site. |
||||||||||


With over 40 years in knitting and crochet design, DROPS Design offers one of the most extensive collections of free patterns on the internet - translated to 17 languages. As of today we count 314 catalogues and 11822 patterns translated into English (UK/cm).
We work hard to bring you the best knitting and crochet have to offer, inspiration and advice as well as great quality yarns at incredible prices! Would you like to use our patterns for other than personal use? You can read what you are allowed to do in the Copyright text at the bottom of all our patterns. Happy crafting!
Post a comment to pattern DROPS 239-30
We would love to hear what you have to say about this pattern!
If you want to leave a question, please make sure you select the correct category in the form below, to speed up the answering process. Required fields are marked *.