
Popular categories
Looking for a yarn?


Comments / Questions (20)
![]() Maddalena De Marchi wrote:
Maddalena De Marchi wrote:
Buongiorno,gentilmente c’è un video per capire il punto nocciolina?Sono una principiante.Grazie e buona giornata.
07.01.2025 - 09:50DROPS Design answered:
Buonasera Maddalena, provi a vedere se questo video le può essere di aiuto. Buon lavoro!
19.01.2025 - 15:27
![]() Heidi wrote:
Heidi wrote:
Maskeantallet stemmer ikke på forstykket når jeg skal sette av masker til hals. Hva er riktig antall?
05.06.2024 - 20:11DROPS Design answered:
Hei Heidi. Vi skal hjelpe deg så godt vi kan, men fint om du kan opplyse hvilken str. du strikker. Sjekk at du har felt riktig i den str. du strikker etter. Etter fellinge til ermhull skal du ha 69-77-81-85-87-91 masker, så settes 19 masker på 1 tråd (= hals) = 50-58-62-66-68-72 masker (= 25-29-31-33-34-36 masker tilbake på hver skulder). Hvilket maskaantall har du? mvh DROPS Design
10.06.2024 - 08:52
![]() Concetta La Scala wrote:
Concetta La Scala wrote:
Come si lavora con 2 filati , alternandosi con con i filati?Prima una maglia con un filo e poi la 2 con l'altro filo e via di seguito. Grazie
08.03.2024 - 16:51DROPS Design answered:
Buonasera Concetta, deve lavorare con entrambi i filati. Buon lavoro!
09.03.2024 - 17:06
![]() Rita wrote:
Rita wrote:
Kan ik voor dit patroon alpaca silk brushed (Color14 al in bezit)gebruiken in combinatie met Flora 14 ijsblauw
17.12.2023 - 18:59DROPS Design answered:
Dag Rita,
In het patroon worden 2 draden van garencategorie A gebruikt. Dit komt ongeveer overeen met de dikte van garens uit garencategorie C. Als je alleen Brushed Alpaca Silk gebruikt komt de stekenhouding wel ongeveer overeen, maar als je er nog een draad van categorie A bij neemt, komt het niet meer overeen.
P.s.: met de garenvervanger kun je ook een vervangend garen berekenen. Hiervan vindt je een link onderaan de materialenlijst bij ieder patroon.
20.12.2023 - 19:26
![]() DEVOT JOSIANE wrote:
DEVOT JOSIANE wrote:
Bonjour. Pouvez vous me faire parvenir un tuto explicatif pour ce modèle afin de tricoter la nope avec les mailles à deux rangs dessous et jeté, soit sur 7 mailles (4 mailles et 3 jetés) Avec mes remerciements. Cordialement
23.10.2023 - 17:10DROPS Design answered:
Bonjour Mme Devot, au lieu de piquer l'aiguille dans la maille suivante sur l'aiguille gauche (vous la tricoterez à la fin), *piquez l'aiguille droite 2 rangs sous cette maille, faites 1 jeté sur l'aiguille droite et ramener le fil, cette maille doit faire environ 2 cm, faites 1 jeté*, puis recommencez de *-* jusqu'à ce qu'il y ait un total de 4 mailles et 3 jetés = 7 mailles au total- avec l'aiguille gauche, reprenez ces 7 mailles (à partir de la dernière tricotée), puis tricotez les ensemble à l'endroit avec la maille suivante sur l'aiguille gauche (celle au-dessus de là où vous avez piqué votre aiguille). Bon tricot!
24.10.2023 - 08:57
![]() Aline Deschesnes wrote:
Aline Deschesnes wrote:
J ai de la difficulté a comprendre l'emmanchure. J aimerai avoir plus explication ou un vidéo merci
30.11.2022 - 13:57DROPS Design answered:
Bonjour Mme Deschesnes , pour l'emmanchure dos/devant, vous devez rabattre de chaque côté tous les 2 rangs: fois 3-3-3-5-5-7 mailles, 0-0-0-1-2-3 fois 2 mailles et 1-1-2-2-2-2 fois 1 maille soit un nombre différent de mailles et de fois en fonction de votre taille, pensez à bien rabattre le même nombre de mailles à chaque fois en début de rang sur l'endroit et en début de rang sur l'envers. N'hésitez pas à nous indiquer votre taille si besoin. Bon tricot!
30.11.2022 - 17:00
![]() Sofia wrote:
Sofia wrote:
Finn det någon instruktionsvideo för den här typen av musch där man ska hämta upp tråd från varv nedanför?
08.05.2022 - 09:34
![]() Caroline wrote:
Caroline wrote:
Bonjour, je peine à faire les nopes dans ce modèle. Il ne s’agit pas de la même façon de faire que dans le tutoriel de nopes joint aux explications. Serait-il possible d’avoir une vidéo pour ce type de nopes s’il-vous-plaît ? Merci d’avance. Caroline
28.02.2022 - 21:24DROPS Design answered:
Bonjour Caroline, cette vidéo montre ce type de nope pour un autre modèle, la seule différence est qu'ici vous allez piquer l'aiguille 2 rangs plus bas et non 6 rangs plus bas comme dans la vidéo, le reste de la nope se fait de la même façon - cf time code 01:33. Bon tricot!
01.03.2022 - 09:56
![]() Kiya Stangbye Thorberg wrote:
Kiya Stangbye Thorberg wrote:
Flora 22 hedder Tåge og ikke Kridt. Plus Kid-Silk 40 Perlerosa virker for varm ift. den kolde farve i viser på billedet. Kan der være skrevet forkert og der er brugt Kid-Silk 04 Rosa med Flora Tåge? Hilsen Kiya Thprberg
15.02.2022 - 06:06DROPS Design answered:
Hej Kiya, Tak for info, nu stemmer det, den er strikket i DROPS Flora 22 hvid tåge og DROPS Kid-Silk 40 perlerosa
15.02.2022 - 09:04
![]() Marion wrote:
Marion wrote:
Als ik het patroon lees begrijp ik niet dat je een rondbreinaald moet gebruiken voor het aparte achter en voorpand …. dan krijg je rond achter- en voor pand? Kunnen mij vertellen hoe ik dat moet zien ?
08.02.2022 - 21:38DROPS Design answered:
Dag Marion,
Vanwege het grote aantal steken wordt een rondbreinaald geadviseerd omdat de steken dan beter op de naald passen (met name bij de grotere maten), maar je kunt de panden inderdaad ook op rechte naalden breien.
11.02.2022 - 14:30
|
|||||||||||||
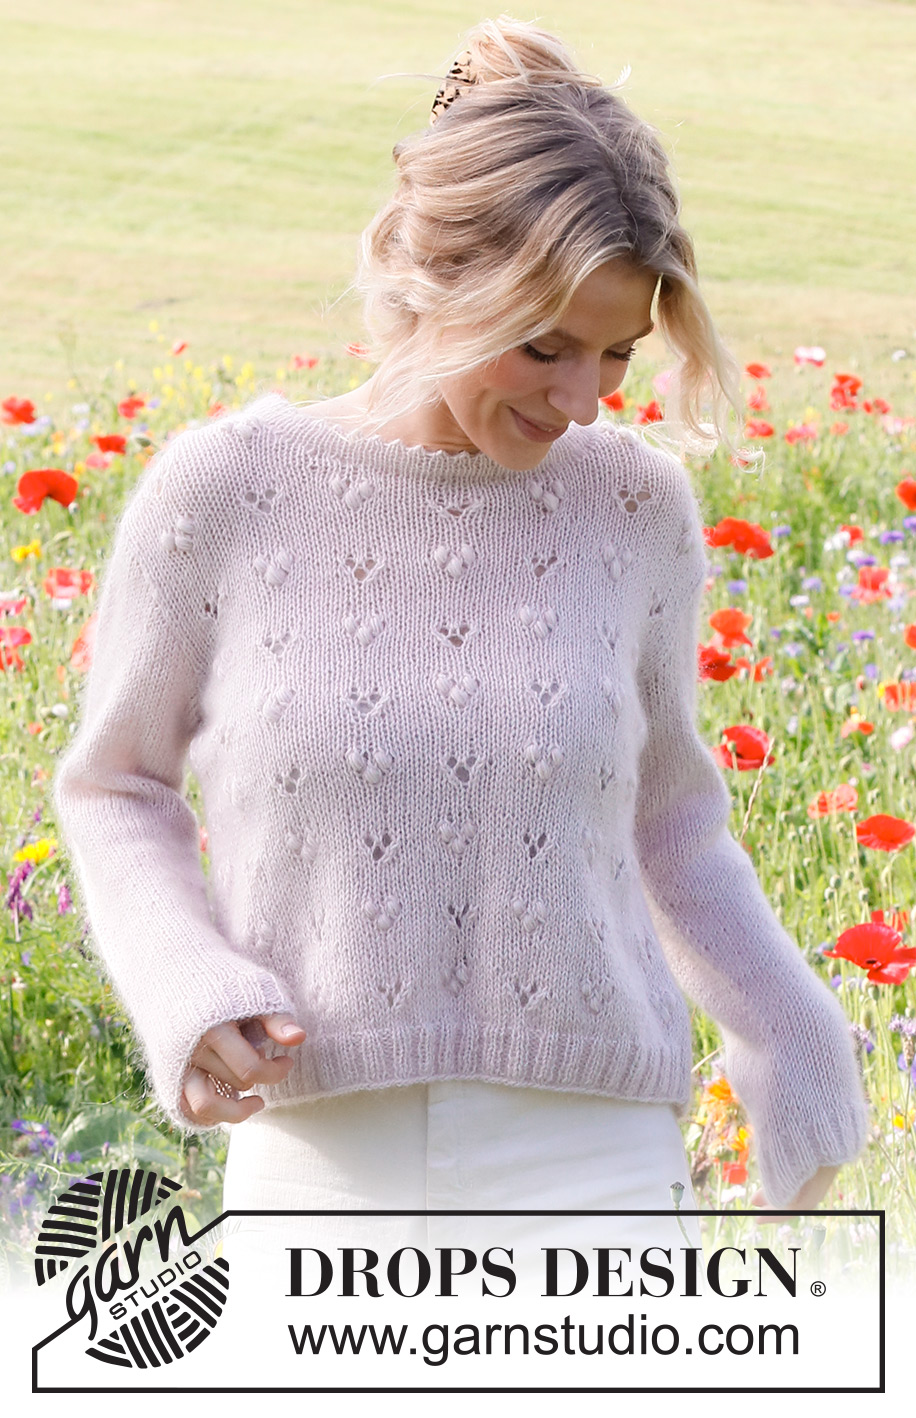
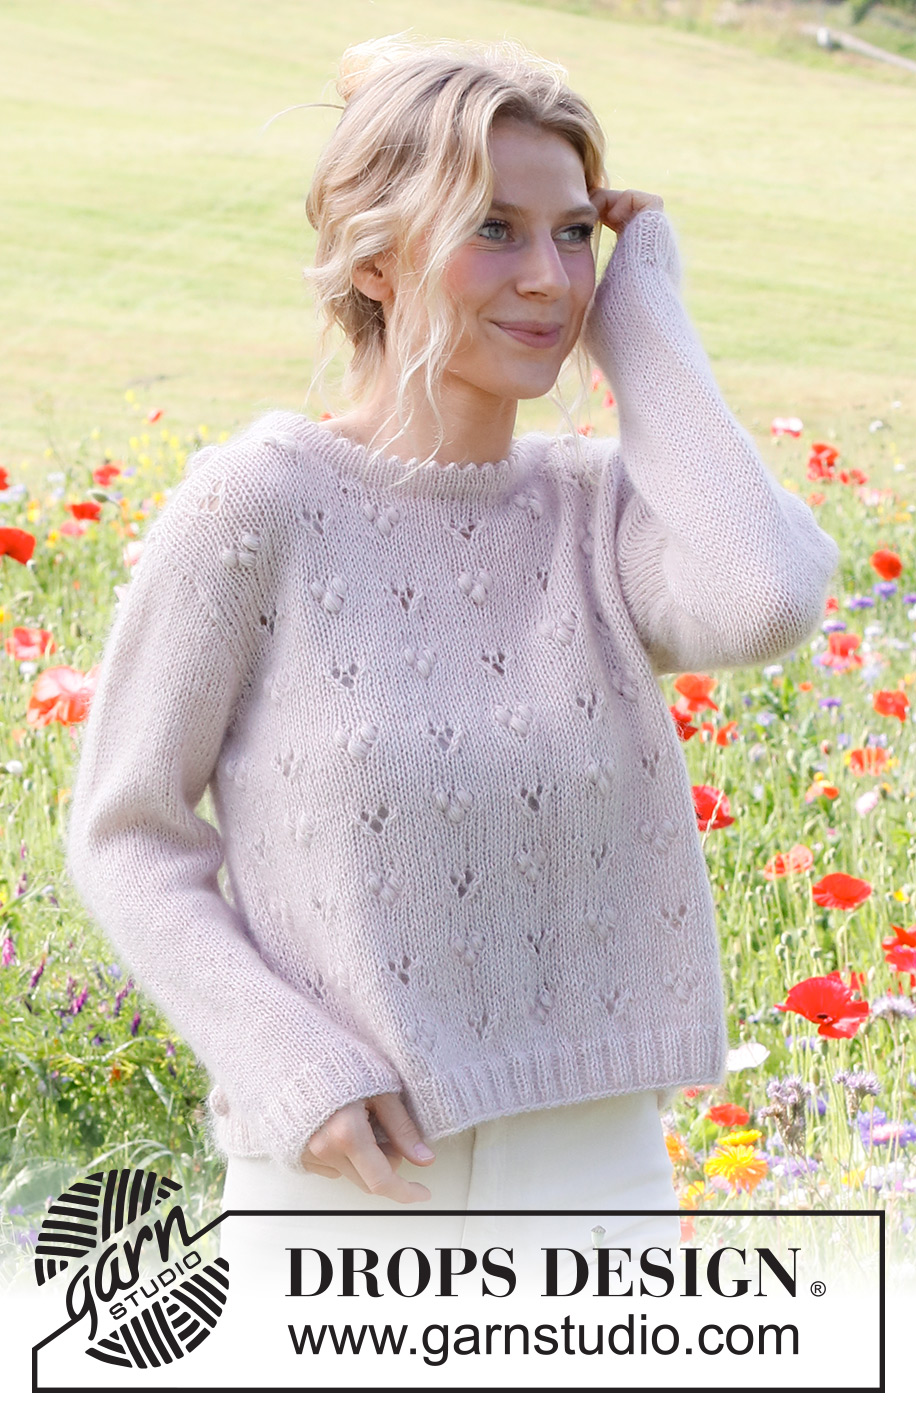
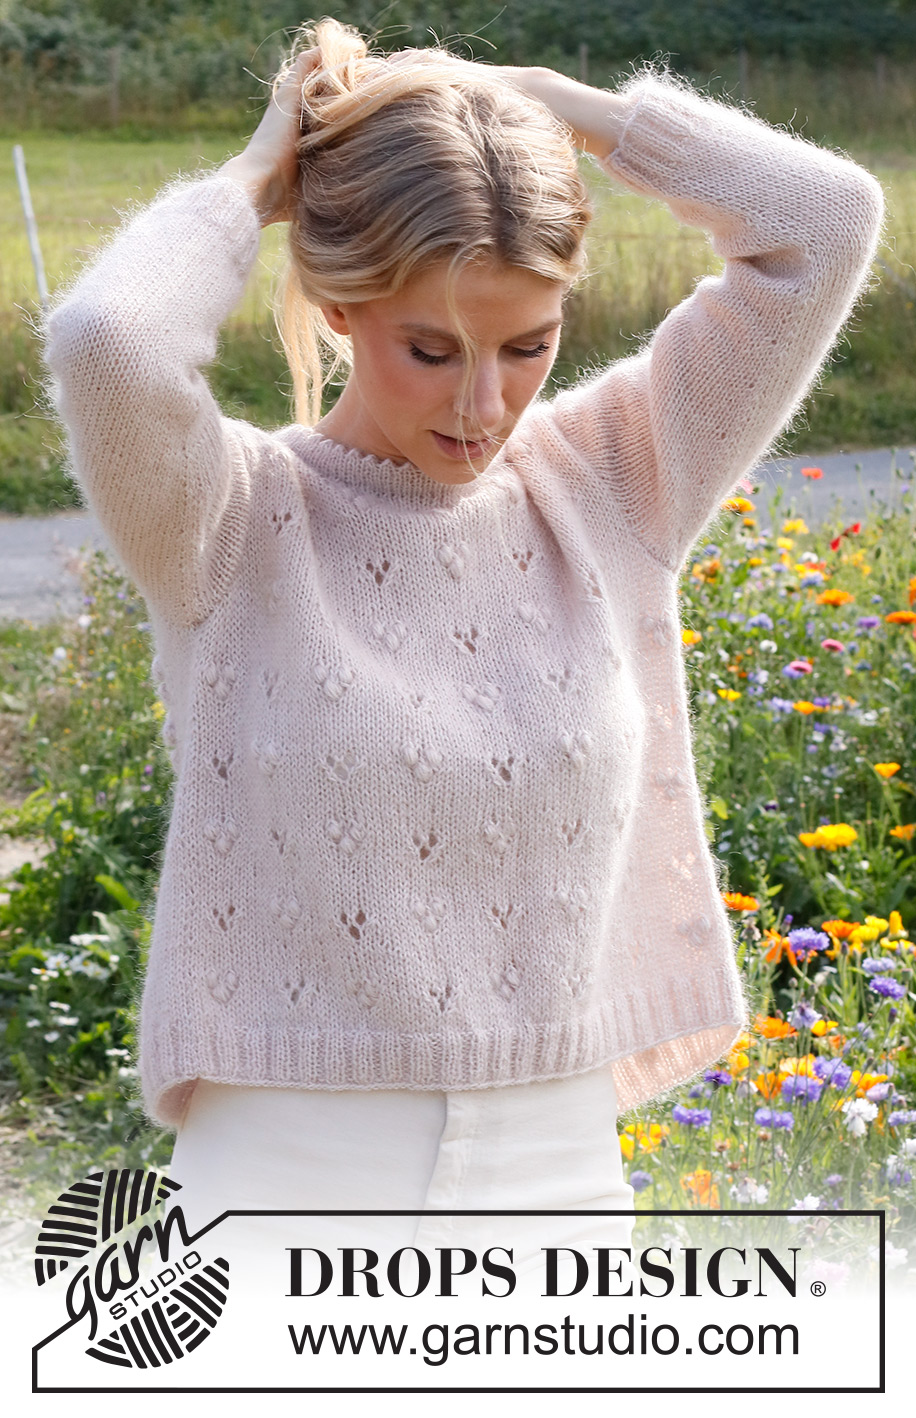
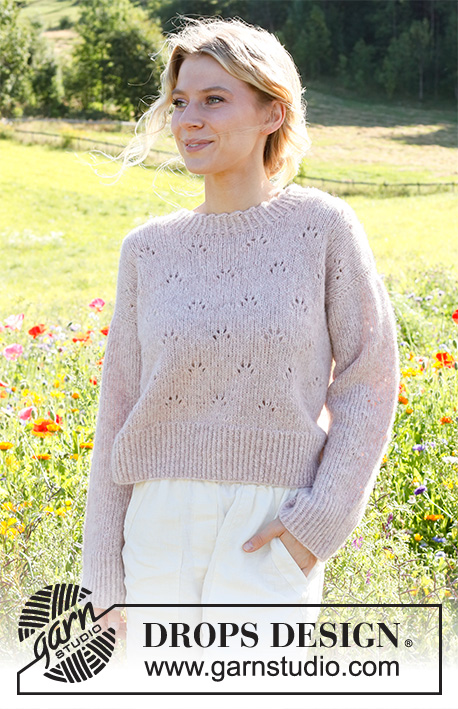
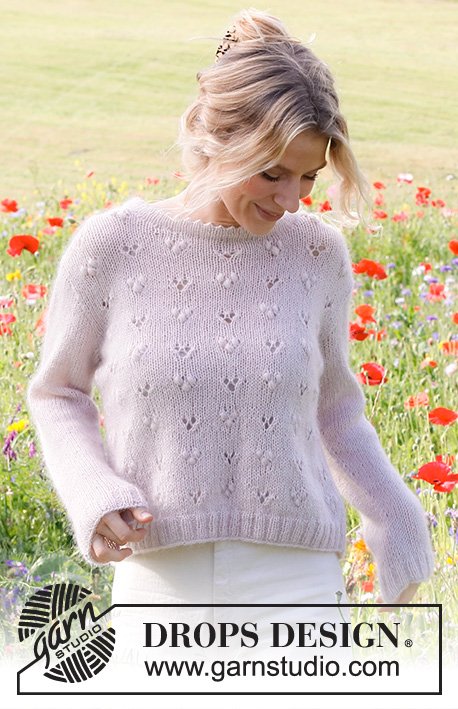
Heart Catcher#heartcatchersweater |
|||||||||||||
 |
 |
||||||||||||
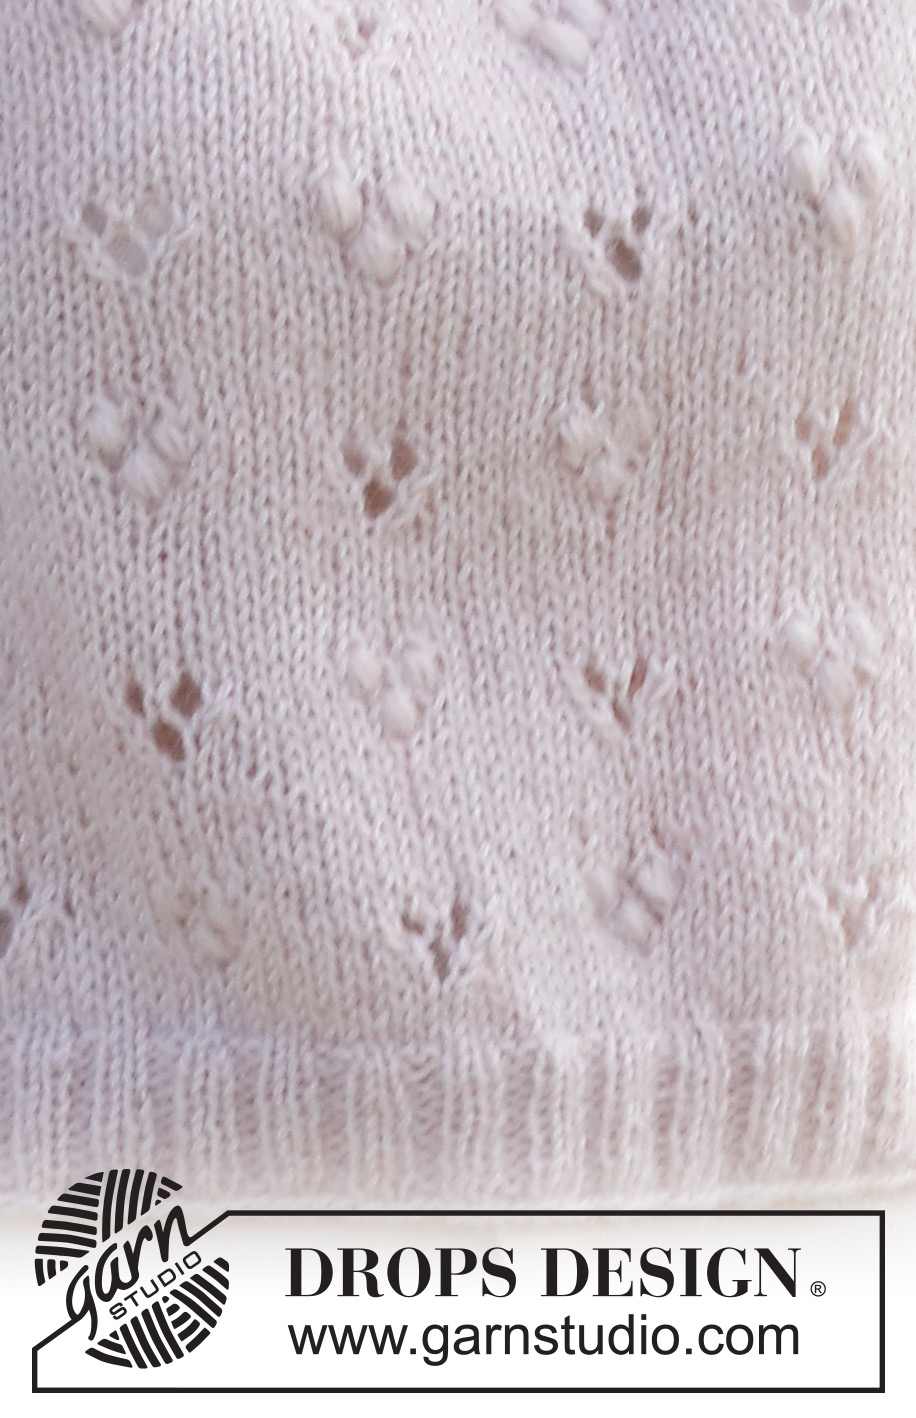
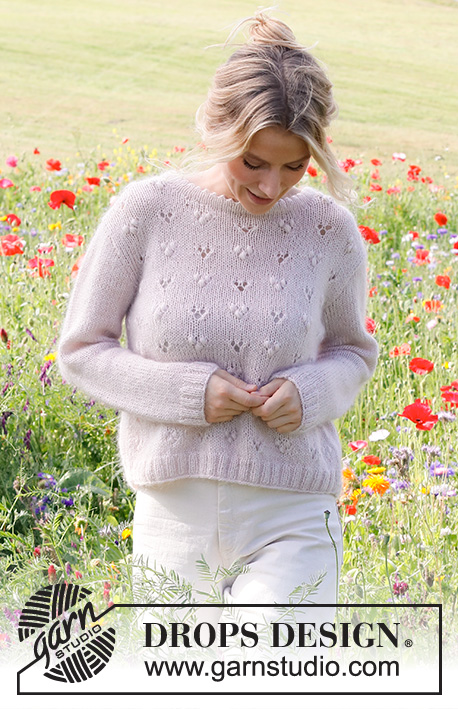
Knitted jumper in DROPS Flora and DROPS Kid-Silk. The piece is worked bottom up, with lace pattern and bobbles. Sizes S - XXXL.
DROPS 231-4 |
|||||||||||||
|
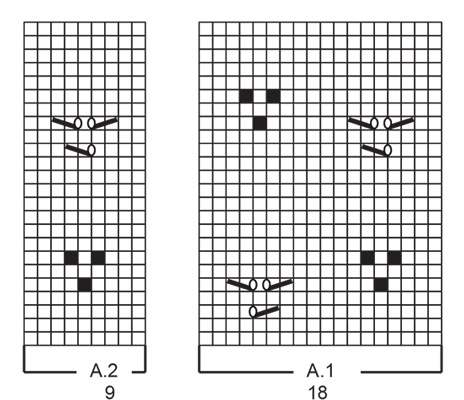
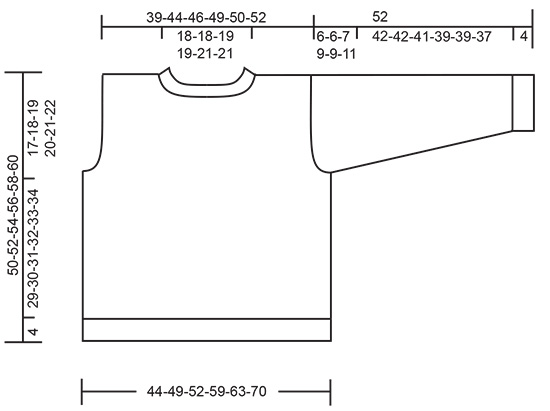
------------------------------------------------------- EXPLANATIONS FOR THE PATTERN: ------------------------------------------------------- RIDGE/GARTER STITCH (worked back and forth): Knit all rows. 1 ridge = knit 2 rows. PATTERN: See diagrams A.1 and A.2. The diagrams show all rows in the pattern from the right side. INCREASE TIP (sleeves): All increases are worked from the right side! Increase by making 1 yarn over inside 2 stitches on each side (2 stitches increased). ------------------------------------------------------- START THE PIECE HERE: ------------------------------------------------------- JUMPER – SHORT OVERVIEW OF THE PIECE: The piece is worked in sections back and forth, and bottom up then sewn together. The neck is worked in the round to finish. BACK PIECE: Cast on 90-98-110-122-130-142 stitches with circular needle size 4 mm and 1 strand of each quality. Purl 1 row from the wrong side, then work rib (knit 2, purl 2) with 1 edge stitch in GARTER STITCH – read description above, on each side. When the rib measures 4 cm, change to circular needle size 5 mm. Knit 1 row from the right side where you decrease 13-13-19-19-21-21 stitches evenly spaced = 77-85-91-103-109-121 stitches. Purl 1 row from the wrong side with 1 edge stitch in garter stitch on each side. Then work pattern as follows: 1 edge stitch in garter stitch, 6-1-4-1-4-1 stitches in stocking stitch, A.1 3-4-4-5-5-6 times in width, A.2, 6-1-4-1-4-1 stitches in stocking stitch and 1 edge stitch in garter stitch. Continue this pattern. REMEMBER THE KNITTING TENSION! When the piece measures 33-34-35-36-37-38 cm, cast off for the armholes at the beginning of each row as follows (continue the pattern where a complete bobble/lace repeat fits in width, work the stitches which do not fit in stocking stitch): Cast off 3-3-3-5-5-7 stitches 1 time, 2 stitches 0-0-0-1-2-3 times and 1 stitch 1-1-2-2-2-2 times on each side = 69-77-81-85-87-91 stitches. Continue with the pattern over the stitches that fits a complete bobble/lace pattern in width, work the stitches which do not fit in stocking stitch and 1 edge stitch in garter stitch on each side. When the piece measures 46-48-48-50-52-54 cm (with the next row a stocking stitch row from the right side), cast off the middle 27-27-29-29-31-31 stitches for the neck and finish each shoulder separately (21-25-26-28-28-30 stitches on the shoulder). Continue with the pattern over the stitches that fits a complete bobble/lace pattern in width, work the stitches which do not fit in stocking stitch and 1 edge stitch in garter stitch on each side. AT THE SAME TIME cast off on each row from the neck as follows: 1 stitch 2 times = 19-23-24-26-26-28 stitches. Continue working until the piece measures 50-52-54-56-58-60 cm. Cast off. Work the other shoulder in the same way. FRONT PIECE: Cast on and work in the same way as the back until the piece measures 42-44-44-46-46-48 cm (with the next row a stocking stitch row from the right side). Place the middle 19 stitches on a thread for the neck and finish each shoulder separately (25-29-31-33-34-36 stitches on the shoulder). Continue with the pattern over the stitches that fits a complete bobble/lace pattern in width, work the stitches which do not fit in stocking stitch and 1 edge stitch in garter stitch on each side. AT THE SAME TIME cast off on each row from the neck as follows: 2 stitches 2 times and 1 stitch 2-2-3-3-4-4 times = 19-23-24-26-26-28 stitches. Continue working until the piece measures 50-52-54-56-58-60 cm. Cast off. Work the other shoulder in the same way. SLEEVES: Cast on 50-54-54-58-62-62 stitches with circular needle size 4 mm and 1 strand of each quality. Purl 1 row from the wrong side, then work rib (knit 2, purl 2) with 1 edge stitch in garter stitch on each side. When the rib measures 4 cm, change to circular needle size 5 mm and continue with stocking stitch with 1 edge stitch in garter stitch on each side. On the first row decrease 8-10-8-10-10-8 stitches evenly spaced = 42-44-46-48-52-54 stitches. When the sleeve measures 12 cm, increase 1 stitch on each side – read INCREASE TIP! Increase like this every 5½-5-4½-4-3-2½ cm a total of 6-7-8-8-9-11 times = 54-58-62-64-70-76 stitches. When the sleeve measures 46-46-45-43-43-41 cm cast off for the sleeve cap at the beginning of each row as follows: 4 stitches 1 time, 2 stitches 3 times, 1 stitch 2 times on each side, then 2 stitches on each side until the sleeve measures 51 cm, cast off 3 stitches at the beginning of the next 2 rows. Cast off. Work the other sleeve in the same way. ASSEMBLY: Sew the shoulder seams. Sew in the sleeves and sew the sleeve and side seams in one go, inside the 1 edge stitch. NECK: Knit up 74 to 92 stitches (including the stitches from the thread) from the right side, inside the 1 edge stitch, with short circular needle size 4 mm and 1 strand of each quality. The number of stitches should be divisible by 2. Work stocking stitch in the round for 2½ cm. Now work a folding-edge as follows: * Knit 2 together, 1 yarn over *, work from *-* to the end of the round. Continue with stocking stitch for another 2 cm. Cast off. Fold the neck to the inside and sew down. |
|||||||||||||
Diagram explanations |
|||||||||||||
|
|||||||||||||
|
|||||||||||||
|
|||||||||||||
Have you finished this pattern?Tag your pictures with #dropspattern #heartcatchersweater or submit them to the #dropsfan gallery. Do you need help with this pattern?You'll find 30 tutorial videos, a Comments/Questions area and more by visiting the pattern on garnstudio.com. © 1982-2025 DROPS Design A/S. We reserve all rights. This document, including all its sub-sections, has copyrights. Read more about what you can do with our patterns at the bottom of each pattern on our site. |
|||||||||||||


With over 40 years in knitting and crochet design, DROPS Design offers one of the most extensive collections of free patterns on the internet - translated to 17 languages. As of today we count 314 catalogues and 11822 patterns translated into English (UK/cm).
We work hard to bring you the best knitting and crochet have to offer, inspiration and advice as well as great quality yarns at incredible prices! Would you like to use our patterns for other than personal use? You can read what you are allowed to do in the Copyright text at the bottom of all our patterns. Happy crafting!
Post a comment to pattern DROPS 231-4
We would love to hear what you have to say about this pattern!
If you want to leave a question, please make sure you select the correct category in the form below, to speed up the answering process. Required fields are marked *.