
Popular categories
Looking for a yarn?


Comments / Questions (45)
![]() Sara wrote:
Sara wrote:
Beste, Let hoeveel lossen moet ik eigenlijk starten? Maak ik eerst een lossenketting en volg ik daarna toer 1...? En hoeveel lossen moet ik dan hebben? Met vriendelijke groeten, Sara
03.01.2026 - 17:16DROPS Design answered:
Dag Sara,
Je begint met 3 lossen en daarna neem je 5 steken op zoals beschreven. Je begint dus niet met een lossenketting, maar met 3 lossen.
04.01.2026 - 15:34
![]() Bonnie wrote:
Bonnie wrote:
What does « Pick up » Mean? Never seen this term in crochet. Thanks
24.12.2024 - 16:36DROPS Design answered:
Dear Bonnie, you can see how to work this star pattern here, including how to pick up stitches in crochet: https://www.garnstudio.com/video.php?id=572&lang=en. Happy crochetting!
29.12.2024 - 20:36
![]() Claire O'Flaherty wrote:
Claire O'Flaherty wrote:
Is there any increasing after round 13 or will the circumference of my hat grow as I continue after round 13? It's hard to see how the hat will fit an adult head. My tension is correct.
14.03.2024 - 20:10DROPS Design answered:
Dear Mrs O'Flaherty, after last increase you should have 69 sts in first size, 73 sts in 2nd size, now work without any further increase until piece measures 18-19 cm before starting star pattern. Happy crocheting!
15.03.2024 - 08:31
![]() Chrystelle wrote:
Chrystelle wrote:
Bonjour, J'ai fait les 3 étoiles en hauteur. Faut-il refaire crocheter encore le 2ème tour et si oui où faut il crocheter les dB ? Merci pour votre réponse
28.01.2024 - 22:33
![]() Steffi wrote:
Steffi wrote:
Liebes Drops-Team, danke für die schöne Anleitung. Ich bin mit unsicher, ob ich ab Runde 14 weiterhin mit einer Luftmasche beginne und die Runde mit einer Kettmasche schließe (Häkelinfo und Video) oder ob ich dann nur noch feste Maschen häkel bis zur Länge von 18cm. Herzlichen Dank für eure Hilfe!
26.03.2023 - 09:10DROPS Design answered:
Liebe Steffi, ja genauso sollen Sie häkeln, wie unter HÄKELINFO: erklärt. Viel Spaß beim häkeln!
27.03.2023 - 10:01
![]() Debra Jacobson wrote:
Debra Jacobson wrote:
Hi! The circumference of my hat after completed round 13 73 stitches, is 18 inches. Will this yield me a size L/XL hat for a head that measures about 22" around? Thanks again! Deb
06.03.2023 - 18:26DROPS Design answered:
Dear Mrs Jacobson, do you have correct tension? You should have 14 sc = 4" - and the hat will be then somewhat tigher than the head circumference in order to fit perfectly. Happy crocheting!
07.03.2023 - 10:09
![]() Debra Jacobson wrote:
Debra Jacobson wrote:
Hi! Ready to start star pattern. Ended round 13 with slip stitch. Is the following correct? Chain 3, pick up 2nd chain from hook, pick 3rd chain from hook. ?Then do I pick up the chain stitch next to the slip stitch in the hat body Or the first genuine single crochet stitch back loop? Thanks for all your help! Deb
04.03.2023 - 19:03DROPS Design answered:
Dear Mrs Jacobsson, finish every round with a slip stitch, then work the star stitch pattern in the round just as shown in this video. Happy crocheting!
06.03.2023 - 09:24
![]() Deb Jacobson wrote:
Deb Jacobson wrote:
Hi! Finished round 13, size L/XL Hat. Do I measure diameter of hat, or radius-- from center (starting circle) to one edge (half diameter)? Deb j
16.02.2023 - 19:51DROPS Design answered:
Dear Deb, yes, it's measured from the starting circle down towards an edge (the radius of the hat). Happy knitting!
16.02.2023 - 20:51
![]() Debra Jacobson wrote:
Debra Jacobson wrote:
Want to use magic circle for my first in the round project using DROPS queen of chill pattern. About counting stitches: is the chain stitch used to lock the magic circle counted as stitch? Pattern says substitute a chain stitch for the first single crotchet in every round. So make 5 additional single crochet and count that chain stitch? Or not count that first magic circle chain stitch and make 6 single crochet? Tearing my hair out :-) Deb
01.02.2023 - 19:46
![]() Debra Jacobson wrote:
Debra Jacobson wrote:
Want to use magic circle (no issue making this) for my first in the round project. Using DROPS queen of chill pattern. Wondering about counting stitches: do I count the chain stitch used to lock the magic circle In a pattern that says to substitute a chain stitch for the first single crotchet in every round? So do I make 5 additional single crochet and count that chain stitch, or not count that first magic circle chain stitch and make 6 single crochet? Tearing my hair out :-) Deb
01.02.2023 - 19:42DROPS Design answered:
Dear Mrs Jacobson, both techniques are possible you can replace the first single crochet with 1 chain (then crochet 1 chain and 5 sc to get 6 sc) or use the first chain just to start the round and do not count this chain as 1st stitch (then crochet 1 chain and 6 sc) - just as you prefer. But then remember to use the same technique all the piece, either counting the first chain as the first stitch or not. Happy crocheting!
02.02.2023 - 09:26
|
|
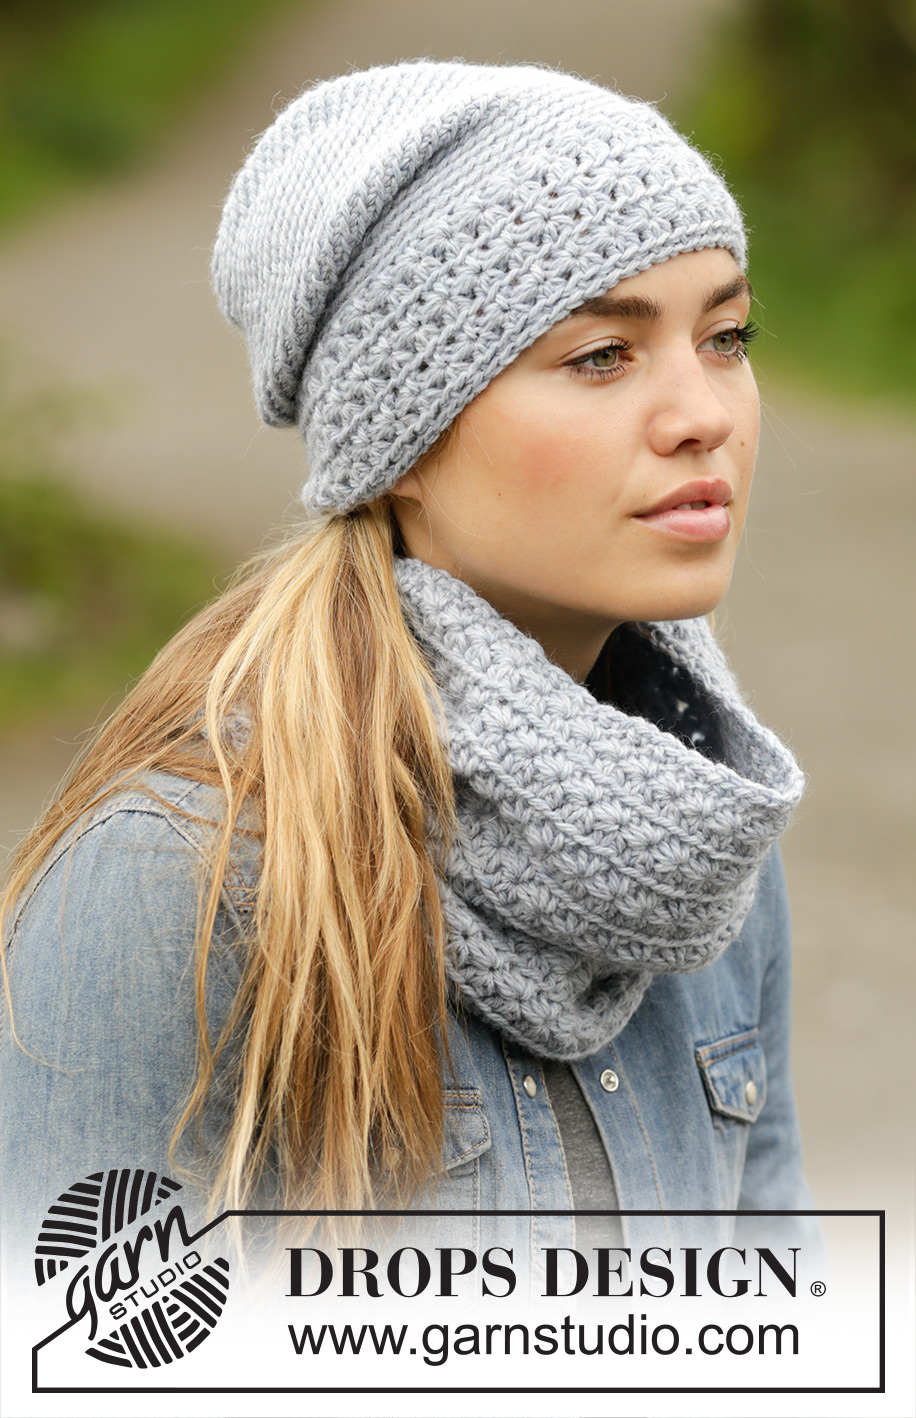
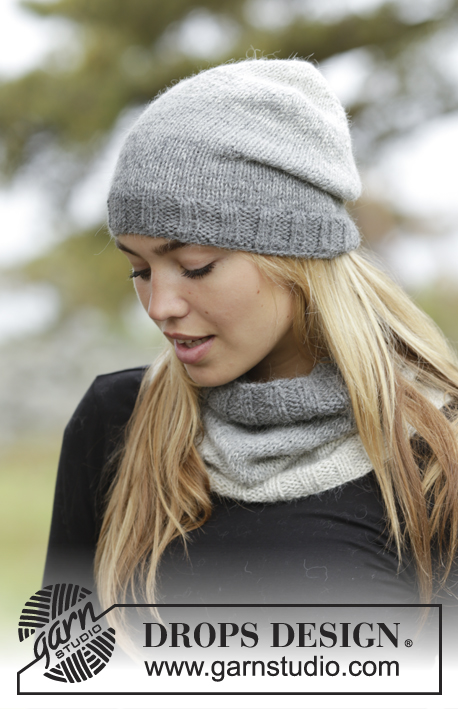
Queen of the Chill#queenofthechillset |
|
|
|
|
Crochet DROPS hat and neck warmer with star pattern in ”Nepal”.
DROPS 171-45 |
|
|
HAT: CROCHET INFO: Replace first dc at beg of every dc round with 1 ch. Finish every round with 1 sl st in first ch on round. INCREASE TIP: Inc 1 st by working 2 dc in same st. STAR PATTERN (in the round): ROUND 1: 3 ch, pick up 5 sts, beg in 2nd ch from hook, when picking up st in dc pick up in back loop (= 6 loops on hook), make a YO and pull through all 6 loops, work 1 ch to make a hole over the 6 sts, * pick up 1 st in the hole, pick up 1 st in the side on the last of the 6 sts, pick up 1 st in same ch as the last of the 6 sts was picked up in, 1 st in back loop in each of the 2 next ch (= 6 loops on hook), make a YO and pull through all 6 loops, 1 ch *, repeat from *-*, finish with 1 sl st in 3rd ch at beg of round. ROUND 2: 2 ch, work 2 htr in each "star hole", finish round with 1 sl st in 2nd ch at beg of round = 34-36 stars. ROUND 3: 3 ch, pick up 1 st in 2nd and 3rd ch from hook, 1 st in back loop of the first 3 htr on row (= 6 loops on hook), make a YO and pull through all 6 loops, 1 ch, * pick up 1 st in the hole, 1 st in the side on the last of the 6 sts, 1 st in back loop of same htr as the last of the 6 sts was picked up in, 1 st in back loop of each of the next 2 htr (= 6 loops on hook), make a YO and pull through all 6 loops, 1 ch *, repeat from *-*, finish with 1 sl st in 3rd ch at beg of round. Repeat 2nd and 3rd round 2 times in total, work 2nd round 1 more time (= 6 rounds in total vertically = 3 stars vertically). ---------------------------------------------------------- HAT: The piece is worked top down in the round. Crochet 4 ch on hook size 5 mm with Nepal and form a ring with 1 sl st in first ch. ROUND 1: Work 6 dc in ch-ring – READ CROCHET INFO! Now work all dc in back loop of dc from previous round. ROUND 2: Work 2 dc in every dc = 12 dc. ROUND 3: * 1 dc in first dc, 2 dc in next dc *, repeat from *-* the entire round = 18 dc. ROUND 4: * 1 dc in each of the first 2 dc, 2 dc in next dc *, repeat from *-* the entire round = 24 dc. REMEMBER THE CROCHET TENSION! ROUND 5: * 1 dc in each of the first 3 dc, 2 dc in next dc *, repeat from *-* the entire round = 30 dc. ROUND 6: * 1 dc in each of the first 4 dc, 2 dc in next dc *, repeat from *-* the entire round = 36 dc. ROUND 7: * 1 dc in each of the first 5 dc, 2 dc in next dc *, repeat from *-* the entire round = 42 dc. ROUND 8: * 1 dc in each of the first 6 dc, 2 dc in next dc *, repeat from *-* the entire round = 48 dc. ROUND 9: * 1 dc in each of the first 7 dc, 2 dc in next dc *, repeat from *-* the entire round = 54 dc. ROUND 10: * 1 dc in each of the first 8 dc, 2 dc in next dc *, repeat from *-* the entire round = 60 dc. ROUND 11: * 1 dc in each of the first 9 dc, 2 dc in next dc *, repeat from *-* the entire round = 66 dc. SIZE S/M: ROUND 12: Work 1 round with 1 dc in every dc and inc 3 dc evenly - READ INCREASE TIP = 69 dc. SIZE L/XL: ROUND 12: * 1 dc in each of the first 10 dc, 2 dc in next dc *, repeat from *-* the entire round = 72 dc. ROUND 13: Work 1 round with 1 dc in every dc and inc 1 dc - READ INCREASE TIP = 73 dc. BOTH SIZES: Piece measures approx. 7-8 cm. Continue to work 1 dc in back loop of every dc until piece measures 18-19 cm. Then work STAR PATTERN – see explanation above. Make sure to not make the star pattern to tight! When star pattern has been worked, work 1 edge in the round as follows: Work 1 dc in back loop of first htr, * 1 ch, skip 1 htr, 1 dc in next htr *, repeat from *-* the entire round. Fasten off. ---------------------------------------------------------- NECK WARMER: STAR PATTERN: ROUND 1: 3 ch, pick up 5 sts, beg in 2nd ch from hook, when picking up st in dc pick up in back loop (= 6 loops on hook), make a YO and pull through all 6 loops, work 1 ch to make a hole over the 6 sts, * pick up 1 st in the hole, pick up 1 st in the side on the last of the 6 sts, pick up 1 st in same ch as the last of the 6 sts was picked up in, 1 st in back loop in each of the 2 next ch (= 6 loops on hook), make a YO and pull through all 6 loops, 1 ch *, repeat from *-*, finish with 1 sl st in 3rd ch at beg of round. ROUND 2: 2 ch, work 2 htr in each "star hole", finish round with 1 sl st in 2nd ch at beg of round = 36-39 stars. ROUND 3: 3 ch, pick up 1 st in 2nd and 3rd ch from hook, 1 st in back loop of the first 3 htr on row (= 6 loops on hook), make a YO and pull through all 6 loops, 1 ch, * pick up 1 st in the hole, 1 st in the side on the last of the 6 sts, 1 st in back loop of same htr as the last of the 6 sts was picked up in, 1 st in back loop of each of the next 2 htr (= 6 loops on hook), make a YO and pull through all 6 loops, 1 ch *, repeat from *-*, finish with 1 sl st in 3rd ch at beg of round. Repeat round 2 and 3. ---------------------------------------------------------- NECK WARMER: Crochet 73-79 LOOSE ch on hook size 6 mm with Nepal and form a ring with 1 sl st in first ch. Work STAR PATTERN - see explanation above. REMEMBER THE CROCHET TENSION! Neck warmer should measure approx. 61-66 cm in circumference, make sure to avoid a tight neck warmer. When piece measures 24-26 cm, adjust so that last round is 2nd round, work 1 edge around the neck warmer as follows: Work 1 ch (= first dc), * 1 ch, skip 1 htr, 1 dc in next htr *, repeat from *-* around the entire neck warmer, finish with 1 sl st in first ch. Fasten off. Work the same edge in opposite side of piece, i.e. in ch-row from RS. Fasten off. |
|
Have you finished this pattern?Tag your pictures with #dropspattern #queenofthechillset or submit them to the #dropsfan gallery. Do you need help with this pattern?You'll find 8 tutorial videos, a Comments/Questions area and more by visiting the pattern on garnstudio.com. © 1982-2026 DROPS Design A/S. We reserve all rights. This document, including all its sub-sections, has copyrights. Read more about what you can do with our patterns at the bottom of each pattern on our site. |


With over 40 years in knitting and crochet design, DROPS Design offers one of the most extensive collections of free patterns on the internet - translated to 17 languages. As of today we count 324 catalogues and 12267 patterns translated into English (UK/cm). 12267
We work hard to bring you the best knitting and crochet have to offer, inspiration and advice as well as great quality yarns at incredible prices! Would you like to use our patterns for other than personal use? You can read what you are allowed to do in the Copyright text at the bottom of all our patterns. Happy crafting!
Post a comment to pattern DROPS 171-45
We would love to hear what you have to say about this pattern!
If you want to leave a question, please make sure you select the correct category in the form below, to speed up the answering process. Required fields are marked *.