
Popular categories
Looking for a yarn?


Comments / Questions (101)
![]() Karin Conte wrote:
Karin Conte wrote:
Ich weiß nicht wie ich bei der Anleitung "173-1 Taschen häkeln" in den Reihen 5 - 10 die Maschen zunehmen muß, damit es im Muster passt. Mit freundlichen Grüßen Karin Conte
08.08.2023 - 18:55DROPS Design answered:
-Siehe Antwort unten, und vielleicht auch diese Lektion, unter Kästchendiagramme / Farbdiagramme wird es erklärt, wie man solche Diagramme häkelt. Viel Spaß beim häkeln!
09.08.2023 - 08:09
![]() Karin Conte wrote:
Karin Conte wrote:
Bei dieser Anleitung weiß ich nicht, wie ich in den Reihen 5 - 10 die Maschen zunehmen soll damit das Muster passt. Liebe Grüße Karin Conte
08.08.2023 - 18:51DROPS Design answered:
Liebe Frau Conte, die Zunahmen werden in die schriftlichen Anleitung erklärt, dh bei der 1. Runde häkeln Sie 12 Stäbchen = 12 Mal A.1; bei der 2. Runde, häkeln Sie 2 Stb in jedes Stb = 24 Stb, die wie bei der 2. Reihe A.1 gehäkelt werden; bei der 3. Runde verdoppelten Sie jedes 2. Stb = 36 Stb (12 x die 3 Stb in A.1 in der Runde) usw. Viel Spaß beim häkeln!
09.08.2023 - 08:08
![]() Guendalina wrote:
Guendalina wrote:
* 1 m.a in ognuna delle (prime 3 m.a /delle )3 m.a successive quindi si deve leggere così, "le prime 3 m.a. " non contano?
20.06.2023 - 17:18DROPS Design answered:
Buongiorno Guendalina, all'inizio del giro lavoreeà 1 maglia alta in ognuna delle prime 3 maglie, poi 1 maglia alta nelle 3 maglie successive, e così via. Buon lavoro!
21.06.2023 - 08:20
![]() Guendalina wrote:
Guendalina wrote:
* 1 m.a in ognuna delle prime 3 m.a /delle 3 m.a successive, me lo spiegate meglio? Non lo capisco. Grazie mille
19.06.2023 - 23:54DROPS Design answered:
Buonasera Guendalina, deve semplicemente lavorare 1 maglia alta in ognuna delle 3 maglie alte successive. Buon lavoro!
20.06.2023 - 16:58
![]() Guendalina Bosio wrote:
Guendalina Bosio wrote:
Domanda sul fondo : Come effettuare gli aumenti dalla riga 5 a 10?
13.06.2023 - 15:40DROPS Design answered:
Buongiorno Guendalina, deve aumentare come nei giri precedenti lavorando 1 maglia in più tra gli aumenti ad ogni giro e continuando a lavorare il motivo A.1. Buon lavoro!
14.06.2023 - 08:41
![]() Mijai wrote:
Mijai wrote:
I had no problem what so ever about pattern But wondering if you have a video of strap Not sure how to attetch Thanks
30.08.2022 - 23:17DROPS Design answered:
Dear Mijai, there is no video to the straps, make a bread with 36 strands of yarn (3 bunches of 12 strands each), starting after approx. 12 cm from one end (make a knot there). When the braid measures approx. 68 cm divide the strands into 2 bunches (18 strands each), insert one bunch into the round with holes on top of bag, from inside towards outside, insert the other bunch into the same round but 3 dc away from the first bunch and make a knot with both bunches. Unknot the knot at the beg of the braid and repeat on the other side of bag. Make another braid and fasten it the same way on the other side of bag. Hope it can help.
31.08.2022 - 07:54
![]() Luna wrote:
Luna wrote:
"På omg med pil hækles der således: * 1 st i hver af de 3 første/næste st, 1 lm, spring over 1 st *, gentag fra *-*. " Jeg forstår ikke. Betyder det. *1 st,1 st, 1 st, lm, spring over 1 st, forsæt med at hækle mønster ??
09.08.2022 - 13:08DROPS Design answered:
Hej Luna, ja det stemmer som du beskriver, sådan gør du hele vejen rundt og fortsætter bagefter med mønster :)
11.08.2022 - 09:17
![]() Rebekah Lovelady wrote:
Rebekah Lovelady wrote:
So on the bottom, when doing the two stitches in the increase, they are both the same color? Like if the one box indicating the color on the diagram that falls on the increase is one color but two stitches? Forgive me if this question was asked before, but there are a lot of comments on this pattern lol!
20.04.2022 - 19:09DROPS Design answered:
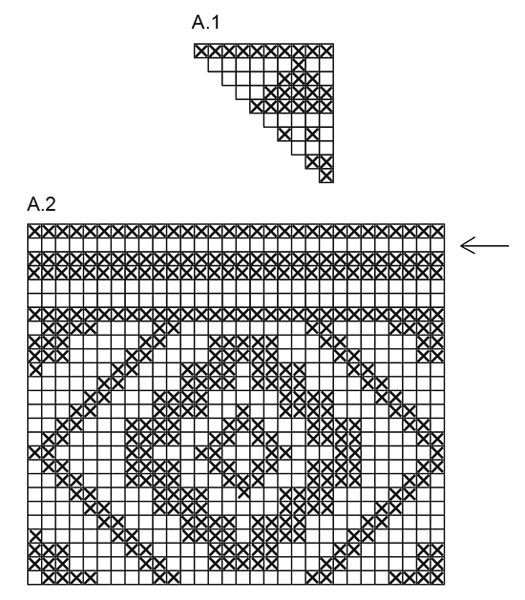
Dear Rebekah, it depends on the pattern. For example, in diagram A.1, you start with 1 stitch in dark grey. In the next round you increase to two stitches in dark grey. In the 3rd round, you increase one of them to 2 light beige stitches and work the third stitch in light beige. In the 4th round, you increase one light beige stitch to 1 dark grey stitch and 1 light beige stitch and work 1 dark grey stitch and 1 light beige stitch over the other 2 stitches. Happy crocheting!
20.04.2022 - 19:53
![]() Mona Ragheb wrote:
Mona Ragheb wrote:
Very nice pattern
08.03.2022 - 07:11
![]() Jaana wrote:
Jaana wrote:
When you have finished the A1 (bottom), you can´t start the A2 from the start, if you want to get the patterns aligned in the middle of the A1. You must begin from the third dc of the pattern A2.
30.06.2021 - 15:32
|
|||||||
Santa Fe#santafebag |
|||||||
|
|
|||||||
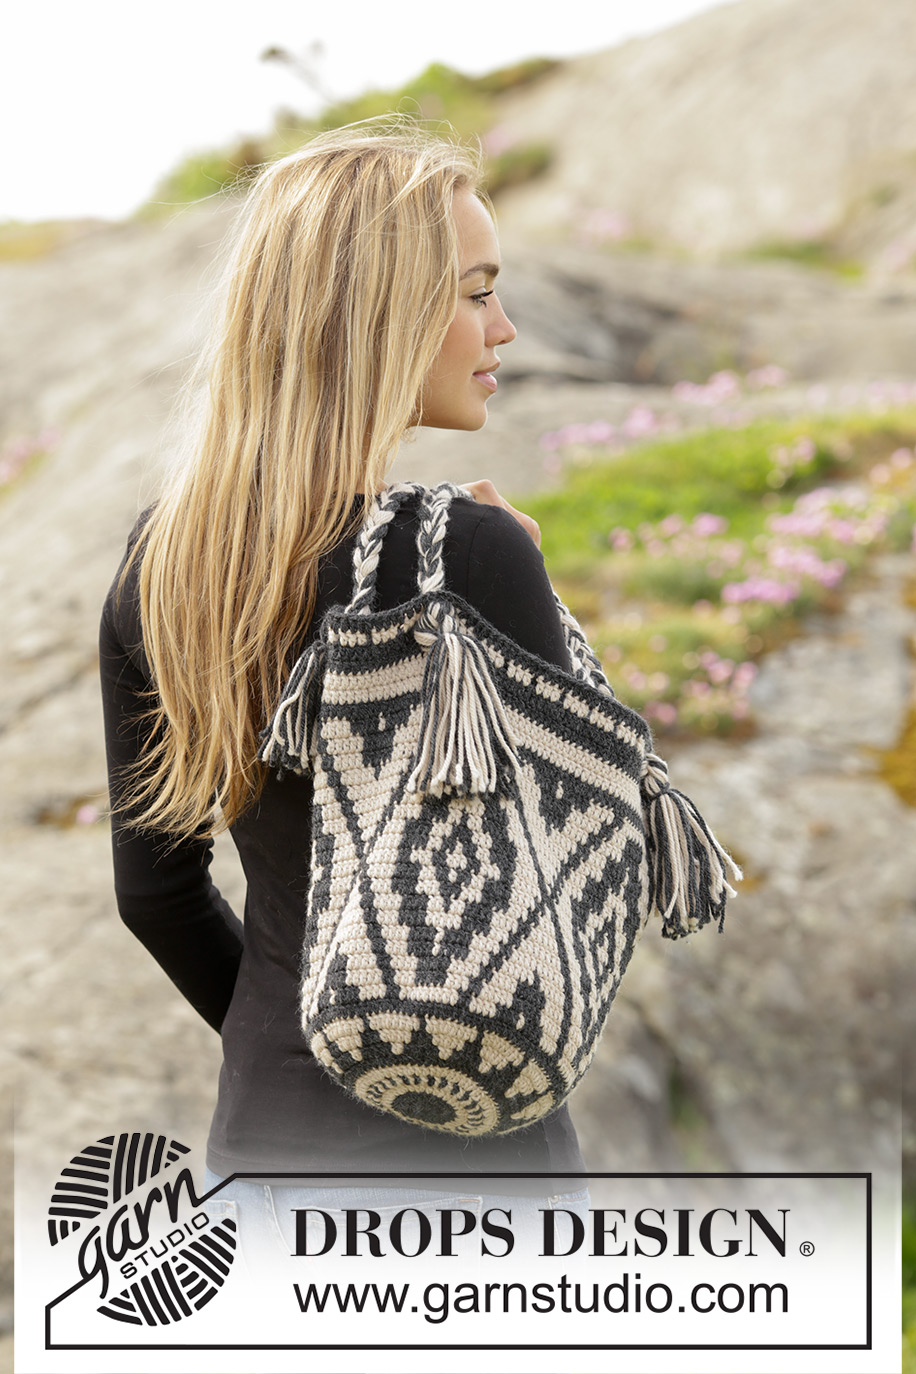
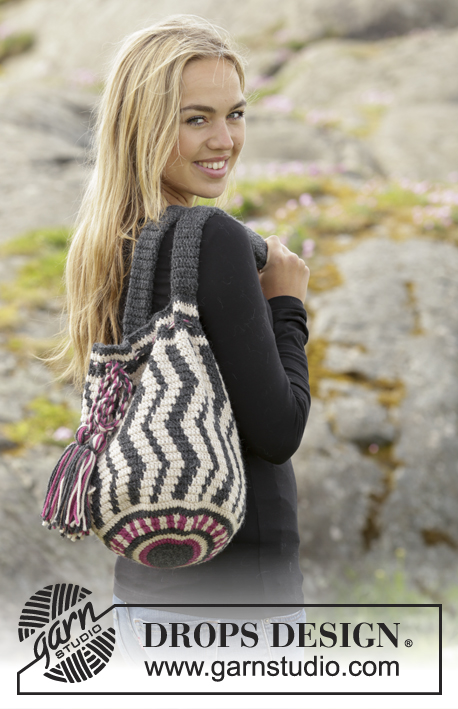
Crochet DROPS bag with colour pattern in ”Nepal”.
DROPS 173-1 |
|||||||
|
PATTERN: See diagrams A.1 and A.2. Diagrams show colours in pattern. 1 square = 1 tr. COLOUR PATTERN (worked in the round): When changing colour work as follows: Work last tr with first colour but wait with last pull through, switch to next colour and work last pull through, then work next tr. When working with two colours place strands for the colour not worked over sts from previous round, work around the strands so that they is hidden and follows in the round. CROCHET INFO: Replace first tr at beg of every round with 3 ch, finish round with 1 sl st in third ch. --------------------------------------------------------- BAG: Worked in the round. Work 5 ch with dark grey on hook size 3.5 mm and form a ring with 1 sl st in first ch. Then work in the round and according to A.1 (work 12 repetitions of A.1 in width) - READ COLOUR PATTERN. ROUND 1: Work 12 tr in ring – read CROCHET INFO. ROUND 2: Work 2 tr in every tr = 24 tr. ROUND 3: Work * 1 tr in first tr, 2 tr in next tr *, repeat from *-* the entire round = 36 tr. ROUND 4: Work * 1 tr in each of the first 2 tr, 2 tr in next tr *, repeat from *-* the entire round = 48 tr. REMEMBER THE CROCHET TENSION! ROUNDS 5-10: Continue with inc and pattern as before, i.e. on every round work 1 more tr between inc = 120 tr. ROUND 11: Continue to work in the round but without inc and work according to A.2 (= 4 repetitions in width). On round with arrow work as follows: * 1 tr in each of the first/next 3 tr, 1 ch, skip 1 tr *, repeat from *-*. Continue until A.2 has been worked, fasten off. STRAPS: Cut 18 lengths of each colour of 120 cm = 36 strands. Place the strands tog and tie a loose knot, leave approx. 12 cm after knot. Distribute strands in 3 piles with 12 strands in each pile. Plait the three piles tog until plait measures approx. 68 cm. Divide strands into 2 piles. Thread the 2 halves through bag, 3 tr apart, in round with holes. Tie the tog into a knot on the front of bag. Take the knot at beg of plait and fasten the end to bag the same way but in the opposite side. Make another plait the same way - see photo. |
|||||||
Diagram explanations |
|||||||
|
|||||||
 |
|||||||
Have you finished this pattern?Tag your pictures with #dropspattern #santafebag or submit them to the #dropsfan gallery. Do you need help with this pattern?You'll find 7 tutorial videos, a Comments/Questions area and more by visiting the pattern on garnstudio.com. © 1982-2026 DROPS Design A/S. We reserve all rights. This document, including all its sub-sections, has copyrights. Read more about what you can do with our patterns at the bottom of each pattern on our site. |
|||||||


With over 40 years in knitting and crochet design, DROPS Design offers one of the most extensive collections of free patterns on the internet - translated to 17 languages. As of today we count 324 catalogues and 12267 patterns translated into English (UK/cm). 12267
We work hard to bring you the best knitting and crochet have to offer, inspiration and advice as well as great quality yarns at incredible prices! Would you like to use our patterns for other than personal use? You can read what you are allowed to do in the Copyright text at the bottom of all our patterns. Happy crafting!
Post a comment to pattern DROPS 173-1
We would love to hear what you have to say about this pattern!
If you want to leave a question, please make sure you select the correct category in the form below, to speed up the answering process. Required fields are marked *.