
Popular categories
Looking for a yarn?


|
||||||||||
Port Noir |
||||||||||
 |
 |
|||||||||
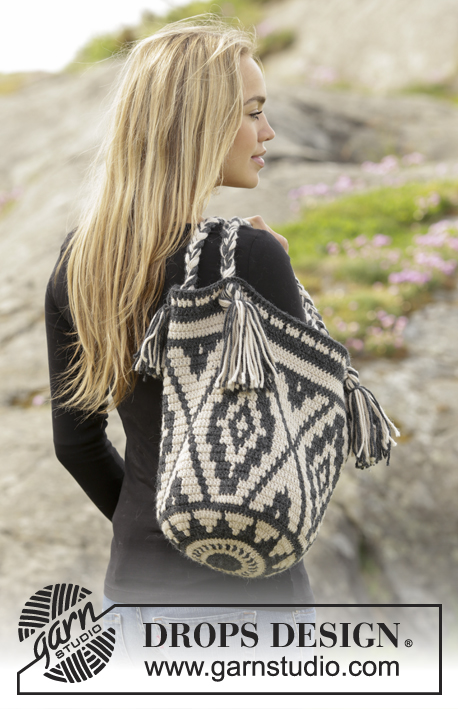
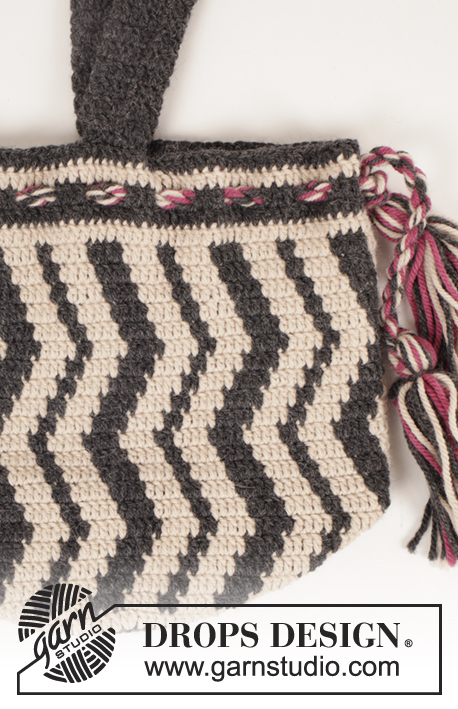
Crochet DROPS bag with colour pattern in ”Nepal”.
DROPS 173-54 |
||||||||||
|
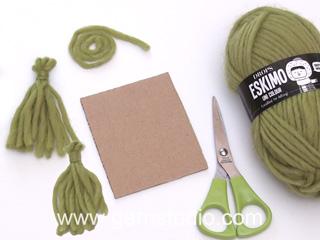
PATTERN: See diagrams A.1 and A.2. Diagrams show colours in pattern. 1 square = 1 tr. COLOUR PATTERN (worked in the round): When changing colour work as follows: Work last tr with first colour but wait with last pull through, switch to next colour and work last pull through, then work next tr. When working with two colours place strands for the colour not worked over sts from previous round, work around the strands so that they is hidden and follows in the round. CROCHET INFO: Replace first tr at beg of every round with 3 ch, finish round with 1 sl st in third ch. --------------------------------------------------------- BAG: Worked in the round. Work 5 ch with dark grey on hook size 3.5 mm and form a ring with 1 sl st in first ch. Then work in the round and according to A.1 (work 12 repetitions of A.1 in width) - READ COLOUR PATTERN. ROUND 1: Work 12 tr in ring – read CROCHET INFO. ROUND 2: Work 2 tr in every tr = 24 tr. ROUND 3: Work * 1 tr in first tr, 2 tr in next tr *, repeat from *-* the entire round = 36 tr. ROUND 4: Work * 1 tr in each of the first 2 tr, 2 tr in next tr *, repeat from *-* the entire round = 48 tr. REMEMBER THE CROCHET TENSION! ROUNDS 5-10: Continue with inc and pattern as before, i.e. on every round work 1 more tr between inc = 120 tr. ROUND 11: Then work in the round, but without inc and work according to A.2 (= 9 repetitions in width), AT THE SAME TIME on first round inc 6 sts evenly = 126 sts. On round with arrow work as follows: * 1 tr in each of the first/next 3 tr, 1 ch, skip 1 tr *, repeat from *-*. Continue until A.2 has been worked, fasten off. TWINED STRING: Cut 2 lengths of each colour of 2 meters = 6 strands. Twine the strands tog until they resist, fold the string double so that it twines again. Make a knot at each end. Thread tie up and down through the holes on bag. TASSELS: Cut 14 lengths in each colour, 32 cm each. Place them double and thread loop through end of tie. Twine one strand from the tassel around the top of tassel and fasten. Repeat in the other end of the twined string. STRAP: Work 16 ch with dark grey and form a ring with a sl st. Work 1 tr in every ch - replace first tr with 3 ch. Continue in the round with 1 tr in every tr until strap measures 80 cm. Fasten strap on each side of bag. |
||||||||||
Diagram explanations |
||||||||||
|
||||||||||

|
||||||||||
|
Have you made this or any other of our designs? Tag your pictures in social media with #dropsdesign so we can see them! Do you need help with this pattern?You'll find tutorial videos, a Comments/Questions area and more by visiting the pattern on garnstudio.com. © 1982-2024 DROPS Design A/S. We reserve all rights. This document, including all its sub-sections, has copyrights. Read more about what you can do with our patterns at the bottom of each pattern on our site. |
||||||||||


With over 40 years in knitting and crochet design, DROPS Design offers one of the most extensive collections of free patterns on the internet - translated to 17 languages. As of today we count 304 catalogues and 11422 patterns - 11422 of which are translated into English (UK/cm).
We work hard to bring you the best knitting and crochet have to offer, inspiration and advice as well as great quality yarns at incredible prices! Would you like to use our patterns for other than personal use? You can read what you are allowed to do in the Copyright text at the bottom of all our patterns. Happy crafting!
Comments / Questions (13)
Hi, Do you have a video or instructions on how to read the A.1 colour chart? Thanks.
06.06.2020 - 22:17Hallo,habe eine Frage zur Zunahme der 6 Maschen in der 11.Runde.Nehme ich dann jede 13.Masche zu. LG Dagmar
28.05.2020 - 07:13DROPS Design answered:
Liebe Frau Hellingrath, diese Zunahmen sollen regelmäßig verteilt gehäkelt, dh Sie werden in jede 20. Masche zunehmen 6 x in der Runde, so haben Sie 6 x 21 Stb = 126 Stb - hier lesen Sie mehr. Viel Spaß beim häkeln!
28.05.2020 - 08:45Forstår ikke hvordan jeg skal lave strop. Opskriften siger: Hækl 16 lm med mørk grå og sæt dem sammen til en ring med 1 km. Hækl 1 st i hver lm (første st erstattes af 3 lm). Fortsæt rundt med 1 st i hver st til stroppen måler 80 cm. Sy stroppen fast på hver side af tasken. ? Stroppen skal vel ikke laves i en ring?
28.12.2019 - 22:04DROPS Design answered:
Hei Jane. Stroppen hekles som en lang tynn"pølse" /hekles rundt (for å få en dobbelt stropp). Se gjerne videoen under oppskriften: Hækl rundt med stangm. Når "pølsen" måler 80 cm, festes hver ende i "pølsen" på hver side av vesken. God Fornøyelse!
20.01.2020 - 11:17HI there! i was just in the Crochet Addict group on FB and one of the members is trying to make this bag. the instructions are a little confusing. it states "COLOR PATTERN (worked in the round)" then in the next section of instructions it says: "CROCHET INFO: Replace first dc at beg of every round with ch 3, finish round with 1 sl st in third ch." both cannot be true or done.
25.04.2019 - 07:57DROPS Design answered:
Dear MzHolliWudKitti , the COLOR PATTERN explains how to change colour on the same round (= when crocheting A.1 and A.2), and CROCHET INFO explains how to start the round, both are working together, when working the diagrams in the round, start each round with 3 chain stitches to replace first dc (change color if necessary - see diagram), then work color pattern changing color as explained. See also bideo below. Happy crocheting!
25.04.2019 - 09:36He seguido el patrón como indica y me queda la base muy pequeña, de 17 cm de diámetro. Cómo puedo hacer para q quede más grande? Uso una aguja de 3,5. Gracias
03.09.2018 - 16:44DROPS Design answered:
Hola Marian, en este caso puedes usar un tamaño de aguja más grande, es decir, de 4 mm o puedes seguir trabajando los aumentos hasta llegar al tamaño deseado.
09.09.2018 - 18:39Please explain how to make the straps. Not understanding innthe round to make straps.
08.08.2017 - 07:19DROPS Design answered:
Dear Tammie, the strap is worked in the round (like a tube) to be more stiff. It shouldn't stretch. HAPPY CROCHETING!
08.08.2017 - 08:29J'adore ce petit sac très séduisant!
28.06.2016 - 19:31Cute bag!
12.06.2016 - 01:44This is sooo cool!
09.06.2016 - 00:25Adoro e vou fazer
07.06.2016 - 23:01