
Popular categories
Looking for a yarn?


Comments / Questions (73)
![]() Dorrit Liin Hansen wrote:
Dorrit Liin Hansen wrote:
Hej igen. Tusind tak for det gode svar.Dejligt at få det forklaret på en enkel måde😄
05.07.2016 - 23:21
![]() Dorrit Liin Hansen wrote:
Dorrit Liin Hansen wrote:
Hejsa. Når jeg starter på diagram A2 og der står at der skal sluttes med den første maske i A2 (. Inden kanten ) må det vel betyde at jeg også skal lægge en maske til, når jeg strikker tilbage ? Hvorfor er det ikke tegnet ind i diagrammet? Mvh Dorrit
03.07.2016 - 23:25DROPS Design answered:
Hej Dorrit. Nej, det er ikke saadan det skal forstaas. Du har til sidst en maske til overs naar du har strikket hele pinden med A.2 og du strikker den maske som förste maske i diagrammet (ret eller vrang afhaengig hvor du er i diagrammet)
05.07.2016 - 14:23
![]() Cristina wrote:
Cristina wrote:
Hola, el patron es muy bonito pero me está costando bastanta. En la talla S dice que hay que coger 89 puntos. Se tejen 5 en punto musgo al principio y al final. Quetan 79 para A1. Pero como es numero impar en la quinta vuelta, la de los calados, como los puntos van de 2 en 2 queda uno suelto al final que no se como tejer. Un saludo
29.06.2016 - 20:34DROPS Design answered:
Hola Cristina. El pt que no entra en el patrón se trabaja en pt jersey.
05.07.2016 - 09:11
![]() Mercedes wrote:
Mercedes wrote:
Para Filippa: Los 245 pts se distribuyen así: 5 musgo, A3 (1 vez), A4 (11 veces),A5 (1 vez) y 5 musgo. Continuar las 13 vueltas con sus aumentos hasta 284 puntos. Saudos.
30.05.2016 - 11:25
![]() Filipa Pontes wrote:
Filipa Pontes wrote:
Boa tarde. No que se refere a este modelo, existe um erro que impede de se poder fazer a camisola. O modelo encontra-se correto até termos A2 todo feito com 245 malhas (isto no tamanho s). A partir daqui é impossível continuar para A3 (11 vezes), A4 e A5. Esta sequência não tem qualquer correspondência com as malhas anteriores. Fiquei triste. Fiz e desfiz três vezes.... Espero que corrijam o diagrama, pois gostaria muito de fazer a camisola. Com os melhores cumprimentos, Filipa
24.04.2016 - 23:16
![]() Mercedes wrote:
Mercedes wrote:
Buenos días, puedo interpretar que cada cuadradito del diagrama se refiere a dos vueltas, es decir vuelta del derecho y vuelta del revés. Ejemplo: A1 se completaría con 20 vueltas (10 derecho, 10 revés Gracias. Disculpen por haber enviado preguntas a comentarios. ;)
23.04.2016 - 15:17DROPS Design answered:
Hola Mercedes, cada cuadrado del diagrama es una fila. Si trabajamos de ida y vta (no en redondo) las filas impares se leen de derecha a izquierda y las filas pares de izquierda a derecha. Si trabajamos en redondo todas las filas se leen de derecha a izquierda. Atención todos los diagramas muestran el patrón visto por el LD. En este caso A.1 tiene 10 filas/vueltas, 5 de derecho y 5 de revés en lugar de esas 20 que indicas
26.04.2016 - 12:14
![]() Mercedes wrote:
Mercedes wrote:
Como complemento a mi pregunta de ayer, puedo interpretar que cada cuadradito del diagrama se refiere a dos vueltas, es decir vuelta del derecho y vuelta del revés. Gracias
22.04.2016 - 18:23
![]() Mercedes wrote:
Mercedes wrote:
Las instrucciones dicen: "Los diagramas muestran todas las filas del patrón visto por el LD. "; es decir que el diagrama A2 consta de 48 vueltas? .i.e. 1a vta 6 pts derecho, 2a vuelta (del reves) 2pts derechos, 1pt reves y 3pts derechos; 3a vuelta ( del derecho)6 pts derecho, y asi las siguiente vueltas?. Muchas gracias por su ayuda.
22.04.2016 - 00:40
![]() Kinga wrote:
Kinga wrote:
So my question is? What does it mean in the description A2 = 6 s. and how come I repeat it 15 times in my case? When do I increase? I know a little about knitting, but this particular description is very hard to figure it out! Can you help me? Thanks!
13.04.2016 - 23:58Kinga answered:
Never mind, I think, I figure it out!
14.04.2016 - 00:28
![]() Rosanna wrote:
Rosanna wrote:
Cosa vuol dire finire con la prima maglia in A2? Non riesco a capire. Grazie
13.04.2016 - 00:44DROPS Design answered:
Buongiorno Rosanna. Vuol dire che deve lavorare la m come indicato per la prima m del diagramma A2. E' come se lavorasse un'altra ripetizione del diagramma, ma solo sulla prima m. Buon lavoro!
13.04.2016 - 06:34
|
||||||||||||||||||||||
Summer Leaves Top#summerleavestop |
||||||||||||||||||||||
|
|
||||||||||||||||||||||
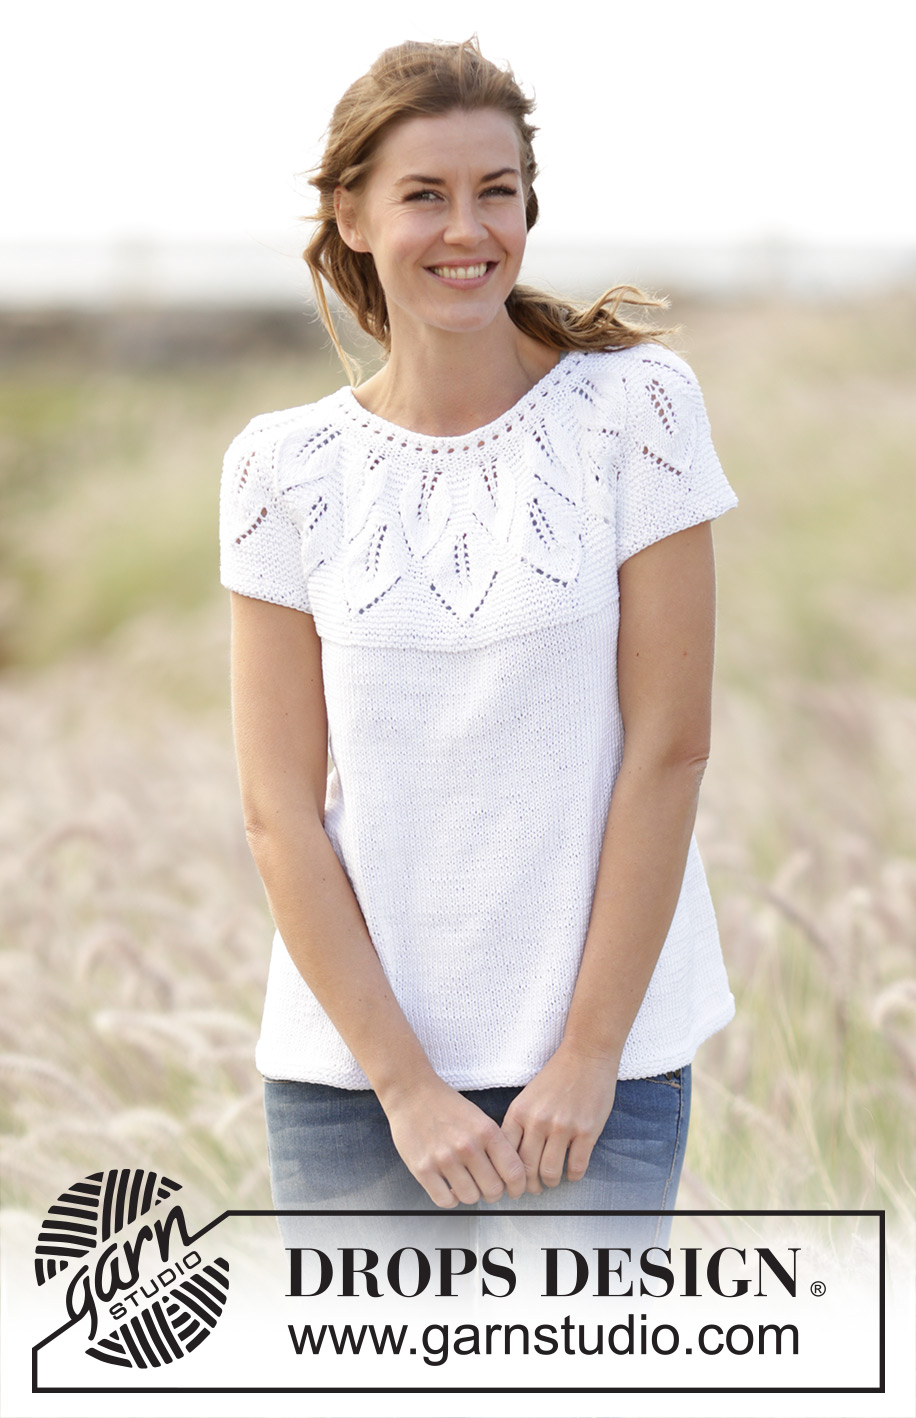
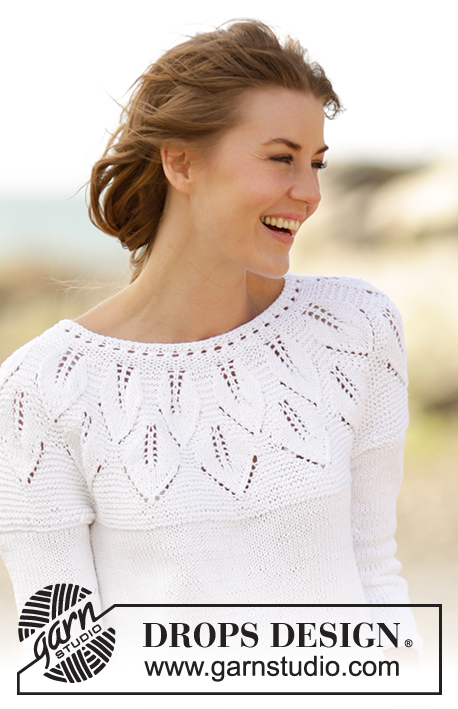
Knitted DROPS top with leaf pattern, ridges, round yoke and short sleeves, worked top down in ”Muskat”. Size S-XXXL.
DROPS 170-27 |
||||||||||||||||||||||
|
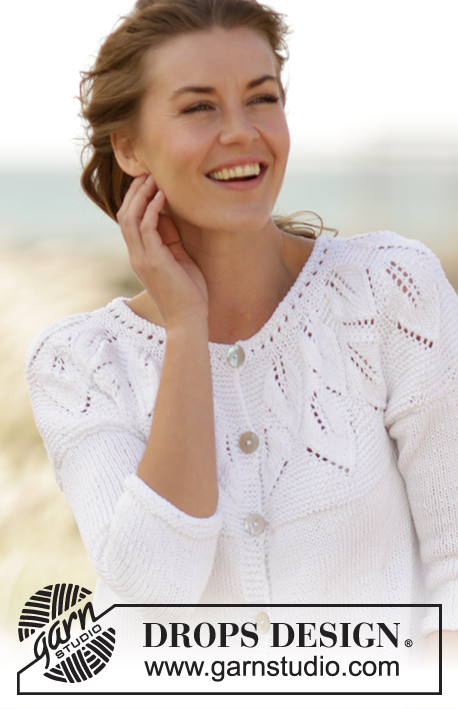
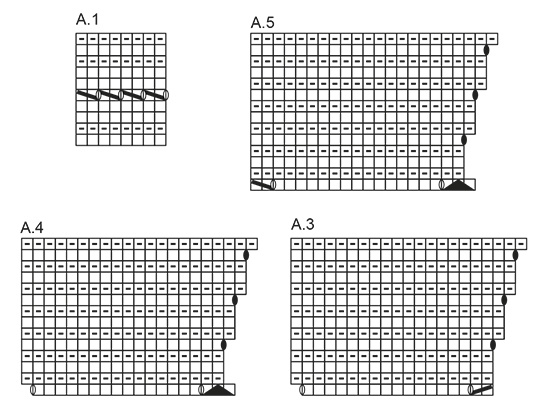
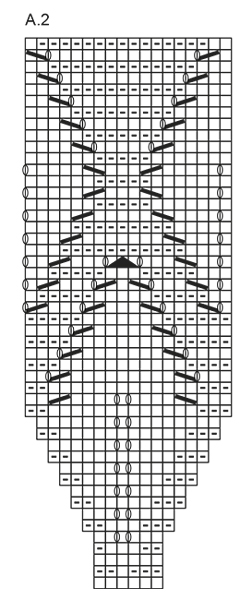
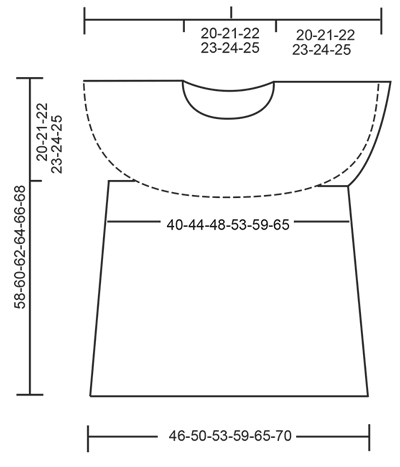
GARTER ST (back and forth): K all rows. 1 ridge = 2 rows K. GARTER ST (worked in the round): 1 ridge = 2 rounds. * K 1 round and P 1 round *, repeat from *-*. PATTERN: See diagrams A.1 to A.5. The diagrams show all rows in pattern seen from RS. BUTTONHOLES: Dec for buttonhole on band at the end of row seen from RS. Work until 4 sts remain. Make 1 YO, K the next 2 sts tog, work the last 2 sts on row. Dec for buttonholes when piece measures (from cast-on edge and along the band): SIZE S: 2, 8, 14 and 19 cm SIZE M: 2, 8, 14 and 20 cm. SIZE L: 2, 8, 14 and 21 cm. SIZE XL: 2, 8, 15 and 22 cm. SIZE XXL: 2, 9, 16 and 23 cm. SIZE XXXL: 2, 9, 16 and 24 cm. ---------------------------------------------------------- TOP: The piece is worked top down. Yoke is worked back and forth on circular needle with button band on the back, then work the body in the round. YOKE: Cast on 89-95-101-113-125-131 sts on circular needle size 3.5 mm with Muskat. Cast off for BUTTON HOLES mid back - see explanation above. Work 5 sts in GARTER ST - see explanation above (= band), A.1 until 5 sts remain, 5 sts in garter st (= band). When A.1 has been worked 1 time vertically, continue as follows: 5 sts in garter st, A.2 (= 6 sts), repeat A.2 13-14-15-17-19-20 times in total, finish with first st in A.2 (so that pattern is the same in each side), finish with 5 sts in garter st. REMEMBER THE KNITTING TENSION When A.2 has been worked 1 time vertically, there are 245-263-281-317-353-371 sts on needle. Then work as follows: 5 sts in garter st, A.3 (= 17 sts), repeat A.4 11-12-13-15-17-18 times, A.5 (= 20 sts) and 5 sts in garter st. When A.3-A.5 have been worked 1 time vertically, there are 284-305-326-368-410-431 sts on needle. Continue in garter st until piece measures 20-21-22-23-24-25 cm, on last row from WS adjust no of sts to 283-307-331-365-397-429. Continue to work as follows (from RS): Cast off the first 5 sts, work the first 39-43-47-53-59-65 sts (= half back piece), slip the next 61-65-69-74-78-82 sts on a stitch holder (= sleeve), cast on 6 new sts under sleeve, work the next 78-86-94-106-118-130 sts (= front piece), slip the next 61-65-69-74-78-82 sts on a stitch holder (= sleeve), cast on 6 new sts under sleeve, work the remaining 39-43-47-53-59-65 sts (= half back piece). BODY: There are now 168-184-200-224-248-272 sts for body. Insert a marker in each side of body where new sts were cast on under sleeve (= 3 new sts on each side of marker). NOW MEASURE THE PIECE FROM HERE. Switch to circular needle size 4 mm. Continue with stocking st, now work in the round. When piece measures 4 cm, inc 1 st on each side of each marker (= 4 sts inc). Repeat inc every 5-5-5-6-6-6 cm 5 more times = 192-208-224-248-272-296 sts. Continue in stocking st until piece measures 34-35-36-37-38-39 cm, switch to circular needle size 3.5 mm and work 3 ridges in GARTER ST - see explanation above. Cast off. The whole piece measures approx. 58-60-62-64-66-68 cm. SLEEVE EDGE: Slip sts from stitch holder back on double pointed needles size 3.5 mm (= 61-65-69-74-78-82 sts). Pick up 1 st in each of the 6 sts cast on under sleeve = 67-71-75-80-84-88 sts. Work 2 ridges in GARTER ST – see explanation above, then cast off. ASSEMBLY: Place band without buttonholes under band with buttonholes and fasten the bottom band. Sew on buttons. |
||||||||||||||||||||||
Diagram explanations |
||||||||||||||||||||||
|
||||||||||||||||||||||
 |
||||||||||||||||||||||
 |
||||||||||||||||||||||
 |
||||||||||||||||||||||
Have you finished this pattern?Tag your pictures with #dropspattern #summerleavestop or submit them to the #dropsfan gallery. Do you need help with this pattern?You'll find 28 tutorial videos, a Comments/Questions area and more by visiting the pattern on garnstudio.com. © 1982-2026 DROPS Design A/S. We reserve all rights. This document, including all its sub-sections, has copyrights. Read more about what you can do with our patterns at the bottom of each pattern on our site. |
||||||||||||||||||||||


With over 40 years in knitting and crochet design, DROPS Design offers one of the most extensive collections of free patterns on the internet - translated to 17 languages. As of today we count 324 catalogues and 12245 patterns translated into English (UK/cm). 12245
We work hard to bring you the best knitting and crochet have to offer, inspiration and advice as well as great quality yarns at incredible prices! Would you like to use our patterns for other than personal use? You can read what you are allowed to do in the Copyright text at the bottom of all our patterns. Happy crafting!
Post a comment to pattern DROPS 170-27
We would love to hear what you have to say about this pattern!
If you want to leave a question, please make sure you select the correct category in the form below, to speed up the answering process. Required fields are marked *.