
Popular categories
Looking for a yarn?


Comments / Questions (10)
![]() ROBYN ROBERTS wrote:
ROBYN ROBERTS wrote:
What alternative yarn can I use for this pattern as DROPS FRUTTI seems to not be on the yarn list. The pattern doe not give a yarn group or strand number.
05.10.2025 - 15:08DROPS Design answered:
Dear Robyn, DROPS Frutti has been discontinued. It was a group D yarn, Weight/length: 50 g = approx 90 m. You could look for a replacement in this link . However, since this yarn has a special effect it will be difficult to replicate. You could for example work with 1 thread of DROPS Fiesta and 1 thread of Brushed Alpaca Silk, to get a hairy effect and a similar gauge. Happy knitting!
05.10.2025 - 17:39
![]() Heike Hindmarsh-Brinker wrote:
Heike Hindmarsh-Brinker wrote:
Hallo liebes Drops-Team, in der Anleitung für die Ärmel steht, dass man UNTER dem Ärmel abnehmen soll. Aber ich habe bis dahin doch nur die Maschen für die Ärmel auf den Nadeln, oder ? Damit gibt es doch kein UNTER. Ist damit am Rand gemeint? Vielen Dank im Voraus
12.02.2023 - 14:25DROPS Design answered:
Liebe Frau Hindmarsh-Brinker, die Ärmel werden in Runden auf Nadelspiel gestrickt, so wird es am Anfang + am Ende der Runde (= unter dem Ärmel) zugenommen. Viel Spaß beim stricken!
13.02.2023 - 09:58
![]() Martina wrote:
Martina wrote:
Is there any way you can prevent the garter st at the beginning from rolling up? Thank you!
27.10.2020 - 15:08DROPS Design answered:
Dear Martina, you can block the jumper at the very end, moisten it and let it dry flat. Happy knitting!
27.10.2020 - 16:20
![]() Dorine Vermeire wrote:
Dorine Vermeire wrote:
Welke wol kan ik gebruiken ter vervanging van drops frutti nr 02
30.05.2020 - 13:14DROPS Design answered:
Dag Dorine,
Frutti valt in garengroep D. Je zou 2 draden uit garengroep B samen kunnen breien om op een gelijke stekenverhouding te komen, maar er zijn meer garncombinaties mogelijk, zie deze link. Je zou dan bijv. 2 draden muskat kunnen nemen. Om de kleurnuance na te bootsen kun je ietwat verschillende kleuren nemen, bijvoorbeeld rood en oranje.
31.05.2020 - 10:13
![]() Sylvie Gagnon wrote:
Sylvie Gagnon wrote:
Merci et bonne journée 😉
11.02.2020 - 16:23
![]() Sylvie Gagnon wrote:
Sylvie Gagnon wrote:
Les instructions pour le raglan est avant le marqueur......et après le marqueur que fait-on ??? Merci
07.02.2020 - 21:45DROPS Design answered:
Bonjour Mme Gagnon, on diminue de chaque côté du marqueur en commençant 2 mailles avant le marqueur et en tricotant ainsi: 2 m ens à l'end (les 2 m avant le marqueur), on glisse le marqueur, puis on glisse 1 m à l'end, on tricote 1 m end, et on passe la m glissée par-dessus la m tricotée = on a diminué 1 m avant + 1 m après le marqueur. Bon tricot!
10.02.2020 - 07:43
![]() Christine wrote:
Christine wrote:
I found this pattern too difficult for me and pulled at all back !! I now have chosen a lovely pattern for my granddaughter, CONFETTI SUNRISE. Will the yarn I bought for Cross My Heart be alright? The site did not suggest any alternative at all and the Swatch I have knitted is clearly showing that the yarn is wrong . Now what? Please help.
05.02.2020 - 16:35
![]() Marianne Nielsen wrote:
Marianne Nielsen wrote:
Jeg har slået 39 m (str. 13/14 år) op til ærmer på en 40 cm rundpind, da jeg går ud fra at en ærmepind er en rundpind - er det rigtigt forstået? Problemet er, at 39 m på 40 cm rundpind ikke kan nå sammen, når jeg skal til at strikke rundt. Desuden skal der tages masker ind efter de to første pinde, så der bliver endnu færre masker på pinden. Jeg har brug for et godt råd. venlig hilsen Marianne Nielsen
16.03.2016 - 16:38DROPS Design answered:
Hej Marianne, Du er nok nødt til at bruge strømpepinde hvis du vil strikke rundt ifølge opskriften. God fornøjelse!
30.03.2016 - 14:37
![]() Christina Frederiksen wrote:
Christina Frederiksen wrote:
Hej Jeg forstår ikke helt hvordan jeg skal forsætte når jeg sætter de 12 masker på tråd til hals. Skal jeg derefter strikke frem og tilbage rundt på de resterende og tage ind i hver ende? Mvh Christina
21.10.2013 - 16:19DROPS Design answered:
Hej Christina. Ja, du strikker frem og tilbage på de masker der er tilbage udover de 12 m midt for. Derudover lukker du af på hver side af de 12 m som beskrevet.
21.10.2013 - 16:42
![]() Kristine wrote:
Kristine wrote:
Hallo, In der Anleitung für den Ärmel steht, man soll gleich nach der 1. Krausrippe 8M abketten, bevor man das Bündchen strickt und danach wieder gleichmäßig zunimmt. Ausserdem haben die Ärmel oben, kurz bevor sie mit dem Körper zusammengestrickt werden, nur 39M (Gr. 134/140). Das kommt mir sehr schmal vor, da man am Armbündchen bereits mit 35M beginnt. Stimmen diese Angaben? Danke und viele Grüße
18.05.2013 - 13:47DROPS Design answered:
Liebe Kristine, die 8 M werden über die Reihe verteilt abgenommen, nicht abgekettet, das wurde damals schlecht übersetzt, wir ändern es gleich. Die 39 M bei Gr. 134/140 entsprechen 30 cm (bei einer Maschenprobe von 13 M = 10 cm), das ist sollte genügen für einen Kinderpullover.
21.05.2013 - 10:45
|
|
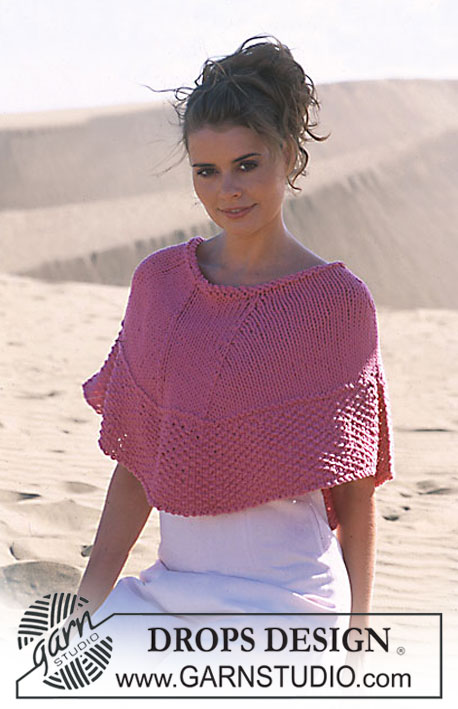
Confetti Sunset |
|
 |
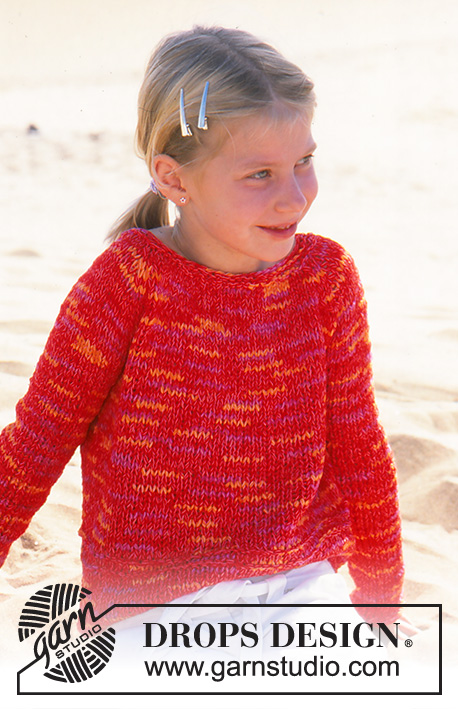 |
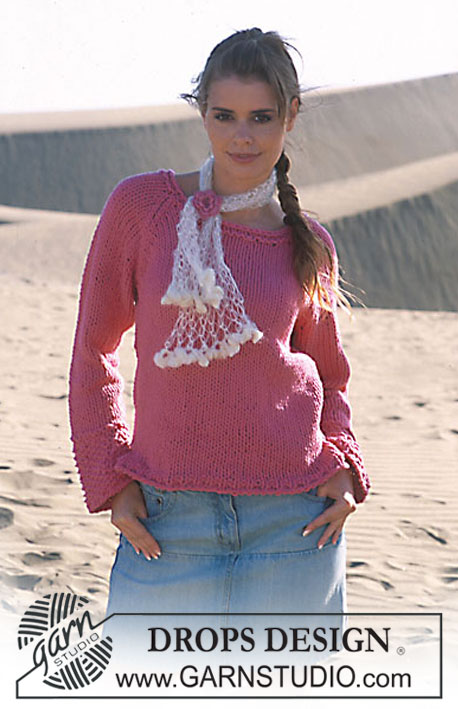
DROPS Girl’s Pullover in Frutti
DROPS 89-11 |
|
|
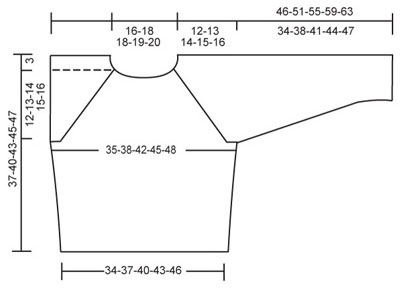
Gauge: 13 sts x 17 rows in stockinette st = 10 x 10 cm. Knitting tips (for raglan): Dec as follows in each transition between sleeve, front and back (start 2 sts before the marker): K 2 tog, slip 1 st as if to knit, K 1, psso. Knitting tip: If your row gauge is not correct, you will need to adjust. If your gauge is too tight, knit more rows between decs. If your gauge is too loose, make decs more frequently. Body: Cast on 88-96-104-112-120 sts; join and place a marker at the join. Knit 2 rows garter st, then knit stockinette st – place a marker at each side. When the piece measures 7-8-8-8-9 cm, P 1 row, then K 2 rows and P 1 row, then continue in stockinette st again. When the piece measures 16 cm inc 1 st at each side of each marker = 92-100-108-116-124 sts. When the piece measures 22-24-26-27-28 cm bind off 3-3-4-4-4 sts at each side of each marker for armholes = 40-44-46-50-54 sts remain on front and back. Lay piece aside and knit the sleeves. Sleeve: Cast on 29-32-35-36-39 sts on double-pointed needles; join and place a marker at the join. K 1 row, P 1 row. Then knit stockinette st, decreasing 6-7-8-9-10 sts evenly distributed on the 1st row = 23-25-27-27-29 sts. When the piece measures 7 cm inc 1 st each side of marker every 6-7-6-5.5-6 cm a total of 5-5-6-7-7 times = 33-35-39-41-43 sts. When sleeve measures 34-38-41-44-47 cm bind off 3-3-4-4-4 sts at each side of marker= 27-29-31-33-35 sts. Lay piece aside and knit 2nd sleeve. Yoke: Put the sleeves in on the same circular needles as body where you bound off for armholes = 134-146-154-166-178 sts. Put 1 marker in each transition between front, back and the sleeve (= 4 markers). Knit 1-1-1-1-0 row before beginning shaping. Read the entire next section before knitting: Raglan shaping: Dec 1 st at each side of all markers (= 8 decs per row) every other row – see knitting tips above – 10-11-12-13-14 times. Neck: When the piece measures 29-32-34-36-37 cm put the center front 12 sts on a st holder for the neck, then bind off at each neck edge every other row: 2 sts 1 time and 1 st 1-1-2-2-2 times. After all raglan and neck shaping is complete 36-40-38-42-46 sts remain on needles. Neckband: Pick up 18-22 sts (incl. sts from st holder) in front neck and put all sts on double-pointed needles = approx. 54-68 sts. P 1 row, then K 1 row decreasing to 47-47-51-51-52 sts. P 1 row and then K and bind off loosely on the next row. Assembly: Sew opening under the sleeve. |
|
 |
|
Have you finished this pattern?Tag your pictures with #dropspattern or submit them to the #dropsfan gallery. Do you need help with this pattern?You'll find 21 tutorial videos, a Comments/Questions area and more by visiting the pattern on garnstudio.com. © 1982-2026 DROPS Design A/S. We reserve all rights. This document, including all its sub-sections, has copyrights. Read more about what you can do with our patterns at the bottom of each pattern on our site. |
|


With over 40 years in knitting and crochet design, DROPS Design offers one of the most extensive collections of free patterns on the internet - translated to 17 languages. As of today we count 325 catalogues and 12298 patterns translated into English (UK/cm). 12298
We work hard to bring you the best knitting and crochet have to offer, inspiration and advice as well as great quality yarns at incredible prices! Would you like to use our patterns for other than personal use? You can read what you are allowed to do in the Copyright text at the bottom of all our patterns. Happy crafting!
Post a comment to pattern DROPS 89-11
We would love to hear what you have to say about this pattern!
If you want to leave a question, please make sure you select the correct category in the form below, to speed up the answering process. Required fields are marked *.