
Popular categories
Looking for a yarn?


Comments / Questions (91)
![]() Carrera Fiorella wrote:
Carrera Fiorella wrote:
Per favore non mi è chiaro nel dietro e davanti’ quando il lavoro misura 10 e 20 centimetri ‘ diminuire 1/2 ripetizioni per lato (dietro) e quando il lavoro misura 15 e 25 cm ecc.
09.09.2020 - 16:30DROPS Design answered:
Buongiorno Fiorella. Per diminuire una mezza ripetizione, deve lavorare 3 maglie bassissime sulle prime tre m della riga e finire la riga 3 maglie prima. La penultima riga del diagramma X.2 può aiutare a capire meglio come lavorare. Buon lavoro!
10.09.2020 - 16:30
![]() Sylvaine wrote:
Sylvaine wrote:
Pour faire l'arrondi de la manche, à la fin i faut diminuer 6 fois tous les rangs 7 rapports donc 42 rapports. Ce n'est pas possible puisque l'on avait que 17 rapports en début de diminutions. Je n'y comprends rien. Merci de m'aider.
02.08.2020 - 17:31DROPS Design answered:
Bonjour Sylvaine, on diminue d'abord un rapport entier de chaque côté puis 1/2 rapport seulement de chaque côté. Autrement dit, 17 rapports = 1 de chaque côté = 15 - 2 x 1/2 rapport (= - 1 de chaque côté soit - 2) = 13 - 6 fois 1/2 rapport = 3 rapports entiers de chaque côté, 13-6=7 rapports. Bon crochet!
03.08.2020 - 08:23
![]() Agnes A wrote:
Agnes A wrote:
C'est quoi un rapport ? c'est un rang ?
06.04.2019 - 13:02DROPS Design answered:
Bonnjour Agnes! M.1 représente 3 rapports en largeur et 1 rapport en hauteur. Donc un rapport est un tiers de M.1. Bon crochet!
06.04.2019 - 18:01
![]() Karin wrote:
Karin wrote:
Varför ska det maskas av vid 10 och 20 cm på bakstycket och vid 15 och 25 cm på framstyckena?
04.01.2019 - 19:52DROPS Design answered:
Hei Karin. Du minsker like mange masker på for og bakstykket, men minskningnen gjøres på forskjellige lengder slik at det blir en jevnere overgang. Du minsker altså ferre masker flere ganger, isteden for mange masker få ganger. God fornøyelse.
09.01.2019 - 10:19
![]() Linda wrote:
Linda wrote:
Hello. My question is for the back piece "Work 1 more row, cut and fasten the thread, the piece measures approx. 54-56-58-60-62-64 cm / 21¼''-22''-22¾''-23 5/8''-24 3/8''-25¼''." Is one row considered as 1) one row of dc/bunched dc OR 2) both dc and bunch dc rows?
14.05.2018 - 09:58DROPS Design answered:
Dear Linda, this will be the 2nd row worked on shoulder, ie you will work 2 more rows over the sts on shoulder than on the middle sts for neck. Happy crocheting!
14.05.2018 - 11:22
![]() Camilla wrote:
Camilla wrote:
Hei. Ser at begge forstykkene skal hekles like, skulle ikke disse vært speilvendt av hverandre? Rett og vrangsiden ser jo veldig forskjellig ut....
16.01.2018 - 22:02DROPS Design answered:
Hei Camilla. Her at det nok blitt vurdert slik at siden man hekler frem og tilbake og med garn fra garngruppe A (tynt garn), så er ikke forskjellen fra rett og vrang så stor. Men om du ønsker å ha det helt likt, kan du fint hekle det andre forstykket speilvendt. God Fornøyelse!
17.01.2018 - 08:42
![]() Monica Guimarães De Carvalho wrote:
Monica Guimarães De Carvalho wrote:
Olá, gostaria de saber para que serve fazer 1/2 diminuição nas costas em 10 cm e 20 cm?
02.06.2017 - 21:21DROPS Design answered:
O casaco tem uma forma em A. As diminuições são feitas para lhe dar essa forma. Bom croché!
06.06.2017 - 13:24
![]() Francesca wrote:
Francesca wrote:
Mi consigliate un filato in cotone per realizzare questa giacca? Grazie
14.02.2017 - 15:31DROPS Design answered:
Buongiorno Francesca. Può usare i cotoni Safran, Drops Loves You 6 (controlli la disponibilità presso il rivenditore), Drops Loves You 7, anch’essi del gruppo A come il filato Alpaca. Alla seguente pagina trova le indicazioni per sostituire correttamente i filati. Verifichi sempre di ottenere lo stesso campione indicato nelle spiegazioni. Buon lavoro!
14.02.2017 - 16:04
![]() Raquel wrote:
Raquel wrote:
Estoy haciendo el delantero derecho y no entiendo eso de empezar a partir del centro del frente y trabajar hacia el lado. Que tengo que ir tejiéndo directamente con la espalda o cómo y si cuando mida 15 cm que tengo que disminuir de un lado o ambos como en la espalda. Gracias
25.04.2016 - 17:38DROPS Design answered:
Hola Raquel, el centro del frente se refiere a la parte de las cenefas, donde se abotona la chaqueta. Los delanteros y la espalda se trabajan por separado pero la espalda nos sirve de referencia para trabajar el delantero. Ten en cuenta que trabajamos 2 delanteros con lo cual las dism se trabajan solo a un lado en este caso y no como en la espalda.
26.04.2016 - 12:21
![]() Raquel wrote:
Raquel wrote:
Estoy haciendo el delantero derecho y no entiendo eso de empezar a partir del centro del frente y trabajar hacia el lado. Que tengo que ir tejiéndo directamente con la espalda o cómo y si cuando mida 15 cm que tengo que disminuir de un lado o ambos como en la espalda. Gracias
25.04.2016 - 17:29DROPS Design answered:
ver respuesta arriba
26.04.2016 - 12:23
|
||||||||||
Whispers#whisperscardigan |
||||||||||
 |
 |
|||||||||
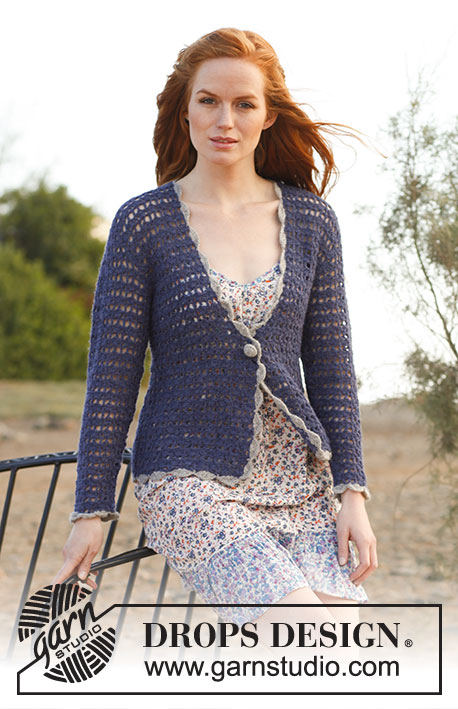
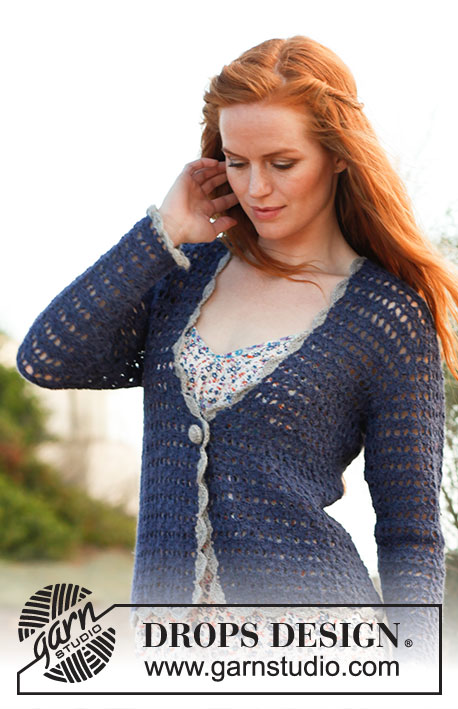
Crochet DROPS jacket in ”Alpaca”. Size: S - XXXL.
DROPS 136-13 |
||||||||||
|
CROCHET INFO: Replace first tr at beg of row with 3 ch. PATTERN: See diagram M.1. Repeat row 1 and 2. M.1 shows 3 repeats in width and 1 repeat in height. MEASURING TIP: The garment will be longer because of pattern. All measurements must therefore be done while holding up the garment. DECREASE TIP: Dec 1 repetition in diagram X.1, or ½ repetition in diagram X.2. Dec at beg of row as follows: Replace 1 repetition with 6 sl st and ½ repetition with 3 sl st. Dec at end of row as follows: Turn piece when either 1 or ½ repetition remains. INCREASE TIP (applies to sleeve): Inc ½ repetition. Inc by turning with 6/7 ch instead of 3, see diagram X.3. -------------------------------------------------------- -------------------------------------------------------- BACK PIECE: Work 120-132-144-156-168-180 ch (incl 8 ch to turn with) on hook size 3.5 mm with blue. Work 1 tr in the 9th ch from hook, * 2 ch, skip 2 ch, 1 tr in next ch *, repeat from *-* = 39-43-47-51-55-59 tr. Continue to work diagram M.1 (1st row is now done, beg on 2nd row) = 19-21-23-25-27-29 repetitions. When piece measures 10 and 20 cm - Read MEASURING TIP, dec ½ repetition in each side – read DECREASE TIP and see diagram X.2 = 17-19-21-23-25-27 repetitions. When piece measures 35-36-37-38-39-40 cm, dec for armholes in each side on every row as follows: 1 repetition 1-1-2-2-2-2 times, then ½ repetitions 0-2-2-2-4-4 times = 15-15-15-17-17-19 repetitions. When piece measures 52-54-56-58-60-62 cm, work 1 row only over the outermost 6-6-6-6-6-7 repetitions in each side (do not work over the middle 3-3-3-5-5-5 repetitions = neck line). Work 1 more row, cut and fasten the thread, the piece measures approx. 54-56-58-60-62-64 cm. RIGHT FRONT PIECE: READ ALL OF THE FOLLOWING SECTION BEFORE CONTINUING! Work 66-72-78-84-90-96 ch (incl 8 ch to turn with) on hook size 3.5 mm with blue. Beg from mid front and work towards the side. Work 1 tr in the 9th ch from hook, * 2 ch, skip 2 ch, 1 tr in next ch *, repeat from *-* = 21-23-25-27-29-31 tr. Continue to work diagram M.1 (1st row is now done, beg on 2nd row) = 10-11-12-13-14-15 repetitions. When piece measures 15 and 25 cm, dec in the side as on back piece. AT THE SAME TIME when piece measures 23-24-25-26-27-28 cm, dec for neck on every other row towards mid front as follows: Dec ½ repetition 4-4-4-6-6-6 times. AT THE SAME TIME when piece measures 35-36-37-38-39-40 cm, dec for armhole in the side as on back piece. After all dec, 6-6-6-6-6-7 repetitions remain for shoulder. Work until piece measures 54-56-58-60-62-64 cm, cut and fasten the thread. LEFT FRONT PIECE: Work as right front piece. SLEEVE: Work 60-60-66-66-72-72 ch (incl 8 ch to turn with) on hook size 3.5 mm with blue. Work 1 tr in the 9th ch from hook, * 2 ch, skip 2 ch, 1 tr in next ch *, repeat from *-* = 19-19-21-21-23-23 tr. Continue to work diagram M.1 (1st row is now done, beg on 2nd row) = 9-9-10-10-11-11 repetitions. When piece measures 6 cm, inc ½ repetition in each side, repeat inc every 12-7-7-7-7-7 cm 3-5-5-5-5-5 more times - read INCREASE TIP = 13-15-16-16-17-17 repetitions. When piece measures 48-47-47-46-46-45 cm (shorter measurements in the larger sizes because of longer sleeve cap and broader shoulder width) dec 1 repetition in each side for sleeve cap. Then dec ½ repetition in each side on every other row a total of 0-0-0-0-2-2 times, then on every row 6-7-8-8-6-6 times = 5-6-6-6-7-7 repetitions. Work until piece measures 57-57-58-58-59-59 cm, cut and fasten the thread. ASSEMBLY: Sew the shoulder seams. Sew in sleeves. Sew sleeve and side seams in one - sew edge to edge with neat, little stitches. CROCHET EDGE: Work an edge on hook size 3.5 mm with light grey up along right front piece, around the neckline, down along left front piece, around the bottom edge and then around the sleeves as follows: Work 1 dc, * skip 2 cm, 4 dtr in next ch, 2 ch, 4 dtr in same st, skip 2 cm, 1 dc in next st *, repeat from *-* and finish with one sl st in first dc. BUTTON COVER: Work cover for 1 button on hook size 3.5 mm with light grey as follows: Work 2 ch, then work 16 tr in the first of the 2 ch worked, finish with 1 sl st at top of first tr (= 1ST ROUND). ROUND 2: Work 1 dc in every tr and finish with 1 sl st in first dc on round. ROUND 3: Work 1 tr in every other dc and finish with 1 sl st in first tr on round = 8 tr. Place button inside the cover, sew around the edge and tighten tog. Sew button on to left front piece, directly before neck dec beg. Use holes in the pattern as button hole. |
||||||||||
Diagram explanations |
||||||||||
|
||||||||||
 |
||||||||||
 |
||||||||||
Have you finished this pattern?Tag your pictures with #dropspattern #whisperscardigan or submit them to the #dropsfan gallery. Do you need help with this pattern?You'll find 6 tutorial videos, a Comments/Questions area and more by visiting the pattern on garnstudio.com. © 1982-2026 DROPS Design A/S. We reserve all rights. This document, including all its sub-sections, has copyrights. Read more about what you can do with our patterns at the bottom of each pattern on our site. |
||||||||||


With over 40 years in knitting and crochet design, DROPS Design offers one of the most extensive collections of free patterns on the internet - translated to 17 languages. As of today we count 324 catalogues and 12267 patterns translated into English (UK/cm). 12267
We work hard to bring you the best knitting and crochet have to offer, inspiration and advice as well as great quality yarns at incredible prices! Would you like to use our patterns for other than personal use? You can read what you are allowed to do in the Copyright text at the bottom of all our patterns. Happy crafting!
Post a comment to pattern DROPS 136-13
We would love to hear what you have to say about this pattern!
If you want to leave a question, please make sure you select the correct category in the form below, to speed up the answering process. Required fields are marked *.