
Popular categories
Looking for a yarn?


Comments / Questions (163)
![]() Sue Knight wrote:
Sue Knight wrote:
At the end of the Back Piece paragraph; why am I only getting 16 dec when it says I should have 58? Thank you.
03.10.2012 - 19:25
![]() Sue Knight wrote:
Sue Knight wrote:
Having the same confusion as Barb Smith. No way am I getting 58 dec. after piece measures 4 3/4 and inc 22 times.
03.10.2012 - 19:23
![]() Barb Smith wrote:
Barb Smith wrote:
I am very confused about the instructions, specifically where it says to "repeat the dec on every row from RS a total of 46 times and when all inc for sleeve edges are complete (piece measures approx 4 3/8")" I have 4 inches after completing the 9 increases but I have only done 7 rows of the decreases. Please help! Thank you.
18.09.2012 - 19:14DROPS Design answered:
Dear Mrs Smith, you increase for the sleeves each side of the piece -to create sleeve edges. But you dec each side of the marker until sleeve edges are completed, then you put aside, you work front piece the same way and then you work both part together, and at the same time, you continue the dec each side of the marker. Happy Knitting !
12.11.2012 - 14:22
![]() Camilla Pedersen wrote:
Camilla Pedersen wrote:
Jeg har strikket ca 50 cm og har nu kun 136 masker tilbage... jeg har taget ind på hver pind midt foran og bagpå... Det står der i opskriften jeg har printet ud jeg skal, men nu kan jeg se der er ændret til at jeg kun skal tage ind på hver 2. pind. men der står også at jeg skal tage ind på retsiden og det bliver jeg ved med at være på eftersom jeg er på rundpinde...
13.03.2012 - 21:07DROPS Design answered:
Du skal fortsætte med at tage ind på hver 2.p som du har gjort hele tiden. God fornøjelse!
15.03.2012 - 09:51
![]() Camilla wrote:
Camilla wrote:
Jeg har samme problem som Kirsten Leth, men jeg kan ikke finde fejlen?? Nogen der kan hjælpe??
11.03.2012 - 21:13DROPS Design answered:
Jeg kan ikke regne ud hvor du får problemer. Hvor langt er du kommet i opskriften?
13.03.2012 - 15:50
![]() Maria De Sousa wrote:
Maria De Sousa wrote:
Love it!
29.12.2011 - 19:01
![]() Drops Design wrote:
Drops Design wrote:
Jo du fortsætter bare indtagningerne på hver 2.p efter at du har sat arbejdet på rundpind. Udtagningerne til ærmekant er nu færdig: "når alle udtagninger til ærmekant er færdig (arb måler ca 10-11-12 cm i højden) afsluttes der med 1 p fra vrangen. Læg arb til side."
22.09.2011 - 15:01
![]() Heidi wrote:
Heidi wrote:
Hej. Kan ikke forstå den del af opskriften, hvor der står man skal lave 58 indtagninger på retsiden og at arb. samtidig kun skal være 12 cm?? Skal man stoppe udtagningerne og fortsætte indtagningerne til ialt 58 gange eller hvad?? v. Heidi
22.09.2011 - 12:29
![]() DROPS Design wrote:
DROPS Design wrote:
Marianne: Det er ikke feil i oppskriften. Etter man har satt sammen delene og strikker rund økes det på hver 2. pinne som før.
12.09.2011 - 09:27
![]() DROPS Design wrote:
DROPS Design wrote:
Wenche: Alpaca brukes bare til halsen og nederst på erme. Denne oppskriften strikkes ofte og vi har ikke fått noe tilbakemeldinger ang. garn mengde.
12.09.2011 - 09:24
|
|
Hometown |
|
 |
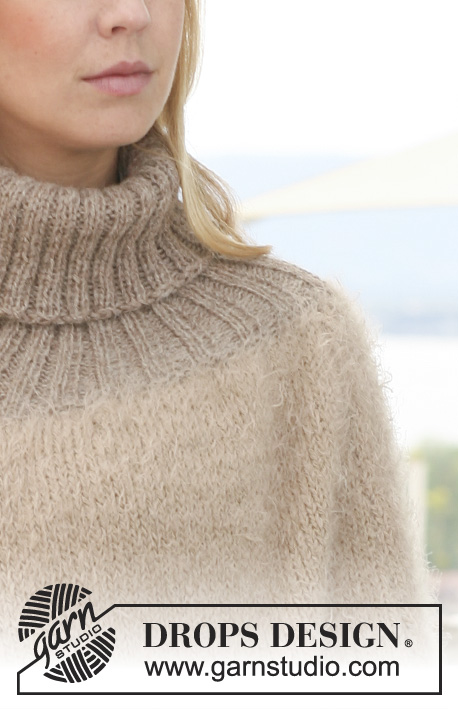 |
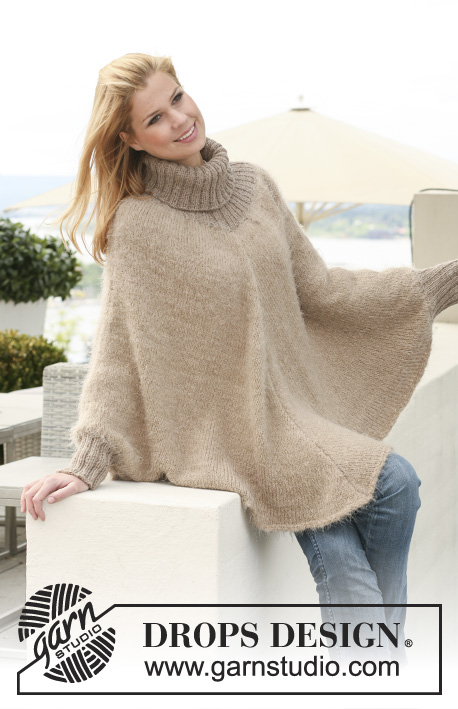
Knitted DROPS poncho in 1 thread ”Symphony”, 1 thread "Melody" or 1 thread "Brushed Alpaca Silk" + 1 thread "Alpaca" with rib in ”Alpaca”. Size S to XXXL.
DROPS 123-28 |
|
|
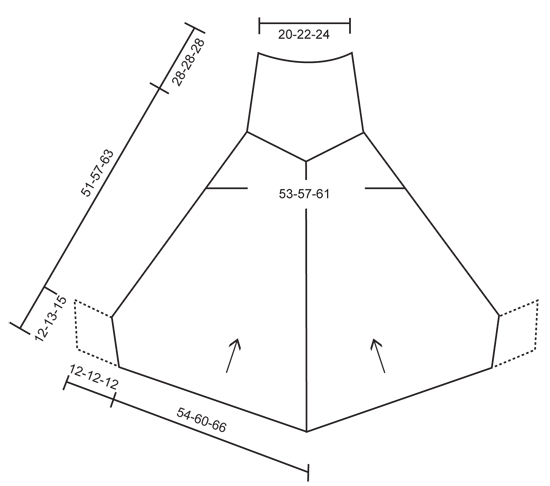
GARTER ST (back and forth on needle): K all rows. DECREASING TIP 1 (applies to mid front and mid back): Dec from RS each side of 2 sts. Dec as follows 3 sts BEFORE marker: K2 tog, K1. Dec as follows AFTER marker: K1, slip 1 st as if to K, K1, psso. DECREASING TIP 2 (applies to the side): Dec by K2 tog before marker and K2 tog into back of loop after marker. -------------------------------------------------------- PONCHO: Worked in 2 parts, then parts are put tog and piece completed in the round on all sts. Arrows in diagram show the knitting direction. BACK PIECE: Worked back and forth on circular needle from the bottom edge up. Cast on 162-180-198 sts on circular needle size 6 mm with 1 thread Symphony, 1 tread Melody or 1 thread Brushed Alpaca Silk + 1 thread Alpaca. Work 4 rows GARTER ST - see above! Insert a marker in the middle of piece, i.e. after 81-90-99 sts. READ ALL OF THE FOLLOWING SECTION BEFORE CONTINUING: REMEMBER THE KNITTING TENSION! Continue in stocking st, AT THE SAME TIME cast on 2 new sts at the end of the next 2 rows for sleeve edges. Repeat the inc at the end of every row a total of 9-10-11 times each side (= 18-20-22 inc sts for sleeve edge each side). AT THE SAME TIME when piece measures 3 cm dec 1 st each side of marker – See DECREASING TIP 1! Repeat the dec on every row from RS a total of 46-52-58 times, and when all inc for sleeve edges are complete (piece measures approx 10-11-12 cm) finish with 1 row from WS. Put piece aside. FRONT PIECE: Like back piece. PONCHO: Slip all sts on the same circular needle and continue in the round. Insert 1 marker at beg of round and 1 after half the sts (to mark the sides). Continue to dec mid front and mid back as before. AT THE SAME TIME when piece measures 12-12-13 cm dec 1 st each side of marker each side – See DECREASING TIP 2! Repeat the dec at the sides on every 6th round (every 3 cm) a total of 13-15-17 times (= until finished measurements). After all dec are complete there are 160-172-184 sts left on needle. Continue until piece measures 51-57-63 cm. NECK: Change to circular needle size 4 mm and 2 strands Alpaca. K 1 round, AT THE SAME TIME K2 tog across the round = 80-86-92 sts. P 1 round and K 1 round, AT THE SAME TIME inc 20-22-24 sts evenly = 100-108-116 sts. Now continue in rib, K2/P2, on all sts. When rib measures 28 cm cast off LOOSELY with K over K and P over P. SLEEVE EDGES: Worked in the round. Sew the garter st at the bottom of back and front piece tog with a couple of sts each side (sleeve edge now has a circumference of approx 24-26-30 cm). Pick up 44-48-52 sts round sleeve edge on double pointed needles size 4 mm with 2 strands Alpaca. P 1 round and continue in rib, K2/P2, on all sts. When rib measures 12 cm cast off with K over K and P over P. |
|
 |
|
Have you finished this pattern?Tag your pictures with #dropspattern or submit them to the #dropsfan gallery. Do you need help with this pattern?You'll find 18 tutorial videos, a Comments/Questions area and more by visiting the pattern on garnstudio.com. © 1982-2026 DROPS Design A/S. We reserve all rights. This document, including all its sub-sections, has copyrights. Read more about what you can do with our patterns at the bottom of each pattern on our site. |
|


With over 40 years in knitting and crochet design, DROPS Design offers one of the most extensive collections of free patterns on the internet - translated to 17 languages. As of today we count 324 catalogues and 12260 patterns translated into English (UK/cm). 12260
We work hard to bring you the best knitting and crochet have to offer, inspiration and advice as well as great quality yarns at incredible prices! Would you like to use our patterns for other than personal use? You can read what you are allowed to do in the Copyright text at the bottom of all our patterns. Happy crafting!
Post a comment to pattern DROPS 123-28
We would love to hear what you have to say about this pattern!
If you want to leave a question, please make sure you select the correct category in the form below, to speed up the answering process. Required fields are marked *.