
Popular categories
Looking for a yarn?


Comments / Questions (32)
![]() Isabelle Grimault wrote:
Isabelle Grimault wrote:
Pour effectuer les diminutions des emmanchures en taille L, combien de mailles diminuer au 1er rang svp ?
14.03.2023 - 17:23DROPS Design answered:
Bonjour Mme Grimault, pour les emmanchures, on rabat d'abord les 8 mailles de chaque côté (3 m avant A.1 + les 2 m de A.1 + 3 m après A.1) puis, on continue chaque pièce en allers et retours, avec 1 m lis de chaque côté, sans autres diminutions pour les emmanchures. Bon tricot!
15.03.2023 - 09:45
![]() Lucette Goukens wrote:
Lucette Goukens wrote:
Je ne sais pas tricoter avec une aiguille circulaire, est ce possible de faire ce pull avec 2 aiguilles ? Merci pour votre réponse
08.02.2023 - 13:29DROPS Design answered:
Bonjour Mme Goukens, cette leçon pourra vous aider à adapter ce modèle sur aiguilles droites, attention, dans la partie "DOS & DEVANT", on doit avoir le motif ajouré A.1 au milieu de chaque côté. Bon tricot!
08.02.2023 - 16:42
![]() Sylvie Lachance wrote:
Sylvie Lachance wrote:
Quelle grosseur d'aiguilles utiliser pour faire le cordon de l'encolure? 3 mm ou 4 mm) Merci!
03.10.2022 - 21:27DROPS Design answered:
Bonjour Mme Lachance, probablement les aiguilles 3, nos stylistes vont vérifier cette info manquante, merci pour votre retour. Bon tricot!
04.10.2022 - 07:54
![]() Sylvie Lachance wrote:
Sylvie Lachance wrote:
Deuxième grandeur la plus petite, pour l'encolure : j'ai 22 m + 38 m en attente + 4x15 m pour les rangs raccourcis devant et dos = 120 m. Je dois en relever 86 à 98... et j'ai des sections rabattues où je devrais relever des mailles... Comment faire? Merci!
03.10.2022 - 19:07DROPS Design answered:
Bonjour Mme Lachance, relevez 86 à 98 mailles tout autour de l'encolure autrement dit les 38 m en attente pour l'encolure + 1 m de chaque côté + 3-4 m le long des rangs raccourcis côté encolure (ne relevez pas 1 maille dans chaque rang mais environ 1 m sur et ce de chaque côté soit par ex. (38+2+6)*2= 92 mailles environ. Bon tricot!
04.10.2022 - 07:47
![]() Margit Irmler wrote:
Margit Irmler wrote:
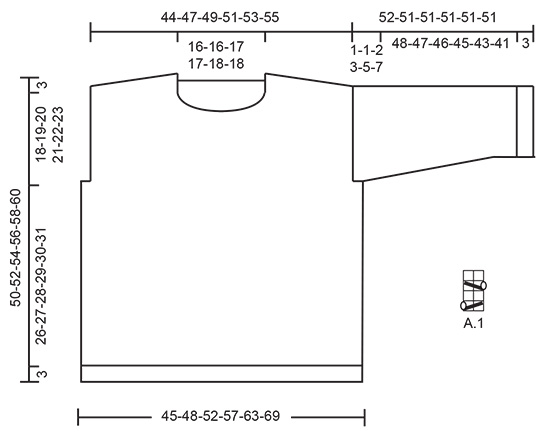
Wo ist das Diagramm zu finden?
02.09.2022 - 18:04DROPS Design answered:
Liebe Margit, das Diagramm A.1 befindet sich unter dem Arm im schematischen Diagramm.
04.09.2022 - 22:45
![]() Veronique Van Cleemput wrote:
Veronique Van Cleemput wrote:
Waar vind ik de tekening van telpatroon A1
25.08.2022 - 14:30DROPS Design answered:
Dag Veronique,
Dit is een hele kleine tekening en staat rechts onder de maattekening.
31.08.2022 - 13:55
![]() Birgitta wrote:
Birgitta wrote:
Förstår inte hur jag ska göra vändningarna på axlarna ?
03.08.2022 - 11:06DROPS Design answered:
Hej Birgitta, skriv hvilken størrelse du strikker, hvor du er og hvad du ikke forstår, så skal vi prøve at hjælpe dig :)
05.08.2022 - 11:33
![]() Eva Allin wrote:
Eva Allin wrote:
Jeg mangler el lille vejledning i hvordan jeg strikke ærmekuplen….ud over at den strikkes frem og tilbage. Skal der lukkes af inden man strikker lige op/ frem og tilbage? Hvor høj skal den være?
20.07.2022 - 13:03DROPS Design answered:
Hej Eva, denne model har ingen klassisk ærmekuppel, se også måleskitsen nederst i opskriften :)
03.08.2022 - 15:26
![]() Susan England wrote:
Susan England wrote:
Where can I find A1. Diagram?
23.06.2022 - 18:14DROPS Design answered:
Dear Susan, you can see diagram A.1 as a small square, below the sleeve in the measurement schematic. Happy knitting!
23.06.2022 - 20:03
![]() Elaine wrote:
Elaine wrote:
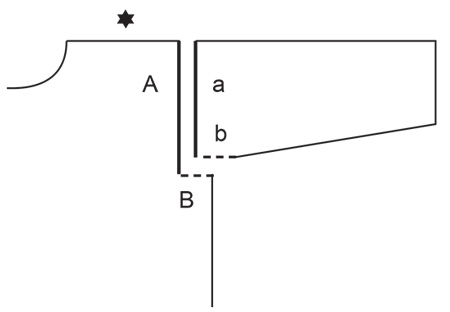
Bonjour, je tricote ce modèle dans la grandeur « L » . Lorsque je rabats pour les emmanchures je me retrouve avec 100 et 104 mailles. Puisque le motif A1 se retrouve à la fin du rang, ne devrait-on pas commencer à rabattre 5 mailles avant le début du tour et une autre fois 3 mailles avant le motif A1. De cette façon mon nombre de mailles est 102 et le motif A1 se retrouve au milieu de 8 mailles rabattues. Suis-je dans l’erreur de procéder de cette façon?
03.06.2022 - 13:24DROPS Design answered:
Bonjour Elaine, vous aviez 110 mailles pour le dos entre les marqueurs, vous rabattez _8 mailles de chaque côté pour les emmanchures, autrement dit: on rabat 4 m après le marqueur on tricote 102 mailles et on rabat 4 mailles avant le marqueur suivant = 110-4-4=102 mailles pour le devant et autant pour le dos. Autrement dit, vous rabattez 1 maille avant A.1 + les 2 m de A.1 + 1 maille après A.1 = 4 mailles de chaque côté. Bon tricot!
03.06.2022 - 16:01
|
||||||||||||||||
Time to Unwind#timetounwindsweater |
||||||||||||||||
 |
 |
|||||||||||||||
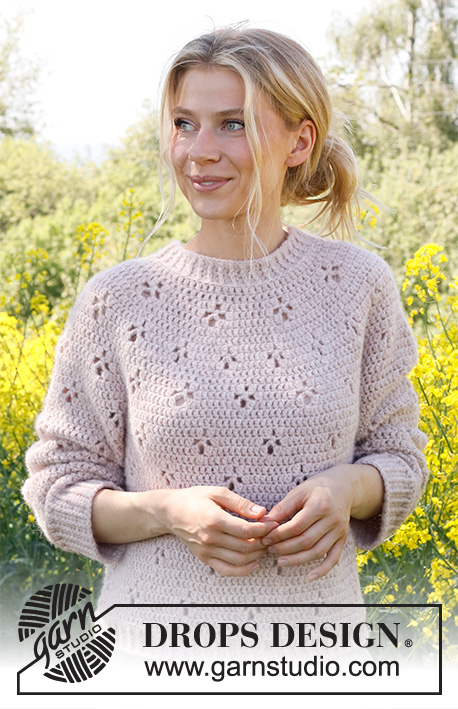
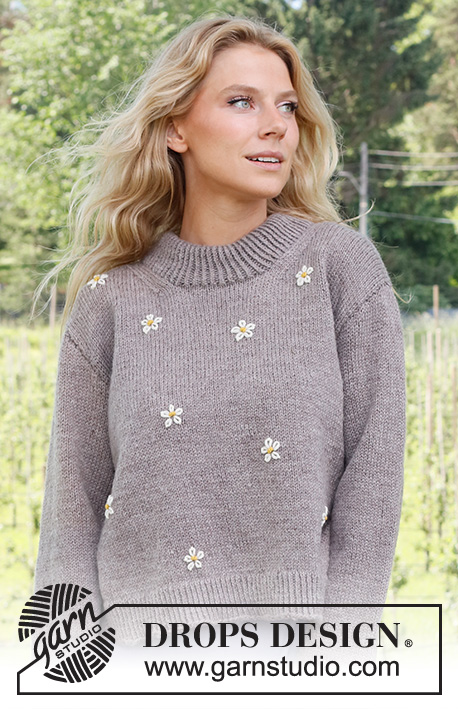
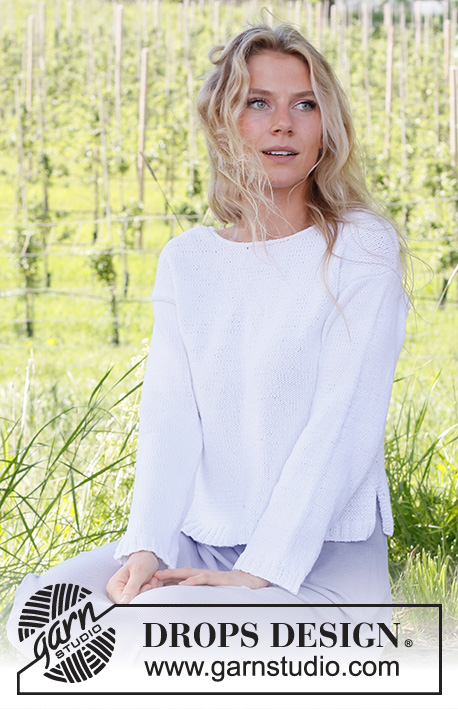
Knitted jumper in DROPS Belle. Piece is knitted bottom up with lace pattern. Size: S - XXXL
DROPS 231-37 |
||||||||||||||||
|
---------------------------------------------------------- EXPLANATION FOR THE PATTERN: ---------------------------------------------------------- GARTER STITCH (back and forth): Knit all rows. 1 ridge vertically = knit 2 rows. PATTERN: See diagram A.1. Diagrams show all rows in pattern seen from the right side. DECREASE TIP (evenly): To calculate how to decrease evenly, use number of stitches on needle (e.g. 106 stitches) and divide stitches by number of decreases to be done (e.g. 18) = 5,8. In this example decrease by knitting approx. every 5th and 6th stitch together. INCREASE TIP (applies to under sleeves): Work until 2 stitches remain before A.1 thread, make 1 yarn over, knit 2, A.1, knit 2, make 1 yarn over (= 2 stitches increased). On next round knit yarns over twisted to avoid holes. Then work the new stitches in stocking stitch. ---------------------------------------------------------- START THE PIECE HERE: ---------------------------------------------------------- JUMPER - SHORT OVERVIEW OF THE PIECE: Work back piece and front piece first back and forth on circular needle separately until vent is done. Then work body in the round on circular needle up to armholes. Then work front piece and back piece back and forth separately. Work sleeves in the round on double pointed needles/circular needle up to sleeve, then work the rest of sleeve back and forth. Finish with a edge with i-cord. BACK PIECE: Cast on 112-124-136-148-164-180 stitches on circular needle size 3 mm with DROPS Belle. Purl 1 row from wrong side. Then work rib as follows: Work 3 stitches in GARTER STITCH - read explanation above, work rib (knit 2/purl 2) until 5 stitches remain on needle, knit 2, work 3 stitches in garter stitch. Continue rib back and forth like this until piece measures 3 cm. Work next row from right side as follows: Work 3 stitches in garter stitch, knit the next 106-118-130-142-158-174 stitches and decrease at the same time 18-24-26-28-32-36 stitches evenly – read DECREASE TIP, work 3 stitches in garter stitch = 94-100-110-120-132-144 stitches. Switch to circular needle size 4 mm. Purl 1 row with 3 stitches in garter stitch in each side. Now work in stocking stitch with 3 stitches in garter stitch in each side until piece measures 8 cm, adjust so that next row is worked from right side. REMEMBER THE KNITTING TENSION! Cut the yarn. Put piece aside. FRONT PIECE: Work the same way as on back piece but do not cut the yarn. BODY: Now insert front piece and back piece on to same circular needle size = 188-200-220-240-264-288 stitches. Work in stocking stitch in the round and continue with GARTER STITCH - read explanation above (= 6 stitches in garter stitch in each side). When 2 ridges have been worked over the 6 stitches, work pattern as follows: Knit 1 stitch. Insert a marker thread here (after this stitch). This is now the beginning of round. Knit over the first 92-98-108-118-130-142, A.1 over the next 2 stitches (= over the middle 2 stitches over the 6 stitches in garter stitch), knit over the next 92-98-108-118-130-142 stitches, work A.1 over the last 2 stitches (= over the middle 2 stitches of the 6 stitches in garter stitch). Continue in the round like this until piece measures 29-30-31-32-33-34 cm from cast-on edge. Now cast off stitches for armholes in each side as follows: Begin 0-0-3-5-9-13 stitches before beginning of round, cast off the next 2-2-8-12-20-28 stitches for armhole, work until 0-0-3-5-9-13 stitches remain before next A.1, cast off the next 2-2-8-12-20-28 stitches for armhole, work the rest of round = 92-98-102-108-112-116 stitches both for front piece and back piece. BACK PIECE: = 92-98-102-108-112-116 stitches. Work back and forth in stocking stitch and with 1 edge stitch in garter stitch in each side. When piece measures 46-48-50-52-54-56 cm, slip the middle 38-38-40-40-42-42 stitches on a thread for neck, and finish each shoulder separately. Then on next row from the neck, cast off 1 stitch = 26-29-30-33-34-36 stitches for shoulder. Continue back and forth with stocking stitch and 1 edge stitch in garter stitch in each side, at the same time on next row from right side work short rows on shoulders as follows: Right shoulder: ROW 1 (= right side): Work over all stitches. ROW 2 (= wrong side): Turn, work until 6-6-7-7-8-8 stitches remain on needle. ROW 3: Turn, tighten yarn and work back. ROW 4: Work until 3-3-3-4-4-4 stitches more remain than on previous time. ROW 5: Turn, tighten yarn and work back. ROW 6: Work until 3-3-3-4-4-4 stitches more remain than on previous time. ROW 7: Turn, tighten yarn and work back. ROW 8: Work until 3-3-3-4-4-4 stitches more remain than on previous time. ROW 9: Turn, tighten yarn and work back. When short rows are done, cast off all stitches by purling from wrong side. Jumper measures approx. 50-52-54-56-58-60 cm from shoulder and down. Left shoulder: ROW 1 (= right side): Work until 6-6-7-7-8-8 stitches remain on needle. ROW 2: Turn, tighten yarn and work back. ROW 3: Work until 3-3-3-4-4-4 stitches more remain than on previous time. ROW 4: Turn, tighten yarn and work back. ROW 5: Work until 3-3-3-4-4-4 stitches more remain than on previous time. ROW 6: Turn, tighten yarn and work back. ROW 7: Work until 3-3-3-4-4-4 stitches more remain than on previous time. ROW 8: Turn, tighten yarn and work back. When short rows are done, cast off all stitches by knitting from right side. Jumper measures approx. 50-52-54-56-58-60 cm from shoulder and down. FRONT PIECE: Work as on back piece. When piece measures 43-45-46-48-49-51 cm, slip the middle 22-22-24-24-26-26 stitches on a thread for neck, and finish each shoulder separately. Then cast off stitches on every row from neck as follows: Cast off 2 stitches 3 times and 1 stitch 3 times = 26-29-30-33-34-36 stitches for shoulder. Continue back and forth with stocking stitch and 1 edge stitch in garter stitch towards the armhole, at the same time when piece measures 47-49-51-53-55-57 cm, work short rows on shoulders the same way as on back piece: I.e. work right shoulder as left shoulder on back piece, and left shoulder as right shoulder on back piece. When short rows are done, cast off. Jumper measures approx. 50-52-54-56-58-60 cm from shoulder and down. SLEEVES: Cast on 64-68-72-72-76-76 stitches on double pointed needles size 3 mm with Belle. Knit 1 round. Then work rib (= knit 2/purl 2) in the round for 3 cm. Knit 1 round while decreasing 12-14-16-14-16-14 stitches evenly - remember DECREASE TIP = 52-54-56-58-60-62 stitches. Switch to double pointed needles size 4 mm. Work pattern as follows: A.1 over the first 2 stitches, knit the remaining stitches on round. When piece measures 8-8-8-8-6-7 cm, increase 1 stitch on each side of A.1 - read INCREASE TIP. Increase like this approx. every 3½-3-3-2½-2½-2 cm 12-13-14-15-16-17 times in total = 76-80-84-88-92-96 stitches. When sleeve measures 51-50-49-48-46-44 cm, work sleeve cap back and forth on circular needle until finished measurements. Continue to work in stocking stitch from the middle of A.1 until sleeve measures approx. 52-51-51-51-51-51 cm. Cast off. Work the other sleeve the same way. ASSEMBLY: Sew shoulder seams inside cast-off edge. Sew sleeve cap to armhole. Then sew vent at the top of sleeve to bottom of armhole - see chart. NECK EDGE: Begin from right side at one shoulder seam and pick up approx. 86 to 98 stitches (including stitches from thread) around the neck with circular needle size 3 mm, cast on 3 stitches at the end of needle. Move the 3 stitches on to left needle so that the last stitch cast on on needle becomes the outermost stitch on left needle. Now work an i-cord in these stitches from right side, as follows: Knit 2, knit next stitch twisted together with the first/next stitch picked up around the neck edge. Move the 3 stitches from right needle back on to left needle (in the order they have). Continue like this along the entire neck edge on back piece until there are no stitches left to work. Cast off the remaining stitches. Sew the last 3 stitches together with the 3 stitches cast on at the beginning of neck edge. Fasten off. |
||||||||||||||||
Diagram explanations |
||||||||||||||||
|
||||||||||||||||
|
||||||||||||||||
|
||||||||||||||||
Have you finished this pattern?Tag your pictures with #dropspattern #timetounwindsweater or submit them to the #dropsfan gallery. Do you need help with this pattern?You'll find 32 tutorial videos, a Comments/Questions area and more by visiting the pattern on garnstudio.com. © 1982-2025 DROPS Design A/S. We reserve all rights. This document, including all its sub-sections, has copyrights. Read more about what you can do with our patterns at the bottom of each pattern on our site. |
||||||||||||||||


With over 40 years in knitting and crochet design, DROPS Design offers one of the most extensive collections of free patterns on the internet - translated to 17 languages. As of today we count 314 catalogues and 11820 patterns translated into English (UK/cm). 11820
We work hard to bring you the best knitting and crochet have to offer, inspiration and advice as well as great quality yarns at incredible prices! Would you like to use our patterns for other than personal use? You can read what you are allowed to do in the Copyright text at the bottom of all our patterns. Happy crafting!
Post a comment to pattern DROPS 231-37
We would love to hear what you have to say about this pattern!
If you want to leave a question, please make sure you select the correct category in the form below, to speed up the answering process. Required fields are marked *.