
Popularne kategorie
Szukasz włóczki?


Komentarze / Pytania (54)
![]() Eva napisała::
Eva napisała::
Zitat:"gleichzeitig bei der ersten Reihe auf beiden Seiten des Vorder- und Rückenteils 6 M abketten." 164 M vor dem Abketten 156 Maschen nach dem Abketten? Das sind nur 8 M Unterschied! Meinen Sie wirklich abketten oder abnehmen? Wird das weiter in Rdn.gestrickt? LG
13.09.2016 - 08:59Odpowiedź DROPS Design :
Liebe Eva, Sie müssen 2 li M in den jeden 6 li M abnehmen, dh man hat 4 x 6 li M - 2 M werden in diesem M. abgenommen, es bleiben hier jetzt 4 li M (anstatt 6 li M) und Sie haben 8 M abgenommen. Anleitung war hier neu geschrieben.
13.09.2016 - 09:49
![]() Jenny napisała::
Jenny napisała::
Ich habe eine Frage zum Oberteil: "gleichzeitig bei der 1. R. auf beide Seiten des Vord- und Rückenteils 6 M. abk. = 156-180-192-216 M." => wo genau wird abgekettet? wie komme ich dann auf 180 M? (Größe S/M) 188m - 6 abketten = 182M ich danke im voraus
01.02.2016 - 19:46Odpowiedź DROPS Design :
Sie ketten jeweils 6 M an den Seiten des Oberteils ab, also insgesamt 12 M. Die Seiten befinden sich dort, wo Sie zuvor die Zunahmen gemacht haben, also ketten Sie die beiden Rechtsmaschen ab, neben denen Sie zugenommen haben, sowie jeweils 2 M rechts und links davon. Die abgeketteten M sind für die Armausschnitte.
03.02.2016 - 20:46
![]() Kim napisała::
Kim napisała::
Ik heb een vraag, het patroon zegt "Brei het Rib, zet 1 merkdraad tussen de 2 ribbelst aan de weersz (de kantst). " Wat wordt hiermee bedoeld? Ik brei met een rondbreinaald, dit betekent dan toch dat ik geen kantsteek heb?
26.04.2015 - 19:50Odpowiedź DROPS Design :
Hoi Kim. Je moet 1 markeerder plaatsen van 2 r aan de zijkanten - dus heb je 108 st op de nld, heb je 18 herhalingen van de boordsteek (2 r, 4 av), dus je moet de markeerder tussen de eerste 2 r en tussen de 2 r van de 10e herhaling plaatsen (9 herhalingen op het voor- en achterpand). Dit patroon is één van onze eerste vertalingen en niet up-to-date. Wij maken zsm een "moderne" en wat duidelijker versie van - ik heb inmiddels al een paar aanpassingen gemaakt.
28.04.2015 - 16:23
![]() Lefebvre napisała::
Lefebvre napisała::
J'ai bien compris, merci pour votre rapidité dans la réponse et franchement tricoter en rond est vraiment agréable !!
05.02.2015 - 18:07
![]() Lefebvre napisała::
Lefebvre napisała::
Bonjour, je suis novice en tricot et je souhaite comprendre les augmentations : 1 maille entre les 2 mailles endroit à chaque rang ou 4 mailles d'un coup ? Merci
05.02.2015 - 16:22Odpowiedź DROPS Design :
Bonjour Mme Lefebvre, vous avez 2 m end sur les côtés de l'ouvrage, à 10 cm, vous augmentez 1 m avant + 1 m après ces 2 m end (= dans la section env juste avant et celle juste après), de chaque côté = vous augmentez 2 m de chaque côté, soit 4 m sur 1 tour. Répétez ces augmentations encore 3 fois (= 4 fois au total) tous les 5 cm. Les augmentations se tricotent à l'envers. Bon tricot!
05.02.2015 - 17:12
![]() Gonet Yvette napisała::
Gonet Yvette napisała::
Bravo pour ce modèle, les explications sont parfaites et il me va super bien !
05.08.2014 - 08:24
![]() Mandy napisała::
Mandy napisała::
Wird das Oberteil hin und rück gestrickt oder rund
06.09.2013 - 14:35Odpowiedź DROPS Design :
Liebe Mandy, es wurd rund gestrickt und ab Armloch geteilt.
07.09.2013 - 14:16
![]() Annette napisała::
Annette napisała::
Je tricote le bas du modèle avec des aiguilles droites. 1) les 2 mailles lisière de chaque c^^oté sont-elles comprises dans les 74 mailles préconisées au départ? 2) Que deviennent les mailles lisière après les 4 rangs de c^otes? 3) Quelle est l'utilité de ces 4 rangs de c^^otes? 4) N'y aurait-il pas une erreur dans les 74 mailles à monter au départ (pour garder l'alternance du point jusqu'au bout )? Merci pour votre aide, suis paumée....
02.07.2013 - 12:11Odpowiedź DROPS Design :
Bonjour Annette, ce modèle est indiqué tricoté en rond, donc sans m lis, 1)quand on sépare l'ouvrage, les 2 m au point mousse de chaque côté sont comprises dans les 74 m (dernière taille).2)Après les 4 rangs de côtes, on met en attente pour tricoter l'empiècement en rond, en côtes comme avant.3)ces rangs de côtes vont former l'emmanchure.4)effectivement, on doit avoir 224 m et non 244 (correction faite, merci). Bon tricot!
02.07.2013 - 14:17Eva napisała::
Nevermind. I get it now. I feel a little dumb ^-^ Good knitting&crocheting to ya'll.
26.05.2012 - 11:48Eva napisała::
It's me again. I tried to translate the other languages of this pattern and, correct me if I'm wrong, I need to place 2 markers on each and every side of 2k sts of the first row. I'll be using many markers, is that right? Thanks. Eva- Italy.
25.05.2012 - 23:09
|
|
Sirenetta |
|
 |
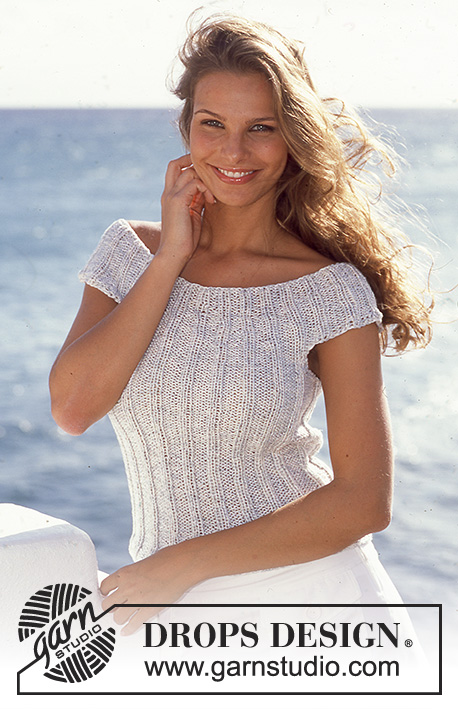 |
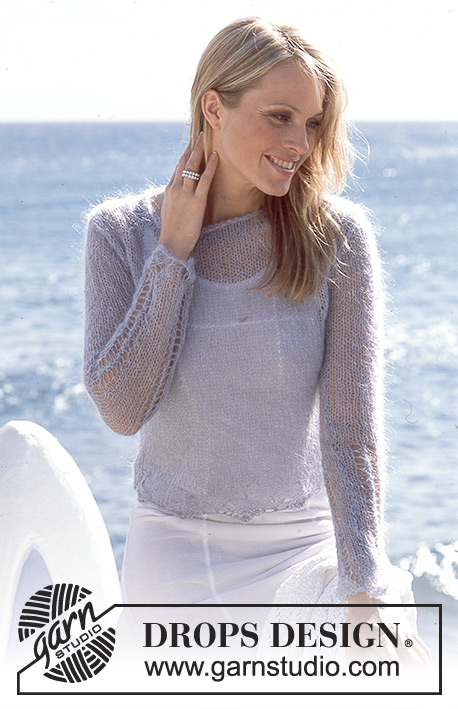
Bluzeczka Drops z włóczek Safran i Coton Viscose
DROPS 81-1 |
|
|
ŚCIĄGACZ Rz. 1: *2 o.p., 4 o.l.* powt. od *do* WYKONANIE TYŁ & PRZÓD 1 nitką każdego rodzaju na DRUTACH Z ŻYŁKĄ nabrać 108-120-132-140 o. Połączyć na okrągło o przer. ściągaczem. Umieścić po 1 markerze między 2 o.p. z każdej strony. Na wys. 10 cm od dołu robótki dodać 1 o. z każdej strony 2 o.p. z każdej strony 4 razy co 5 cm (przer. te oczka na lewo) = 124-136-148-160 o. Na wys. 30-31-32-33 cm od dołu robótki zamknąć 6 o. z każdej strony na podkroje rękawów (= 2 o.l., 2 o.p., 2 o.p., 3 o. z każdej strony każdego markera). Zostawić na drucie pomocniczym. PRZÓD = 52-62-68-74 o. Przer. 2-2-4-4 rz. ściągaczem z 2 o. brzeg. ściegiem francuskim z każdej strony. Zostawić na drucie pomocniczym. TYŁ Przer. jak przód, zostawić o. na drucie i przer. karczek KARCZEK Jest 52-62-68-74 o. na tył, nabrać luźno 26-32-32-38 o. na ramię, wziąć z powrotem oczka przodu na drut i nabrać luźno 26-32-32-38 o. na ramię = 164-188-200-224 o; połączyć na okrągło. Od tego momentu mierzyć stąd. Umieścić jeden marker w miejscu każdego przejścia między tyłem/przodem i rękawami. Dalej przer. ściągaczem jak wcześniej ponad wszystkimi oczkami, zamknąć 2 o.l. w grupach 6 o.l. gdzie oczka były dodawane (=> 4 o.l.) = 156-180-192-216 o. Po przerobieniu 4 cm karczka, zamknąć 1 o.l. w co drugiej grupie 4 o.l. = 3 o.l. = 130-150-160-180 o.; dalej przer. ściągaczem. Na wys. 8-9-10-11 cm od dołu robótki, zamknąć 1 o.l w każdej grupie 3 o.l. tyłu/przodu => 2 o.l. (3 o.l. rękawów pozostają) 112-130-138-156 o. Dalej przer. ściągaczem, aż wys. karczka wynosi ok. 10-11-12-13 cm, zamknąć o. tak jak schodzą z drutu. |
|
 |
|
Skończyłaś ten wzór?Otaguj swoje zdjęcia #dropspattern lub prześlij je do #dropsfan gallery. Potrzebujesz pomocy w związku z tym wzorem?Zobacz 15 instrukcje video, sekcję Komentarze/Pytania i jeszcze więcej, wchodząc na stronę wzoru na garnstudio.com © 1982-2026 DROPS Design A/S. Wszelkie prawa zastrzeżone. Ten dokument, w całości, jest chroniony prawem. Zobacz co możesz robić z naszymi wzorami na dole każdego wzoru na naszej stronie. |
|


Posiadając 40 lat doświadczenia w projektowaniu wzorów na druty i szydełko, DROPS Design oferuje jedną z największych kolekcji bezpłatnych wzorów w internecie – przetłumaczonych na 17 języków. Obecnie jest dostępnych 324 katalogów i 12290 wzorów w języku polskim.
Dokładamy wszelkich starań, aby oferować Wam druty i szydełka, inspiracje, fachowe porady oraz doskonałej jakości włóczki w najlepszych cenach! Zamierzasz wykorzystać nasze wzory inaczej niż tylko do osobistego użytku? Przeczytaj jakie masz prawa w Copyright, który znajdziesz na końcu każdego wzoru. Miłej pracy!
Dodaj komentarz do modelu DROPS 81-1
Chcielibyśmy się dowiedzieć co masz do powiedzenia o tym wzorze!
Jeśli chcesz zadać pytanie i szybko uzyskać odpowiedź, upewnij się, że została wybrana właściwa kategoria w formularzu poniżej. Pola obowiązkowe są oznaczone *.