
Categorie popolari
State cercando un filato?


Commenti / Domande (232)
![]() Nadean ha scritto:
Nadean ha scritto:
Is there any ease factored into the pattern? If I want some positive ease should I go up a size? Thank you.
19.05.2026 - 20:17DROPS Design ha risposto:
Dear Nadean, please read how to find size and matching ease here. Happy knitting!
20.05.2026 - 07:47
![]() Susanne ha scritto:
Susanne ha scritto:
In der Anleitung für das Armbündchen steht "Maschen aus dem Halsausschnitt" aufnehmen. Hier ist doch sicher der Armausschnitt gemeint?
19.05.2026 - 00:25DROPS Design ha risposto:
Liebe Susanne, oh ja genau, danke für den Hinweis, eine Korrektur erfolgt. Viel Spaß beim Stricken!
19.05.2026 - 11:43
![]() Aybuke ha scritto:
Aybuke ha scritto:
Hello,I'm a beginner in knitting. The decrease right after the rib (172 st to 164 st) is only k2tog or SSK as well? I thought it would be SSK before the half-way/86 st marker. Thank you
06.05.2026 - 01:04DROPS Design ha risposto:
Hi Aybuke, We suggest K2 together for all the decreases after the rib. Regards, Drops Team.
06.05.2026 - 05:56
![]() Susan ha scritto:
Susan ha scritto:
I've just started casting off for the armholes and about to continue the front piece. The pattern says to cast off at BEGINNING of rows. Doesn't that mean that the armholes will be at slightly different levels? Would it not be better to cast off at Beginning AND end?? thanks
04.05.2026 - 14:57DROPS Design ha risposto:
Dear Susan, should you cast off at the beg + at the end of each row you would then have to cut the yarn after each row, to avoid this you cast off at the beg of each row on each side (armholes for ex) so that you can continue back and forth, there will be a very slight difference of 1 row which is not visible. Happy knitting!
04.05.2026 - 15:45
![]() Amanda ha scritto:
Amanda ha scritto:
I can’t wrap my head around the binder off instructions. They seem different between the front/back piece and the shoulder pieces. It makes sense, since the shoulder decrease doesn’t happen equally on both sides. Can you explain how the shoulder bind off (decrease) happens, using the medium as an example? Also, should we do a left or right leaning decrease for the shoulders? Thank you so much!
03.05.2026 - 04:30DROPS Design ha risposto:
Dear Amanda, when you have cast off the middle stitches for neck (on both front and back piece) you will cast off extra stitches for neck at the beg of every row from neck: from RS on left shoulder back piece and right shoulder front piece / from WS on right shoulder back piece and left shoulder front piece. On front pieces you cast off 2 sts 2 times and 1 st 4 times (= 8 sts in total) and on back piece 1 st 1 time. Stitches are cast off at the beg of row from neck, not decreased. Hope it can help. Happy knitting!
04.05.2026 - 13:53
![]() Fabienne ha scritto:
Fabienne ha scritto:
Je réponds à la réponse J’ai bien compris le droite-gauche par rapport à la façon dont on porte le pull. Tout s’est bien passé pour l’épaule droite (devant) je ne pouvais que commencer sur l’envers. Mais pour l’épaule gauche (devant) mon aiguille est orientée pour commencer sur l’envers alors que le patron nous demande de commencer sur l’endroit Cordialement Ps: bravo et merci pour la rapidité des réponses !
29.04.2026 - 10:22DROPS Design ha risposto:
Bonjour Fabienne, glissez les mailles de l'épaule droite si besoin sur une autre aiguille (ou si vous tricotez en circulaire, faites les glisser à l'autre extrémité), ainsi le 1er rang sera tricoté sur l'endroit. Bon tricot!
29.04.2026 - 16:06
![]() Fabienne ha scritto:
Fabienne ha scritto:
Question déjà posée mais je ne comprends pas les réponses pour l’épaule gauche du devant. On me dit de commencer sur l’endroit mais mon aiguille est orientée pour nouveau rang sur l’envers, le câble et l’autre aiguille soutiennent le dos. Concrètement, faut-il tout mettre sur une ligne de vie ou une épingle retenant les mailles et inverser le sens des aiguilles ? PS: ce serait bien de pouvoir filtrer les questions/réponses selon la langue.
29.04.2026 - 09:02DROPS Design ha risposto:
Bonjour Fabienne, l'épaule droite du devant quand on porte le pull est l'épaule qui se trouve à gauche quand l'ouvrage se présente sur l'endroit, donc vous allez bien la commencer sur l'envers car le rang sur l'endroit précédent est le rang où vous avez rabattu les mailles de l'encolure. Notez qu'ici l'épaule droite/gauche s'entend quand on porte le pull et pas quand on a l'ouvrage sur les aiguilles. À moins que j'ai mal compris votre question? Nous ne pouvons malhreuseument pas proposer ce type de filtre car la langue n'est pas forcément liée à un drapeau. Mais vous avez toujours cette rubrique pour y poser vos questions. Bon tricot!
29.04.2026 - 09:46
![]() Anna ha scritto:
Anna ha scritto:
Interessante e semplice
25.04.2026 - 16:35
![]() Anna ha scritto:
Anna ha scritto:
Interessante e semplice
25.04.2026 - 16:35
![]() FRANCE ha scritto:
FRANCE ha scritto:
Je ne trouve pas combien de pelotes je dois commander en taille S
18.04.2026 - 17:42DROPS Design ha risposto:
Bonjour, 150gr = 3 pelotes du DROPS Air. Bon tricot!
18.04.2026 - 18:06
|
|
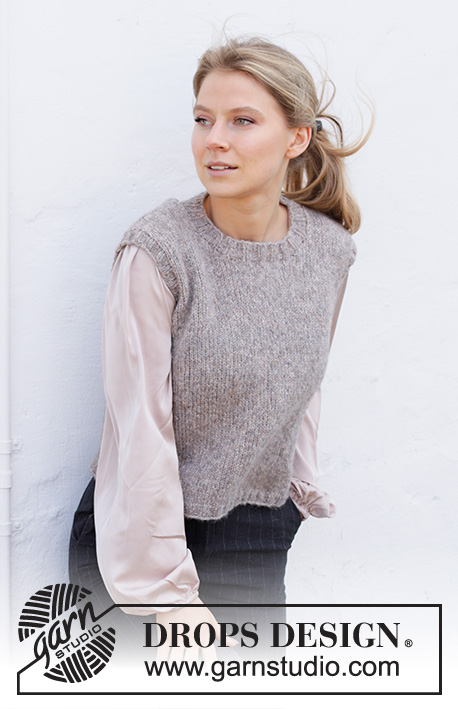
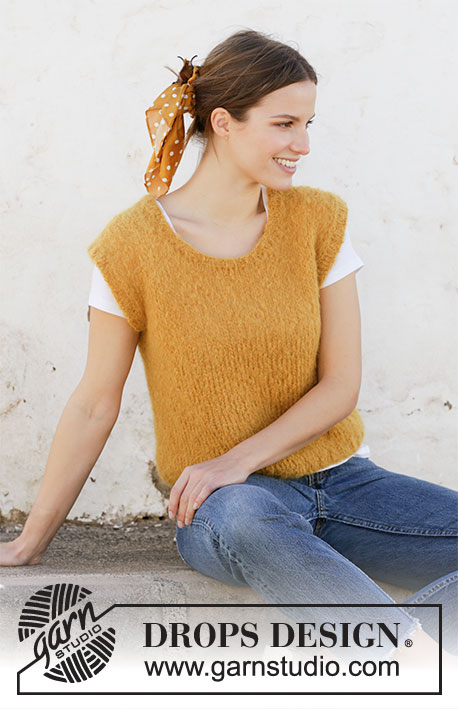
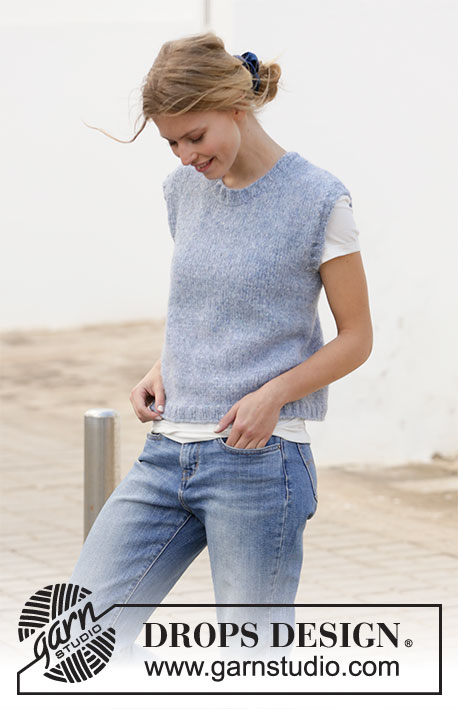
College Days#collegedaysvest |
|
 |
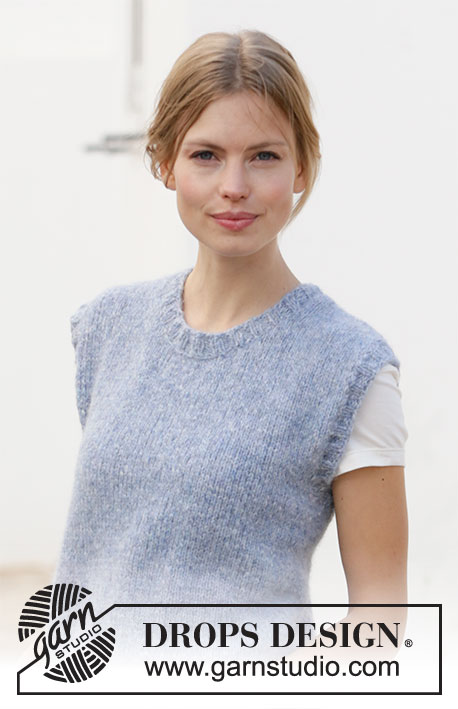 |
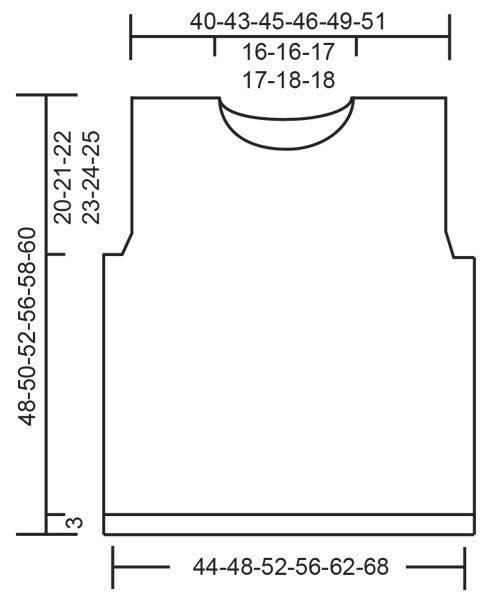
Gilet / smanicato lavorato ai ferri con collo rotondo in DROPS Air. Taglie: Dalla S alla XXXL.
DROPS 210-28 |
|
|
------------------------------------------------------- TECNICHE IMPIEGATE: ------------------------------------------------------- SUGGERIMENTO PER LE DIMINUZIONI (a intervalli regolari): Per calcolare ogni quante maglie diminuire, dividere il numero complessivo delle maglie (p.es: 156 maglie) per il numero di diminuzioni da fare (p.es 8) = 19,5. Per diminuire, in questo esempio, lavorare insieme alternativamente ogni 18a e 19a maglia e ogni 19a e 20a maglia. ------------------------------------------------------- IL LAVORO INIZIA QUI: ------------------------------------------------------- GILET – BREVI INDICAZIONI PER IL LAVORO: Si lavora in tondo con i ferri circolari, dal basso verso l’alto fino agli scalfi. Finire il davanti e il dietro separatamente, avanti e indietro. Lavorare il collo e i bordi delle maniche in tondo con i ferri circolari. DAVANTI E DIETRO: Avviare 156-172-184-200-220-240 maglie con i ferri circolari n° 4,5 ed il filato Air. Lavorare 1 giro a diritto. Proseguire a coste (2 maglie diritto, 2 maglie rovescio) per 3 cm. Passare ai ferri circolari n° 5. Lavorare a maglia rasata e, durante il primo giro, diminuire 8 maglie a intervalli regolari = 148-164-176-192-212-232 maglie – vedere il SUGGERIMENTO PER LE DIMINUZIONI sopra. Inserire 1 segno all’inizio del giro e 1 segno dopo le 74-82-88-96-106-116 maglie successive. I segni seguono il lavoro; serviranno in seguito, per gli scalfi. Proseguire a maglia rasata finché il lavoro non misura 28-29-30-33-34-35 cm dal ferro di avvio delle maglie. RICORDARSI DI MANTENERE LA CORRETTA TENSIONE DEL LAVORO! Sul giro successivo, intrecciare per gli scalfi, iniziando 3-3-3-4-4-4 maglie prima del primo segno; intrecciare 6-6-6-8-8-8 maglie (il segno si trova al centro di queste maglie), lavorare come prima finché non rimangono 3-3-3-4-4-4 maglie prima del segno successivo, intrecciare le 6-6-6-8-8-8 maglie successive (il segno si trova al centro di queste maglie) e lavorare fino alla fine del giro. Finire il davanti e il dietro separatamente, avanti e indietro sui ferri. DAVANTI: = 68-76-82-88-98-108 maglie. Lavorare a maglia rasata e intrecciare per gli scalfi da ciascun lato all’inizio di ogni ferro come segue: Intrecciare 2 maglie 1 volta e 1 maglia 1-3-4-6-9-12 volte = 62-66-70-72-76-80 maglie. Proseguire finché il lavoro non misura 38-40-40-44-44-46 cm (rimangono ancora circa 10-10-12-12-14-14 cm alla fine del lavoro). Al ferro successivo sul diritto del lavoro, intrecciare per lo scollo come segue: Lavorare le prime 25-27-28-29-30-32 maglie, intrecciare le 12-12-14-14-16-16 maglie successive e lavorare le ultime 25-27-28-29-30-32 maglie. Finire ore le spalle separatamente; non tagliare il filo – proseguire con la spalla destra, sul rovescio del lavoro. SPALLA DESTRA, DAVANTI: = 25-27-28-29-30-32 maglie. Lavorare a maglia rasata, iniziando sul rovescio del lavoro e intrecciare le maglie per lo scollo all’inizio di ogni ferro sul diritto del lavoro, come segue: Intrecciare 2 maglie 2 volte e 1 maglia 4 volte = 17-19-20-21-22-24 maglie. Proseguire finché il lavoro non misura 48-50-52-56-58-60 cm dal ferro di avvio delle maglie. Intrecciare le maglie e tagliare il filo. SPALLA SINISTRA, DAVANTI: = 25-27-28-29-30-32 maglie. Lavorare a maglia rasata, iniziando sul diritto del lavoro e intrecciare le maglie per lo scollo all’inizio di ogni ferro sul rovescio del lavoro, come segue: Intrecciare 2 maglie 2 volte e 1 maglia 4 volte = 17-19-20-21-22-24 maglie. Proseguire finché il lavoro non misura 48-50-52-56-58-60 cm dal ferro di avvio delle maglie (verificare la lunghezza con la spalla destra). Intrecciare le maglie e tagliare il filo. DIETRO: = 68-76-82-88-98-108 maglie. Lavorare a maglia rasata e intrecciare le maglie per gli scalfi da ciascun lato all’inizio di ogni ferro, come segue: Intrecciare 2 maglie 1 volta e 1 maglia 1-3-4-6-9-12 volte = 62-66-70-72-76-80 maglie. Proseguire finché il lavoro non misura 44-46-48-52-54-56 cm (rimangono ancora circa 4 cm alla fine del lavoro). Al ferro successivo sul diritto del lavoro, intrecciare per lo scollo come segue: Lavorare le prime 18-20-21-22-23-25 maglie, intrecciare le 26-26-28-28-30-30 maglie successive e lavorare le ultime 18-20-21-22-23-25 maglie. Finire ore le spalle separatamente; non tagliare il filo – proseguire con la spalla sinistra, iniziando sul rovescio del lavoro. SPALLA SINISTRA, DIETRO: = 18-20-21-22-23-25 maglie. Lavorare a maglia rasata, iniziando sul rovescio del lavoro e intrecciare 1 maglia all’inizio del ferro successivo sul diritto del lavoro = 17-19-20-21-22-24 maglie. Proseguire finché il lavoro non misura 48-50-52-56-58-60 cm dal ferro di avvio delle maglie; verificare la lunghezza con il davanti. Intrecciare le maglie e tagliare il filo. SPALLA DESTRA, DIETRO: = 18-20-21-22-23-25 maglie. Lavorare a maglia rasata, iniziando sul diritto del lavoro e intrecciare 1 maglia all’inizio del ferro successivo sul rovescio del lavoro = 17-19-20-21-22-24 maglie. Proseguire finché il lavoro non misura 48-50-52-56-58-60 cm dal ferro di avvio delle maglie; verificare la lunghezza con il davanti. Intrecciare le maglie e tagliare il filo. CONFEZIONE: Cucire le spalle a punto maglia. COLLO: Con i ferri circolari n° 4,5 riprendere circa da 76 a 92 maglie tutto intorno al collo, iniziando da una delle spalle, sul diritto del lavoro (il numero delle maglie deve essere divisibile per 4). Lavorare a coste (2 maglie diritto, 2 maglie rovescio) in tondo per 2 cm. Intrecciare lavorando a diritto le maglie a diritto e a rovescio le maglie a rovescio. BORDO INTORNO AGLI SCALFI: Con i ferri circolari n° 4,5 riprendere circa da 84 a 124 maglie intorno allo scalfo, iniziando sul diritto del lavoro nel punto in cui il davanti e il dietro sono stati divisi (il numero delle maglie deve essere divisibile per 4). Lavorare a coste (2 maglie diritto, 2 maglie rovescio) in tondo per 2 cm. Intrecciare lavorando a diritto le maglie a diritto e a rovescio le maglie a rovescio. Lavorare un bordo uguale intorno all’altro scalfo. |
|
 |
|
Avete terminato questo modello?Allora taggate le vostre foto con #dropspattern #collegedaysvest o inviatele alla #dropsfan gallery. Avete bisogno di aiuto con questo modello?Troverete 22 video tutorial, una sezione per i commenti/domande e molto altro guardando il modello su www.garnstudio.com © 1982-2026 DROPS Design A/S. Ci riserviamo tutti i diritti. Questo documento, compreso tutte le sue sotto-sezioni, è protetto dalle leggi sul copyright. Potete leggere quello che potete fare con i nostri modelli alla fine di ogni modello sul nostro sito. |
|


Con oltre 40 anni di esperienza nel design di modelli di maglia e uncinetto, DROPS Design offre la più estesa collezione di modelli gratuiti su internet - tradotti in 17 lingue. Ad oggi vi possiamo fornire 325 cataloghi e 12298 modelli - 9569 dei quali sono tradotti in Italiano.
Ci stiamo impegnando molto per darvi il meglio che vi possiamo offrire in termini di maglia e uncinetto, ispirazioni e consigli così come filati di grande qualità ad un prezzo incredibile! Volete utilizzare i nostri modelli per qualcosa d'altro oltre al vostro uso personale? Potete leggere tutto ciò che è consentito nel testo sul Copyright in basso su tutte le pagine dei nostri modelli. Buon lavoro!
Lasciare un commento sul modello DROPS 210-28
Noi saremmo felici di ricevere i tuoi commenti e opinioni su questo modello!
Se vuoi fare una domanda, fai per favore attenzione a selezionare la categoria corretta nella casella qui sotto per velocizzare il processo di risposta. I campi richiesti sono indicati da *.