
Categorie popolari
State cercando un filato?


Commenti / Domande (52)
![]() Birgit ha scritto:
Birgit ha scritto:
Jeg forstår ikke udtagningerne på hver side af de 60 \\r\\nEr det 4 masker på hver side plus udtag i siden
29.06.2025 - 09:03
![]() Claude Bergeron ha scritto:
Claude Bergeron ha scritto:
Bonjour, Pourriez-vous m’informer à quels endroits on doit faire des jetés? Exemple: du côté endroit, on fait une jeté après la maille lisière, on fait une jeté après le deuxième marqueur etc….. Et du côté envers aussi. On fait des augmentations 48 fois, donc c’est pendant 48 rangs? Vous avez répondu à Lucie dans le même sens mais comme je suis débutante, j’aimerais plus de précision. Merci à l’avance
28.01.2025 - 13:42DROPS Design ha risposto:
Bonjour Mme Bergeron, sur l'endroit vous allez augmenter 4 m ainsi: 1 m end, 1 jeté, tricotez en jersey jusqu'aux 60 m centrales, 1 jeté, tricotez les 60 m, 1 jeté, tricotez jusqu'à la dernière maille, 1 jeté, tricotez la dernière maille. Sur l'envers, augmentez 2 m ainsi: 1 m end, 1 jeté, tricotez à l'envers jusqu'à ce qu'il reste 1 m, 1 jeté, 1 m end. Sur l'envers, tricotez les jetés torse pour éviter des trous. Répétez ces 2 rangs 48 fois au total = vous avez tricoté 96 rangs et augmenté 96 fois à 1 m des bords et 48 fois de chaque côté des 60 m centrales. Bon tricot!
28.01.2025 - 14:40
![]() Lucie ha scritto:
Lucie ha scritto:
Bonjour, j'ai un doute sur ceci :" 1 m de chaque côté à 1 m point mousse des bords tous les rangs et 1 m de chaque côté des 60 m centrales tous les 2 rangs." Est il bien que l'augmentation dans un rang impair est 4 mailles et celle dans un rang pair est 2 mailles ?
19.10.2024 - 23:50DROPS Design ha risposto:
Bonjour Lucie, tout à fait, vous augmentez tous les 2 rangs (= tous les rangs sur l'endroit) 4 mailles (1 de chaque côté + 1 de part et d'autre des 60 m centrales) et vous augmentez en plus tous les rangs sur l'envers 2 mailles = 1 maille de chaque côté (à 1 m des bords). Bon tricot!
21.10.2024 - 08:46
![]() Monica Hellström ha scritto:
Monica Hellström ha scritto:
Vilket garn kan jag byta till för att sicka den här sjalen, Falling in Lace? Använde konvertreraren , men den hittade inget alternativ.
23.05.2024 - 12:58DROPS Design ha risposto:
Hej Monica, jo du vælger DROPS Lace, vælg 100 g (som står i opskriften) og vælg 1 tråd: Så får du 6 forskellige alternativer :)
23.05.2024 - 13:48
![]() Mimi ha scritto:
Mimi ha scritto:
Je suis complètement perdue. Tel que je lis les instructions, le haut doit mesurer 154cm mais est constitué de 72 mailles au départ, ce qui correspond à environ 60 cm. Comment peut-on arriver à la forme finale? Si c'est tricoté de haut en bas, le plus grand nombre de mailles devrait se trouver en haut, non? Merci de m'éclairer
23.03.2024 - 15:44DROPS Design ha risposto:
Bonjour Mimi, le châle se tricote de haut en bas, les 72 mailles montées au départ sont celles du milieu dos mais on va augmenter de chaque côté du châle pour obtenir l'envergure de 154 cm (après blocage) = on augmente: 1 m de chaque côté tous les rangs + 1 de chaque côté des 60 m centrales tous les 2 rangs. Bon tricot!
02.04.2024 - 08:40
![]() Filo Rojas ha scritto:
Filo Rojas ha scritto:
Cuando empiezas el calado no se aumenta en los estrenos ? Se sigue siempre con los 363 puntos hasta terminar la labor?
24.09.2023 - 19:24DROPS Design ha risposto:
Hola Filo, como puedes ver, los calados descritos en los diagramas tienen aumentos que se contrarrestan con disminuciones. Por lo tanto, no se aumenta el número de puntos en la labor.
24.09.2023 - 23:31
![]() Suk ha scritto:
Suk ha scritto:
DROPS Design 02.03.2020 kl. 11:24: Dear Suk, you increase 4 sts on every other row (= every row from RS) and 2 sts on every row, ie you increase a total of 6 sts after each set of 2 rows (= 1 row from RS + 1 row from WS) = 48 x 6 = 288 sts increased. I understand the increase 4 sts on every row, but how to increase 2 sts on the WS ? (ie the purl row). thanks
02.03.2020 - 13:16DROPS Design ha risposto:
Dear Suk, from WS you will increase 1 stitche on each side, inside the edge stitch: Inc 1 st in each side inside 1 edge st in garter st on every row ie from RS you will work 1 edge st, YO, work to marker, YO, K60, YO, K to last st, YO, K last st and every row from WS work: K1, YO, P to the edge st, YO, K1. Happy knitting!
02.03.2020 - 13:21
![]() Suk ha scritto:
Suk ha scritto:
According to the instruction above it says: ' Inc 1 st in each side inside 1 edge st in garter st on every row & inc 1 st on each side of the middle 60 sts every other row. Continue like this until inc have been done 48 times in total on each side of the 60 sts and 96 times in each side = 360 sts on needle.' f only increase on the RS rows, there won't be 360 sts on needle? Please help!! Thanks
02.03.2020 - 10:32DROPS Design ha risposto:
Dear Suk, you increase 4 sts on every other row (= every row from RS) and 2 sts on every row, ie you increase a total of 6 sts after each set of 2 rows (= 1 row from RS + 1 row from WS) = 48 x 6 = 288 sts increased + 72 sts at the beg = 360 sts. Happy knitting!
02.03.2020 - 11:24
![]() Suk ha scritto:
Suk ha scritto:
Thanks for the explanation on the RS row, how about on the WS row, R2(WS) & R4(WS) - how to increase on these rows? Thanks
28.02.2020 - 12:10DROPS Design ha risposto:
Dear Suk, you will only increase on the RS rows, from WS work: 1 edge st in garter st, purl until 1 st remain (= purl the yarn over twisted to avoid holes), finish with 1 edge st in garter stitch. Happy knitting!
28.02.2020 - 13:23
![]() Suk ha scritto:
Suk ha scritto:
Inc 1 st in each side inside 1 edge st in garter st on every row and inc 1 st on each side of the middle 60 sts every other row. - What does this mean? Is it like this: Cast on 72 sts, R1(RS): K6, K60, K6 (72 sts) R2(WS): P6, P60, P6 (72 sts) - R3(RS): K1, YO, K5, YO, K60, YO, K5, YO, K1 (76sts) R4(WS): K1,PTBL,K5, PTBL, K60, PTBL,K5,PTBL,K1 (76sts) - how to increase on this row? Thanks
27.02.2020 - 22:19DROPS Design ha risposto:
Dear Suk, correct, but you start increasing from first row, ie row 1: K1, YO, K5, YO, K60, YO, K5, YO, K1 YO and then work every RS row like this: K1, YO, K to the first marker, YO, slip marker, K60, slip marker, YO, K to the last st, YO, K last st. Happy knitting!
28.02.2020 - 08:11
|
|||||||||||||||||||
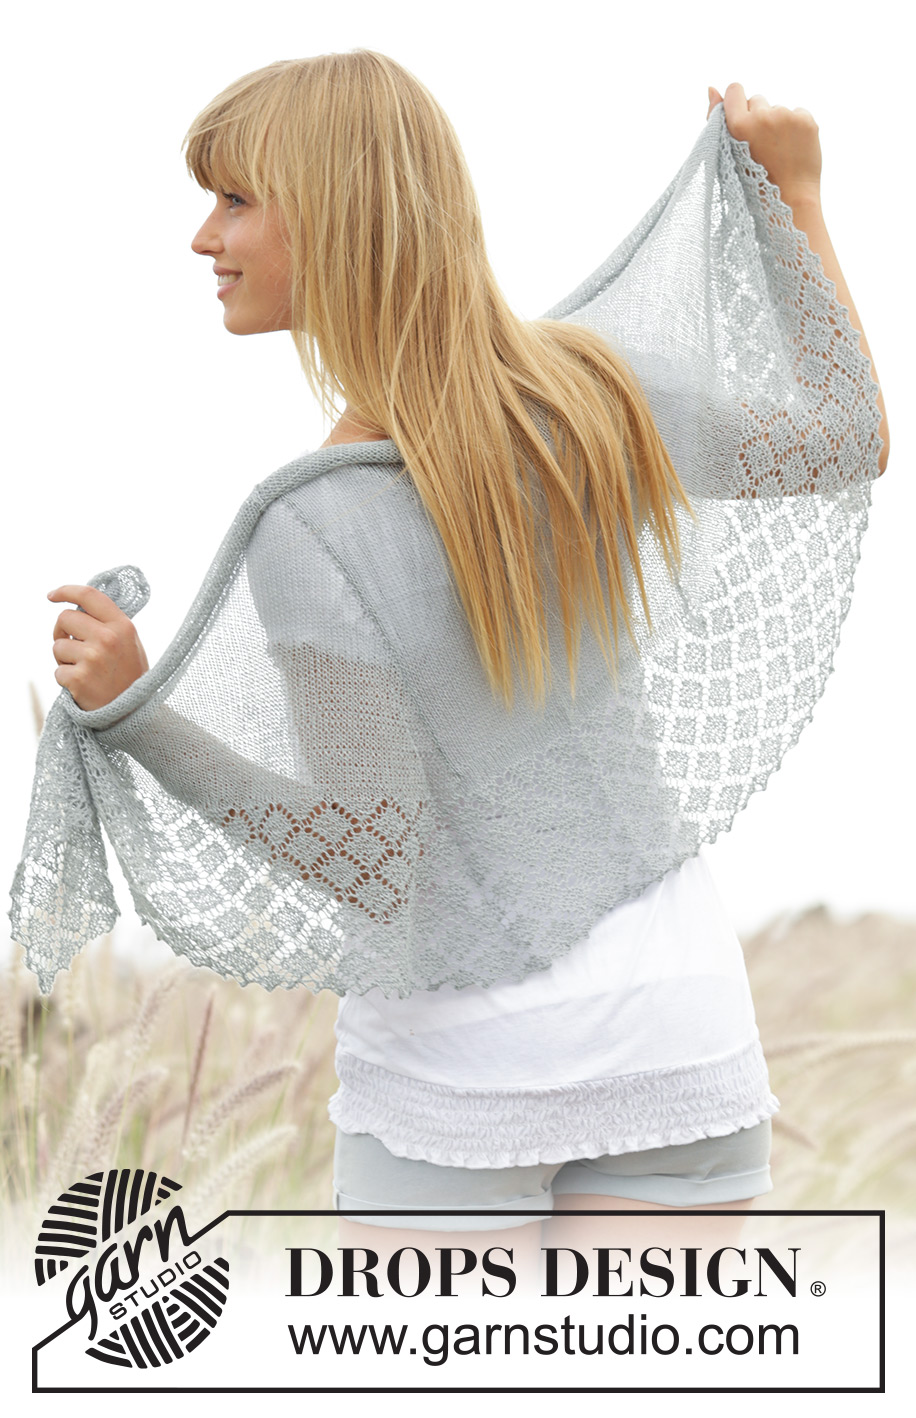
Falling in Lace#fallinginlaceshawl |
|||||||||||||||||||
|
|
|||||||||||||||||||
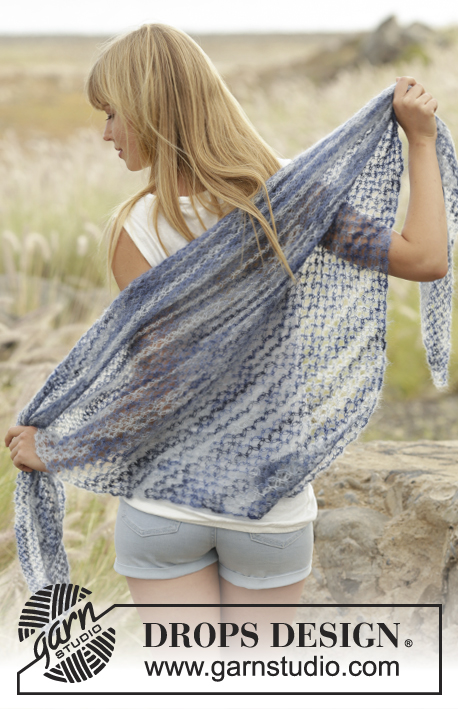
Scialle DROPS ai ferri, a maglia rasata, e bordo con motivo traforato e a coste a legaccio, in "Lace".
DROPS 169-8 |
|||||||||||||||||||
|
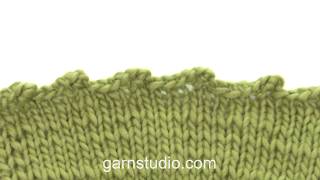
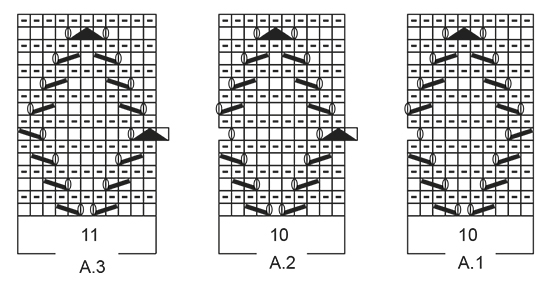
TENSIONE DEL LAVORO: Una volta completato, lo scialle andrà lavato e bloccato per portarlo alle misure corrette; la tensione del lavoro non è quindi così importante. Tuttavia, per avere un’indicazione se state lavorando troppo stretto o troppo largo, potete prendere come riferimento un campione di ca. 24 m x 32 ferri a maglia rasata = 10 x 10 cm con i ferri n° 3. PUNTO LEGACCIO (avanti e indietro sui ferri): Lavorare tutti i ferri a dir. 1 “costa” a legaccio = 2 ferri a dir. MOTIVO: Vedere i diagrammi da A.1 a A.3. I diagrammi mostrano tutti i ferri del motivo, visti sul diritto del lavoro. SUGGERIMENTO PER GLI AUMENTI: Per aumentare 1 m, fare 1 m gettata; al ferro successivo, lavorare la m gettata a rov ritorto (quindi lavorarla nel filo posteriore e non in quello anteriore) per evitare che si formi un buco. ---------------------------------------------------------- SCIALLE: Si lavora avanti e indietro sui ferri circolari dall’alto verso il basso. Avviare 72 m sui ferri circolari n° 3 con il filato Lace, inserire 2 segni nel lavoro da ciascun lato delle 60 m centrali. Proseguire a maglia rasata con 1 m vivagno a punto legaccio - vedere le spiegazioni sopra, da ciascun lato - ALLO STESSO TEMPO, aumentare come segue - VEDERE IL SUGGERIMENTO PER GLI AUMENTI: Aumentare ad ogni ferro 1 m ai lati prima/dopo 1 m vivagno a punto legaccio, e aumentare ogni 2 ferri 1 m da ciascun lato delle 60 m centrali. RICORDARSI LA TENSIONE DEL LAVORO ! Proseguire in questo modo finché gli aumenti non sono stati fatti 48 volte in tutto da ciascun lato delle 60 m e 96 volte da ciascun lato = 360 m sui ferri. Lavorare ora 1 costa a punto legaccio e, ALLO STESSO TEMPO, aumentare 3 m in modo uniforme durante il 1° ferro della costa a legaccio = 363 m. Il lavoro misura ora ca.30 cm al centro, sul dietro. Proseguire a lavorare il motivo sul diritto del lavoro come segue: 1 m vivagno a punto legaccio, diagramma A.1 (= 10 m), ripetere il diagramma A.2 (= 10 m) 34 volte in larghezza, diagramma A.3 (= 11 m), 1 m vivagno a punto legaccio. Ripetere i diagrammi da A.1 a A.3 in tutto 4 volte in verticale. Il lavoro misura ca.43 cm. Intrecciare con un bordo a picot. CHIUSURA DELLE M CON BORDO PICOT: Intrecciare le prime 2 m del ferro, (* inserire il ferro di destra tra le prime 2 del ferro di sinistra (passare il ferro di destra tra le m del ferro di sinistra, non nelle m), fare 1 m gettata sul ferro di destra, far passare la m gettata tra le m e mettere la m gettata sul ferro di sinistra *, ripetere da *-* altre 2 volte (= ci sono ora 3 nuove m sul ferro di sinistra), ** lavorare a dir la prima m del ferro di sinistra, accavallare la 1a m del ferro di destra sopra l’ultima m lavorata **), ripetere da **-** 7 volte in tutto e ripetere da (-) lungo tutto il lato dello scialle finché non rimane 1 m. Tagliare il filo e farlo passare attraverso l’ultima m. BLOCCAGGIO: Mettere lo scialle in acqua tiepida in modo che sia impregnato d’acqua. Molto delicatamente fare pressione sullo scialle in modo da far uscire la maggior parte dell’acqua – non torcere lo scialle; avvolgere poi lo scialle in un asciugamano e fare pressione delicatamente in modo da far uscire ulteriore acqua. Lo scialle deve rimanere solo umido. Stendere lo scialle su un tappeto o su un materasso – con molta cautela tirare lo scialle per portarlo alle misure corrette. Lo scialle deve misurare ca. 50 cm al centro, sul dietro. Fissare degli spilli lungo i bordi e inserire 1 spillo in ogni picot lungo il bordo di chiusura delle m per renderli più marcati. Lasciare asciugare lo scialle. Ripetere questo procedimento ogni volta che si lava lo scialle. |
|||||||||||||||||||
Spiegazioni del diagramma |
|||||||||||||||||||
|
|||||||||||||||||||
 |
|||||||||||||||||||
Avete terminato questo modello?Allora taggate le vostre foto con #dropspattern #fallinginlaceshawl o inviatele alla #dropsfan gallery. Avete bisogno di aiuto con questo modello?Troverete 18 video tutorial, una sezione per i commenti/domande e molto altro guardando il modello su www.garnstudio.com © 1982-2026 DROPS Design A/S. Ci riserviamo tutti i diritti. Questo documento, compreso tutte le sue sotto-sezioni, è protetto dalle leggi sul copyright. Potete leggere quello che potete fare con i nostri modelli alla fine di ogni modello sul nostro sito. |
|||||||||||||||||||


Con oltre 40 anni di esperienza nel design di modelli di maglia e uncinetto, DROPS Design offre la più estesa collezione di modelli gratuiti su internet - tradotti in 17 lingue. Ad oggi vi possiamo fornire 324 cataloghi e 12291 modelli - 9562 dei quali sono tradotti in Italiano.
Ci stiamo impegnando molto per darvi il meglio che vi possiamo offrire in termini di maglia e uncinetto, ispirazioni e consigli così come filati di grande qualità ad un prezzo incredibile! Volete utilizzare i nostri modelli per qualcosa d'altro oltre al vostro uso personale? Potete leggere tutto ciò che è consentito nel testo sul Copyright in basso su tutte le pagine dei nostri modelli. Buon lavoro!
Lasciare un commento sul modello DROPS 169-8
Noi saremmo felici di ricevere i tuoi commenti e opinioni su questo modello!
Se vuoi fare una domanda, fai per favore attenzione a selezionare la categoria corretta nella casella qui sotto per velocizzare il processo di risposta. I campi richiesti sono indicati da *.