
Categorie popolari
State cercando un filato?


Commenti / Domande (237)
![]() Eva Sundman ha scritto:
Eva Sundman ha scritto:
Det står i mönstret att man ska öka/minska vartannat varv. Menas det vartannat rätt varv eller vartannat varv.
16.11.2019 - 11:15DROPS Design ha risposto:
Hej Eva, vi menar vartannat varv . Se även vår video :)
21.11.2019 - 09:05
![]() Marion ha scritto:
Marion ha scritto:
Ich glaube das Problem bei den Abnahmen ist, dass in der Anleitung steht 1 M. vor UND 1M. nach der 2., 4., 6. Markierung abnehmen mit dem Hinweis auf den Abnahmetipp. Diese Art der Abnahme darf man nur 1 x pro Markierung machen,denn dabei werden schon 2 M. abgenommen.
10.11.2019 - 12:48DROPS Design ha risposto:
Liebe Marion, dieses Video zeigt, wie man bei dieser Mütze zu- bzw abnimmt. Viel Spaß beim stricken!
11.11.2019 - 12:16
![]() Christine ha scritto:
Christine ha scritto:
Tolle Mütze:-) und eine super Strickanleitung, vielen Dank
25.09.2019 - 09:52
![]() Agata ha scritto:
Agata ha scritto:
Czemu drukuje się jedynie pierwsza strona wzoru?(wszystkie parametry drukarki ustawione są prawidłowo)
12.06.2019 - 08:30DROPS Design ha risposto:
Witaj Agato. Musisz kliknąć na ikonkę drukarki z napisem WZÓR (tuż nad opisem wzoru). Następnie DRUKUJ WZÓR w prawym górnym rogu okna, które się pojawi i jest cały wzór do wydruku. Jeśli nie zadziała, po prostu zaznacz opis, skopiuj do worda i wtedy drukuj. Powodzenia!
12.06.2019 - 16:39
![]() Elli ha scritto:
Elli ha scritto:
Ich habe die Mütze nun schon 2x getrickt. Mit original Garn und Nadelnstärke. Maschenprobe stimmt auch. Aber sie wird immer viiiieeeel zu klein! Sogar mit 159M Anschlag ist sie noch zu klein bei einem Kopfumfang von ca 44cm. Was mache ich falsch????
29.05.2019 - 15:29DROPS Design ha risposto:
Liebe Elli, es ist so etwas schwierig zu sagen, was falsch ist, am besten nehmen Sie Kontakt mit Ihrem DROPS Laden auf, gerne können Sie auch ihnen ein Foto per E-Mail schicken, damit Sie auch sehen, wie Sie die Mütze stricken. Viel Spaß beim stricken!
29.05.2019 - 15:39
![]() Leyla ha scritto:
Leyla ha scritto:
Ja genau, 16cm ist die richtige Länge, aber ich habe noch 33 Maschen auf der Nadel und zwischen den 3 Markierungen nur noch jeweils eine Masche übrig... Ich habe jetzt einfach anders abgenommen, sodass ich auf die 15 Maschen gekommen bin. So gehen allerdings die schönen Abnahmestränge nicht ganz bis nach oben in die Spitze.. Ich hoffe, es sieht am Ende trotzdem gut aus...
02.04.2019 - 11:53DROPS Design ha risposto:
Liebe Leyla, dann stimmt sicher etwas mit den Abnahmen nicht: Reihe 1 bis 11 bleibt die Maschenanzahl dieselbe, aber dann stricken Sie die Abnahmen in jede 2. Reihe von Reihe 13 bis Reihe 51 = 20 Reihe mit Abnahmen (135 - 20x6 Abnahme = 15). Viel Spaß beim stricken!
02.04.2019 - 12:45
![]() Leyla ha scritto:
Leyla ha scritto:
Die Maschenprobe stimmte eigentlich, aber evtl habe ich im Verlauf etwas lockerer gestrickt. Das Problem ist aber eigentlich eher, dass ich mir nicht sicher bin wie ich weiter abnehmen soll.
02.04.2019 - 09:55DROPS Design ha risposto:
Liebe Leyla, ich habe gerade die Reihenanzahl gezählt und es ist richtig in Größe 2 Jahre: 8 Reihen Krausrechts + Reihe 1 bis 11 (Ab- und Zunahme) + Reihe 13 bis 51 (Abnahmen x 20 Reihe x 6 Abnahmen) = 15 M übrig und 51 cm sind 15 cm + die Krausrippen = ca 16 cm. Viel Spaß beim stricken!
02.04.2019 - 10:53
![]() Leyla ha scritto:
Leyla ha scritto:
Entschuldigung, ich sehe grade Ich habe in meiner ersten Frage versehentlich 2cm statt 16 cm getippt, das ist natürlich Blödsinn... Die Arbeit misst 16 cm.
01.04.2019 - 17:04
![]() Leyla ha scritto:
Leyla ha scritto:
Wie gesagt, ich habe alles ganz genau nach Anleitung gestrickt, so wie sie es oben beschrieben haben. Jetzt habe ich aber zu viele Maschen (33) auf der Nadel und kann nicht mehr wie gewohnt abnehmen da zwischen den Markierungen nur noch je eine Masche übrig ist. Die Arbeit misst trotzdem schon 16 cm. Wie kann ich nun sinnvoll weiter abnehmen um die Arbeit zu beenden?
01.04.2019 - 17:02DROPS Design ha risposto:
Liebe Leyla, stimmt Ihre Maschenprobe? Haben Sie die 34 Reihen = 10 cm?
02.04.2019 - 09:33
![]() Leyla ha scritto:
Leyla ha scritto:
Liebes Drops Team, ich stricke die Mütze für die Größe 2 Jahre und habe, denke ich, alles nach Anleitung gestrickt. Nun habe ich noch 33 Maschen auf der Nadel und, wie bei anderen schon beschrieben, nur noch jeweils eine Masche zwischen den drei Markierungen. Die Arbeit misst aber auch jetzt schon 2 cm an den Ohrenklappen... Wie gehe ich jetzt am besten vor?
01.04.2019 - 09:50DROPS Design ha risposto:
Liebe Leyla, am Anfang wird es 6 M zu- und 6 M abgenommen total 6 Mal, dann wird es nur abgenommen bis 15 M übrig sind = die Mütze misst dann 16 cm ab 2. und 6. Markierung. Haben Sie alle Zu- und Abnahme gearbeitet dann nur in jeder Hinreihe abgenommen?
01.04.2019 - 15:25
|
|
Alladin#alladinhat |
|
|
|
|
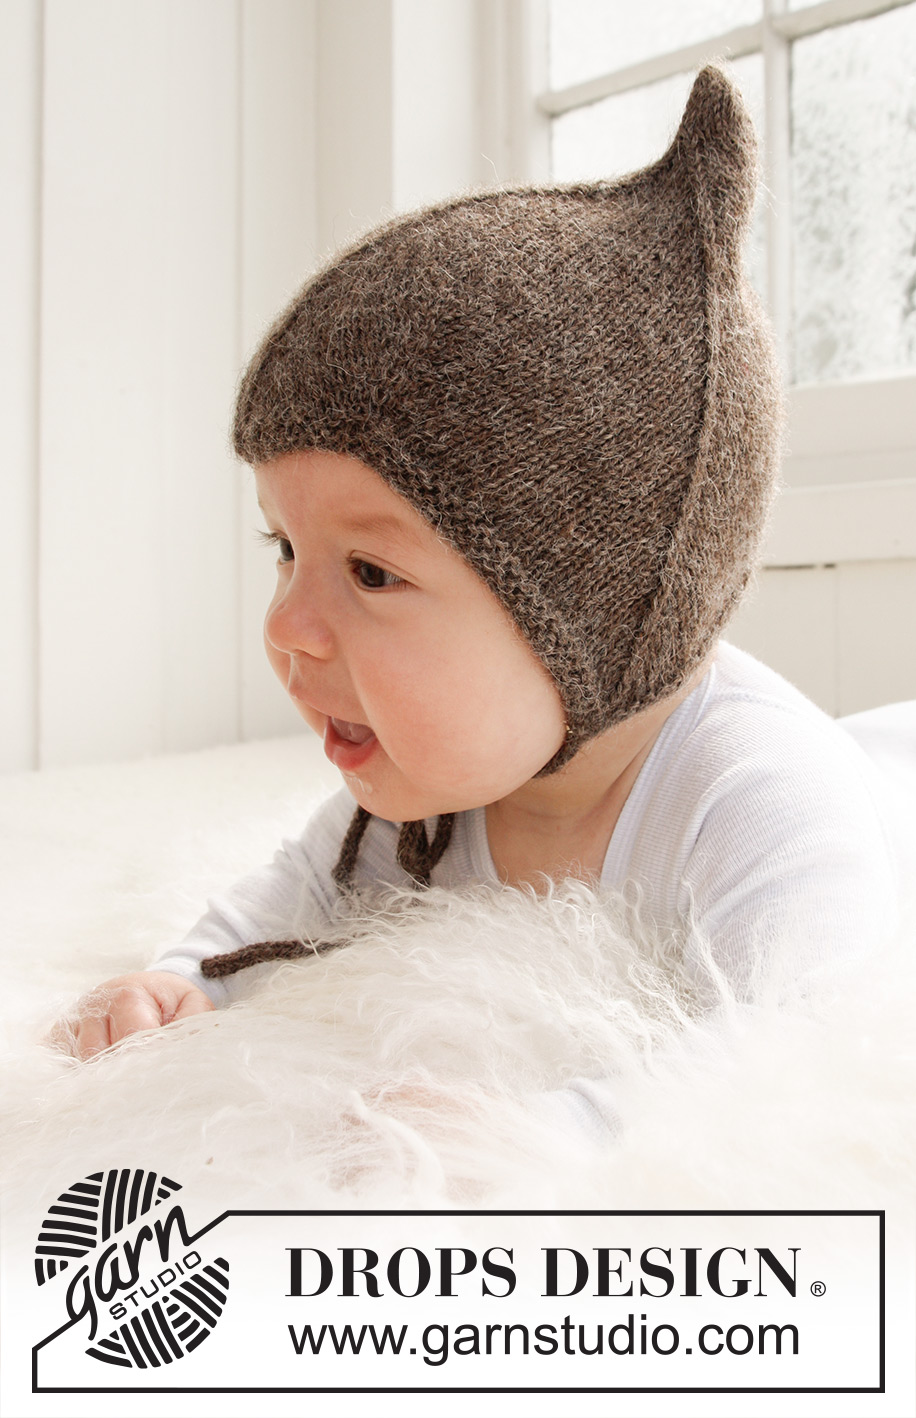
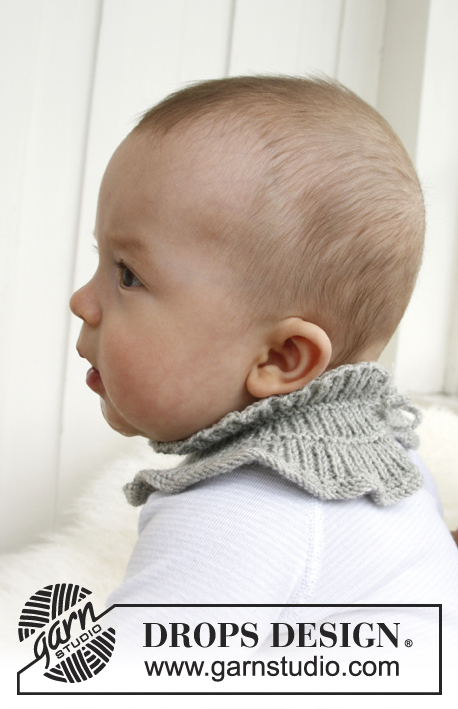
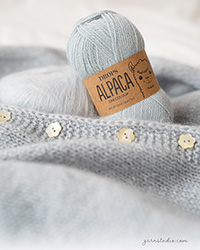
Cappello lavorato ai ferri per per neonati e bambini in DROPS Alpaca.
DROPS Baby 21-34 |
|
|
SUGGERIMENTO PER GLI AUMENTI: Tutti gli aumenti vengono effettuati sul diritto del lavoro. Aumentare 1 m prima e dopo la m con il segno, inserendo 1 m gettata. Al giro successivo, lavorare la m gettata a rovescio ritorto (prendere la m nell’asola posteriore e non in quella anteriore) per evitare che si formi un buco. SUGGERIMENTO PER LE DIMINUZIONI: Tutte le diminuzioni vengono effettuate sul diritto del lavoro. Diminuire 1 m da ciascun lato della m con il segno. Iniziare 1 m prima della m con il segno. Passare 1 m sul ferro ausiliario dietro il lavoro, passare 1 m senza lavorarla (= m con il segno), lavorare insieme a dir la m successiva e la m sul fermamaglie, accavallare la m passata sulle m lavorate. -------------------------------------------------------- BERRETTO: Si lavora avanti e indietro sui ferri. Avviare 117-123-129 (135-141) m (compresa 1 m vivagno da ciascun lato) sui ferri n° 2,5 con il filato Alpaca. Lavorare 8 ferri a dir (1° ferro = diritto del lavoro). Inserire 7 segni nel lavoro sul diritto del lavoro, come segue: 1° segno nella 2a m, 2° segno nella 24a-25a-26a (27a-28a) m, 3° segno nella 48a-50a-52a (54a-56a) m, 4° segno nella 59a-62a-65a (68a-71a) m, 5° segno nella 70a-74a-78a (82a-86a) m, 6° segno nella 94a-99a-104a (109a-114a) m, e il 7° segno nella penultima m sul ferro. Proseguire a maglia rasata con 1 m vivagno a punto legaccio da entrambi i lati – ALLO STESSO TEMPO, durante il primo ferro, iniziare ad aumentare e a diminuire – vedere il SUGGERIMENTO PER GLI AUMENTI e il SUGGERIMENTO PER LE DIMINUZIONI sopra – ogni 2 ferri come segue: Aumentare 1 m dopo il 1° segno. Diminuire 1 m da ciascun lato del 2° segno. Aumentare 1 m da ciascun lato del 3° segno. Diminuire 1 m da ciascun lato del 4° segno. Aumentare 1 m da ciascun lato del 5° segno. Diminuire 1 m da ciascun lato del 6° segno. Aumentare 1 m prima del 7° segno. Proseguire ad aumentare e a diminuire sul diritto del lavoro ogni 2 ferri (cioè su ogni ferro dal diritto del lavoro) per un totale di 6 volte. Il lavoro misura circa 6 cm dal bordo di avvio – se la tensione in altezza non è corretta potete lavorare come prima con gli aumenti/diminuzioni. Diminuire poi, ogni 2 ferri sul diritto del lavoro, da ciascun lato del 2°, 4° e 6° segno finché sul ferro non rimangono 15 m (= 17-18-19 (20-21 volte). Il lavoro misura ca. 16-17-17 (18-19) cm dalla punta inferiore fino al 2° o al 6° segno = paraorecchie. Lavorare il ferro successivo sul diritto del lavoro come segue: 1 m a dir, 2 m insieme a dir, 9 m a dir, 2 m insieme a dir, 1 m a dir = 13 m. Ripetere le diminuzioni da ciascun lato su tutti i ferri (sul rovescio del lavoro lavorare insieme a rov le 2 m che precedono e che seguono la m vivagno) finché non rimangono 5 m. Sull'ultimo ferro dal rovescio del lavoro lavorare 1 maglia di vivagno, 3 maglie insieme a rovescio e lavorare 1 maglia di vivagno. Far passare il filo attraverso le maglie rimaste. CONFEZIONE: Cucire il berretto insieme al centro sul dietro, all’interno della m vivagno. La punta centrale delle 3 punte sul ferro di avvio va posizionata davanti, sulla fronte. CORDONCINO: Avviare 4 m sui ferri n° 2,5. Lavorare come segue: * 1 m a dir, portare il filato sul davanti del lavoro (verso di voi), passare 1 m a rov senza lavorarla, portare il filo sul dietro del lavoro (lontano da voi) *, ripetere da *-* ancora 1 volta, per tutti i ferri. In questo modo si forma un cordoncino tondo. Chiudere le m quando il cordoncino misura ca. 20-22-24 (26-28) cm. Lavorare un secondo cordoncino uguale. Cucire un cordoncino sulla punta di ciascuno dei due paraorecchie. |
|
Avete terminato questo modello?Allora taggate le vostre foto con #dropspattern #alladinhat o inviatele alla #dropsfan gallery. Avete bisogno di aiuto con questo modello?Troverete 17 video tutorial, una sezione per i commenti/domande e molto altro guardando il modello su www.garnstudio.com © 1982-2026 DROPS Design A/S. Ci riserviamo tutti i diritti. Questo documento, compreso tutte le sue sotto-sezioni, è protetto dalle leggi sul copyright. Potete leggere quello che potete fare con i nostri modelli alla fine di ogni modello sul nostro sito. |


Con oltre 40 anni di esperienza nel design di modelli di maglia e uncinetto, DROPS Design offre la più estesa collezione di modelli gratuiti su internet - tradotti in 17 lingue. Ad oggi vi possiamo fornire 324 cataloghi e 12190 modelli - 9459 dei quali sono tradotti in Italiano.
Ci stiamo impegnando molto per darvi il meglio che vi possiamo offrire in termini di maglia e uncinetto, ispirazioni e consigli così come filati di grande qualità ad un prezzo incredibile! Volete utilizzare i nostri modelli per qualcosa d'altro oltre al vostro uso personale? Potete leggere tutto ciò che è consentito nel testo sul Copyright in basso su tutte le pagine dei nostri modelli. Buon lavoro!
Lasciare un commento sul modello DROPS Baby 21-34
Noi saremmo felici di ricevere i tuoi commenti e opinioni su questo modello!
Se vuoi fare una domanda, fai per favore attenzione a selezionare la categoria corretta nella casella qui sotto per velocizzare il processo di risposta. I campi richiesti sono indicati da *.