
Popular categories
Looking for a yarn?


Comments / Questions (9)
![]() Elena wrote:
Elena wrote:
Hallo, mijn proeflapje (15 st en 19 nld) met nld 6 is precies 10 cm breed, maar 9 cm lang ipv 10 cm. Breedte is dus prima, maar lengte te kort. Hoe kan ik dit oplossen? Ik hoor het graag. Alvast met dank.
26.03.2026 - 08:58DROPS Design answered:
Dag Elena,
De breedte van het proeflapje is inderdaad het belangrijkst. Voor de lengte kun je de aangegeven afmetingen in centimeters aanhouden volgens de beschrijving in het patroon.
29.03.2026 - 11:29
![]() Marie-José wrote:
Marie-José wrote:
Wellicht heb ik het niet duidelijk genoeg uitgelegd in mijn voorgaande berichtje. Ik heb Alaska vervangen door Nepal. Het proeflapje is gebreid op 15 st en 19 rijen. met nld 6, terwijl Nepal eigenlijk op nld 5 zou moeten. Kom ik uit op 9 x 9 cm … moet ik dan nog een naald hoger gaan (nld 7) om hier 10 x 10 cm van te maken? Dan is het breisel echt te los en lijkt mij geen goede oplossing … wat kan ik wel doen? Met vr groet, Marie-José
01.03.2026 - 21:52
![]() Marie-José wrote:
Marie-José wrote:
Hallo, mijn keuze is gevallen op Nepal ipv Alaska. 1 draad Alaska = 1 draad Nepal. Nepal geeft echter aan nld nr 5 ipv nr 6 te gebruiken. Ik heb het proeflapje gebreid met nld nr 6 en het aantal steken en rijen van het proeflapje aangehouden. Dit kwam uit op 9x9 cm. D.w.z. dat ik de naalddikte zou moeten verhogen ... ik heb echter al een naalddikte hoger gebruikt dan aangegeven voor Nepal. Het breisel wordt dan te los. Wat kan ik het beste doen? Alvast dank voor een reactie.
27.02.2026 - 20:40DROPS Design answered:
Dag Marie-José,
Als je 9 steken in de breedte hebt en het proeflapje moet 15 steken zijn, dan moet je dunnere naalden nemen.
01.03.2026 - 11:17
![]() Hess Andrea wrote:
Hess Andrea wrote:
Das Abketten bei den Schultern (von den Ärmeln) verstehe ich gar nicht. Es betrifft diesen Teil: Nach 50-49-46-44 cm, bei jeder 2. R. gegen die Schulter abk.: 3 M. 1 Mal, 2 M. 2-2-2-3 Mal und 1 M. 1-3-5-6 Mal, weiter, auf beiden Seiten 2 M. abk. bis die Arbeit 56-57-57-57 cm misst, danach 1 Mal 3 M. abk. Die restlichen M. nach ca. 57-58-58-58 cm abk. Könnten Sie mir das genau erklären? Es ist auch nicht ersichtlich, wieviele Maschen übrig bleiben. Das wäre sehr hilfreich zu wissen.
23.10.2023 - 21:21DROPS Design answered:
Liebe Frau Hess, so ketten Sie ab: 3 M am Anfang der 2 nächsten Reihen (3 M beidseitig) dann 2 M am Anfang der 4-4-4-6 nächsten Reihen (= 2-2-2-3 Mal 2 Maschen beidseitig), dann 1 M am Anfang der 2-6-10-12 nächsten Reihen (= 1-3-5-6 Mal 1 M beidseitg), dann ketten Sie 2 M am Anfang Hin- und Rückreihen bis die Ärmel 56-57 cm misst (wieviele Reihen Sie brauchen hängt an Ihrer Maschenprobe in der Höhe ab, wichtig ist nur die Höhe in cm und daß die selbe Maschenanzahl beidseitig abgekettet wird), dann ketten Sie 3 M am Anfang der 2 nächsten Reihen. Viel Spaß beim stricken!
24.10.2023 - 09:18
![]() Manon wrote:
Manon wrote:
Bonjour, je tricote la taille M. Pour la manche, on dit A 22 cm de hauteur totale, augmenter 1 m de chaque côté 8-10-11-13 fois tous les 3.5-2.5-2-1.5 cm = 56-60-62-66 m – tricoter les augmentations en point fantaisie. Est ce que cela veut dire que je tricote les augmentations en mailles envers jusqu`à ce que je puisse reprendre le point 4 mailles envers, une maille endroit. Merci et bonne année !
31.12.2020 - 16:09DROPS Design answered:
Bonjour Manon! Vous avez bien compris. Bon tricot!
31.12.2020 - 17:58
![]() Kater wrote:
Kater wrote:
Ich würde gerne eine Wolle haben, die kuschelig und weich ist. Ohne viel zu Flüssen und zu warm ist. Ko Können Sie mir weiterhelfen Mit freundlichen Grüßen Nicole Kater
23.10.2019 - 21:55DROPS Design answered:
Liebe Kater, versuchen Sie unseren Garnumrechner, Ihr DROPS Laden wird Ihnen gerne weiterhelfen, auch telefonisch oder per E-Mail. Viel Spaß beim stricken!
24.10.2019 - 10:23
![]() Marianne Fibæk wrote:
Marianne Fibæk wrote:
Jeg forstår ikke hvordan udtagningerne på bullen skal forstås: "Samtidig når arb måler 15 cm tages der 1 m ud på hver side af m med mærketråd i begge sider på hver 8.-14.-15.-16. cm totalt 3-2-2-2 gange = 132-148-168-188 m" Skal jeg tage alle 12m ud på den samme omgang v. 15 cm? Jeg forstår simpelthen ikke formuleringen.
08.12.2012 - 13:51DROPS Design answered:
Du starter udtagningen når arb måler 15 cm og det gør du så på hver 15.cm 2 gange hvis du strikker den næst største størrelse. God fornøjelse"
13.12.2012 - 09:48
![]() DROPS Design wrote:
DROPS Design wrote:
Hej Karen. Det stemmer, nu lukker du af under ærmet så der dannes en ærmekuppel. God fornøjelse!
22.10.2007 - 09:58
![]() Karen B. wrote:
Karen B. wrote:
Jeg forstår ikke hvordan man skal lave ærmekuplen. Der står at man skal lukke af i hver side. Er det på undersiden af ærmet der menes, således at man nu skal strikke frem og tilbage igen?
19.10.2007 - 22:15
|
|||||||
DROPS 84-5 |
|||||||
|
|
|||||||
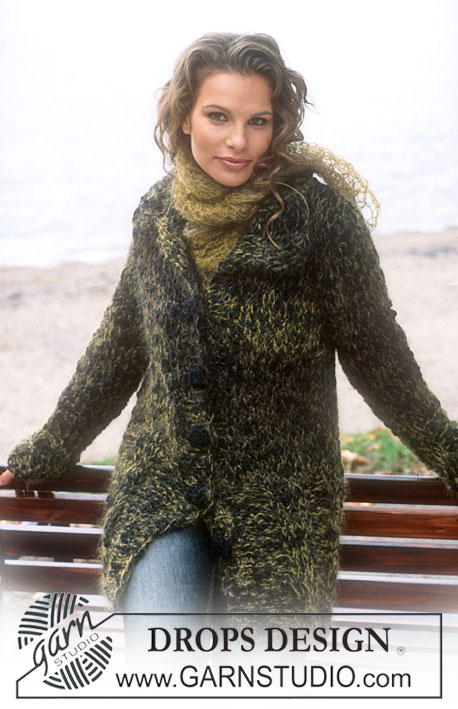
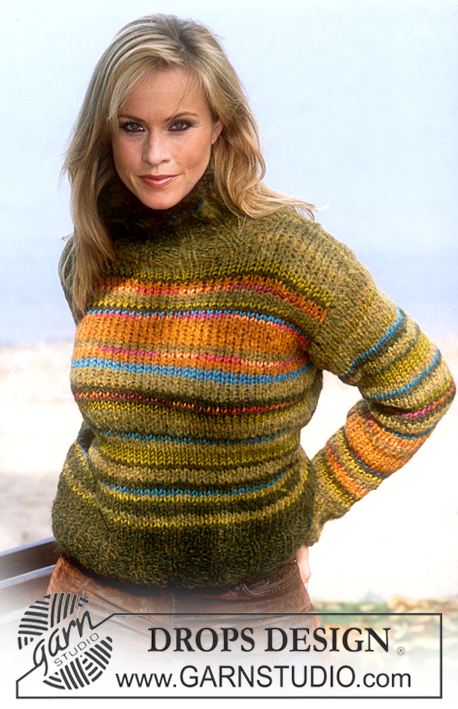
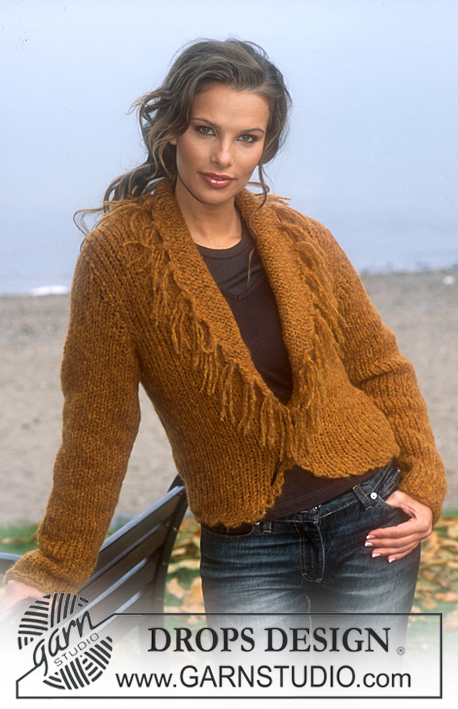
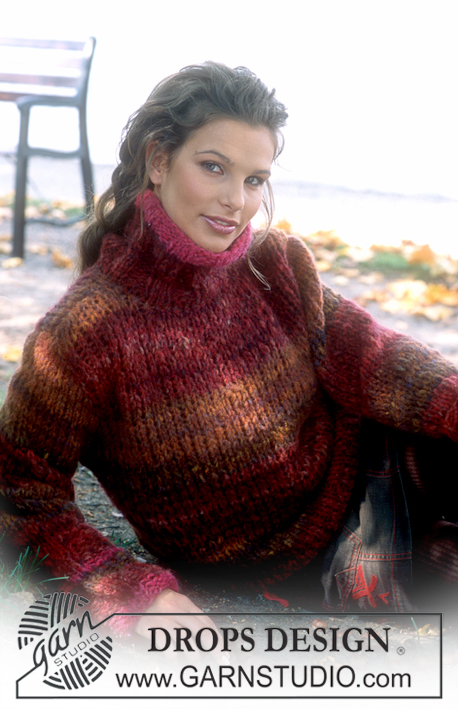
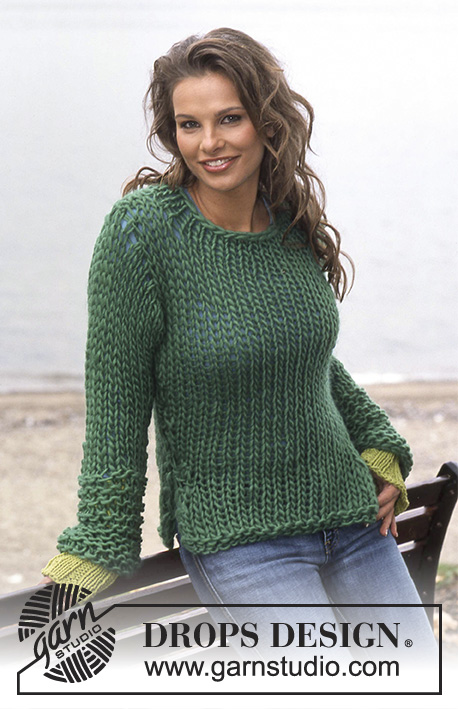
DROPS Pullover in Alaska and Wristwarmer in Vivaldi
DROPS 84-5 |
|||||||
|
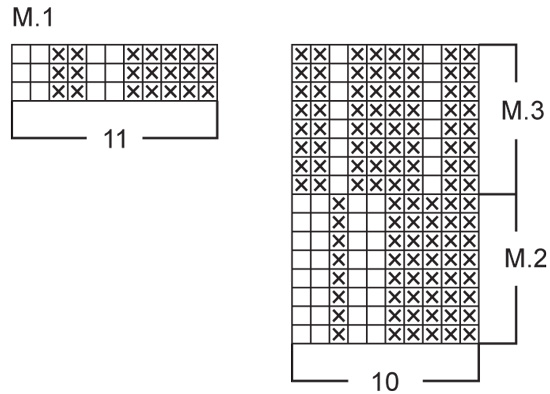
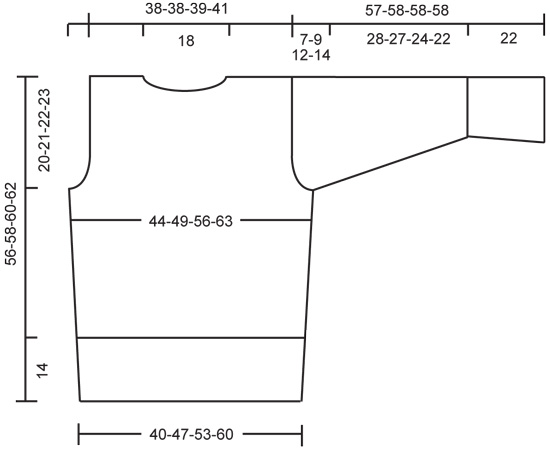
PULLOVER: Gauge: 15 sts x 19 rows in stockinette st = 10 x 10 cm. Pattern: See charts. The pattern is seen from the right side. Body: Cast on 130-152-174-196 sts on circular needles; join and knit 1 row. Knit the next row as follows: P 1 and place a marker in this st (= side), K 2, Pattern 1 over the following 55-66-77-88 sts, P 5, K 2, P 1 and place a marker in this st (= side), K 2, Pattern 1 over the following 55-66-77-88 sts, P 5 and K 2. Knit 2 rows more as established, then on the next row P 2 tog all the P 2 in Pattern 1 (the remaining sts knit the same as before) = 120-140-160-180 sts. Then knit det as follows: P 1 (= side), K 2, Pattern 2 until 7 sts remain on row, finish with P 5 and K 2. When the piece measures 14 cm knit the next row as follows: K 1 (= side), P 2, Pattern 3 until last 2 sts, finish with P 2. Continue as established to finished measurements. When the piece measures 15 cm inc 1 st each side of each st with markers (sides) every 8-14-15-16 cm a total of 3-2-2-2 times = 132-148-168-188 sts – P the increased sts. When the piece measures 36-37-38-39 cm bind off 5 sts at each side for armhole (= st with marker + 2 sts each side of that st). Knit each side separately. Front: = 61-69-79-89 sts. Continue the pattern as before. Bind off for armhole at each side every other row: 3 sts 0-0-1-1 time, 2 sts 0-2-2-4 times and 1 st 2-2-3-3 times = 57-57-59-61 sts. When the piece measures 48-50-51-53 cm bind off the center 15 sts for the neck. Then bind off at each neck edge every other row: 2 sts 2 times and 1 st 2 times = 15-15-16-17 sts remain on each shoulder. Bind off when the piece measures 56-58-60-62 cm. Back: = 61-69-79-89 sts. Bind off for armhole as on front = 57-57-59-61 sts. When the piece measures 54-56-58-60 cm bind off the center 25 sts for the neck. On the next row dec 1 st at each neck edge = 15-15-16-17 sts remain on each shoulder. Bind off when the piece measures 56-58-60-62 cm. Sleeve: The cuff is knit flat until after the zipper. Cuff: Cast on 52 sts and P 1 wrong side row, with 1 garter st edge st at each side. Knit the next 3 rows as follows: Rows 1 and 3 (right side): K 1 (edge st), * K 3, P 2, K 3, P 6 *, repeat * - * a total of 3 times and finish with K 3, P 2, K 3 and K 1 (edge st). Row 2: K 1 (edge st), * P 3, K 2, P 3, K 6 *, repeat * - * a total of 3 times and finish with P 3, K 2, P 3 and K 1 (edge st). On the next row K tog all the K 2 on the row (seen from the wrong side) = 48 sts. Continue the rib until the piece measures 20 cm, then cast on 3 new sts at the end of row (right side row) = 51 sts. Change to double-pointed needles – divide sts onto 4 needles. The zipper opening is the top center of the sleeve. Start the row at the opposite side, in the center of a P 6 – place a marker here. Knit 3 rows rib as before, but the 3 new sts + the garter st edge st at each side (= 5 sts) now P. On the 3rd row dec all K 3 to K 2 and all P 6 to P 5 = 40 sts, and knit Pattern 3 – start the pattern so there is a K 1 at the marker. When the piece measures 22 cm inc 1 st at each side of marker every 3.5-2.5-2-1.5 cm a total of 8-10-11-13 times = 56-60-62-66 sts – knit the increased sts in the pattern as you go along. When sleeve measures 50-49-46-44 cm bind off for sleeve cap at each side of marker every other row: 3 sts 1 time, 2 sts 2-2-2-3 times and 1 st 1-3-5-6 times, then 2 sts at each side until the piece measures 56-57-57-57 cm, then bind off 3 sts at each side 1 time. Bind off the remaining sts, the piece measures approx. 57-58-58-58 cm. Assembly: Sew shoulder seams. Collar: Pick up approx. 65-75 sts (divisible by 5) around the neck on double-pointed needles; join and knit Pattern 3. When the collar measures 5-5-6-6 cm knit the next row as follows: K 1, * P 1, K 1, P 1, K 2 *, repeat * * around row and finish with P 1, K 1, P 1 and K 1. Knit 2 rows more in the same rib, then bind off all sts in rib. The collar measures approx. 7-7-8-8 cm. Rolled edge: Pick up approx. 65-75 sts around the neck on double-pointed needles in the 1st row of the collar rib. Join and knit 4 rows stockinette st (= rolled edge) and bind off loosely – to be sure the edge will not be too tight, make a yo approx. every 5 sts at the same time as binding off. Sew in sleeves using edge sts as seam allowance. Sew in a zipper on each cuff. WRISTWARMER: Measurements: Length: approx. 26 cm [10.25"] Circumference: approx. 18 cm [7"] Materials: Garnstudio VIVALDI 43% mohair, 27% acrylic, 30% polyester, 50 g./280 m./305 yards 50 gr nr 01, black DROPS 2.5 mm [US 1] needles, or size needed to obtain correct gauge. Gauge: . 25 sts x 50 rows in garter st = 10 x 10 cm. Garter St with Picot edge: Row 1: knit. Row 2: knit. Row 3: knit to last 4 sts, K 2 tog, yo, in the 2 last sts knit 2 sts in each st = 2 new sts. Row 4: Sl 1, K 1, psso, K 1 and bind it off – 2 sts bound off, and K across row.Repeat rows 1 to 4. Wristwarmer: Cast on 65 sts around 2 needles (so that cast-on edge will be loose). Pull out one needle and knit garter st with picot edge – see instructions above. When the piece measures 18 cm put sts on a |
|||||||
Diagram explanations |
|||||||
|
|||||||
 |
|||||||
 |
|||||||
Have you finished this pattern?Tag your pictures with #dropspattern or submit them to the #dropsfan gallery. Do you need help with this pattern?You'll find 24 tutorial videos, a Comments/Questions area and more by visiting the pattern on garnstudio.com. © 1982-2026 DROPS Design A/S. We reserve all rights. This document, including all its sub-sections, has copyrights. Read more about what you can do with our patterns at the bottom of each pattern on our site. |
|||||||


With over 40 years in knitting and crochet design, DROPS Design offers one of the most extensive collections of free patterns on the internet - translated to 17 languages. As of today we count 324 catalogues and 12290 patterns translated into English (UK/cm). 12290
We work hard to bring you the best knitting and crochet have to offer, inspiration and advice as well as great quality yarns at incredible prices! Would you like to use our patterns for other than personal use? You can read what you are allowed to do in the Copyright text at the bottom of all our patterns. Happy crafting!
Post a comment to pattern DROPS 84-5
We would love to hear what you have to say about this pattern!
If you want to leave a question, please make sure you select the correct category in the form below, to speed up the answering process. Required fields are marked *.