
Popular categories
Looking for a yarn?


Comments / Questions (53)
![]() Elisa wrote:
Elisa wrote:
Buonasera. Non sono contenta di come è venuto il giro maniche, che mi risulta un po' "tirato", inoltre risultano troppo lunghe. Dovendo quindi disfarle, mi chiedo se una soluzione potrebbe essere tirare su i punti dal giro maniche e lavorare così le maniche dall'alto verso il polso. Cosa ne pensate? Grazie!
04.01.2024 - 22:50DROPS Design answered:
Buonasera Elisa, per un aiuto così personalizzato può rivolgersi al suo rivenditore DROPS di fiducia. Buon lavoro!
10.01.2024 - 16:38
![]() Gisèle Allemand wrote:
Gisèle Allemand wrote:
Bonjour, les côtes anglaise de ce modèle ressembles beaucoup au point de brioche qui est plus rapide à tricoter car sans les jetés mais avec une maille double endroit et un maille endroit, quand pensez vous ? cela changerait il les mesures du modèle ?
28.08.2023 - 12:49DROPS Design answered:
Bonjour Mme Allemand, le point dit "brioche" en anglais correspond en général aux côtes anglaises avec jeté expliquées dans ce modèle. Si vous préférez tricoter les côtes anglaises différemment, pensez à bien tricoter un échantillon au préalable pour vérifier vos mesures (et les quantités peuvent en être affectées). Retrouvez ici une petite récap des différentes variations des côtes anglaises. Bon tricot!
28.08.2023 - 16:33
![]() Kerstin Fullerton wrote:
Kerstin Fullerton wrote:
Hi. Is it possible to knit this in the round on circular needles up to the armholes? Do i need to make any adjustments for that? Thank you for your help.
14.03.2023 - 08:46DROPS Design answered:
Dear Mrs Fullerton, probably yes, you just have then to remove the edge stitches that you don't need in the round, but then cast them on when dividing piece to finish front and back pieces separately. Happy knitting!
14.03.2023 - 10:10
![]() Sue Whitehall wrote:
Sue Whitehall wrote:
I’m knitting drops extra 0-898 and I’ve got to the false raglan. The pattern says k 2sts together at the start of the row and 3 sts together at the end of the row but the video seems to K 3 sts together at the start of the row and 4sts together at the end of the row. Can you advise p,ease?
15.01.2023 - 13:07DROPS Design answered:
Dear Mrs Whiteall, to shape the false raglan, you will increase before 1st marker = 2 yarn overs + decrease after 2nd marker (ses 01.10 in the video: slip 1, K2 tog, psso) (false raglan on the right side of piece) and decrease then before 3rd marker (03.14: K3 tog) + increase after 4th marker (04:10 in the video) (false raglan on the left side of piece) - you have now increase 2 sts on each side and decrease 2 sts inside the markers 2 and 3. Happy knitting!
16.01.2023 - 09:19
![]() Caitie Santo wrote:
Caitie Santo wrote:
I'm trying to knit english rib but confused about inc 1 st at last row of rib before english rib. I end up with 91 st and when i try row 2 of english rib, there is an extra st after I knit 1st in garter and before I k tog Yo and slipped. What am i supposed to do with the extra st in row 2 after I knit 1st stitch?
14.01.2023 - 17:41DROPS Design answered:
Dear Caitie, the pattern is correct. You have 91 stitches. The uneven stitch is used to make the english rib symmetrical on both sides. You can see that at the end of the 1st row you have worked 1 yo, slip 1 stitch purlwise, (you don't knit 1 stitch), so you have uneven stitches. In the next row. You work in the next row the edge stitch, and the slipped stitch + the yo of the previous row are worked together (there shouldn't be any stitches in between). Happy knitting!
15.01.2023 - 12:24
![]() Caitie Santo wrote:
Caitie Santo wrote:
I'm trying to knit english rib but confused about inc 1 st at last row of rib before english rib. I end up with 91 st and when i try row 2 of english rib, there is an extra st after I knit 1st in garter and before I k tog Yo and slipped. What am i supposed to do with the extra st in row 2 after I knit 1st stitch?
14.01.2023 - 17:41
![]() Schrevens Arlette wrote:
Schrevens Arlette wrote:
Hallo,als je bij de schets de mouwen aftrekt van de totale lengte dan moet je toch meer cm breien dan in de beschrijving staat voor je aan de valse raglanmouwen begint of begrijp ik het verkeerd?Groetjes.
20.11.2022 - 12:48DROPS Design answered:
Dag Arlette,
Dit kan per maat verschillend zijn (lees eerder beginnen dan dat het armsgat begint) om de schuine lijn goed te laten lopen en dus goed uit te komen met de hoogte en breedte die over is om de schuine lijn te maken bij de schouder. Hopelijk heb ik het zo goed uitgelegd. 🤔
20.11.2022 - 17:00
![]() Christiane wrote:
Christiane wrote:
Bij patroon drops 0898 staat het aantal rijen in de patentsteek opgegeven als 35 rijen voor tien cm. wanneer ik het staal brei, het aantal steken klopt 18 st per 10 cm maar het aantal rijen niet, voor 10 cm in patentsteek kom ik aan 48 rijen wat natuurlijk het verschil gaat maken bij het breien van de valse raglan. Ik moet i.p.v. 4 naalden 6 naalden breien om aan de juiste hoogte van het armsgat te komen. Kan ik daar wat uitleg over krijgen aubl.
10.10.2022 - 10:40DROPS Design answered:
Dag Christiane,
Dat is nogal een verschil in aantal naalden en ik vermoed dat dat misschien te maken heeft met de patensteek. Dit is nogal een rekbare steek in de breedte, dus misschien moet je het proeflapje ietsje uitrekken in de breedte, waarschijnlijk kom je dan wel op de juiste stekenverhouding. (Wellicht moet je daar dan een dunnere naald voor gebruiken.)
12.10.2022 - 20:13
![]() Mona wrote:
Mona wrote:
Ich verstehe irgendwie die abnehmen für den Halsausschnitt nicht ? Ich hab das so verstanden: 45 cm hochstricken Dann auf/abnahmen -> falsche raglanschräge beginnen dabei jede 6. Reihe Diese ab/Aufnahmen machen? Ab 66cm die Mittleren ma Abk.? Trotzdem mit der schräge fortfahren [halt separat weil ja das Teil geteilt ist ab da] Und... dann?? Am Hals in jeder raglanschrägenreihe 2ma Abk? Und am Rand 1 ma?
16.09.2022 - 20:41DROPS Design answered:
Liebe Mona, stricken Sie die 5. Größe? Also ja beim 45 cm beginnen Sie die falsche Raglanabnahmen (mit Ab- bzw Zu-nahmen) 17 Mal insgesamt in jeder 6. Reihe; dann stricken Sie 2 cm Vollpatent und ketten Sie die mittleren Maschen für Halsausschnitt (= 45 cm + ca 28 cm = ca 74 cm), dann stricken Sie noch 2 weitere cm über jede Schulter = 76 cm von der Anschlagskante bis zur Schulter . Viel Spaß beim stricken!
11.10.2022 - 16:14
![]() Brigitte wrote:
Brigitte wrote:
Hallo, ich möchte diesen Pullover in Halbpatent stricken. Erste Frage: muss die Maschenprobe ebenfalls hängend ausgemessen werden? Zweite Frage: ist es überhaupt möglich diesen falschen Raglan trotzdem zu stricken? Gruß Brigitte
25.09.2021 - 20:31DROPS Design answered:
Liebe Brigitte, leider können wir jeder Anleitung nach jedem individuellen Frage anpassen und einzelne Modelle auf individuellen Wunsch hin umrechnen. Aber stimmt ja, immer eine Maschenprobe zuerst stricken, um zu prüfen, wie Sie dieses Modell nach Ihrem Geschmack anpassen können. Wenden Sie sich bitte an Ihrem DROPS Laden, dort hilft man Ihnen gerne weiter. Danke im voraus für Ihr Verständnis. Viel Spaß beim stricken!
27.09.2021 - 08:15
|
|
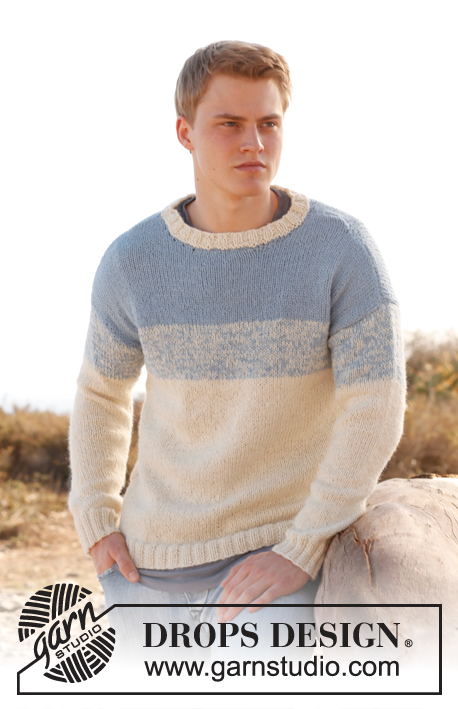
DROPS Extra 0-898 |
|
 |
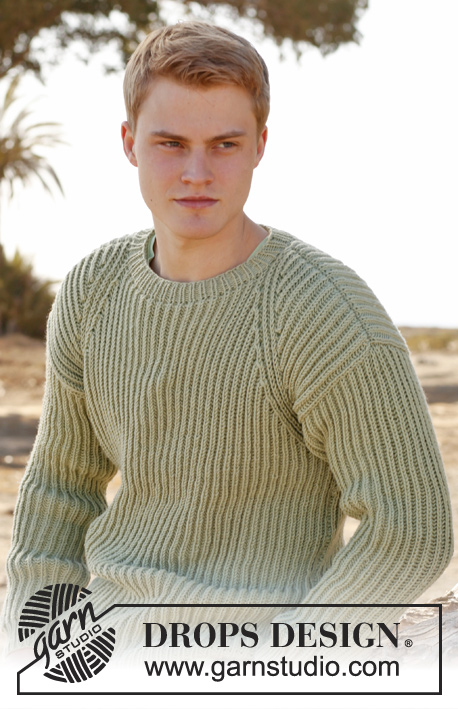 |
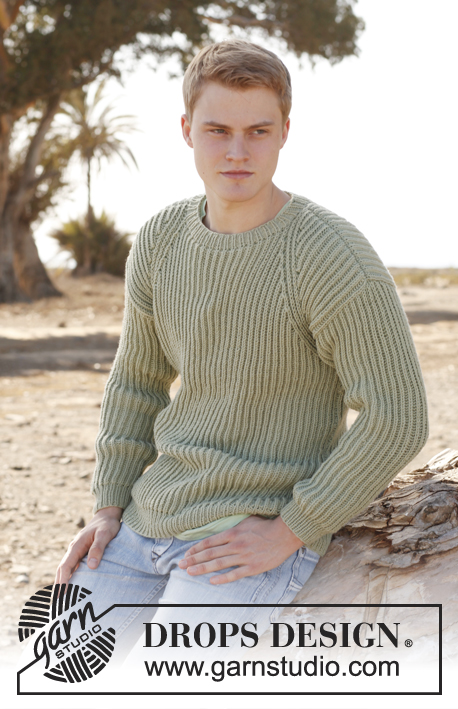
Men's knitted jumper with English rib, in DROPS Karisma. Size: S - XXXL.
DROPS Extra 0-898 |
|
|
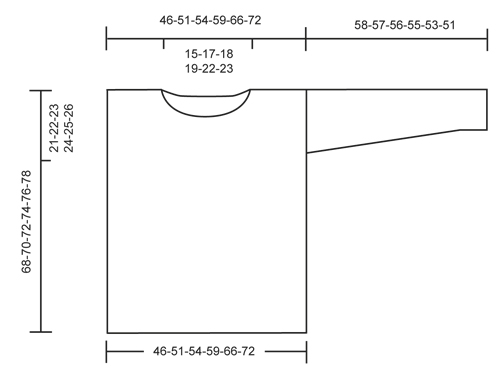
MEASURING TIP: Because of the weight of the yarn all measurements must be done when the piece is held up. GARTER ST (back and forth on needle): K all rows. 1 ridge = 2 rows K. ENGLISH RIB (back and forth on needle): Row 1 (from WS): 1 st in garter st, * 1 YO, slip 1 st as if to P, K 1 *, repeat from *-* until 2 sts remain, 1 YO, slip 1 st as if to P, 1 st in garter st. Row 2 (= from RS): 1 st in garter st, * K tog YO and slipped st, 1 YO, slip 1 st as if to P *, repeat from *-* until 2 sts remain, K tog YO and slipped st, 1 st in garter st. Row 3 (= from WS): 1 st in garter st, * 1 YO, slip 1 st as if to P, K tog YO and slipped st *, repeat from *-* until 2 sts remain, finish with 1 YO, slip 1 st as if to P, 1 st in garter st. Repeat 2nd and 3rd row upwards. ENGLISH RIB ST: When counting the sts, the YOs are not counted as sts. INCREASE TIP (applies to sleeve): Inc 1 st inside 1 edge st in each side of piece. Inc 1 st by making 1 YO, on next row work YO twisted i.e. work in back loop of st instead front. NOTE: Work the inc sts in English rib. CAST-OFF TIP: When casting off, work YO and slipped st K tog (= K 1). ---------------------------------------------------------- BACK PIECE: Worked back and forth on circular needle to make room for all the sts. Cast on 82-90-96-106-118-128 sts on circular needle size 4.5 mm with Karisma. Work as follows – from RS: 1 edge st, * K 1, P 1 *, repeat from *-* and finish with 1 edge st. Work edge st in GARTER ST until finished measurements - see explanation above. Work rib like this for 6 cm – READ MEASURING TIP. Inc 1 st at the end of last row in rib (last row = from RS) = 83-91-97-107-119-129 sts. Continue to work in ENGLISH RIB with 1 edge st in each side - see explanation above. When piece measures 47-47-47-46-45-43 cm, work a false raglan – 4 sts in English rib in each side should be displaced towards the neck. In the right side (from RS) inc 2 sts before 4 sts in English rib and dec 2 sts after 4 sts in English rib. In the left side dec 2 sts before 4 sts in English rib and inc 2 sts after 4 sts in English rib. No of sts should always be the same. Work the 2 inc sts in English rib. Work as follows from RS: 1 edge st in garter st, 2 YOs, insert 1 marker in piece, work 4 sts in English rib as before (YOs are not counted as sts - READ ENGLISH RIB ST), insert 1 marker in piece, pass next YO over st (so that it is behind this st), slip this st to the right needle as if to K, K the next 2 sts tog, psso, continue in English rib until 7 sts in English rib + 1 edge st remain, K the next 3 sts tog, insert 1 marker in piece, work 4 sts in English rib as before, insert 1 marker in piece, 2 YOs, finish with 1 edge st in garter st. On next row work the new YOs as follows: At beg of row (seen from WS): 1 edge st, P in back loop of first YO, 1 YO, K in back loop of second YO, continue in English rib as before. At end of row (seen from WS): K 1 in back loop of first YO, P 1 in back loop of second YO, 1 YO, 1 edge st in garter st. Work 4 rows in English rib over all sts. On next row work in English rib AT THE SAME TIME inc before first marker, dec after second marker, dec before third marker and inc after fourth marker as explained above. Inc and dec on every 6th row 11-12-13-15-17-19 times in total. Work in English rib for 2 cm after last dec/inc. Now cast off the middle 27-31-33-35-39-41 sts - READ CAST-OFF TIP = 28-30-32-36-40-44 sts remain on each shoulder. Finish each shoulder separately. Work in English rib for 2 cm, cast off. The whole piece measures approx. 68-70-72-74-76-78 cm. Insert 1 marker in each side of back piece, 21-22-23-24-25-26 cm down from shoulder. Markers show where sleeve is sewn in. FRONT PIECE: Cast on and work as on back piece until piece measures 58-60-62-64-66-68 cm. Continue inc and dec on every 6th row AT THE SAME TIME cast off for neck as follows: Slip the middle 17-21-23-25-29-31 sts on a stitch holder for neck and finish each shoulder separately. Continue pattern and displacement as before AT THE SAME TIME cast off for neck on every row from mid front as follows: 2 sts 2 times and 1 st 1 time = 28-30-32-36-40-44 sts remain on shoulder. Cast off when piece measures 68-70-72-74-76-78 cm. Insert 1 marker in each side of piece, 21-22-23-24-25-26 cm down from shoulder. Markers show where sleeve is sewn in. SLEEVE: Worked back and forth on circular needle. Loosely cast on 44-46-48-50-52-54 sts with Karisma on circular needle size 4.5 mm. Work as follows – from RS: 1 edge st, * K 1, P 1 *, repeat from *-* and finish with 1 edge st. Work edge sts in garter st until finished measurements. Work rib for 6 cm – READ MEASURING TIP. Inc 1 st at the end of last row in rib (last row = from RS) = 45-47-49-51-53-55 sts. Then work in English rib with 1 edge st in garter st in each side. When piece measures 8 cm, inc 1 st in each side - READ INCREASE TIP above! Repeat inc every 3-2½-2½-2½-2-2 cm 15-16-16-17-18-18 more times (16-17-17-18-19-19 inc in total) = 77-81-83-87-91-93 sts. When piece measures 58-57-56-55-53-51 cm (NOTE! Shorter measurements in the larger sizes because of wider shoulders), cast off. ASSEMBLY: Sew underarm seams inside 1 edge st. Sew in sleeves, down to markers on body. Sew side seams inside one edge st. NECK EDGE: Pick up approx. 84-88-92-96-100-104 sts (incl sts on stitch holder) around the neck on a short circular needle size 4.5 mm. Work rib = K 1/P 1 for 3 cm, then cast off with K over K and P over P. |
|
 |
|
Have you finished this pattern?Tag your pictures with #dropspattern or submit them to the #dropsfan gallery. Do you need help with this pattern?You'll find 18 tutorial videos, a Comments/Questions area and more by visiting the pattern on garnstudio.com. © 1982-2026 DROPS Design A/S. We reserve all rights. This document, including all its sub-sections, has copyrights. Read more about what you can do with our patterns at the bottom of each pattern on our site. |
|


With over 40 years in knitting and crochet design, DROPS Design offers one of the most extensive collections of free patterns on the internet - translated to 17 languages. As of today we count 324 catalogues and 12291 patterns translated into English (UK/cm). 12291
We work hard to bring you the best knitting and crochet have to offer, inspiration and advice as well as great quality yarns at incredible prices! Would you like to use our patterns for other than personal use? You can read what you are allowed to do in the Copyright text at the bottom of all our patterns. Happy crafting!
Post a comment to pattern DROPS Extra 0-898
We would love to hear what you have to say about this pattern!
If you want to leave a question, please make sure you select the correct category in the form below, to speed up the answering process. Required fields are marked *.