
Popular categories
Looking for a yarn?


Comments / Questions (48)
![]() Elena wrote:
Elena wrote:
...quindi le 2 maglie punto legaccio costituiscono una specie di vivagno,giusto? la traduzione italiana non fa capire bene, gli aumenti sembrano all'interno cioè TRA le 2 m punto legaccio! grazie a Rachel che mi ha permesso di capire grazie alla sua domanda (e grazie all'illuminante risposta di Drops in inglese)
30.07.2013 - 18:09DROPS Design answered:
Buongiorno Elena, le 2 m. a punto legaccio formano il vivagno ai lati e gli aumenti vanno fatti dopo/prima di queste m.. Abbiamo modificato leggermente il testo per renderlo più chiaro. Se riscontra altri problemi ci scriva pure! Buon lavoro!
02.08.2013 - 15:22
![]() Rachel Gawinski wrote:
Rachel Gawinski wrote:
Thanks so much!! Before I read your response, I figured that maybe words got lost in translation!! And that that 2 garter stitches had to be together!! Yay!
28.02.2013 - 03:09
![]() Roberta wrote:
Roberta wrote:
Le spiegazioni dicono che ci sono 6 punti aumentati, a me invece ne risultano 4
26.02.2013 - 10:46DROPS Design answered:
1 m aumetata all’interno delle 2 m punto legaccio del bordo del lavoro AD OGNI LATO ogni ferro (=4 AUMENTI) + aumentare 1 m prima del 1° segnapunti e 1 m dopo il 2° segnapunti (=2 AUMENTI) ogni ferro sul dir del lavoro (= 4+2=6 m aumentate).
26.02.2013 - 11:34
![]() Rachel wrote:
Rachel wrote:
Im trying to start this beautiful shawl, and I'm sure it's just me, but I'm not quite understanding the 2 garter stitches- are they simly the first 2 stitches on either side of shawl? And if so, how then to work the YO between those 2 stsitches especially after the first row as then you encounter the YO from previous, thus the 2 garter stitches are no longer together!! Can you offer help for me? Thanks so much. Also a visual of the start of shawl would certainly help me as well!
22.02.2013 - 21:50DROPS Design answered:
Dear Rachel, these 2 garter sts are the first 2 and the last 2 sts on row. The inc are made just after the 2 garter st at the beg of row and before the last 2 garter sts at the end of row, so that yo can be P or K on next row. see "INCREASE TIPS" at the beg of the pattern. Happy knitting !
23.02.2013 - 15:41
![]() Lea wrote:
Lea wrote:
Kaunis sall la014
15.02.2013 - 18:07
![]() Kerstin wrote:
Kerstin wrote:
Wo stricke ich die beiden Maschen Kraus rechts? (bei Tipp zur Aufnahme)
05.02.2013 - 10:32DROPS Design answered:
Liebe Kerstin, dies ist noch nicht im Stricktipp beschrieben, sondern weiter unten in der eigentlichen Anleitung: „ Glatt re mit 2 M kraus re - siehe oben - auf jeder Seite stricken..“
05.02.2013 - 13:23
![]() Lea wrote:
Lea wrote:
Meediv sall.
03.02.2013 - 18:46
![]() Sofibella wrote:
Sofibella wrote:
à quand les explications de ce très joli modèle de châle "ailes de mésange" ?
15.01.2013 - 12:01
![]() Jutta wrote:
Jutta wrote:
Zarter Sommerhauch - wunderschön
14.01.2013 - 15:57
![]() Guinchard wrote:
Guinchard wrote:
Plume
13.01.2013 - 18:14
|
||||||||||
Wings#wingsshawl |
||||||||||
 |
 |
|||||||||
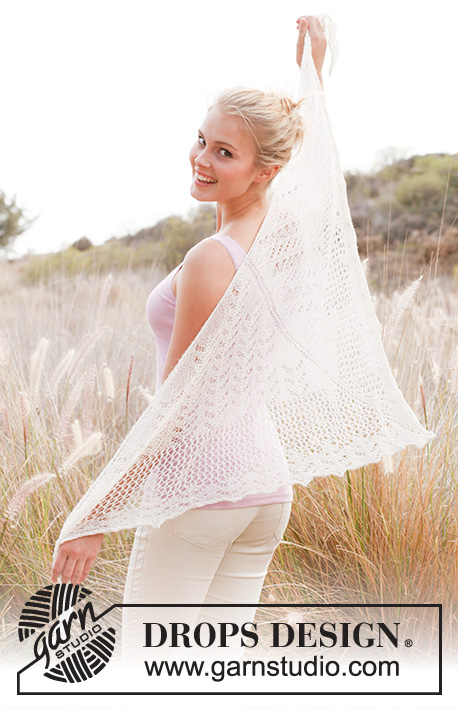
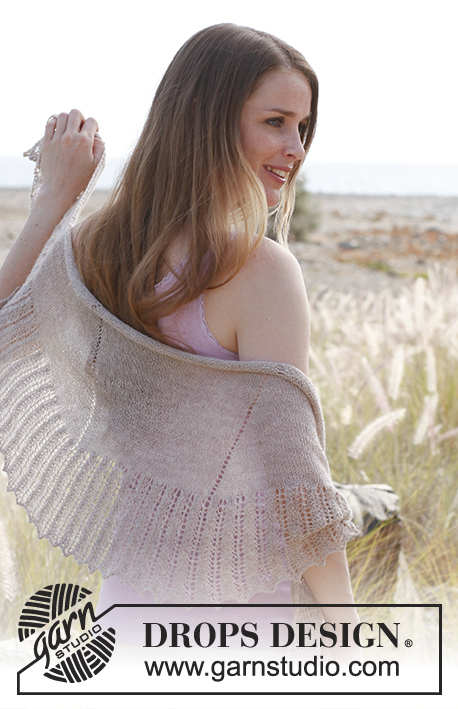
Knitted DROPS shawl with lace pattern in ”Lace”.
DROPS 146-28 |
||||||||||
|
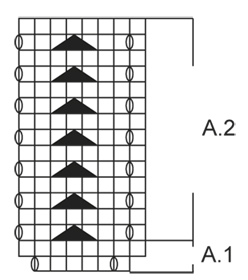
GARTER ST (back and forth on needle): K all rows. 1 ridge = 2 rows K. PATTERN: See diagrams A.1 and A.2. Diagrams show all rows in pattern seen from RS. INCREASE TIP: Inc 1 st inside 2 sts in garter st in each side of piece on every row by making a YO, P the YO from WS and K the YO from RS to make holes. Inc 1 st before 1st marker from RS by making a YO before marker and inc 1 st after 2nd marker from RS by making a YO after marker, P the YOs from WS to make holes. ---------------------------------------------------------- SHAWL: Worked back and forth on circular needle to make room for all the sts. Cast on 65 sts on circular needle size 3.5 mm with Lace. Insert markers inside 3 sts in each side of shawl (= 59 sts between markers) and move the markers upwards when working. Work in stocking st with 2 sts in GARTER ST - see explanation above, in each side (1st row = RS) - AT THE SAME TIME inc - read INCREASE TIP above, 1 st inside 2 sts in garter st in each side of piece on every row, and inc 1 st before 1st marker and 1 st after 2nd marker on every row from RS (= 6 inc sts after every other row). Continue to work and inc this way until there are 129 sts before 1st marker, 59 sts in the middle and 129 sts after 2nd marker = 317 sts on row. After all inc piece measures approx. 28 cm in the knitting direction along one of the markers. On next row from RS work as follows: 2 sts in garter st and diagram A.1(= 6 sts) 52 times until 3 sts remain, work 1 st in stocking st and finish with 2 sts in garter st. When diagram A.1 has been worked 1 time vertically, there are 421 sts on row. Continue to work 2 sts in garter st, diagram A.2 until 3 sts remain, 1 st in stocking st and 2 sts in garter st, work until diagram A.2 has been worked a total of 3 times vertically, piece measures approx. 42 cm measured in knitting direction along one of the markers. On next row from RS, loosely cast off as follows – NOTE: It is very important to cast off very LOOSELY otherwise the edge cannot be shaped into tips: Cast of the first 3 sts in garter st (lightly pull them when casting off so that they are loose), * make 1 loose YO on right needle, cast off YO, cast off 2 sts (lightly pull when casting off so that they are loose) *, repeat from *-* until 2 sts remain, cast off these sts. BLOCKING: Place the shawl in lukewarm water until it is soaking wet. Carefully squeeze the water out of the shawl - do not twist the shawl - then roll the shawl in a towel and squeeze to remove more water - the shawl will now only be moist. Place the shawl on a carpet or mattress - carefully stretch it out to size and fasten it with pins. NOTE: Fasten several pins in the outermost sts along cast on edge and out to the outermost sts in each side of shawl, fasten 1 pin between every repetition along the 2 diagonal sides, lightly pull at every pin so that the edge is shaped with small tips. Leave to dry. Repeat the process when the shawl has been washed. |
||||||||||
Diagram explanations |
||||||||||
|
||||||||||
 |
||||||||||
Have you finished this pattern?Tag your pictures with #dropspattern #wingsshawl or submit them to the #dropsfan gallery. Do you need help with this pattern?You'll find 14 tutorial videos, a Comments/Questions area and more by visiting the pattern on garnstudio.com. © 1982-2026 DROPS Design A/S. We reserve all rights. This document, including all its sub-sections, has copyrights. Read more about what you can do with our patterns at the bottom of each pattern on our site. |
||||||||||


With over 40 years in knitting and crochet design, DROPS Design offers one of the most extensive collections of free patterns on the internet - translated to 17 languages. As of today we count 324 catalogues and 12290 patterns translated into English (UK/cm). 12290
We work hard to bring you the best knitting and crochet have to offer, inspiration and advice as well as great quality yarns at incredible prices! Would you like to use our patterns for other than personal use? You can read what you are allowed to do in the Copyright text at the bottom of all our patterns. Happy crafting!
Post a comment to pattern DROPS 146-28
We would love to hear what you have to say about this pattern!
If you want to leave a question, please make sure you select the correct category in the form below, to speed up the answering process. Required fields are marked *.