
Popular categories
Looking for a yarn?


Comments / Questions (36)
![]() Christel wrote:
Christel wrote:
Jeg kan se, at en anden har kommenteret vedrørende samme problem med opskriften som jeg har skrevet om. I skriver ganske vist at der ikke er fejl i opskriften, men kunne I lige dobbelttjekke? I diagrambeskrivelsen står der ‘masken under’. Det står ikke længere oppe, der står ikke hvad man skal gøre med den markerede maske og videoen er ikke det der står i diagrambeskrivelsen.
02.11.2022 - 18:42DROPS Design answered:
Hej igen Christel, jo i opskriften her stikker du højre pind ind i masken under og strikker de 7 masker som i videoen, når du har 7 masker på højre pind løfter du masken af venstre pind. Hvis du hellere vil strikke i selve masken som i videoen så går det også fint :)
03.11.2022 - 14:23
![]() Jennyfer wrote:
Jennyfer wrote:
Ho trovato un errore nella descrizione del diagramma A.1 1 maglia diritto nella maglia sotto la maglia con il segnapunti, ma non farla cadere dal ferro sinistro, non si deve prendere il punto nella maglia sottostante ma semplicemente nellal maglia sul ferro sinistro per favore correggete, io ho sbagliato molti ferri per questo motivo grazi
31.10.2022 - 11:40DROPS Design answered:
Buonasera Jennyfer, al momento non sono stati riportati errori in questo modello: se il modello dovesse essere corretto, troverà la correzione direttamente online. Buon lavoro!
01.11.2022 - 16:56
![]() Christel wrote:
Christel wrote:
Ja, jeg har ser videoen. I diagram skrivelsen står der at man ska l strikke i masken under den markerede maske - det er ikke det videoen viser.
25.10.2022 - 14:46
![]() Christel wrote:
Christel wrote:
Jeg forstår ikke raglanudtagningen A1 helt. Som jeg læser det, skal de 6 masker tages ud i masken under masken man har sat mærke i. Når jeg gør det, har jeg ganske rigtigt de syv masker jeg skal have, men masken med mærke i er jo ikke strikket. Der står ikke noget om hvad man skal med den og hvis jeg blot strikker den som normalt, vil jeg have 8 masker. Hvad skal man gøre med den maske?
23.10.2022 - 12:56DROPS Design answered:
Hej Christel, har du set videoen vi har lavet til? Hvordan tages der ud ved at strikke 7 masker i 1 maske
25.10.2022 - 13:38
![]() Riikka wrote:
Riikka wrote:
Hei! Minulla jää hurjan iso reikä tuon raglanlisöyksen jälkeen, vaikka tekisin kuinka tiukkaa tahansa. Otan ohjeen mukaan edellisen silmukan ja teen samoin kuin ohjevideossa. Mallipaidassa en näe reikiä, enkä sellaisia haluaisi. Miten välttää reiät tässä neuleessa?
25.09.2022 - 17:23DROPS Design answered:
Hei, työhön jää aina pieni tai isompi reikä, riippuen siitä millä langalla neulotaan. DROPS Alpaca- ja Baby Merino -langat ovat kuitenkin hyvin joustavia lankoja, joten tämä reikä pienenee itsestään, kun jatkat neulomista.
29.09.2022 - 18:31
![]() Annika wrote:
Annika wrote:
Hello I have a question about the A1 diagram. You supposed to increase 6 sts, so it’s 7 sts in total. How come on the A1 next row counts 9 sts? On the third row (A1) you supposed to knit 2toghether and 2 twisted together, so from the 9 becomes 7. But if there only were 7 to begin with, it would leave you 5. I can’t see how the A1 and description match together Kind regards
17.08.2022 - 09:17DROPS Design answered:
Hi Annika, On row 1 you have 1 knitted stitch on each side of the increase-stitch (where you increase 6 stitches) , which leaves you with 9 stitches on row 2. Happy knitting!
18.08.2022 - 06:50
![]() Marte Hoogerwerf wrote:
Marte Hoogerwerf wrote:
Beste dropsteam, wat een prachtige trui! Ik begrijp alleen de volgorde van A1 en A2 niet. Bij de raglan staat dat ik na 1 keer A1 A2 moet breien terwijl in de tekst staat brei A1 13 keer in totaal en A2 2 keer in totaal. Daarna nog 1 keer 4 meerderheden. Bedoelen jullie dan A1 1 keer dan A2 1 keer (of 2 keer) en dan weer verder met A1 tot je 13 keer A1 hebt gebreid? En daarna die 4 meerderingen? Ik hoor het graag! Groetjes, Marte
18.07.2022 - 12:55DROPS Design answered:
Dag Marte,
Bij de raglan staat beschreven hoeveel steken er op een naald zijn gemeerderd nadat je A.1 of A.2 1 keer in de hoogte hebt gereid. Het aantal keren dat je A.1 en A.2 in de hoogte herhaalt staat per maat in de tekst beschreven. Dus je breit A.1 13 keer in de hoogte en daarna brei je A.2 2 keer in de hoogte.
24.07.2022 - 09:45
![]() Berthiaume wrote:
Berthiaume wrote:
J’ai 484 mailles comme prévu. Je ne suis pas certaine d’avoir compris A1 et A2. J’ai augmenté 16 fois par rang ,2 augmentations de chaque côté du marqueur. Les mailles se présentent ainsi: 136 dos, 106 manche,136 devant, 106 manche. Je dois pourtant diviser les mailles selon le modèle ainsi: 74 (demi-dos ), 94 mailles pour les manches etc. Vous me conseiller de suivre le modèle ou je n’ai pas compris les augmentations? Pouvez-vous m’aider? Merci et bonne journée!
24.04.2022 - 17:37DROPS Design answered:
Bonjour Mme Berthiaume, c'est bien correct ainsi, les 5 mailles de chaque côté de chacune des manches sont attribuées au dos et au devant, autrement dit, demi-dos = 68 M + la maille avec le marqueur + les 5 m suivantes = 74 m; vous aviez 104 m pour la manche entre les marqueurs - 10 (5 pour le dos, 5 pour le devant) = 94 m. Bon tricot!
25.04.2022 - 08:26
![]() Hanne Jespersen wrote:
Hanne Jespersen wrote:
Hej Jeg skal i gang med denne lækre sweater. I diagram 2 er der en stjerne i midten, som jeg ikke kan se forklaring på. Jeg kan dog se, at der tages to masker ind og at man ender ud med to masker ekstra. Jeg gætter derfor på, at der skal tages 4 masker ud - men skal det være på samme måde som i diagram 1.
14.03.2022 - 22:47DROPS Design answered:
Hej Hanne, i A.1 tager du 6 masker ud ifølge diagramteksten. I A.2 betyder den sorte stjerne at du tager 4 masker ud, diagramteksten til den er lige under den anden diagramtekst :)
15.03.2022 - 15:07
![]() Anne Mette Frank wrote:
Anne Mette Frank wrote:
Mange tak for svar - er det inklusiv positive ease? Venlig hilsen.
19.11.2021 - 10:02
|
|||||||||||||||||||
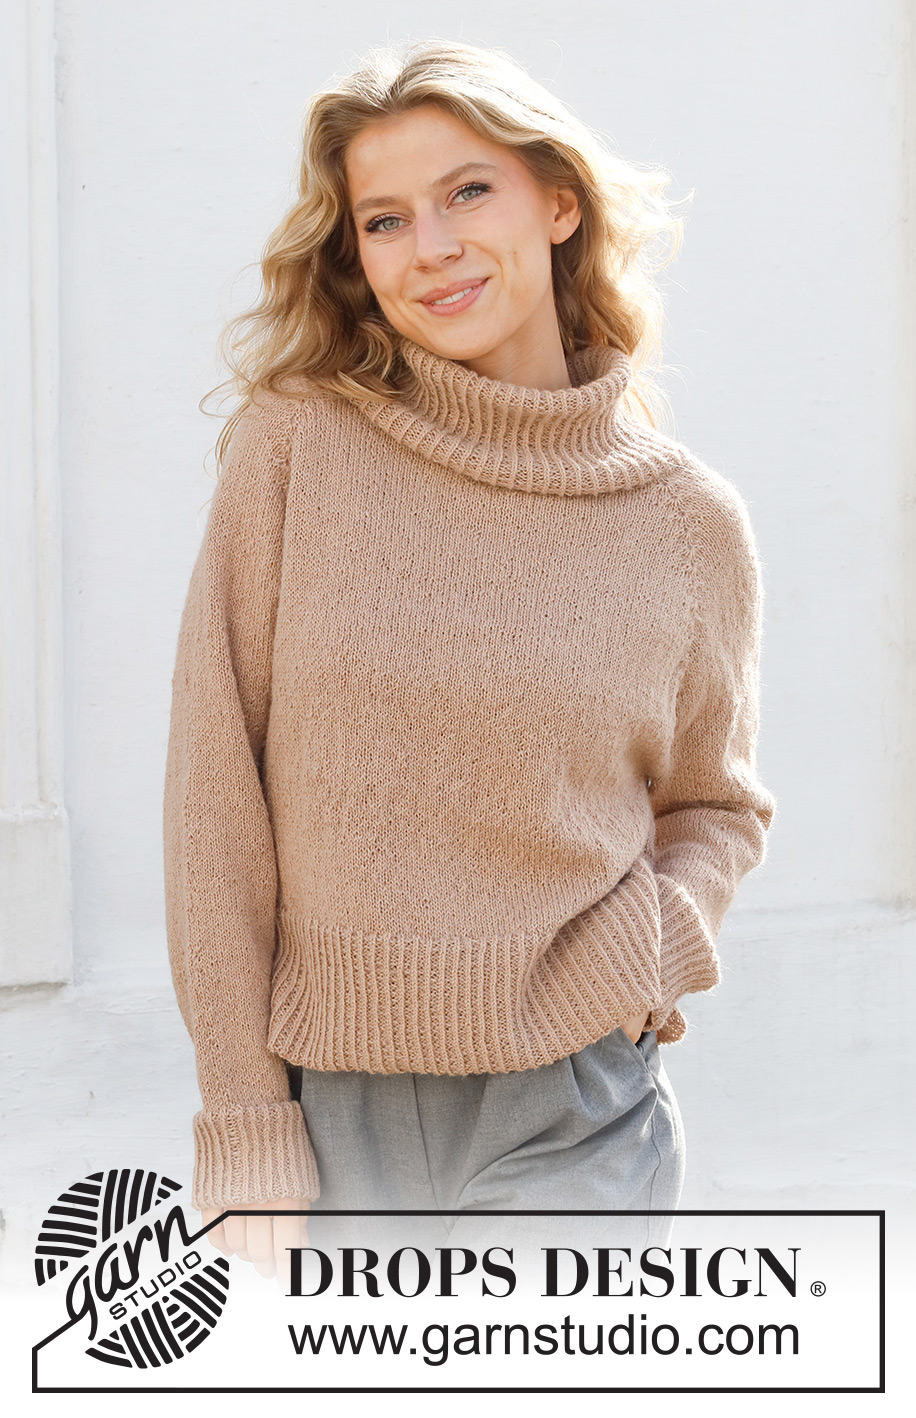
Chill Chaser Sweater#chillchasersweater |
|||||||||||||||||||
 |
 |
||||||||||||||||||
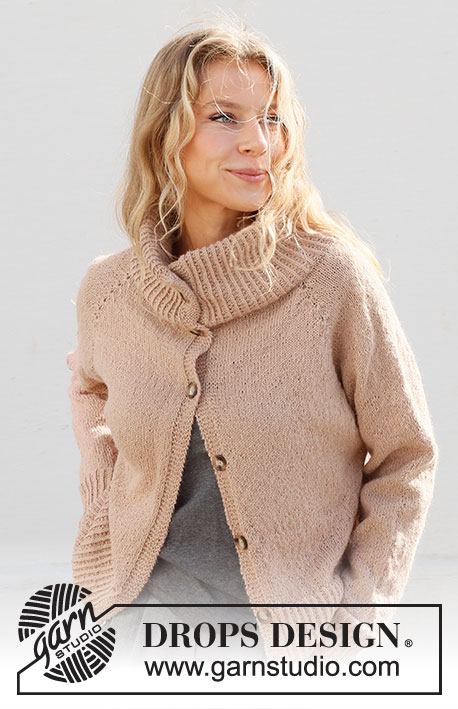
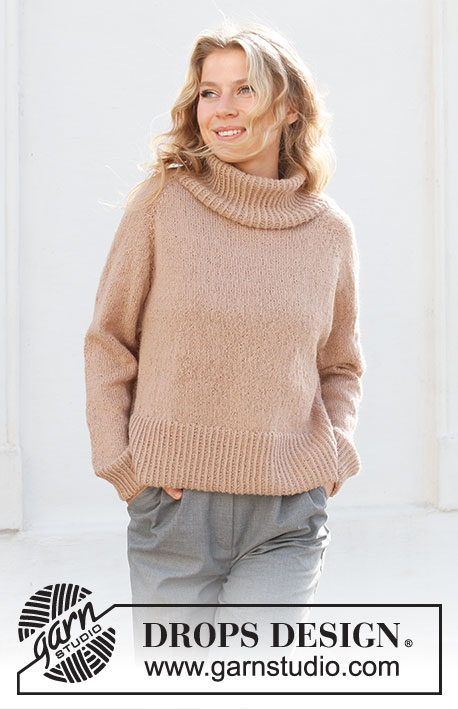
Knitted jumper in DROPS Alpaca or DROPS BabyMerino. The piece is worked top down with double neck, raglan and split in the sides. Sizes S - XXXL.
DROPS 227-35 |
|||||||||||||||||||
|
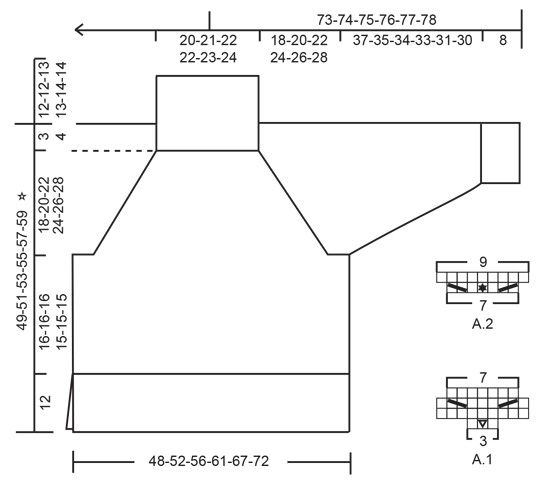
------------------------------------------------------- EXPLANATIONS FOR THE PATTERN: ------------------------------------------------------- RIDGE/GARTER STITCH (worked back and forth): Knit all rows. 1 ridge = knit 2 rows. DECREASE/INCREASE TIP (evenly spaced): To work out how to decrease/increase evenly, count the total number of stitches on needle (e.g. 147 stitches), and divide by number of decreases/increases to be made (e.g. 23) = 6.4. In this example, decrease by knitting together alternately each 5th and 6th stitch and each 6th and 7th stitch. When increasing, make 1 yarn over after alternately each 6th and 7th stitch. On the next round work the yarn overs twisted to avoid holes. PATTERN: See diagrams A.1 and A.2. RAGLAN: Increase to raglan by working A.1 over each marker-stitch as described in the text. When A.1 has been worked 1 time in height at all 4 markers, you have increased 16 stitches. Then work A.2 over each marker-stitch as described in the text. When A.2 has been worked 1 time in height at all 4 markers, you have increased 8 stitches. DECREASE TIP (for sleeves): Decrease 1 stitch on either side of the marker thread as follows: Work until there are 3 stitches left before the marker thread, knit 2 together, knit 2 (marker thread sits between these 2 stitches), slip 1 stitch as if to knit, knit 1 and pass the slipped stitch over the knitted stitch (2 stitches decreased). CASTING-OFF TIP: To avoid the cast-off edge being tight you can cast off with a larger size needle. If the edge is still tight, make 1 yarn over after approx. each 6th stitch at the same time as casting off; the yarn overs are cast off as normal stitches. ------------------------------------------------------- START THE PIECE HERE: ------------------------------------------------------- JUMPER – SHORT OVERVIEW OF THE PIECE: The neck and yoke are worked in the round from mid-back, top down. The yoke is divided for the body and sleeves. The body is continued in the round with circular needle until the rib. Then the piece is divided and the front and back pieces are finished separately, back and forth. The sleeves are worked in the round with short circular needle/double pointed needles, top down. DOUBLE NECK: Loosely cast on 147-153-159-171-177-183 stitches with short circular needle size 3 mm and DROPS Alpaca or DROPS Baby Merino. Knit 1 round. Change to circular needle size 2.5 mm and work rib in the round (knit 1 twisted, purl 2) for 25-25-27-27-29-29 cm. Knit 1 round where you decrease 23-25-27-27-29-31 stitches evenly spaced – read DECREASE/INCREASE TIP = 124-128-132-144-148-152 stitches. The neck is later folded double to give a neck height of 12-12-13-13-14-14 cm. Insert 1 marker in the middle of the round; the yoke is measured from this marker! YOKE: Change to circular needle size 3 mm. Insert 4 new markers, with a different colour from the marker on the neck. These markers are used when increasing to raglan. Count 22-23-24-25-26-27 stitches (= ½ back piece), insert 1 marker in the next stitch, count 16-16-16-20-20-20 stitches (= sleeve), insert 1 marker in the next stitch, count 44-46-48-50-52-54 stitches (= front piece), insert 1 marker in the next stitch, count 16-16-16-20-20-20 stitches (= sleeve), insert 1 marker in the next stitch. There are 22-23-24-25-26-27 stitches left on the round after the last marker (= ½ back piece). Work stocking stitch in the round. REMEMBER THE KNITTING TENSION! AT THE SAME TIME on the 2nd round begin to increase to RAGLAN – read description above. Increase at each marker by working A.1 over each marker-stitch (middle stitch in A.1 matches the marker-stitch – begin A.1 one stitch before the stitch with the marker). Increase by repeating A.1 a total of 13-14-16-18-20-21 times in height = 332-352-388-432-468-488 stitches. On the next round increase at each marker by working A.2 over each marker-stitch (middle stitch in A.2 matches the marker-stitch –begin A.2 three stitches before the stitch with the marker). Increase by repeating A.2 a total of 2-3-3-2-2-3 times in height = 348-376-412-448-484-512 stitches. On the next round increase 4-4-0-4-0-0 stitches (increase 1 stitch by knitting the front and back loop of the stitch with a marker) = 352-380-412-452-484-512 stitches. Continue with stocking stitch, but without further increases, until the piece measures 18-20-22-24-26-28 cm from the marker mid-front. On the next round divide for the body and sleeves as follows: Work 54-58-62-68-74-80 stitches in stocking stitch (= ½ back piece), place the next 68-74-82-90-94-96 stitches on 1 thread for the sleeve, cast on 8-8-10-10-12-12 stitches (= in side under sleeve), work 108-116-124-136-148-160 stitches in stocking stitch (= front piece), place the next 68-74-82-90-94-96 stitches on 1 thread for the sleeve, cast on 8-8-10-10-12-12 stitches (= in side under sleeve), work 54-58-62-68-74-80 stitches in stocking stitch. Cut the strand. The body and sleeves are finished separately. THE PIECE IS NOW MEASURED FROM HERE! BODY: = 232-248-268-292-320-344 stitches. Insert 1 marker thread in each side of the body – in the middle of the 8-8-10-10-12-12 stitches cast on under each sleeve. There are 116-124-134-146-160-172 stitches between the marker threads. Allow the threads to follow your work onwards – they are used when dividing for the split later. Start the round at one of the marker threads and continue with stocking stitch in the round until the piece measures 16-16-16-15-15-15 cm from the division. There is approx. 12 cm left to finished length – NOTE: The jumper will be approx. 3 cm longer than these measurements when worn – see measurements chart. Try the jumper on and work to desired length before working the split in each side. Now divide the piece at each marker thread and finish the front and back pieces separately. FRONT PIECE: = 116-124-134-146-160-172 stitches. Knit 1 row from the right side where you increase 29-30-32-35-39-42 stitches evenly spaced – remember DECREASE/INCREASE TIP = 145-154-166-181-199-214 stitches. Change to circular needle size 2.5 mm and work rib as follows: ROW 1 (wrong side): 3 edge stitches in garter stitch, * purl 1 twisted, knit 2 *, work from *-* until there are 4 stitches left, purl 1 twisted and finish with 3 edge stitches in garter stitch. ROW 2 (right side): 3 edge stitches in garter stitch, * knit 1 twisted, purl 2 *, work from *-* until there are 4 stitches left, knit 1 twisted and finish with 3 edge stitches in garter stitch. Repeat rows 1 and 2 until the rib measures 12 cm. Cast off with knit from the right side – read CASTING-OFF TIP! The jumper measures approx. 49-51-53-55-57-59 cm from the shoulder down – measured flat. BACK PIECE: = 116-124-134-146-160-172 stitches. Knit 1 row from the right side where you increase 29-30-32-35-39-42 stitches evenly spaced = 145-154-166-181-199-214 Change to circular needle size 2.5 mm and work rib as follows: ROW 1 (wrong side): 3 edge stitches in garter stitch, * purl 1 twisted, knit 2 *, work from *-* until there are 4 stitches left, purl 1 twisted and finish with 3 edge stitches in garter stitch. ROW 2 (right side): 3 edge stitches in garter stitch, * knit 1 twisted, purl 2 *, work from *-* until there are 4 stitches left, knit 1 twisted and finish with 3 edge stitches in garter stitch. Repeat rows 1 and 2 until the rib measures 12 cm. Cast off with knit from the right side – remember CASTING-OFF TIP! The jumper measures approx. 49-51-53-55-57-59 cm from the shoulder down – measured flat. SLEEVES: Place the 68-74-82-90-94-96 stitches from the thread on the one side of the piece on short circular needle size 3 mm and knit up 1 stitch in each of the 8-8-10-10-12-12 stitches cast on under the sleeve = 76-82-92-100-106-108 stitches. Insert 1 marker thread in the middle of the 8-8-10-10-12-12 stitches under the sleeve. Allow the thread to follow your work onwards – it is used when decreasing under the sleeve. Start at the marker thread and work stocking stitch in the round. When the piece measures 3-3-3-2-2-2 cm from the division, decrease 2 stitches under the sleeve – read DECREASE TIP. Decrease like this every 4-3-2-1½-1½-1½ cm a total of 9-11-15-18-19-19 times = 58-60-62-64-68-70 stitches. Continue working until the sleeve measures 37-35-34-33-31-30 cm from the division (shorter measurements in larger sizes due to wider neck and longer yoke). There is approx. 8 cm left to finished length; try the jumper on and work to desired length. Knit 1 round where you increase 14-12-13-14-13-14 stitches evenly spaced – remember DECREASE/INCREASE TIP = 72-72-75-78-81-84 stitches. Change to double pointed needles size 2.5 mm and work rib (knit 1 twisted, purl 2) for 8 cm. Cast off with knit. The sleeve measures approx. 45-43-42-41-39-38 cm. Work the other sleeve in the same way. ASSEMBLY: Fold the neck double to the inside and sew down. To avoid the seam being tight, it is important the seam is elastic. |
|||||||||||||||||||
Diagram explanations |
|||||||||||||||||||
|
|||||||||||||||||||
 |
|||||||||||||||||||
Have you finished this pattern?Tag your pictures with #dropspattern #chillchasersweater or submit them to the #dropsfan gallery. Do you need help with this pattern?You'll find 36 tutorial videos, a Comments/Questions area and more by visiting the pattern on garnstudio.com. © 1982-2026 DROPS Design A/S. We reserve all rights. This document, including all its sub-sections, has copyrights. Read more about what you can do with our patterns at the bottom of each pattern on our site. |
|||||||||||||||||||


With over 40 years in knitting and crochet design, DROPS Design offers one of the most extensive collections of free patterns on the internet - translated to 17 languages. As of today we count 324 catalogues and 12290 patterns translated into English (UK/cm). 12290
We work hard to bring you the best knitting and crochet have to offer, inspiration and advice as well as great quality yarns at incredible prices! Would you like to use our patterns for other than personal use? You can read what you are allowed to do in the Copyright text at the bottom of all our patterns. Happy crafting!
Post a comment to pattern DROPS 227-35
We would love to hear what you have to say about this pattern!
If you want to leave a question, please make sure you select the correct category in the form below, to speed up the answering process. Required fields are marked *.