
Popular categories
Looking for a yarn?


Comments / Questions (32)
![]() Vitalia wrote:
Vitalia wrote:
Mi è sfuggito oppure non ci sono le asole?
09.04.2016 - 09:09DROPS Design answered:
Buongiorno Vitalia. Non sono previste asole. I bottoni andranno abbottonati passando attraverso i fori che il motivo crea sul bordo davanti destro. Buon lavoro!
09.04.2016 - 09:27
![]() Kirsten Larsen wrote:
Kirsten Larsen wrote:
Har strikket modellen nøjagtig efter opskrift og i muskat. Halsudskæringen bagpå er for stor, hvad kan dette skyldes:
17.07.2015 - 13:13DROPS Design answered:
Hej Kirsten, Det er svært at svare på, men maskeantallet i opskriften stemmer med målene i måleskitsen. Kan du evt have slået op og strikket lidt løst? Hvis du vil trække den lidt sammen, så går det at hækle en lille kant i halsen bagefter. God fornøjelse!
29.07.2015 - 15:47
![]() Danoudia wrote:
Danoudia wrote:
Je ne comprends pas bien comment procéder pour les augmentations pour le raglan et le devant et le dos. Fait-on une seule fois une augmentation pour le raglan à chaque extrémité de A3 ou bien il faut répéter les augmentations tout en faisant celles pour le devant et le dos. C'est la première fois que je tricote un gilet du haut vers le bas je suis un peu perdue avec ces explications! Merci de m'aider afin que je puisse mener à bien ce projet. Merci
03.07.2015 - 17:39DROPS Design answered:
Bonjour Danoudia, les augmentations du raglan se font différemment sur le dos/chaque devant et sur les manches: 14-30 fois tous les rangs + 7-9 fois tous les 2 rangs pour le dos et les devants: augmentez 1 m avant ou après A3 mais bien côté devant/dos (vu sur l'end= avant A.3 pour le devant gauche, après+avant A.3 pour le dos et après A.3 pour le devant droit). Pour les manches: après A.3 (avant la manche) + avant A.3 (à la fin de la manche). Bon tricot!
04.07.2015 - 09:20
![]() Marlena Podemska wrote:
Marlena Podemska wrote:
Nie bardzo rozumiem sposób dodawania oczek na przodach, tyle i na rękawkach oraz z każdej strony raglanu ? Będę wdzięczna za podpowiedź :) Marlena
04.06.2015 - 15:34DROPS Design answered:
Reglan jest wykonywany z każdej strony schematu A.3. Jest 8 miejsc, w których dodajemy oczka - zaczynając od początku rzędu jest dodawane po 1 o. w następujących miejscach: 1. na przodzie, schemat A.3, 2 . na rękawku, 3. na rękawku, schemat A.3, 4. na tyle, 5. na tyle, schemat A.3, 6. na rękawku, 7. na rękawku, schemat A.3, 8. na przodzie. Dodajemy tak jak w opisie KARCZKU, czyli: "Dodawać o. na przodach/tyle: 14-16-18-20-26-30 razy 1 o. w każdym rzędzie (tzn. i na prawej i na lewej stronie robótki), dalej 7-8-9-10-9-9 razy co 2 rz. Dodawać o. na rękawach: ……”
06.06.2015 - 14:41
![]() Henny Thorup Laursen wrote:
Henny Thorup Laursen wrote:
Hvor skal der tages ud på ærmet? mvh Henny
30.04.2015 - 22:30DROPS Design answered:
Hej Henny. Det gör du ved raglan - her tager du ud paa begge sider af hver maerketraad = overgang mellem for/bagstykke og aermerne.
01.05.2015 - 11:07
![]() Yvonne Frederiksen wrote:
Yvonne Frederiksen wrote:
Dear Garnstudio I followed instructions for size S and bought 300 g of Drops Muskat and used the correct needle sizes as well as you suggested. Now I miss yarn for the sleeve endings. I knit very neat so I dont believe that its my knitting style that causes the missing yarn for size S. You should change the instructions accordingly as I now have to order more yarn before I can finish the jacket.
22.04.2015 - 11:51DROPS Design answered:
Dear Mrs Frederiksen, pattern has been checked and 300 g should be enough in size S - remember to check and keep the correct tension in width and height. Happy knitting!
23.04.2015 - 15:07Aileen wrote:
Question regarding the increases. Pattern says INC FOR RAGLAN ON EACH SIDE OF A3. Does it mean I do the following? Garter band, 17 SS, sleeve: make 1, A3, 1 SS, make 1, A3 , make 1, Back: 36 SS, sleeve: make 1, a3, make 1 , 1 SS, make 1, a3, make 1. fromt 17 SS, garter band ? Ie am I increasing 8 stitches every row, right side& wrong side 16 times( M size) If I do that, I'm already at 296 stitches before doing any INC on sleeves!!!
20.04.2015 - 13:56DROPS Design answered:
Dear Aileen, you increase with a YO (see Raglan at beg of pattern), but increase differently on body and sleeves, ie in size M increase before/after A.3 1 st every row 16 times and every other row 8 times, and on sleeves inc 1 st every other row 4 times, and every 4th row 6 times. Happy knitting!
20.04.2015 - 17:51
![]() Audelin wrote:
Audelin wrote:
Ou faut il lettre les marqueurs ce n est pas précisé
13.04.2015 - 13:18DROPS Design answered:
Bonjour Madame Audelin, les marqueurs se placent sur les côtés, au milieu des nouvelles mailles montées sous les manches (au-dessus de celles des manches que l'on met en attente). Bon tricot!
13.04.2015 - 13:45
![]() I Van Der Doorn wrote:
I Van Der Doorn wrote:
Waarom beide biezen gaatjes zou toch een kant moeten zijn. bij de mouwen staat niet aangegeven waar de meerderingen moeten dit ivm patroon kom er niet uit
04.04.2015 - 19:48DROPS Design answered:
Het patroon is zo ontworpen, met een kantpatroon op beide biezen, maar als u het niet mooi vindt, staat het u vrij uw eigen aanpassingen te doen. De mouwen worden niet los gebreid, maar zijn onderdeel van het hele vest - door te meerderen aan elke kant van de raglan ontstaan vanzelf de mouwen.
05.04.2015 - 09:20
![]() Viviane wrote:
Viviane wrote:
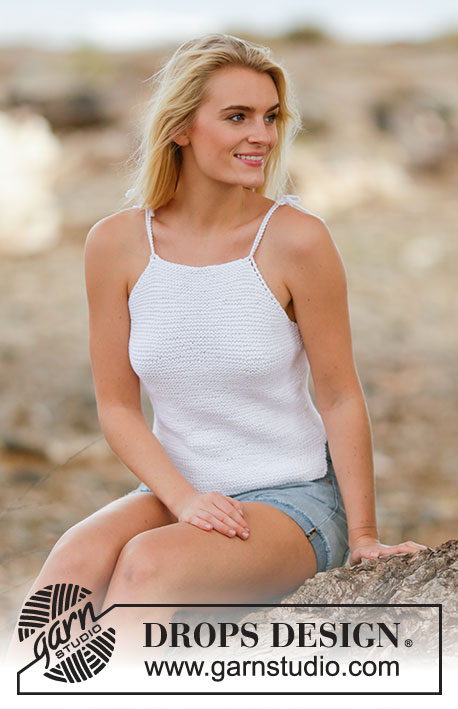
Simple, frais, de bon goût, le blanc est toujours si beau.
09.02.2015 - 17:23
|
||||||||||||||||||||||
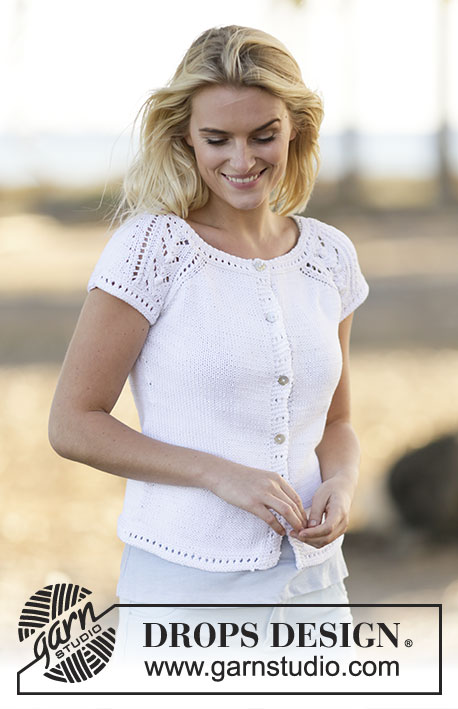
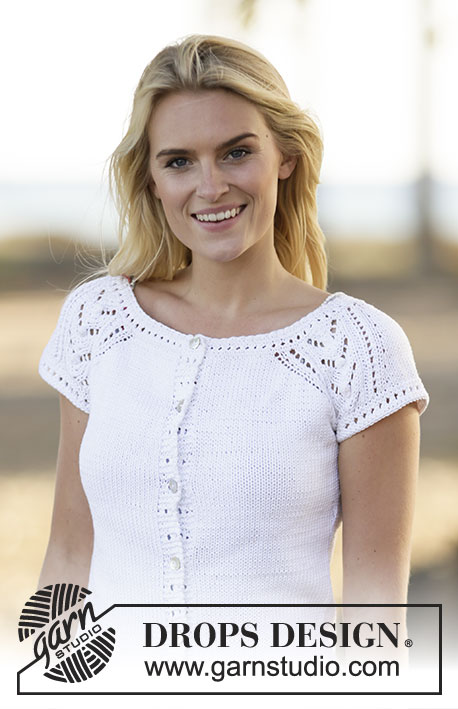
Esther Cardigan#esthercardigan |
||||||||||||||||||||||
 |
 |
|||||||||||||||||||||
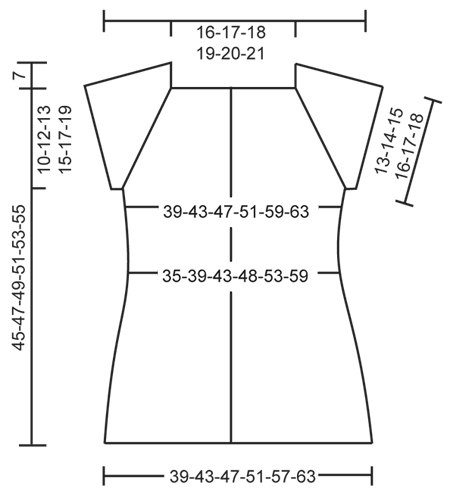
Knitted DROPS jacket with raglan and lace pattern, worked top down with short sleeves in ”Muskat”. Size: S - XXXL.
DROPS 159-32 |
||||||||||||||||||||||
|
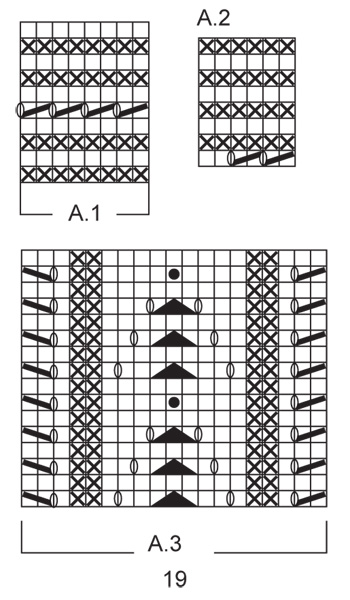
PATTERN: See diagrams A.1, A.2 and A.3. Diagram show all rows seen from RS. RAGLAN: Inc for raglan on each side of A.3. Inc with a YO, work YO twisted on next row to avoid holes. The inc on body and sleeves are uneven as explained in pattern. INCREASE TIP: Beg 1 st before marker and inc as follows: 1 YO, K 2 (marker is between these 2 sts), 1 YO. On next round K YOs twisted to avoid holes. DECREASE TIP: Dec as follows before marker: K 2 tog. Dec as follows after marker: Slip 1 st as if to K, K 1, psso. ---------------------------------------------------------- JACKET: Worked back and forth on circular needle, top down. YOKE: READ ALL OF THE FOLLOWING SECTION BEFORE CONTINUING! Cast on 156-160-164-168-172-176 sts on circular needle size 3 mm with Muskat. Work 6 sts in garter st, A.1 until 6 sts remain, 6 sts in garter st. Work 4 rows like this, then work A.2 over the 6 sts in each side (= band), continue with A.1 over the remaining sts. When A.1 has been worked, switch to circular needle size 4 mm. Work next row as follows: A.2 (= band), work 16-17-18-19-20-21 sts in stocking st (= front piece), work A.3 (= 19 sts), 1 st in stocking st, A.3 (= 19 sts) (= 39 sts on sleeve), work 34-36-38-40-42-44 sts in stocking st (= back piece), work A.3, 1 st in stocking st and A.3 (= 39 sts on sleeve) and continue with 16-17-18-19-20-21 sts in stocking st (= front piece), finish with A.2 (= band). Continue pattern like this AT THE SAME TIME inc for RAGLAN beg on next row - see explanation above. Inc on front/back piece: 1 st every row (i.e. from both RS and WS) a total of 14-16-18-20-26-30 times, then on every other row 7-8-9-10-9-9 times. Inc on sleeves: 1 st every other row a total of 2-4-6-8-10-12 times and then every 4th row a total of 6 times in all sizes. After all inc there are 272-296-320-344-376-404 sts on row and piece measures approx. 17-19-20-22-24-26 cm from shoulder and down. Work next row from RS as follows: K 43-47-51-55-61-66 (= front piece), slip the next 55-59-63-67-71-75 sts on a stitch holder for sleeve, cast on 6-6-6-8-8-10 new sts, insert 1 marker in the middle of the new sts, K 76-84-92-100-112-122 (= back piece), slip the next 55-59-63-67-71-75 sts on 1 stitch holder for sleeve, cast on 6-6-6-8-8-10 new sts, insert 1 marker in the middle of the new sts and K the remaining 43-47-51-55-61-66 ( = front piece) = 174-190-206-226-250-274 sts on row - NOW MEASURE PIECE FROM HERE. BODY: Continue in stocking st and band (in A.2). When piece measures 4 cm, dec 1 st on each side of marker in the sides - READ DECREASE TIP (= 4 sts dec). Repeat dec every 4 cm a total of 4 times = 158-174-190-210-234-258 sts. When piece measures 22 cm in all sizes, inc 1 st on each side of marker in the sides - READ INCREASE TIP (= 4 sts inc). Repeat inc every 2 1/2 cm a total of 4 times = 174-190-206-226-250-274 sts. When piece measures 33-33-34-34-34-34 cm, switch to circular needle size 3 mm. Work pattern according to diagram A.1 (continue band in A.2), then loosely cast off. Jacket measures approx. 52-54-56-58-60-62 cm from shoulder and down. SLEEVE EDGE: Worked in the round on double pointed needles. Slip the 55-59-63-67-71-75 sts from stitch holder back on double pointed needles size 3 mm and cast on 6-6-6-8-8-10 new sts under sleeve = 61-65-69-75-79-85 sts. Work pattern in the round according to diagram A.1 and then loosely cast off. Work the other sleeve edge the same way. ASSEMBLY: Sew tog under sleeves. Fasten the buttons on left front band, the top button approx. 1 cm down from neck, the bottom button approx. 12 cm from bottom edge. Distribute the remaining button every between these. Sew on buttons to button them in holes on right band. |
||||||||||||||||||||||
Diagram explanations |
||||||||||||||||||||||
|
||||||||||||||||||||||
 |
||||||||||||||||||||||
 |
||||||||||||||||||||||
Have you finished this pattern?Tag your pictures with #dropspattern #esthercardigan or submit them to the #dropsfan gallery. Do you need help with this pattern?You'll find 22 tutorial videos, a Comments/Questions area and more by visiting the pattern on garnstudio.com. © 1982-2026 DROPS Design A/S. We reserve all rights. This document, including all its sub-sections, has copyrights. Read more about what you can do with our patterns at the bottom of each pattern on our site. |
||||||||||||||||||||||


With over 40 years in knitting and crochet design, DROPS Design offers one of the most extensive collections of free patterns on the internet - translated to 17 languages. As of today we count 324 catalogues and 12290 patterns translated into English (UK/cm). 12290
We work hard to bring you the best knitting and crochet have to offer, inspiration and advice as well as great quality yarns at incredible prices! Would you like to use our patterns for other than personal use? You can read what you are allowed to do in the Copyright text at the bottom of all our patterns. Happy crafting!
Post a comment to pattern DROPS 159-32
We would love to hear what you have to say about this pattern!
If you want to leave a question, please make sure you select the correct category in the form below, to speed up the answering process. Required fields are marked *.