
Popular categories
Looking for a yarn?


Comments / Questions (133)
Sybille wrote:
Bonjour! Vous avez répondu précédemment à la question de Josette qui avait la même question que moi: «si le début de votre tour se situe au niveau de la m end entre les 2 jetés, la jonction sera invisible.» Comment fait-on pour bien tricoter de cette façon? Je ne sais pas comment placer mes mailles!! Merci beaucoup!
28.01.2014 - 21:49DROPS Design answered:
Bonjour Sybille, quand vous commencez en rond, vous avez 2 m par aiguille, le début du tour commence juste au niveau de la 1ère m. conservez bien le marqueur sur la 1ère m, c'est le début du tour, la transition entre le jeté et la 1ère m se fera donc tout en douceur, naturellement. Bon tricot!
29.01.2014 - 16:07
![]() Jytte Gjerulff wrote:
Jytte Gjerulff wrote:
Der bliver en tydelig overgang hvor man skifter fra ret til vang - hver anden pind skal jo strikkes vrang
07.12.2013 - 21:14
![]() Sofi wrote:
Sofi wrote:
Hej! Vilken storlek har modellen på sig?
04.12.2013 - 10:31
![]() Josette wrote:
Josette wrote:
Comment faire pour que l'on ne voit pas la jonction entre la 1ère maille et la dernière maille lorsque l'on tricote avec les aiguilles double pointes ou avec l'aiguille circulaire car cela fait une démarquait on sur le tricot? Merci
25.11.2013 - 00:14DROPS Design answered:
Bonjour Josette, si le début de votre tour se situe au niveau de la m end entre les 2 jetés, la jonction sera invisible. Bon tricot!
25.11.2013 - 10:14
![]() Line wrote:
Line wrote:
Hei - ønsker å strikke denne med ullgarn istedenfor bomull. Hvilket garn kan da brukes.
22.11.2013 - 15:25DROPS Design answered:
Hei Line. Du kan bruge garner fra samme gruppe: Alaska, Big Fabel, Nepal, Alpaca Silk eller DLY #3. Se under garnalternativer
22.11.2013 - 15:45
![]() Maria wrote:
Maria wrote:
¿Que quiere decir montar puntos con Paris? Gracias
22.10.2013 - 22:21DROPS Design answered:
Hola Maria. "Paris" es la calidad de la lana.
25.10.2013 - 20:34
![]() Amalie wrote:
Amalie wrote:
Jeg er lidt forvirret over hvordan jeg skal strikke halsen? Jeg er sluttet med 1 vr. p. og strikker så ret hen til de 16 midterste masker mellem 1. og 2. mærketråd, tager dem på tråd, vender arbejdet, lukker 2 m af og strikker ret. Men når jeg så passerer 1. mærketråd igen er jeg jo så nødt til at strikke vrang for at mønsteret skal forsætte. Jeg får 25 m som er modsat resten af pinden. Hvordan undgår jeg det?
10.10.2013 - 18:44DROPS Design answered:
Det stemmer, til sidst vil du være nødt til at strikke et lille antal masker modsat for at fortsætte mønsteret i retstrik. God fornøjelse!
17.10.2013 - 12:24
![]() Hannah wrote:
Hannah wrote:
Similar to Lucy, I am confused about the necklike. Say I'm knitting my first round in this manner I increase 1 before the stitch marker, bind 2 off from stitch holder, knit 12 stitches on the holder! Bind off 2 more, increase at other side of the marker and continue? I can't visualize it. Do you have a video of this process?
24.09.2013 - 04:58DROPS Design answered:
Dear Hannah, for front piece, you slip the middle 16-18 sts (see size) between 1st and 2nd marker on a st holder, and continue then as before but back and forth, ie turn afer each row, but continue inc at markers as before, and at the same time, bind off each side at the beg of every row : 2 sts 2 times and 1 st 2 times. Happy knitting!
24.09.2013 - 08:56
![]() Fenya wrote:
Fenya wrote:
Hallo!! Wie lang muss das zu benutzende Nadelspiel sein? Die Angabe von 60 und 80 cm bezieht sich doch auf die Rundnadel, oder? LG und danke für eine baldige Antwort, möchte nämlich gerne bald starten;o) Fenya
16.09.2013 - 18:31DROPS Design answered:
Liebe Fenya, ein normales Nadelspiel ist immer 20 cm lang.
17.09.2013 - 08:16
![]() Irina wrote:
Irina wrote:
Hallo, ich habe mal wieder los gestrickt ohne nachzudenken. Nun bin ich am Halsausschnitt angekommen und habe fest gestellt, das ich alles in Kraus rechts hätte stricken müssen... Leider habe ich alles glatt rechts gestrickt. Muss ich nun von vorne anfangen? Oder gibt es eine Möglichkeit den Pullover in glatt rechts zu stricken?
19.08.2013 - 08:55DROPS Design answered:
Liebe Irina, so lange die Passform (Maschenprobe) stimmt, ist das kein Problem. Glatt rechts ist nur in der Regel höher als kraus re, da sich das Gestrick nicht in der Höhe zusammenzieht.
19.08.2013 - 09:34
|
|
Hugs and kisses#hugsandkissessweater |
|
 |
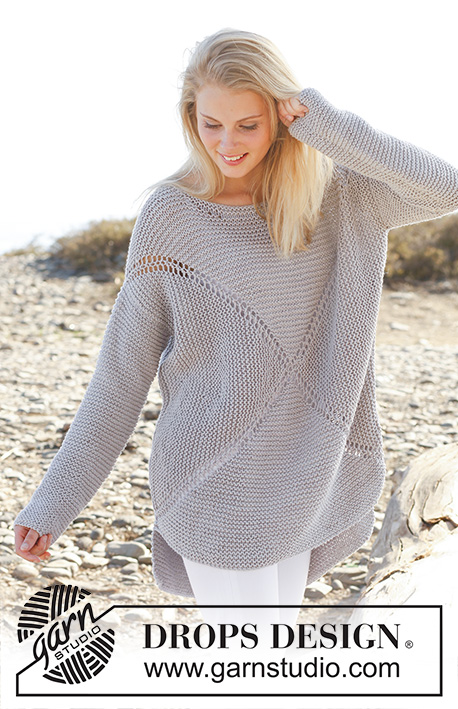 |
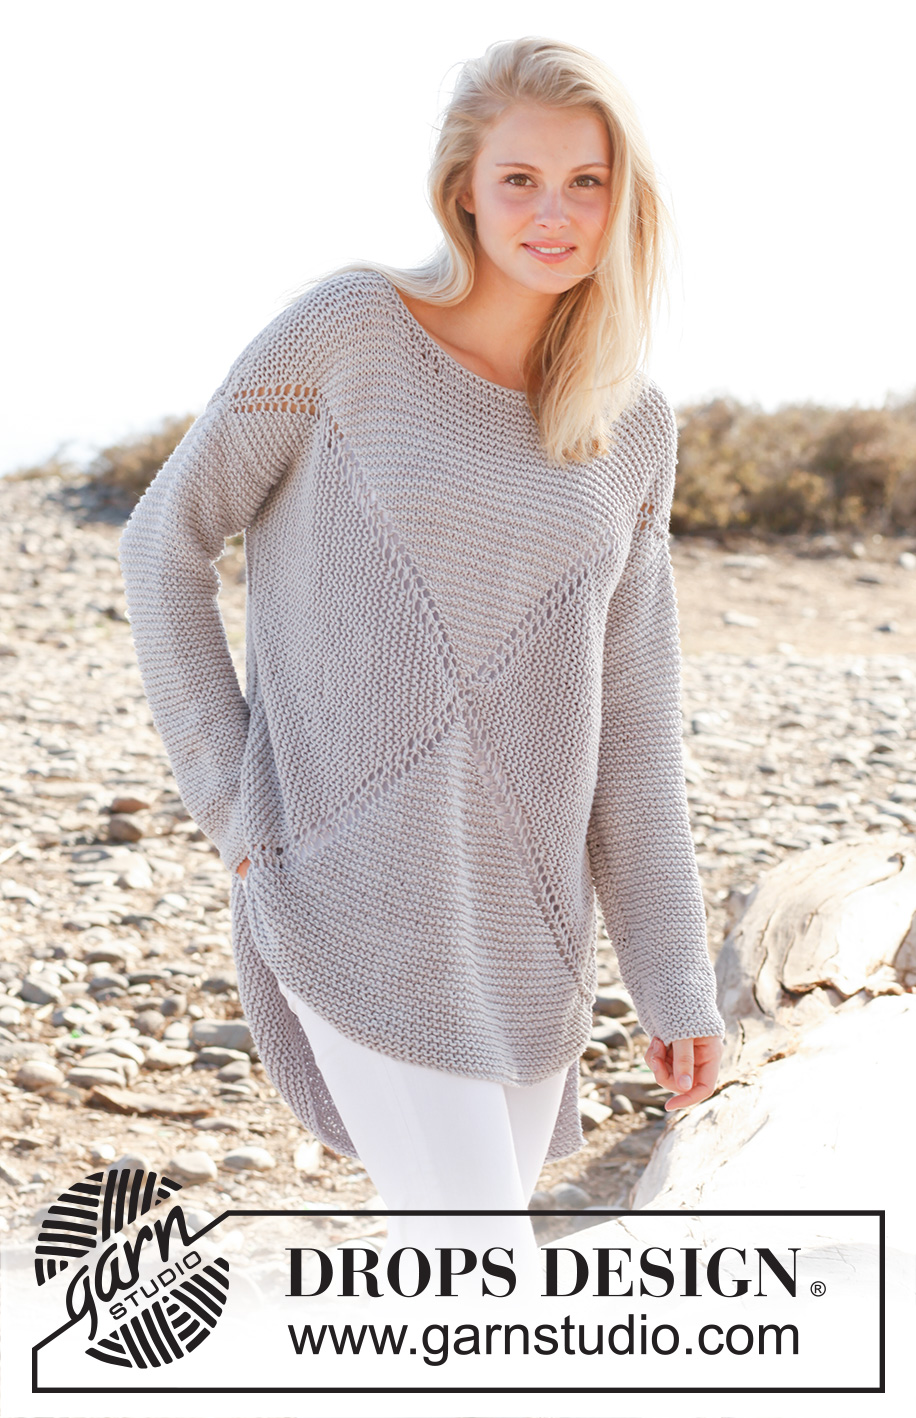
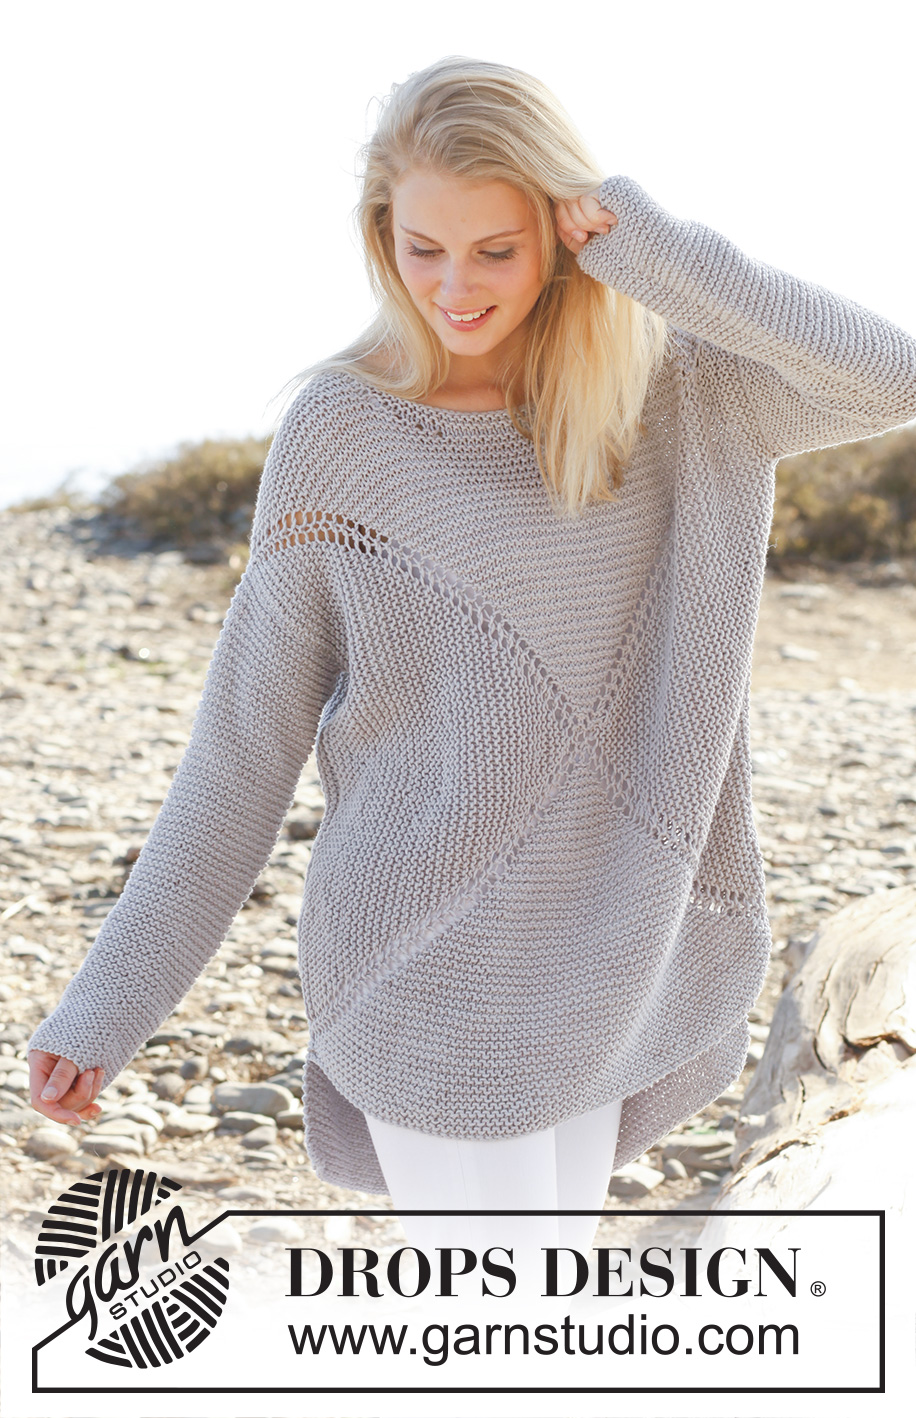
Knitted DROPS jumper worked in a square in garter st in ”Paris”. Size: S - XXXL.
DROPS 146-2 |
|
|
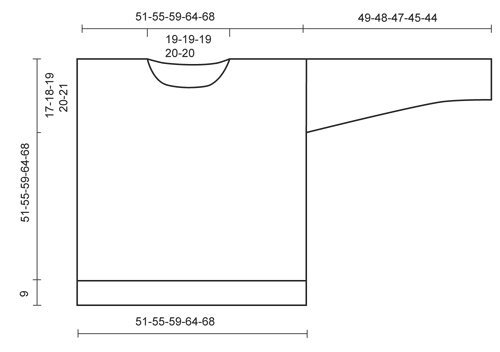
GARTER ST (in the round on circular needle): 1 ridge = 2 rounds. * K 1 round and P 1 round *, repeat from *-*. GARTER ST (back and forth on needle): K all rows. 1 ridge = 2 rows K. MEASURING TIP: Hold the piece up when measuring. Because of the garter st and the weight of the yarn the sleeve will be somewhat longer. If a lighter sleeve is wanted, work 4 ridges at the bottom of sleeve, then work in reversed stocking st. ---------------------------------------------------------- JUMPER: Worked in 2 parts from mid front/mid back in a square. Cast on and work on double pointed needles, switch to circular needle when needed. Finish by working the sleeves. FRONT PIECE: Cast on 8 sts with Paris and divide them on 4 double pointed needles size 6 mm (= 2 sts on every needle). Insert a marker in the first, third, fifth and seventh st (= 4 markers). Then work in the round and in GARTER ST over all sts - see explanation above. AT THE SAME TIME on every other round make 1 YO on each side of every marker (= 8 inc on every other round), on next round K YOs to make holes. Continue like this until there are 240-264-288-320-344 sts on needle (= 29-32-35-39-42 inc and 60-66-72-80-86 sts on each of the 4 sides). Stop with 1 P round. Now slip the middle 16-16-18-18-18 sts between 1st and 2nd marker on a stitch holder for neck, then work piece back and forth. Continue in garter st and continue inc at markers - AT THE SAME TIME cast off towards the neck on every other row as follows: 2 sts 2 times and 1 st 2 times. Continue inc until there are 284-308-330-362-386 sts on needle (= 38-41-44-48-51 inc, 78-84-90-98-104 sts between markers, 25-28-30-34-37 sts on each side of neck). Keep sts between 3rd and 4th marker on needle, cast off the other sts = 78-84-90-98-104 sts on needle. Work 2 ridges back and forth over these sts. Cast off. Insert a marker in each side, 17-18-19-20-21 cm down from the shoulder. This shows where the sleeve is sewn in. BACK PIECE: Cast on 8 sts with Paris and divide them on 4 double pointed needles size 6 mm (= 2 sts on every needle). Insert a marker in the first, third, fifth and seventh st (= 4 markers). Then work in the round and in garter st over all sts, AT THE SAME TIME on every other round make 1 YO on each side of every marker (= 8 inc on every other round), on next round K YOs to make holes. Continue like this until there are 288-312-336-368-392 sts on needle (= 35-38-41-45-48 inc and 72-78-84-92-98 sts between markers). Now cast off the middle 28-28-30-30-30 sts between 1st and 2nd marker for neck, then work piece back and forth = 260-284-306-338-362 sts. Continue inc until there are 284-308-330-362-386 sts on needle (= 38-41-44-48-51 inc, 78-84-90-98-104 sts between markers, 25-28-30-34-37 sts on each side of neck). Keep sts between 3rd and 4th marker on needle, cast off the other sts = 78-84-90-98-104 sts on needle. Work 15 ridges back and forth over these sts. Cast off. Insert a marker in each side, 17-18-19-20-21 cm down from the shoulder. This shows where the sleeve is sewn in. SLEEVE: Worked back and forth on circular needle. READ MEASURING TIP! Cast on 37-38-41-44-45 sts (incl 1 edge st in each side) on circular needle size 6 mm with Paris. Work in garter st. When piece measures 8 cm, inc 1 st in each side. Repeat inc every 5-4½-4½-4-3½ cm 7-8-8-8-9 more times (= 8-9-9-9-10 inc in total) = 53-56-59-62-65 sts. Cast off when piece measures 49-48-47-45-44 cm (shorter measurements in the larger sizes because of broader shoulder width). ASSEMBLY: Sew the shoulder seams. Sew in sleeves down to markers on front/back piece. Sew underarm and side seams in one inside 1 edge st, leave the bottom 10 cm = vent. NECK EDGE: Knit up approx. 66 to 74 sts (incl sts on stitch holder) on a short circular needle (40 cm) around the neck. Work 2 ridges. Cast off. |
|
 |
|
Have you finished this pattern?Tag your pictures with #dropspattern #hugsandkissessweater or submit them to the #dropsfan gallery. Do you need help with this pattern?You'll find 17 tutorial videos, a Comments/Questions area and more by visiting the pattern on garnstudio.com. © 1982-2026 DROPS Design A/S. We reserve all rights. This document, including all its sub-sections, has copyrights. Read more about what you can do with our patterns at the bottom of each pattern on our site. |
|


With over 40 years in knitting and crochet design, DROPS Design offers one of the most extensive collections of free patterns on the internet - translated to 17 languages. As of today we count 324 catalogues and 12290 patterns translated into English (UK/cm). 12290
We work hard to bring you the best knitting and crochet have to offer, inspiration and advice as well as great quality yarns at incredible prices! Would you like to use our patterns for other than personal use? You can read what you are allowed to do in the Copyright text at the bottom of all our patterns. Happy crafting!
Post a comment to pattern DROPS 146-2
We would love to hear what you have to say about this pattern!
If you want to leave a question, please make sure you select the correct category in the form below, to speed up the answering process. Required fields are marked *.